
Preparing the Necessary Equipment
Before you can start connecting your X Rocker gaming chair with speakers, it’s essential to make sure you have all the necessary equipment ready. Here are the items you’ll need:
- An X Rocker gaming chair with built-in speakers
- A gaming console or a PC
- A television or monitor
- Audio cables (including HDMI, RCA, or optical cables)
- A power outlet or extension cord
Ensure that your gaming console or PC is in proper working condition and that the X Rocker chair is free from any obstructions. This will help optimize your gaming experience.
If you are connecting the gaming chair to a console, have your console’s power cable, HDMI cable, and any additional audio cables on hand. For PC connections, ensure that your PC is equipped with the necessary audio ports or adapters for your chair.
For a television connection, check if your TV has the required audio output ports, such as RCA or optical. If not, you may need an HDMI audio extractor or an RCA-to-optical adapter cable.
It’s also advisable to have a power outlet or extension cord nearby to supply power to your gaming chair. Make sure the cord is long enough to reach the desired location comfortably.
Take a moment to familiarize yourself with the instruction manual or user guide that accompanies your X Rocker gaming chair. This will provide you with specific details on the chair’s features and any additional requirements for a successful connection.
Now that you have everything prepared, you’re ready to proceed with connecting your X Rocker gaming chair to your console, PC, or TV. The following sections will guide you through the process, based on the type of connection you’re aiming to establish.
Understanding the Different Types of X Rocker Gaming Chairs
When it comes to X Rocker gaming chairs, there are various models and types available in the market. Understanding the differences between these models will help you choose the one that best suits your gaming needs. Here are a few popular types of X Rocker gaming chairs:
- X Rocker Pedestal Chairs: These chairs come with a built-in pedestal, allowing you to sit higher off the ground. They offer a comfortable seating position and often include additional features like swivel and tilt functionality.
- X Rocker Floor Rockers: These chairs are designed to be placed directly on the floor. They provide a low seating position and are ideal for gamers who prefer a more relaxed gaming experience. Floor rockers are lightweight and easy to move around.
- X Rocker PC Gaming Chairs: These gaming chairs are specifically designed for PC gamers. They often come with adjustable armrests, lumbar support, and ergonomic features to enhance comfort during long gaming sessions. PC gaming chairs may also include built-in speakers and wireless connectivity options.
- X Rocker Bluetooth Chairs: These chairs are equipped with Bluetooth technology, allowing you to connect wirelessly to your gaming console, PC, or mobile device. Bluetooth chairs offer convenience and eliminate the need for messy cables, providing a clutter-free gaming setup.
Each type of X Rocker gaming chair has its own set of features and advantages. Consider factors such as your gaming preferences, available space, and budget when choosing the right chair for you.
Before making a purchase, take the time to read reviews and compare different models. This will help you make an informed decision and ensure that the chair you choose meets your expectations.
Now that you have a better understanding of the various types of X Rocker gaming chairs available, let’s dive into the process of connecting your chair to your gaming console, PC, or TV.
Connecting the Chair to a Console or PC
Connecting your X Rocker gaming chair to a console or PC is a straightforward process. Follow these steps to establish a connection:
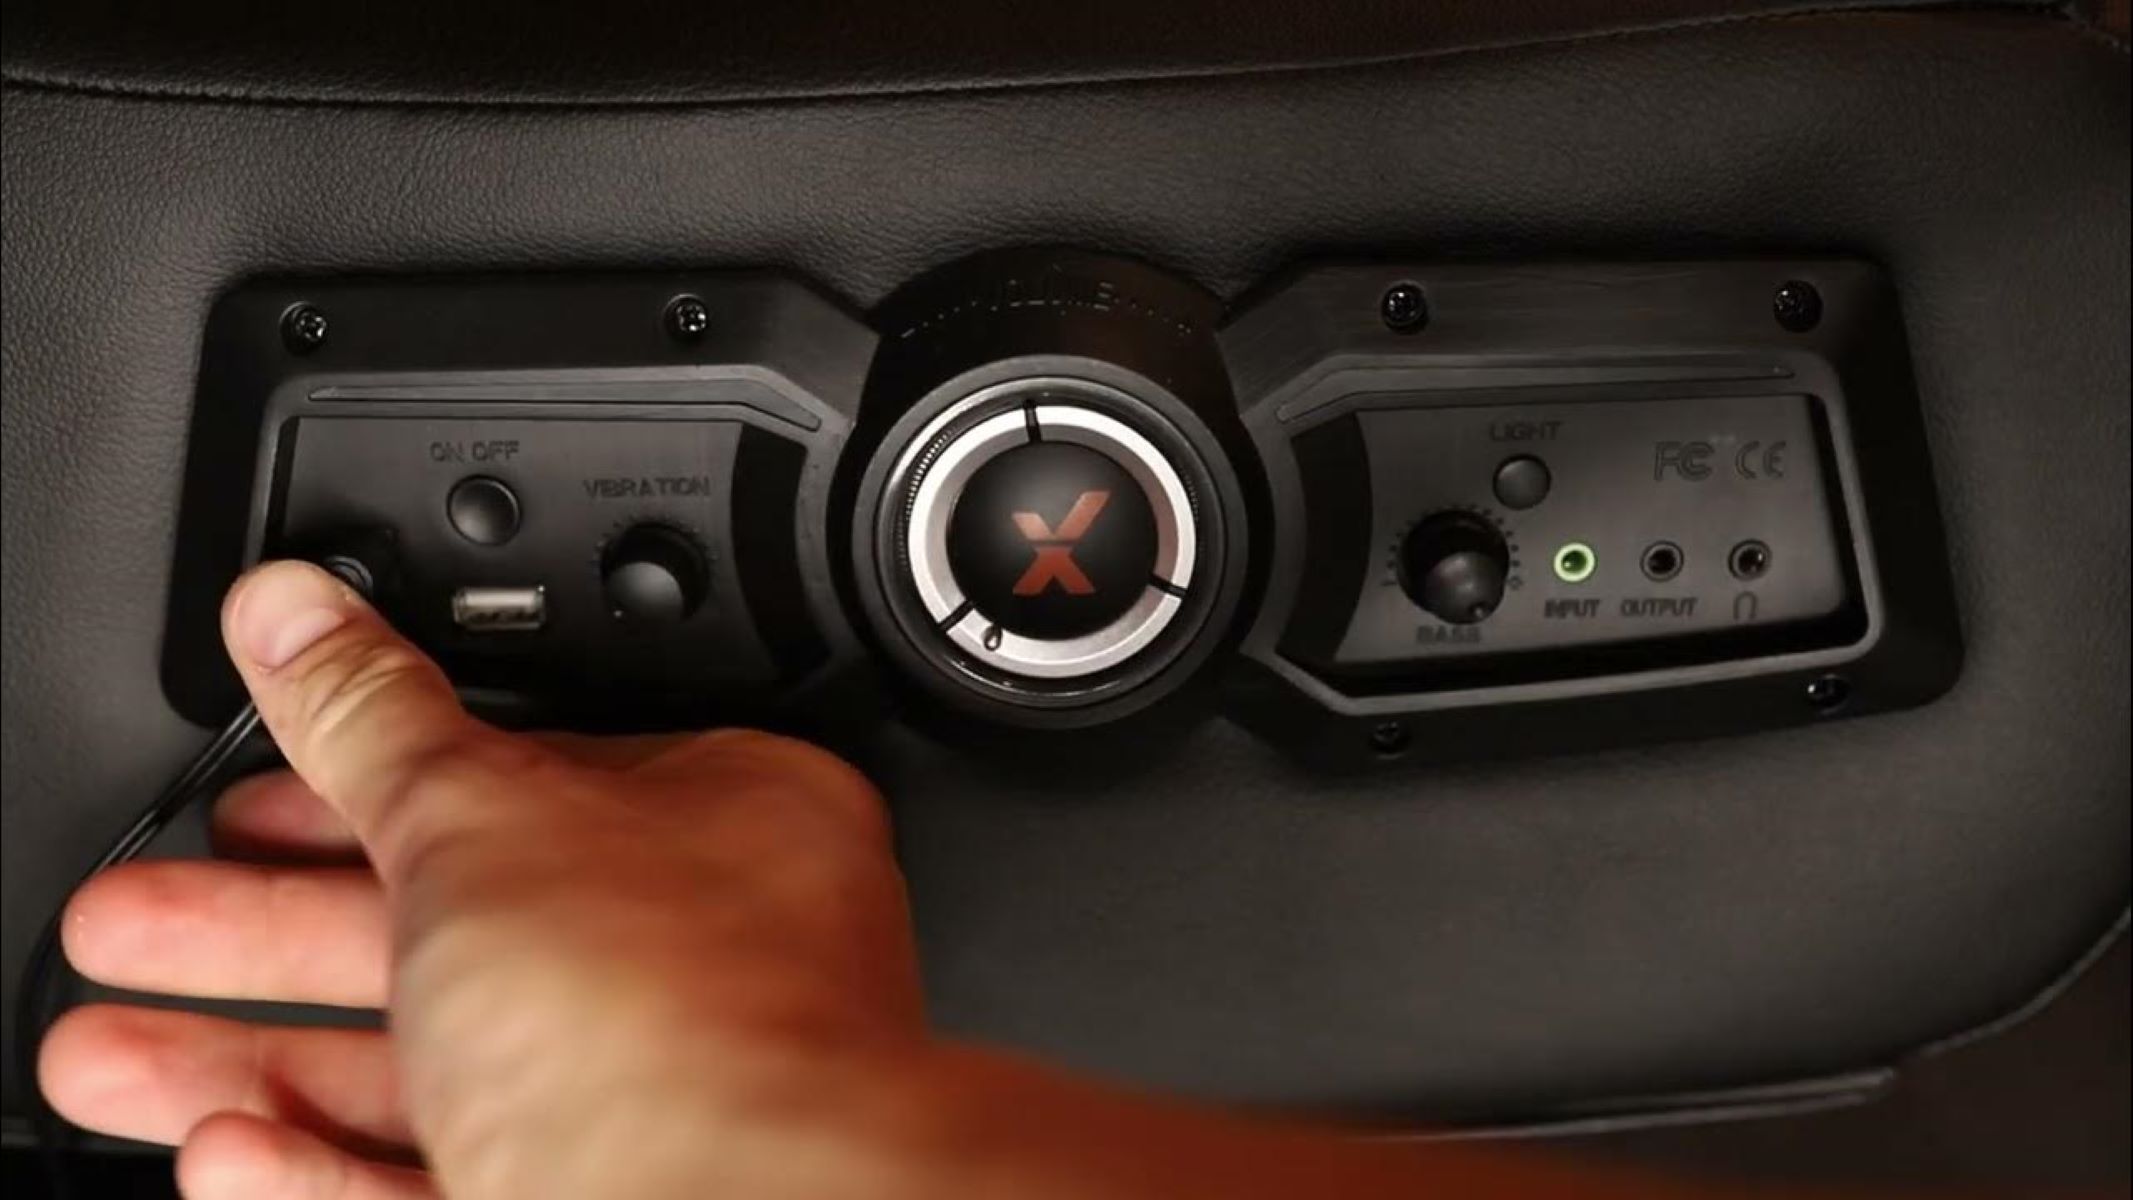
- Locate the audio output ports on your gaming console or PC. Typically, consoles have HDMI, RCA, or optical audio ports, while PCs often have audio jacks.
- Identify the corresponding audio input ports on your X Rocker gaming chair. These may be located on the control panel or on the sides of the chair.
- Plug one end of the audio cable into the audio output port of your console or PC. Choose the appropriate cable based on the available ports and the supported connections of your chair.
- Connect the other end of the audio cable to the audio input port of your X Rocker gaming chair. Ensure a secure connection to avoid any audio disruptions.
- If your chair has separate power requirements, connect it to a power outlet using the provided cord. Some X Rocker chairs have built-in batteries, eliminating the need for a power connection.
- Turn on your gaming console or PC and adjust the audio settings to enable the output through external speakers. Consult the user manual or the settings menu of your device for specific instructions.
- Test the audio by playing a game or media that produces sound. Adjust the volume and audio settings on both the chair and the console/PC to achieve the desired sound quality.
Note that the specific steps and available ports may vary depending on your gaming console or PC model and the type of X Rocker gaming chair you own. Refer to the instruction manual or user guide provided with your devices for more detailed information.
Now that your X Rocker gaming chair is connected to your console or PC, you can immerse yourself in the gaming experience and enjoy the enhanced sound and comfort it provides.
Connecting the Chair to a Television
If you want to connect your X Rocker gaming chair to a television, follow these steps:
- Check the audio output options on your television. Common audio output ports include RCA, optical, or HDMI ARC (Audio Return Channel).
- Identify the audio input ports on your X Rocker gaming chair. These may be located on the control panel or on the sides of the chair.
- Choose the appropriate audio cable based on the available ports. For RCA connections, use an RCA stereo audio cable. For optical connections, use an optical audio cable. If your TV supports HDMI ARC, you can use an HDMI cable with ARC support.
- Connect one end of the audio cable to the audio output port of your television. Ensure a secure connection.
- Connect the other end of the audio cable to the audio input port of your X Rocker gaming chair.
- If your gaming chair requires a power connection, plug it into a power outlet using the provided cord.
- Turn on your television and go to the audio settings menu. Select the appropriate audio output option to enable audio output through external speakers.
- Test the audio by playing a TV program or media that produces sound. Adjust the volume and audio settings on both the chair and the television to achieve the desired sound quality.
Note that the specific steps and available ports may vary depending on the make and model of your television and the type of X Rocker gaming chair you have. Reference the instruction manual or user guide for your devices for more detailed information on their audio connection options.
With your X Rocker gaming chair successfully connected to your television, you can now enjoy an immersive gaming or entertainment experience with enhanced audio and comfort.
Connecting the Chair to Bluetooth Devices
If you have an X Rocker gaming chair with Bluetooth capability, you can easily connect it to various Bluetooth devices, such as gaming consoles, PCs, or mobile devices. Follow these steps to establish a Bluetooth connection:
- Make sure that the Bluetooth feature on your X Rocker gaming chair is enabled. Refer to the chair’s user manual for instructions on how to activate Bluetooth mode.
- On your Bluetooth-enabled device, enable Bluetooth and ensure that it is discoverable.
- Using the control panel on your X Rocker gaming chair, navigate to the Bluetooth pairing mode. This is usually indicated by an icon or a button labeled “Pair” or “Bluetooth.”
- In the Bluetooth settings menu of your device, search for available Bluetooth devices. Locate and select the name of your X Rocker chair from the list of available devices.
- If prompted, enter the PIN or passcode provided in the chair’s user manual to complete the pairing process.
- Once the pairing is successful, you will hear a confirmation sound or see a notification on your device, indicating that it is now connected to your X Rocker gaming chair.
- Play any audio or media on your Bluetooth-enabled device and adjust the volume settings on both your device and the chair as desired.
Remember that the specific steps for Bluetooth pairing may vary depending on the model of your X Rocker gaming chair and the Bluetooth device you are using. Consult the user manual or guide for your chair and device for more detailed instructions.
With the Bluetooth connection established, you can now enjoy wirelessly streaming audio from your compatible devices to your X Rocker gaming chair, freeing yourself from the confines of cables.
Troubleshooting Common Connection Issues
While connecting your X Rocker gaming chair with speakers, you may encounter some common issues. Here are a few troubleshooting steps to help resolve these problems:
- No audio or weak sound: Ensure that all audio cables are securely connected to the appropriate ports on both your gaming console/PC and the chair. Additionally, check the volume settings on both devices and make sure they are not muted or set to a low level. Try adjusting the volume on the chair itself and your gaming console/PC to achieve the desired sound.
- Bluetooth connection problems: If you are experiencing difficulty connecting your X Rocker gaming chair via Bluetooth, make sure that both the chair and the device you want to connect it to are within range. Try turning off and on the Bluetooth feature on both devices and attempt to re-establish the connection. If the issue persists, consult the device’s user manual for specific troubleshooting steps.
- Compatibility issues: It’s crucial to ensure that your X Rocker gaming chair is compatible with your gaming console, PC, or television. Check the chair’s user manual or the manufacturer’s website for information on compatible devices and audio output options. If your devices are not compatible, you may need additional adapters or cables to establish a successful connection.
- Inadequate power supply: If your X Rocker gaming chair requires a power connection, make sure it is plugged into a working power outlet or extension cord. Avoid using a faulty power outlet or overloading the circuit with other devices. If the chair still does not power on, double-check the power cable for any signs of damage and consider contacting customer support for assistance.
- Poor wireless signal: If you have a wireless X Rocker gaming chair, ensure that it is placed within range of your gaming console, PC, or Bluetooth device. Walls, furniture, and other obstructions can weaken the wireless signal. Consider relocating the chair or the device to improve the wireless connection strength.
- Update firmware or drivers: Periodically check for firmware or driver updates for both your X Rocker gaming chair and your connected devices. Keeping the firmware and drivers up to date can resolve compatibility issues and improve overall performance.
If you encounter any other issues that cannot be resolved through basic troubleshooting, consult the instruction manual provided with your X Rocker gaming chair or contact the manufacturer’s customer support for further assistance. They will be able to provide you with specific steps or solutions tailored to your chair’s model and the devices you are trying to connect.
By addressing these common connection issues, you can ensure a seamless and enjoyable gaming experience with your X Rocker gaming chair.