
Tools and Materials Needed
To tighten the headset on a mountain bike, you'll need a few essential tools and materials. Here's a comprehensive list to ensure you have everything on hand before you begin:
Tools:
- Hex Keys (Allen Wrenches): These are essential for loosening and tightening the stem bolts and adjusting the headset.
- Adjustable Wrench: You'll need this to hold the headset in place while tightening the stem bolts.
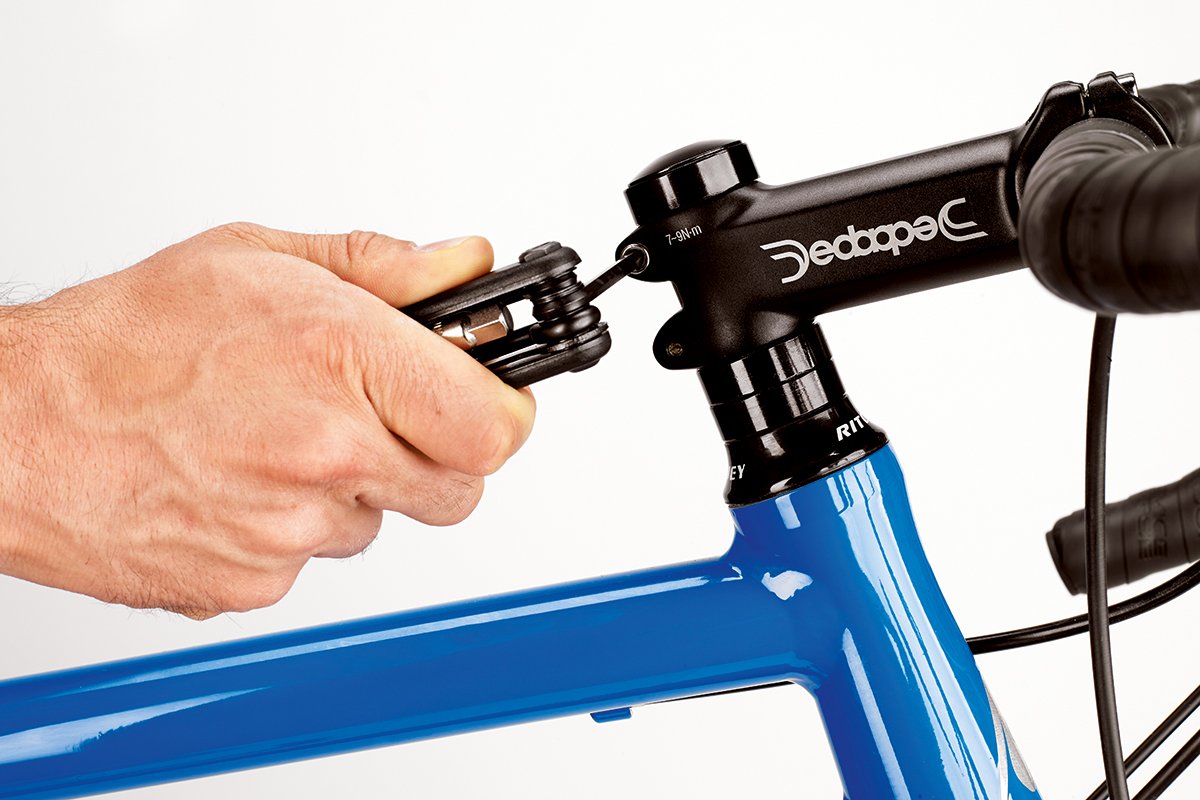
- Torque Wrench: This tool is crucial for applying the correct amount of force when tightening the stem bolts to the recommended torque.
- Bike Stand or Work Stand: A stable stand will elevate the bike, allowing you to work on the headset and stem comfortably.
- Grease: Applying a small amount of grease to the headset bearings can help reduce friction and ensure smooth operation.
Materials:
- Clean Rag: Use a rag to wipe off any dirt or grime from the headset and stem components before making adjustments.
- Degreaser: If the headset or stem components are excessively dirty or greasy, a degreaser can help clean them effectively.
- Bike Cleaner: This will come in handy for cleaning the entire bike after completing the headset adjustment.
- Optional: Carbon Assembly Compound: If your bike has a carbon steerer tube, using carbon assembly compound can prevent slippage between the stem and steerer tube.
Having these tools and materials at your disposal will make the process of tightening the headset on your mountain bike much more efficient and straightforward. Now that you have everything you need, it's time to move on to assessing the headset.
Step 1: Assessing the Headset
Before diving into the process of tightening the headset on your mountain bike, it’s crucial to assess the current state of the headset and identify any issues that may need attention. Here’s a step-by-step guide to help you assess the headset effectively:
1.1 Inspect for Loose Bearings
Begin by gently rocking the bike back and forth while applying the front brake. Pay close attention to any unusual knocking or clunking sounds that may indicate loose headset bearings. If you detect any play or knocking, it’s a clear sign that the headset needs adjustment.
1.2 Check for Rough Movement
Turn the handlebars from side to side while holding the front wheel between your knees. Feel for any roughness or resistance in the movement, which could indicate worn or improperly adjusted bearings.
1.3 Examine the Headset Adjustment
Look for any visible signs of misalignment or looseness in the headset. Check the top cap and stem to ensure they are properly aligned and securely fastened to the steerer tube.
1.4 Evaluate Cable and Hose Routing
Inspect the routing of any cables or hoses that are connected to the handlebars and front fork. Ensure that they are not excessively taut or causing any interference with the headset or stem.
By thoroughly assessing the headset using these steps, you’ll gain valuable insights into the specific issues that need to be addressed. Once you’ve identified any areas of concern, you can proceed to the next steps to effectively tighten the headset and ensure optimal performance during your rides.
Step 2: Loosening the Stem Bolts
Before you can make adjustments to the headset, it’s essential to loosen the stem bolts to allow for proper tightening and alignment. Follow these steps to safely and effectively loosen the stem bolts:
2.1 Secure the Bike
Place your mountain bike on a stable stand or work stand to elevate it off the ground. Ensuring that the bike is secure will provide a stable working environment for the upcoming adjustments.
2.2 Identify the Stem Bolts
Locate the stem bolts on the top cap of the stem. Depending on your bike’s configuration, there may be two to four bolts securing the stem to the steerer tube. Use the appropriate-sized hex key to fit the bolt heads.
2.3 Loosen the Bolts
Using the hex key, carefully loosen each stem bolt in a diagonal pattern. Start with a half-turn on each bolt to ensure even pressure release. Continue loosening the bolts until they are all sufficiently loosened, but not completely removed.
2.4 Remove the Top Cap
Once the stem bolts are loosened, gently remove the top cap from the stem. Set it aside in a safe place, as you will need it later in the process of tightening the headset.
2.5 Inspect the Stem and Handlebars
With the top cap removed, visually inspect the stem and handlebars for any signs of damage, wear, or misalignment. This is also an opportune time to clean any accumulated dirt or debris from these components.
By carefully following these steps to loosen the stem bolts, you’ll prepare the headset and stem for the subsequent adjustments. With the stem bolts loosened and the top cap removed, you’re now ready to proceed with tightening the headset to optimize the performance of your mountain bike.
Step 3: Tightening the Headset
After loosening the stem bolts, the next crucial step in the process of adjusting the headset on your mountain bike is tightening the headset to eliminate any play or knocking. Follow these steps to effectively tighten the headset:
3.1 Apply Grease
Before proceeding, apply a small amount of grease to the headset bearings to reduce friction and ensure smooth operation. This will help prolong the life of the bearings and enhance the overall performance of the headset.
3.2 Align the Stem and Front Wheel
With the stem bolts loosened, align the stem and front wheel so that they are perfectly centered. This alignment will ensure that the headset is adjusted accurately and that the front wheel tracks straight during rides.
3.3 Adjust the Top Cap
Place the top cap back onto the stem, ensuring that it sits flush and level with the top of the steerer tube. Gently thread the top cap bolt into the star nut or compression plug, but do not tighten it completely at this stage.
3.4 Apply Even Pressure
Using an adjustable wrench, apply even pressure to the top cap bolt to remove any remaining play in the headset. Be mindful not to overtighten the top cap, as doing so can lead to premature bearing wear and restricted headset movement.
3.5 Test Headset Play
With the top cap partially tightened, gently rock the bike back and forth while applying the front brake. Check for any remaining play or knocking in the headset. If there is still play, continue to tighten the top cap bolt in small increments until the play is eliminated.
By diligently following these steps to tighten the headset, you’ll ensure that the headset operates smoothly and efficiently, providing a stable and responsive riding experience. Once the headset is properly tightened, you can proceed to the next steps to complete the adjustment process and enhance the performance of your mountain bike.
Step 4: Realigning the Stem
After tightening the headset, the next crucial step in the process of adjusting your mountain bike’s headset is realigning the stem to ensure proper positioning and stability. Follow these steps to effectively realign the stem:
4.1 Center the Handlebars
Stand in front of the bike and visually align the handlebars with the front wheel. Ensure that the handlebars are centered and straight, providing a balanced and comfortable riding position.
4.2 Check for Equal Gap
Verify that there is an equal gap between the left and right sides of the stem and the top of the fork’s steerer tube. This symmetrical gap indicates that the stem is aligned properly and will help prevent any steering issues while riding.
4.3 Tighten the Stem Bolts
Using the appropriate torque wrench, gradually tighten the stem bolts in a diagonal pattern to the manufacturer’s recommended torque specifications. This even tightening sequence helps ensure that the stem is securely fastened without causing any undue stress on the components.
4.4 Verify Alignment
Double-check the alignment of the handlebars and stem to confirm that they are still centered and straight after tightening the stem bolts. Make any necessary adjustments to achieve proper alignment if needed.
4.5 Test Handlebar Movement
With the stem bolts securely tightened, gently turn the handlebars from side to side to confirm smooth and unrestricted movement. Ensure that there is no binding or interference between the handlebars and the headset or fork components.
By meticulously following these steps to realign the stem, you’ll ensure that the handlebars are positioned correctly and that the stem is securely fastened to the steerer tube. This alignment is essential for maintaining stable and predictable handling characteristics during your rides, enhancing both safety and performance.
Step 5: Re-tightening the Stem Bolts
Once the stem has been realigned and the handlebars are centered, the next crucial step in the process of adjusting your mountain bike’s headset is re-tightening the stem bolts to secure the stem in its proper position. Follow these steps to effectively re-tighten the stem bolts:
5.1 Verify Torque Specifications
Consult your bike’s manual or the manufacturer’s specifications to determine the recommended torque value for the stem bolts. It’s essential to adhere to these specifications to avoid over-tightening or under-tightening the bolts.
5.2 Gradually Tighten the Bolts
Using a torque wrench, begin tightening the stem bolts in a diagonal pattern, applying gradual and even pressure to each bolt. This method helps distribute the clamping force evenly and minimizes the risk of component damage.
5.3 Check for Equal Tension
As you tighten the stem bolts, pay attention to the tension in each bolt to ensure that they are all tightened to the same degree. This uniform tension helps maintain the stability and integrity of the stem and handlebar assembly.
5.4 Confirm Proper Alignment
Throughout the tightening process, periodically check the alignment of the handlebars to ensure that they remain centered and straight. Any slight misalignment can be corrected before the bolts are fully tightened.
5.5 Verify Torque Setting
Once all the stem bolts have been tightened to the specified torque, double-check the torque setting to ensure that it aligns with the manufacturer’s recommendations. This final verification helps guarantee that the stem bolts are securely fastened without exceeding the prescribed torque.
By meticulously following these steps to re-tighten the stem bolts, you’ll ensure that the stem is securely clamped to the steerer tube, providing a stable and reliable connection between the handlebars and the front fork. Properly tightened stem bolts are essential for maintaining steering precision and rider control, contributing to a safe and enjoyable riding experience.
Step 6: Testing the Headset
After completing the adjustments to the headset and stem, it’s crucial to thoroughly test the headset to ensure that it operates smoothly and without any play or binding. Follow these steps to effectively test the headset:
6.1 Rock the Bike
While standing beside the bike, firmly grip the top of the headset and gently rock the bike back and forth. Pay close attention to any sensations of play or knocking, which may indicate that the headset requires further adjustment.
6.2 Apply Front Brake
With the front brake engaged, rock the bike back and forth again to detect any abnormal movement or noise in the headset. The brake helps isolate the movement to the headset, making it easier to identify any issues.
6.3 Test Handlebar Movement
Turn the handlebars from side to side, feeling for smooth and consistent movement without any binding or roughness. The handlebars should move freely without any resistance, indicating that the headset and stem are properly adjusted and aligned.
6.4 Listen for Unusual Sounds
While testing the headset, listen for any unusual creaking, clicking, or grinding sounds that may indicate potential issues with the headset bearings or components. Unusual sounds could be a sign of inadequate adjustment or worn bearings.
6.5 Ride Test
Take the bike for a short test ride, paying attention to the handling and steering responsiveness. Ride over varied terrain and surfaces to assess the bike’s stability and the headset’s performance under different conditions.
By diligently following these steps to test the headset, you’ll ensure that the adjustments made to the headset and stem have resulted in a properly functioning and reliable system. Thorough testing is essential for identifying any remaining issues and confirming that the headset operates optimally, providing a safe and enjoyable riding experience.