
Step 1: Gather the Necessary Tools
Before you begin changing the battery in your carbon monoxide detector, it’s essential to gather the necessary tools to ensure a smooth and efficient process. Here’s what you’ll need:
- New Battery: Ensure you have the correct type of battery required for your specific carbon monoxide detector. Refer to the manufacturer’s instructions or the old battery for the correct model.
- Screwdriver: Depending on the model of your detector, you may need a small screwdriver to open the battery compartment. Check the detector’s manual or inspect the unit to determine the type of screwdriver required.
- Ladder or Step Stool: If your carbon monoxide detector is installed in a high location, such as on the ceiling or high on a wall, you may need a stable ladder or step stool to safely reach the unit.
- Cloth or Tissue: It’s always handy to have a cloth or tissue nearby to wipe off any dust or debris that may have accumulated around the detector.
By ensuring you have these tools on hand, you’ll be well-prepared to proceed with the battery replacement process without any interruptions or delays. Now that you have gathered the necessary tools, let’s move on to the next step!
Step 2: Locate Your Carbon Monoxide Detector
Locating your carbon monoxide (CO) detector is the first crucial step in the process of changing its battery. CO detectors are typically placed in key areas of your home to provide optimal protection against this silent, odorless, and potentially deadly gas. Here’s how to find your CO detector:
- Check Common Areas: Start by looking in common areas of your home where CO detectors are commonly installed. This includes bedrooms, hallways, near the kitchen, and near any fuel-burning appliances like furnaces or water heaters.
- Look at Eye Level: CO detectors are usually installed at eye level, making them easily visible and accessible. Check around the perimeter of your rooms at this level, paying attention to any alarms or indicators on the unit.
- Inspect Uncommon Locations: Some homes may have less conventional placements for CO detectors, such as in basements, attics, or near attached garages. Be thorough in your search to ensure you locate all detectors in your home.
- Refer to the Manual: If you’re still having trouble finding your CO detector, consult the manual that came with your home or the detector itself. The manual often contains specific information about the detector’s placement in your home.
Once you have located your CO detector, take note of its position and any specific instructions or warnings on the unit. This will help you proceed with the battery replacement process smoothly and safely. With your CO detector identified, you’re ready to move on to the next step!
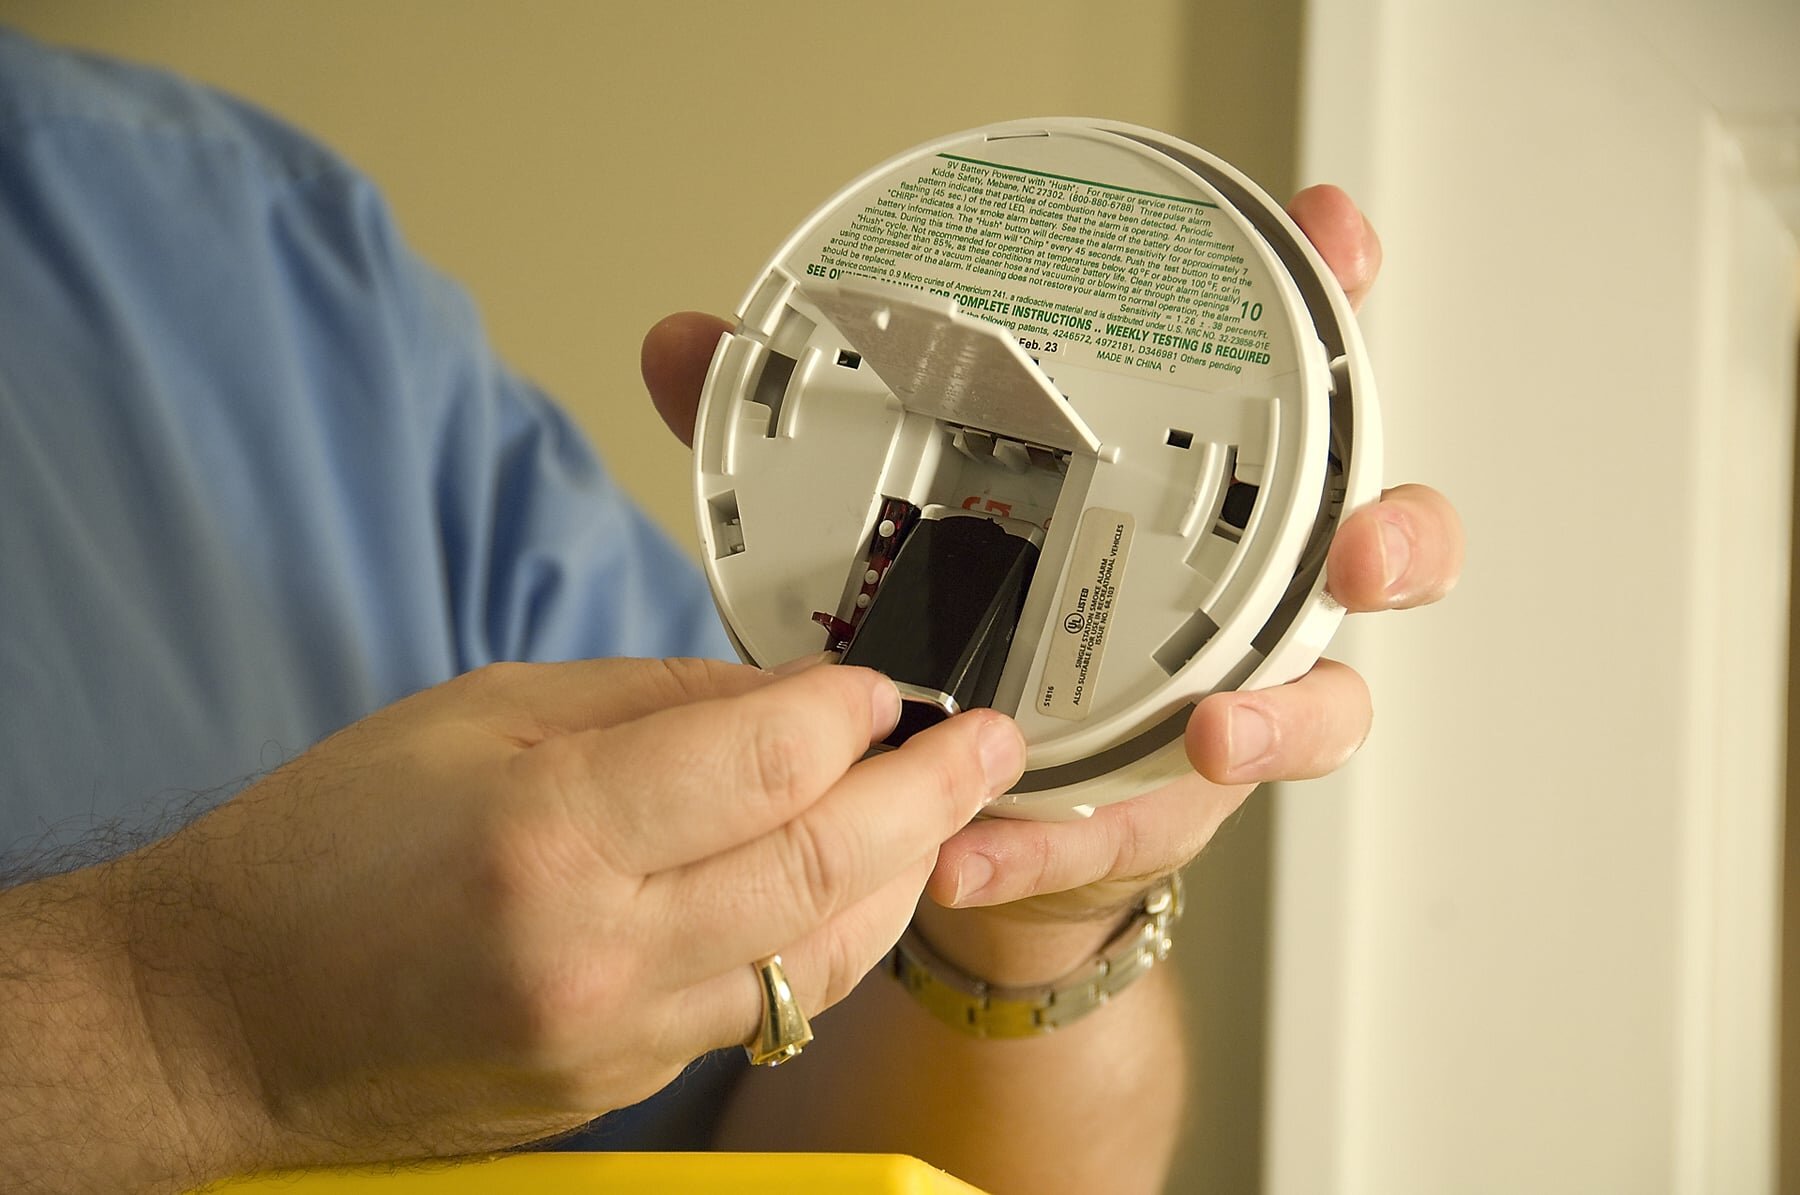
Step 3: Remove the Old Battery
Now that you’ve located your carbon monoxide (CO) detector, it’s time to remove the old battery. Follow these steps to safely and effectively remove the old battery from your CO detector:
- Turn Off the Detector: Before removing the battery, it’s important to turn off the CO detector to prevent any potential alarms or alerts during the battery replacement process. Look for a designated power or reset button on the unit and follow the manufacturer’s instructions to power it down.
- Access the Battery Compartment: Depending on the model of your CO detector, the battery compartment may be located on the front, back, or side of the unit. Use a screwdriver, if necessary, to open the compartment securely and expose the old battery.
- Remove the Old Battery: Carefully take out the old battery from the compartment, paying attention to any specific instructions or warnings on the unit. Some detectors may have a locking mechanism or specific removal process, so refer to the manual if needed.
- Dispose of the Old Battery Properly: Once the old battery is removed, handle it according to local regulations for battery disposal. Many communities have specific recycling programs or drop-off locations for household batteries, ensuring they are disposed of in an environmentally friendly manner.
By following these steps, you can safely remove the old battery from your CO detector, setting the stage for the next crucial phase: inserting the new battery. With the old battery out of the way, you’re ready to proceed to the next step!
Step 4: Insert the New Battery
With the old battery removed from your carbon monoxide (CO) detector, it’s time to insert the new battery. Follow these steps to ensure a seamless and successful battery replacement process:
- Check Battery Orientation: Before inserting the new battery, verify the correct orientation as indicated by the markings inside the battery compartment. Ensure the positive (+) and negative (-) terminals align with the corresponding indicators.
- Insert the New Battery: Gently place the new battery into the compartment, following the correct orientation. Press it firmly into place, ensuring a secure fit. Some detectors may have a specific locking mechanism or cover that needs to be secured after inserting the new battery.
- Confirm Proper Connection: Once the new battery is in place, double-check that it is securely connected and making proper contact with the terminals. This ensures reliable power for your CO detector.
- Close the Battery Compartment: If the battery compartment has a cover or door, securely close and fasten it according to the manufacturer’s instructions. Use a screwdriver, if necessary, to tighten any screws and ensure the compartment is sealed.
By following these steps, you can effectively insert the new battery into your CO detector, setting the stage for the next crucial phase: testing the carbon monoxide detector. With the new battery in place, you’re ready to proceed to the next step!
Step 5: Test the Carbon Monoxide Detector
After inserting the new battery into your carbon monoxide (CO) detector, it’s essential to test the unit to ensure it is functioning properly. Follow these steps to conduct a thorough test of your CO detector:
- Power On the Detector: Turn the CO detector back on according to the manufacturer’s instructions. This may involve pressing a power button, resetting the unit, or following specific procedures outlined in the manual.
- Wait for Initialization: Once powered on, allow the CO detector to go through its initialization process, which may involve a series of beeps, lights, or a digital display indicating that it is operational.
- Test the Alarm: Most CO detectors have a dedicated test button that allows you to simulate a CO alarm. Press and hold this button to initiate the test. The detector should emit a loud, unmistakable alarm sound if it is functioning correctly.
- Verify Power Source: Confirm that the CO detector is receiving power from the new battery. Check for any low-battery indicators or warnings that may appear on the unit’s display.
- Monitor for False Alarms: During the test, observe the CO detector for any signs of false alarms or irregular behavior. If the unit consistently triggers false alarms or displays errors, refer to the manual for troubleshooting steps.
By following these steps, you can confidently test your CO detector and ensure that it is responsive and reliable. A properly functioning CO detector is crucial for safeguarding your home and family against the dangers of carbon monoxide. With the test successfully completed, you’re ready to move on to the next step!
Step 6: Reinstall the Cover
With the new battery successfully inserted and the carbon monoxide (CO) detector tested for functionality, the next step is to reinstall the cover or door of the detector. Follow these steps to securely reassemble the CO detector:
- Align the Cover: Position the cover or door of the CO detector over the battery compartment, ensuring it aligns correctly with the unit’s housing. Take care to match any grooves, tabs, or alignment markers for a proper fit.
- Secure the Cover: If the cover is designed to latch or lock into place, follow the manufacturer’s instructions to secure it. This may involve sliding the cover into position and locking it, using screws to fasten it, or following specific closure procedures.
- Test the Secure Fit: After reinstalling the cover, gently test its fit by pressing on the edges to ensure it is securely attached to the CO detector. A snug and secure fit helps maintain the integrity of the unit and prevents dust or debris from entering the battery compartment.
- Inspect for Damage: Take a moment to inspect the cover and the surrounding area for any signs of damage or wear. If you notice any cracks, warping, or other issues with the cover, consider contacting the manufacturer for a replacement.
By following these steps, you can effectively reinstall the cover of your CO detector, ensuring that it is securely in place and protecting the internal components. With the cover securely reinstalled, your CO detector is nearly ready to resume its vital role in safeguarding your home. Now that the cover is back in place, you’re ready to proceed to the final step!
Step 7: Check the Expiration Date
As the final step in the process of changing the battery in your carbon monoxide (CO) detector, it’s crucial to check the expiration date of the unit. This step ensures that your CO detector remains reliable and effective in detecting the presence of carbon monoxide in your home. Here’s how to check the expiration date:
- Locate the Expiration Information: Check the back, bottom, or inside of your CO detector for the expiration date or the date of manufacture. This information is typically printed on a label or directly on the unit itself.
- Understand the Expiration Date: The expiration date indicates the end of the CO detector’s effective operational life. After this date, the unit may no longer provide accurate or reliable detection of carbon monoxide, posing a potential safety risk to your household.
- Replace Expired Detectors: If your CO detector has reached or exceeded its expiration date, it is essential to replace it with a new, up-to-date model. Most CO detectors have a lifespan of 5 to 7 years, but this can vary by manufacturer and model.
- Follow Manufacturer Recommendations: Refer to the manufacturer’s instructions or the detector’s manual for specific guidance on replacing expired units. Some manufacturers provide recommendations for testing, maintenance, and replacement intervals for CO detectors.
By checking the expiration date of your CO detector, you can ensure that your home remains protected by reliable and accurate carbon monoxide detection. If your CO detector is approaching or has surpassed its expiration date, take proactive steps to replace it with a new unit and maintain a safe living environment for you and your family.