
Step 1: Locate the SIM Card Tray
Locating the SIM Card Tray on Your Moto X
Before you can remove the SIM card from your Moto X, you need to locate the SIM card tray. The SIM card tray on the Moto X is usually located on the side of the phone. The exact location may vary depending on the model of your Moto X, but it is commonly found on the upper portion of the device. Look for a small pinhole or a tiny slot along the edge of your phone. This is where the SIM card tray is housed.
Once you have identified the location of the SIM card tray, you can proceed to the next step of removing the SIM card from your Moto X.
It’s important to note that the SIM card tray is delicate, so handle it with care to avoid any damage. Additionally, if you encounter any difficulties locating the SIM card tray, referring to the user manual that came with your Moto X can provide further guidance.
Step 2: Insert the SIM Ejection Tool
Using the SIM Ejection Tool
After locating the SIM card tray on your Moto X, the next step is to prepare the SIM ejection tool. This tool is typically included in the packaging of your device, and it is specifically designed to facilitate the removal of the SIM card tray.
Begin by retrieving the SIM ejection tool from the Moto X’s packaging. It is a small, pointed instrument that resembles a tiny pin. If you cannot locate the SIM ejection tool, a paperclip can serve as an alternative, provided it is small enough to fit into the pinhole on the SIM card tray.
Once you have the SIM ejection tool in hand, carefully insert the pointed end into the pinhole or slot next to the SIM card tray. Apply gentle pressure to push the tool into the hole until you feel a slight resistance. This indicates that the tool has engaged with the internal mechanism of the SIM card tray.
It’s crucial to exercise caution during this process to prevent any damage to the SIM card tray or the surrounding components of your Moto X. The SIM ejection tool should slide into the pinhole smoothly without excessive force. If you encounter any significant resistance, reassess the angle and position of the tool to ensure proper alignment with the tray’s release mechanism.
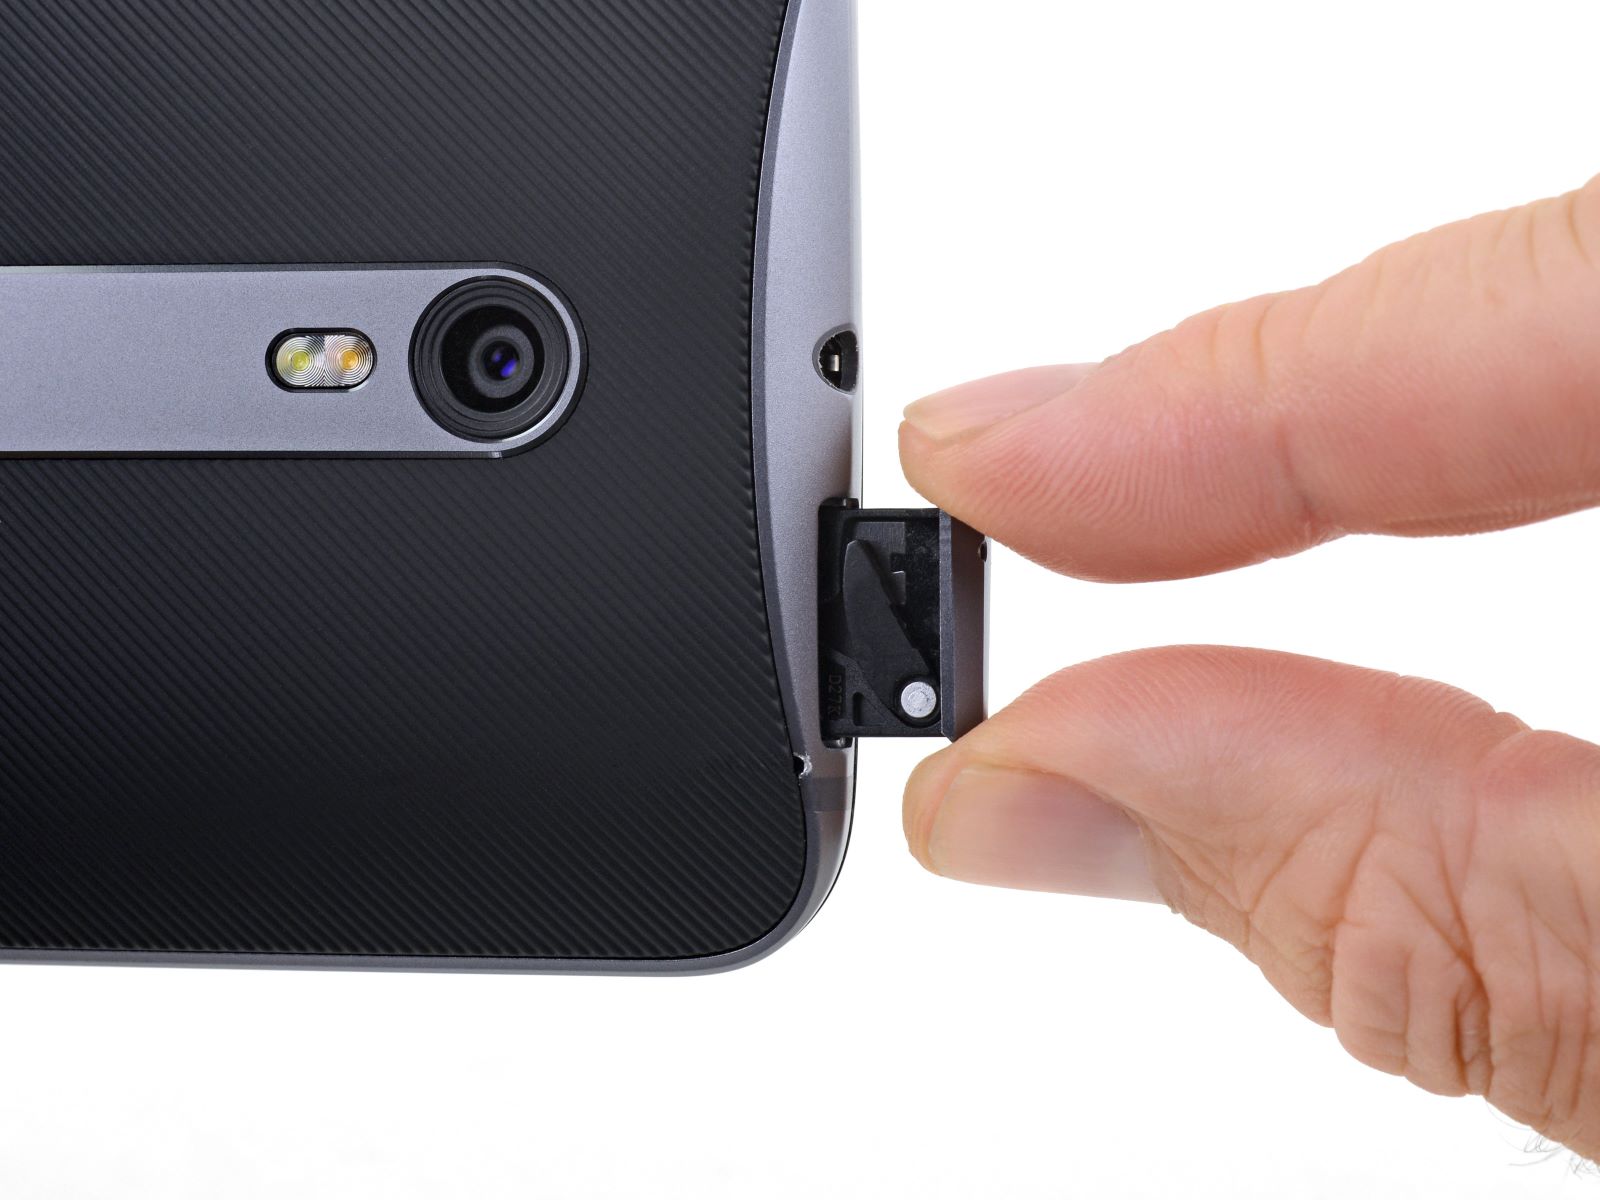
Step 3: Remove the SIM Card Tray
Taking Out the SIM Card Tray Safely
With the SIM ejection tool inserted into the pinhole or slot next to the SIM card tray on your Moto X, you are now ready to proceed with removing the tray. Gently press the tool further into the hole, maintaining steady but moderate pressure. As you do so, you should feel a subtle release or click, indicating that the SIM card tray is disengaging from its locked position within the device.
Once the SIM card tray is partially ejected, carefully pull it out from the Moto X. Take care to handle the tray delicately and avoid any sudden or forceful movements that could potentially cause damage. It’s important to maintain a steady and controlled approach to ensure the safe removal of the tray without compromising the integrity of the SIM card or the device itself.
As you extract the SIM card tray, be mindful of the SIM card housed within it. Avoid tilting or shaking the tray excessively to prevent the SIM card from dislodging or falling out unintentionally. Keeping the tray level and stable during removal is essential for safeguarding the SIM card and preventing any accidental damage or misplacement.
Once the SIM card tray is fully removed from the Moto X, set it aside in a secure location to prevent it from being misplaced or damaged. At this stage, you are ready to proceed with the next step of extracting the SIM card from the tray.
Step 4: Take Out the SIM Card
Removing the SIM Card from the Tray
With the SIM card tray successfully removed from your Moto X, the next step is to extract the SIM card from the tray itself. The SIM card is typically secured within a small slot on the tray, and it is essential to handle it with care to avoid any damage or misplacement.
Inspect the SIM card tray to locate the slot that houses the SIM card. Depending on the design of the tray, the slot may be clearly visible or may require closer examination to identify. Once you have located the slot, gently maneuver the SIM card to ease it out of the tray. Exercise caution to prevent bending or damaging the SIM card during this process.
It’s important to handle the SIM card delicately and avoid touching the metal contacts on its surface. The metal contacts facilitate the connection between the SIM card and the device, and any smudges or damage to these contacts can interfere with the card’s functionality. By holding the SIM card along its edges, you can minimize the risk of inadvertently affecting the metal contacts.
As you carefully remove the SIM card from the tray, take note of its orientation and position. This will be crucial when reinserting the SIM card or transferring it to another device. Keeping the SIM card aligned and free from any debris or obstruction is vital for ensuring optimal performance and connectivity when it is placed back into a compatible device.
Step 5: Reinsert the SIM Card Tray
Returning the SIM Card Tray to Your Moto X
After removing the SIM card and ensuring its safety, the final step is to reinsert the SIM card tray back into your Moto X. Before proceeding, take a moment to verify the correct orientation of the SIM card tray to avoid any potential issues during reinsertion. Align the tray carefully to ensure a seamless fit within the device.
Once you have confirmed the proper alignment, gently slide the SIM card tray back into its designated slot on the Moto X. Exercise caution to prevent any resistance or misalignment during this process. The tray should slide smoothly into place without requiring excessive force. Applying gentle, even pressure will help guide the tray back into its original position securely.
As the SIM card tray approaches its fully inserted position, listen for a faint click or feel for a subtle resistance, indicating that the tray is securely seated within the device. It’s essential to ensure that the tray is fully and securely inserted to maintain the integrity of the SIM card connection and prevent any potential issues with connectivity or functionality.
Once the SIM card tray is securely reinserted, take a moment to power on your Moto X and verify that the device recognizes the SIM card. If the SIM card is detected successfully, you can proceed to use your Moto X as usual, with the reassurance that the SIM card has been safely reinstalled.
With the completion of this final step, you have successfully removed and reinserted the SIM card tray in your Moto X, allowing for the safe removal and handling of the SIM card while ensuring the continued functionality of your device.