
Choosing the Right Clear Phone Case
When it comes to personalizing your phone, a clear phone case provides a blank canvas for your creativity. However, not all clear phone cases are created equal. Selecting the right case is crucial to achieving the best results when painting it. Here are some factors to consider when choosing the perfect clear phone case for your DIY project:
- Material: Opt for a clear phone case made from high-quality, durable materials. Look for options that are scratch-resistant and offer adequate protection for your phone. A sturdy case will ensure that your artwork remains intact and the case continues to safeguard your device.
- Fit: Ensure that the case fits your phone model perfectly. A snug fit will prevent the case from shifting or moving around, which could potentially distort or damage the painted design.
- Transparency: The level of transparency of the case is an important consideration. A crystal-clear case will showcase your artwork beautifully, allowing the colors to pop and the details to shine through.
- Texture: Consider the texture of the case. A smooth surface is ideal for painting, as it provides a consistent and even base for your design. Avoid cases with a heavily textured surface, as these may interfere with the painting process.
- Raised Edges: Look for a case with raised edges around the screen and camera to provide added protection. These raised edges can also prevent the painted surface from coming into direct contact with flat surfaces, reducing the risk of scratches or chipping.
By carefully considering these factors, you can choose a clear phone case that serves as the perfect canvas for your artistic endeavors. Once you have selected the ideal case, you can move on to preparing it for the painting process.
Preparing the Case for Painting
Before diving into the painting process, it’s essential to properly prepare the clear phone case to ensure optimal paint adhesion and longevity of the design. Follow these steps to get your case ready for painting:
- Clean the Surface: Begin by thoroughly cleaning the clear phone case with a mild soap and water solution. This will remove any dust, oils, or residues that could interfere with the paint’s ability to adhere to the surface. Ensure the case is completely dry before proceeding to the next step.
- Surface Sanding: Use a fine-grit sandpaper to lightly sand the surface of the case. This gentle abrasion creates a slightly roughened texture, promoting better paint adherence. Be careful not to over-sand, as it may cause visible scratches on the case.
- Dust Removal: After sanding, wipe the case with a tack cloth or microfiber cloth to eliminate any sanding dust. A clean surface is crucial for achieving a smooth and flawless paint finish.
- Masking: If there are any areas of the case that you prefer to remain clear and unpainted, such as camera lens openings or logos, use painter’s tape to mask off these areas. This will ensure clean lines and precise boundaries for your design.
- Priming (Optional): Depending on the type of paint you plan to use, you may consider applying a thin layer of plastic adhesion promoter or clear plastic primer to enhance the paint’s bond with the case. Follow the manufacturer’s instructions for proper application and drying times.
By meticulously preparing the clear phone case, you set the stage for a successful painting experience. The clean and properly prepped surface will allow the paint to adhere securely, resulting in a professional-looking and long-lasting custom design. Once the case is prepped, you can move on to selecting the right paint for your project.
Selecting the Right Paint
Choosing the appropriate paint for your clear phone case is crucial to achieving a vibrant and durable finish. Consider the following factors when selecting the right paint for your DIY project:
- Acrylic Paint: Acrylic paint is a popular choice for painting clear phone cases due to its versatility and adhesion properties. It is available in a wide range of colors and finishes, including matte, glossy, and metallic. Look for acrylic paint specifically formulated for use on plastic surfaces for optimal results.
- Spray Paint: For a smooth and even application, spray paint can be an excellent option. Choose a spray paint designed for use on plastic or multi-surface applications. Ensure proper ventilation and apply thin, even coats to avoid drips or runs.
- Oil-Based Paint Markers: Oil-based paint markers offer precision and control, making them ideal for creating intricate designs and fine details on clear phone cases. These markers provide excellent coverage and can be used to achieve a variety of artistic effects.
- Specialty Plastic Paints: Some manufacturers offer specialty paints designed specifically for plastic surfaces, including clear phone cases. These paints often feature enhanced adhesion and durability, providing a long-lasting finish that resists chipping and peeling.
- Transparent or Opaque: Consider whether you want to maintain the transparent nature of the case or opt for an opaque finish. Transparent paints allow the clear surface to show through, while opaque paints provide full coverage and can create bold, solid colors.
Before purchasing paint, it’s essential to ensure compatibility with plastic materials and flexibility once dried. Additionally, consider the level of detail and intricacy in your design, as different paints offer varying levels of control and coverage. Once you have selected the right paint for your project, you can proceed to the exciting process of applying the base coat.
Applying the Base Coat
The base coat serves as the foundation for your painted design, providing a smooth and consistent backdrop for the subsequent layers of paint. Follow these steps to apply the base coat to your clear phone case:
- Priming the Surface: If you opted for a plastic adhesion promoter or clear plastic primer during the case preparation stage, apply it now according to the manufacturer’s instructions. This step enhances the paint’s adhesion to the plastic surface.
- Choosing the Base Color: Select the color for your base coat. Whether you prefer a solid color or a translucent tint, ensure that the chosen paint complements the overall design you envision for your clear phone case.
- Even Application: Using a fine brush, foam brush, or spray paint, apply the base coat evenly across the entire surface of the case. Work in thin layers to prevent drips and ensure smooth coverage. If using spray paint, apply light, overlapping passes to achieve a uniform finish.
- Drying Time: Allow the base coat to dry completely according to the paint manufacturer’s recommended drying time. Ensure that the case is placed on a level surface to prevent any pooling or uneven drying of the paint.
- Additional Coats (Optional): Depending on the opacity and coverage of the base coat, you may opt to apply additional coats to achieve the desired intensity of color. Allow each layer to dry thoroughly before applying the next coat.
The base coat sets the stage for the visual impact of your painted design. A well-executed base coat provides a solid foundation for the subsequent layers of paint and ensures a professional-looking finish. Once the base coat is applied and fully dried, you can proceed to the exciting phase of adding your chosen design or pattern to the clear phone case.
Adding Design or Pattern
With the base coat in place, it’s time to infuse your creativity by adding a unique design or pattern to your clear phone case. Whether you opt for a minimalist approach, intricate details, or bold graphics, the following steps will guide you through the process of applying your chosen design:
- Sketching the Design: If you have a specific design or pattern in mind, lightly sketch it onto the case using a pencil or a washable marker. This initial sketch serves as a guideline for the placement and proportions of your design elements.
- Painting Techniques: Depending on your chosen design, employ various painting techniques such as brush strokes, stippling, layering, or masking to achieve the desired visual impact. Take your time and work patiently to bring your vision to life on the case’s surface.
- Layering Colors: If your design incorporates multiple colors, apply them in layers, allowing each color to dry before adding the next. This approach ensures clean lines and prevents colors from blending unintentionally.
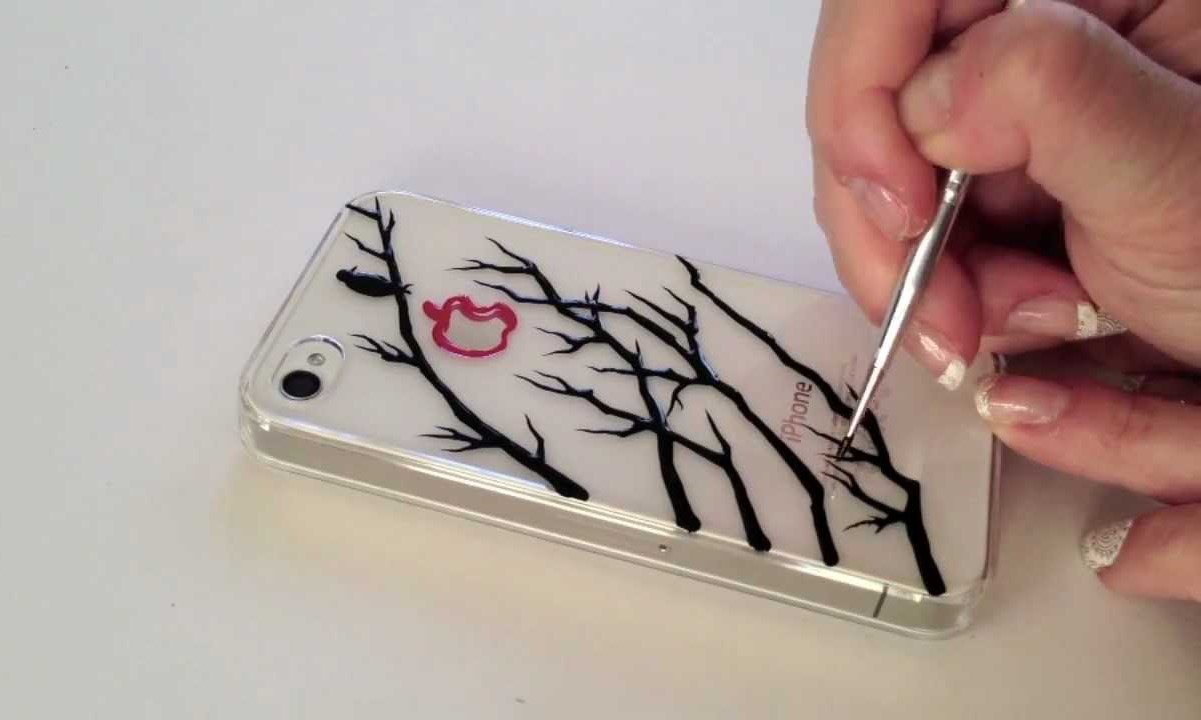
- Detailing and Precision: For intricate designs or fine details, utilize fine-tipped paintbrushes or oil-based paint markers to ensure precision and accuracy. These tools offer control and allow you to add intricate elements with ease.
- Experiment and Explore: Don’t be afraid to experiment with different patterns, textures, and styles. Embrace the creative process and let your imagination guide you as you embellish the clear phone case with your personalized design.
Adding your unique design or pattern to the clear phone case transforms it into a one-of-a-kind accessory that reflects your individual style and creativity. Once you are satisfied with the painted design, the next crucial step is to seal the paint to ensure its longevity and durability.
Sealing the Paint
After investing time and creativity in painting your clear phone case, it’s essential to protect the design and ensure its longevity. Sealing the paint not only enhances its durability but also safeguards it against scratches and fading. Follow these steps to effectively seal the painted design on your clear phone case:
- Choosing the Sealant: Select a clear sealant specifically formulated for use on painted plastic surfaces. Look for sealants that offer UV protection and are compatible with the type of paint you used. Options include clear acrylic sealants or polyurethane sealants designed for plastic applications.
- Test Application: Before applying the sealant to the entire case, perform a test application on a small, inconspicuous area to ensure compatibility with the painted surface. This step helps prevent any adverse reactions or unwanted effects on the design.
- Even Application: Apply the sealant evenly over the entire painted surface of the clear phone case. Use a fine brush or spray application, following the manufacturer’s recommendations for proper coverage and drying times.
- Drying Time: Allow the sealant to dry thoroughly according to the manufacturer’s instructions. Ensure that the case is placed in a dust-free environment during the drying process to prevent particles from adhering to the sealant.
- Additional Coats (Optional): Depending on the type of sealant and the level of protection desired, you may opt to apply multiple coats of sealant. Ensure that each layer is fully dry before applying the next coat.
Sealing the paint not only adds a protective layer to your custom design but also imparts a professional finish to the clear phone case. The sealant enhances the vibrancy of the colors and provides a smooth, glossy appearance. Once the sealant has fully dried and cured, your painted clear phone case is ready to adorn your device and showcase your artistic flair.
Caring for Your Painted Clear Phone Case
Proper care and maintenance are essential to preserve the integrity and visual appeal of your painted clear phone case. By following these guidelines, you can ensure that your custom design remains vibrant and protected:
- Gentle Cleaning: When cleaning your painted clear phone case, use a soft, damp cloth to gently wipe away dust and smudges. Avoid harsh chemicals or abrasive cleaning agents, as these can damage the painted surface.
- Avoiding Extreme Temperatures: Protect your painted clear phone case from prolonged exposure to extreme temperatures, as this can affect the adhesion and appearance of the paint. Avoid leaving the case in direct sunlight for extended periods.
- Handling with Care: Handle your phone with care to prevent accidental scratches or impacts that could damage the painted design. Consider using a screen protector to provide an additional layer of protection for your device.
- Regular Inspections: Periodically inspect the painted surface for any signs of wear, chipping, or peeling. Address any issues promptly to prevent further damage and maintain the aesthetics of the case.
- Storage: When not in use, store your painted clear phone case in a clean, dry environment, away from sharp objects or items that could potentially scratch or damage the design.
By incorporating these simple care practices into your routine, you can prolong the life of your painted clear phone case and continue to enjoy its personalized charm. With proper care, your custom design will remain a standout feature of your phone, reflecting your creativity and style for an extended period.