
Check System Requirements
Before manually installing a printer on your Mac, it’s important to ensure that your system meets the necessary requirements. This will help ensure that the printer functions optimally and avoids any compatibility issues. Here are some key factors to consider:
- Operating System: Check if your Mac is running a compatible version of macOS. Most printers are designed to work with the latest operating systems, so it’s advisable to update your Mac before proceeding.
- Printer Compatibility: Confirm that the printer you wish to install is compatible with macOS. This information can usually be found on the manufacturer’s website or in the printer’s user manual.
- System Resources: Take into account the available disk space and memory on your Mac. Installing a printer may require a certain amount of storage space and RAM, so ensure your system has enough resources to accommodate the installation.
- Internet Connection: Some printers may require an internet connection in order to download and install the necessary drivers or firmware updates. Double-check if your Mac is connected to the internet before proceeding.
By verifying these system requirements, you can prevent any unexpected issues during the installation process. It’s always better to be prepared and ensure that your Mac is ready to connect and communicate with the printer seamlessly.
Connect Your Printer to Your Mac
In order to manually install a printer on your Mac, you need to establish a physical connection between the printer and your computer. Follow the steps below to connect your printer:
- Prepare the Printer: Make sure your printer is turned on and properly plugged into a power source. Check for any error messages or blinking lights on the printer’s display panel, and resolve any issues if necessary.
- Connect the Printer to Your Mac: Use a USB cable or, if available, an Ethernet cable to connect your printer to your Mac. The type of cable required may vary depending on your printer model.
- Ensure a Stable Connection: Ensure that the cable is securely connected to both the printer and your Mac. Avoid loose connections, as this can lead to communication errors between the devices.
- Power On the Printer: Once the printer is connected to your Mac, power it on if it hasn’t already been turned on. Wait for the printer to initialize and be ready for communication.
Once the printer is successfully connected to your Mac, you can proceed with installing the printer driver and configuring the necessary settings. A stable connection is crucial to ensure that your Mac can communicate with the printer effectively, enabling you to print documents and perform other printer-related tasks.
Download Printer Driver from the Manufacturer’s Website
In order for your Mac to recognize and communicate with your printer, you’ll need to download the appropriate printer driver from the manufacturer’s website. The driver acts as a bridge, enabling your computer’s operating system to understand and utilize the printer’s features. Here’s how you can download the printer driver:
- Identify the Manufacturer: Determine the manufacturer of your printer. This information is usually displayed on the printer’s exterior or in the user manual. Common printer manufacturers include HP, Epson, Canon, Brother, and many others.
- Visit the Manufacturer’s Website: Open a web browser and navigate to the official website of the printer manufacturer.
- Locate the Support or Driver Section: Look for a support or driver section on the manufacturer’s website. This section is typically labeled “Support,” “Downloads,” or something similar.
- Select Your Printer Model: Search for your specific printer model or navigate through the provided options to find your printer’s support page.
- Download the Printer Driver: Once you’ve landed on your printer’s support page, locate the appropriate driver for your operating system. Select the driver that corresponds to your Mac’s operating system version and click on the download button.
- Install the Printer Driver: After the driver download is complete, locate the downloaded driver file on your Mac and double-click on it to initiate the installation. Follow the on-screen instructions to complete the installation process.
Downloading the correct printer driver ensures that your Mac can communicate effectively with your printer, enabling seamless printing and access to all the printer’s features. It’s essential to obtain the driver directly from the manufacturer’s website for the most up-to-date and reliable version.
Install the Printer Driver
Now that you’ve downloaded the printer driver from the manufacturer’s website, it’s time to install it on your Mac. The printer driver allows your operating system to interact with the printer and control its functions. Follow the steps below to install the printer driver:
- Locate the Downloaded Driver: Open the folder on your Mac where you saved the downloaded printer driver file. Typically, downloads are stored in the “Downloads” folder.
- Double-Click the Driver File: Locate the driver file and double-click on it to start the installation process. If prompted, enter your Mac’s administrator username and password to authorize the installation.
- Follow the On-Screen Instructions: The installer will guide you through the installation process. Read and follow the prompts carefully. Pay attention to any additional options or settings that may be presented during the installation.
- Complete the Installation: Once the installation is complete, you may be prompted to restart your Mac. It’s recommended to restart your computer to ensure that the driver is fully integrated into the system.
After successfully installing the printer driver, your Mac will be ready to communicate with the printer. The driver establishes the necessary connection and ensures that your printer’s features and functionality are accessible through your Mac’s printing preferences.
Add the Printer on Your Mac
After installing the printer driver, it’s time to add the printer to your Mac. Adding the printer will enable your computer to detect and communicate with the printer, allowing you to send print jobs from your Mac seamlessly. Here’s how you can add the printer:
- Open System Preferences: Click on the Apple menu in the top-left corner of your screen and select “System Preferences” from the drop-down menu.
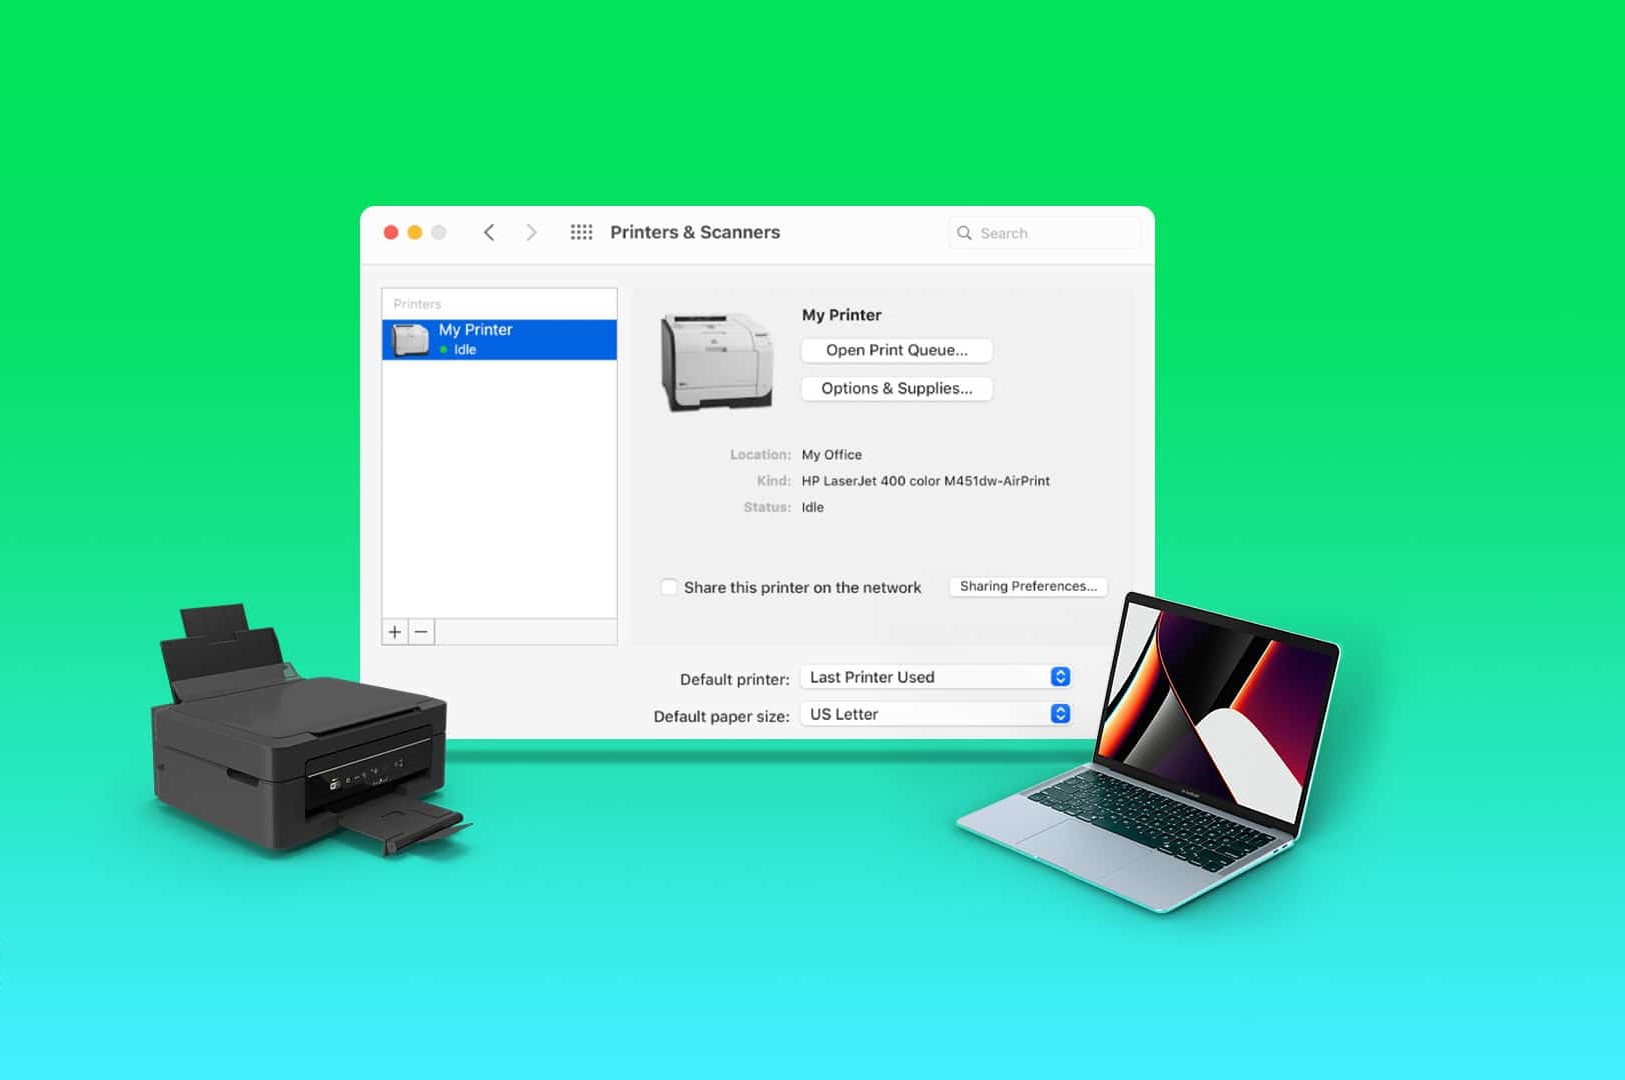
- Click on “Printers & Scanners”: In the System Preferences window, locate and click on the “Printers & Scanners” option. This will open the Printers & Scanners preferences pane.
- Click on the “+” Button: In the Printers & Scanners preferences pane, click on the “+” button located below the list of printers on the left side of the window. This will open the “Add Printer or Scanner” dialog box.
- Select Your Printer: In the “Add Printer or Scanner” dialog box, select your printer from the list of available devices. If your printer does not appear, make sure it is connected properly and turned on. You may need to click on the “Refresh” or “Search” button to scan for available printers.
- Click on “Add”: Once you’ve selected your printer, click on the “Add” button to add it to your Mac.
- Configure Printer Settings (Optional): After adding the printer, you can configure various settings such as paper size, print quality, and default printer preferences. This can be done by selecting the printer on the list and clicking on the “Options & Supplies” or “Printer Settings” button.
Once you’ve added the printer and configured the necessary settings, your Mac is ready to print using the newly installed printer. Make sure the printer is set as the default printer if you wish to use it for all your print jobs. Now you can enjoy convenient printing from your Mac without any hassle.
Configure Printer Settings
After adding the printer to your Mac, you may want to configure specific settings to optimize your printing experience. Customizing the printer settings allows you to adjust parameters such as paper size, print quality, and default preferences. Here’s how you can configure the printer settings:
- Select the Printer: Open the “Printers & Scanners” preferences pane by navigating to the Apple menu, selecting “System Preferences,” and clicking on “Printers & Scanners.”
- Choose the Printer: From the list of printers on the left side of the preferences pane, select the printer you want to configure. The selected printer will be highlighted.
- Access Printer Options: To access the printer settings, click on the “Options & Supplies” or “Printer Settings” button. This will open a new window with various configuration options.
- Adjust Printer Settings: In the printer options window, you’ll find a range of settings that can be customized according to your preferences. Some common settings include paper size, print quality, orientation, and duplex printing.
- Saved Preferences: You may have the option to save your preferred settings as presets. Saving presets allows you to quickly switch between different configurations based on your specific printing needs.
- Default Printer: If you want this printer to be the default printer for all your print jobs, you can set it as the default by selecting “Set Default Printer” or a similar option in the printer options window.
- Test Print: Before finalizing the settings, it’s a good idea to print a test page to ensure that everything is configured correctly. This will help identify any potential issues and ensure the settings are producing the desired output.
By configuring the printer settings, you can tailor the printing experience to your specific requirements. Feel free to explore the available options and adjust the settings based on your preferences. Experimenting with different settings can help you optimize print quality, save resources, and enhance overall efficiency.
Test the Printer
After completing the installation and configuration of your printer on your Mac, it’s important to perform a test print to ensure that the printer is functioning correctly. This will allow you to verify that the printer is connected properly and can produce the desired output. Here are the steps to test your printer:
- Prepare the Test Document: Open a text document, image, or any other file that you want to use for the test print. Make sure the content is suitable for testing the printer’s various features and functions.
- Select Print: With the document open, go to the “File” menu and select the “Print” option. Alternatively, you can use the keyboard shortcut “Command + P” to open the print dialog.
- Verify Printer Selection: In the print dialog, confirm that the correct printer is selected. If necessary, use the drop-down menu to choose the printer you installed. Check that the printer settings, such as paper size and orientation, are appropriate for your test print.
- Preview Print Settings: Take a moment to review the print settings displayed in the print dialog. Ensure that the settings match your desired output, such as color or grayscale, single or double-sided printing, and any other specific requirements.
- Initiate the Test Print: Once you are satisfied with the settings, click on the “Print” button to start the test print process. The printer will receive the print job and begin printing the document.
- Check the Printed Output: After the print job is complete, inspect the printed document for any issues. Pay attention to the quality of the print, color accuracy, alignment, and any other factors that are important for your specific test.
- Resolve Any Issues: If you encounter any problems during the test print, such as smudging, poor print quality, or incorrect alignment, refer to the printer’s manual or the manufacturer’s support resources to troubleshoot and resolve the issue.
Performing a test print allows you to ensure that your printer is functioning properly and producing the desired results. By carefully reviewing the output and addressing any issues that arise, you can make adjustments and fine-tune the printer settings if needed. Once you are satisfied with the test print, you can confidently use your printer for all your printing needs.