
Step 1: Identify the Battery Type
Before you start replacing the battery in your Liftmaster remote, it’s important to identify the correct battery type. The battery type required for your remote control can vary depending on the model. Typically, Liftmaster remotes use coin cell batteries, also known as button cell batteries. These small, round batteries are commonly used in electronic devices and come in different sizes and voltages. The most common types used in Liftmaster remotes are CR2032 and CR2016, but it’s essential to check your specific remote’s manual or the existing battery to confirm the correct type.
Locating the battery type is relatively straightforward. The battery type is often printed on the existing battery itself. If the battery is no longer functional or the print is too small to read, you can find the information in the user manual that came with your remote control. If you don’t have the manual on hand, you can usually find it online by searching for the model number of your Liftmaster remote.
Another method to identify the battery type is to open the battery compartment of the remote. Carefully remove the existing battery and check for any markings or labels inside the compartment that indicate the required battery type. Pay close attention to the polarity markings (+ and -) to ensure you insert the new battery correctly.
Once you have determined the correct battery type for your Liftmaster remote, you can proceed to the next step of replacing the battery.
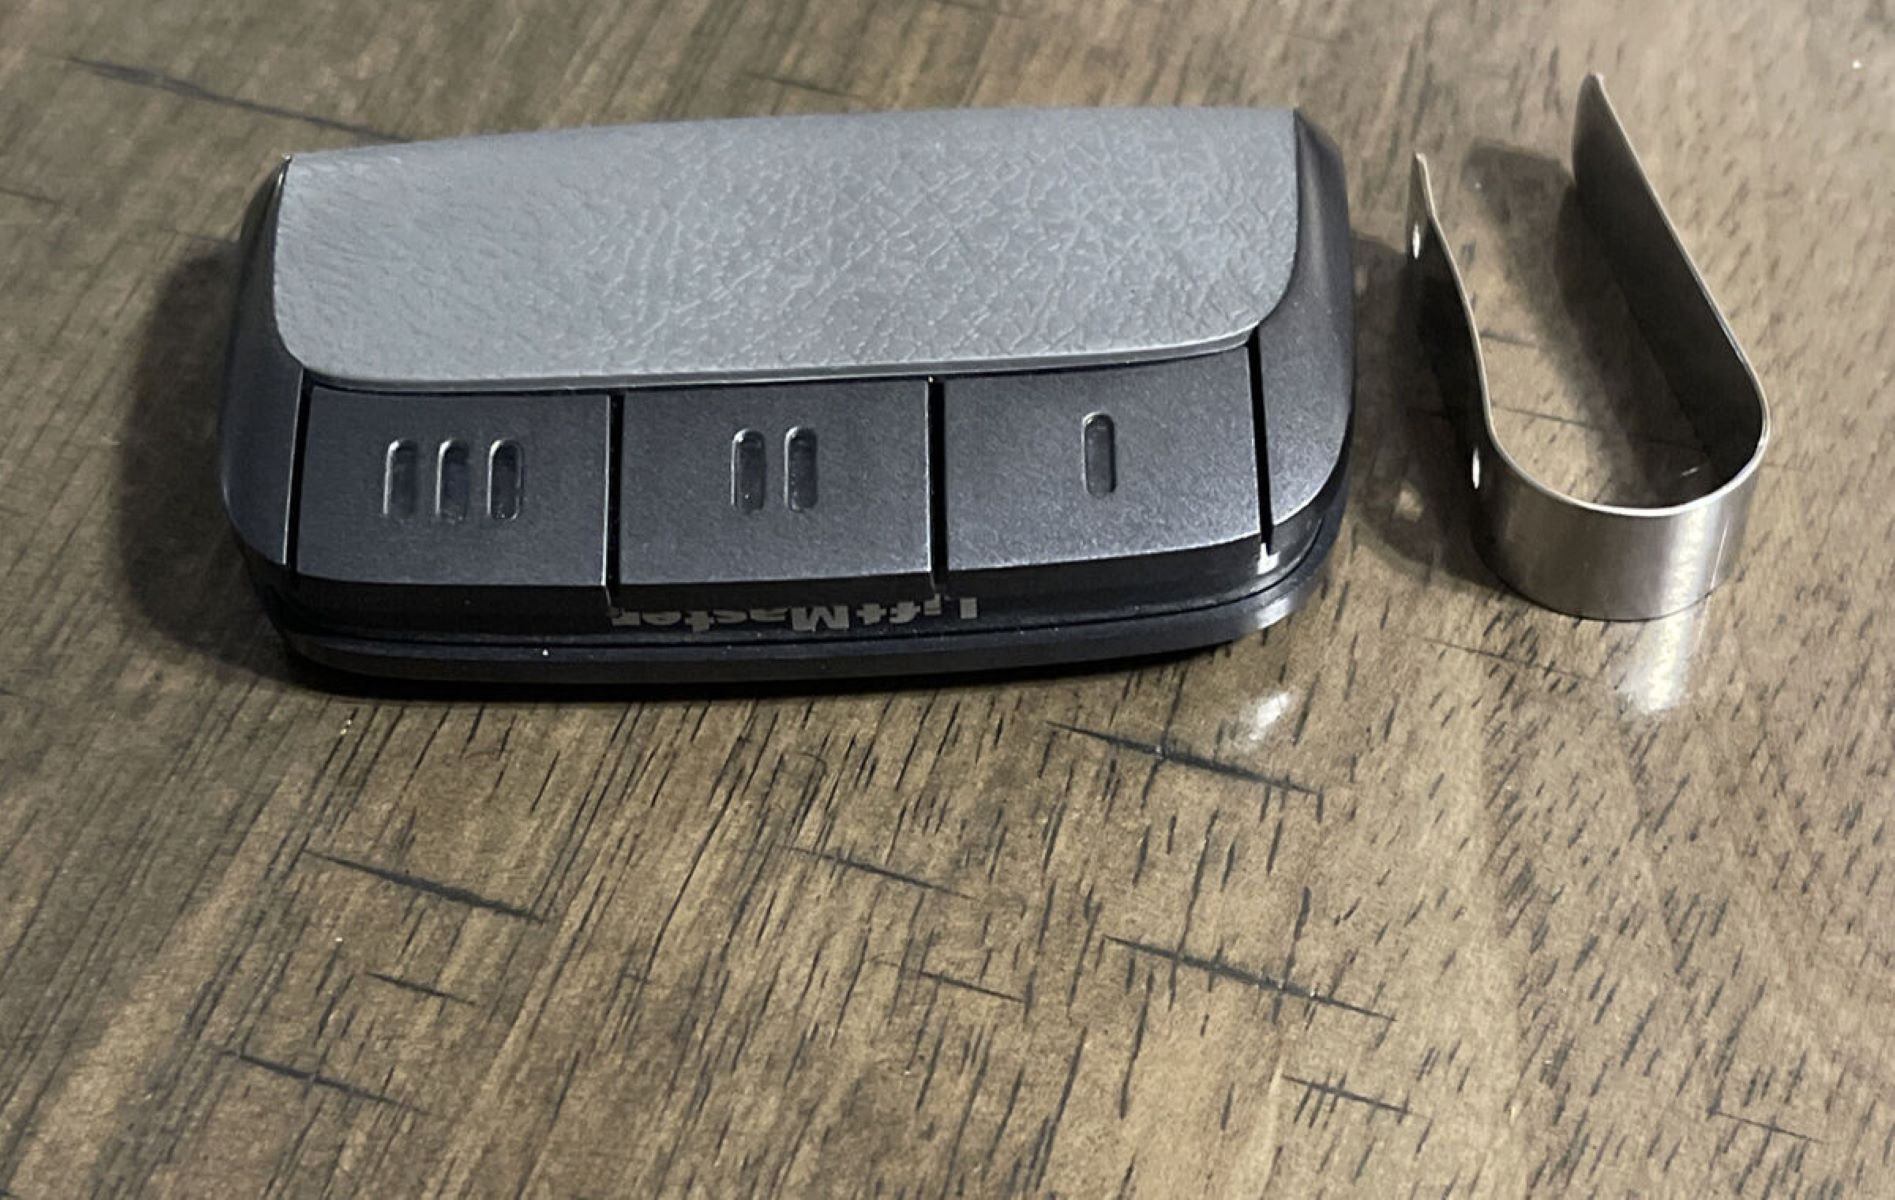
Step 2: Remove the Battery Cover
With the knowledge of the correct battery type in hand, the next step in replacing the battery of your Liftmaster remote is to access the battery compartment by removing the battery cover. The process may vary slightly depending on the model of your remote, but the general steps are similar.
First, locate the battery compartment on your Liftmaster remote. This is usually situated on the back of the remote and is designed to be easily accessible for battery replacement. The compartment is often secured with a small latch or screw to keep the battery in place and protect it from accidental dislodging.
Use a small screwdriver or coin to carefully open the compartment. If the compartment is secured with a screw, use the appropriate screwdriver to loosen and remove it. For compartments with a latch, gently slide or press the latch to release the cover. Exercise caution to avoid causing any damage to the remote or the cover during this process.
Once the cover is released, carefully lift it away from the remote to reveal the existing battery. Take note of the orientation of the battery and any additional components within the compartment. Some remotes may have a small spring or metal contact that holds the battery in place. Be mindful of these components to ensure they remain intact and properly positioned for reassembly.
After the cover is removed, set it aside in a safe place to prevent misplacement. With the battery now exposed, you are ready to proceed to the next step of replacing the battery with a new one.
Step 3: Replace the Battery
Now that the battery compartment is open and the existing battery is accessible, it’s time to replace it with a new one. Ensure you have the correct replacement battery on hand, as identified in the previous step. For Liftmaster remotes, the most common battery types are CR2032 and CR2016, but it’s essential to verify the specific type required for your remote.
Begin by carefully removing the old battery from the compartment. Depending on the design of the compartment, you may need to gently push the battery from the side to release it from any retaining clips or contacts. Take note of the orientation of the battery, especially if it has polarity markings (+ and -). It’s crucial to insert the new battery in the same orientation to ensure proper functionality.
Before inserting the new battery, inspect the battery compartment for any debris or corrosion that may have accumulated over time. If necessary, use a soft, dry cloth to gently clean the compartment, ensuring that it is free from any foreign matter that could affect the performance of the new battery.
Next, take the new battery and align it correctly within the compartment, matching the polarity markings with the corresponding indicators inside the compartment. Press the battery firmly into place, ensuring that it is secure and making proper contact with any terminals or contacts within the compartment.
Once the new battery is securely installed, it’s time to replace the battery cover. Carefully position the cover back onto the remote, ensuring that it aligns properly with the compartment. If the cover is secured with a screw, use the appropriate screwdriver to reinsert and tighten the screw. For covers with a latch, gently press or slide it into place until it clicks or locks securely.
With the new battery in position and the cover securely fastened, your Liftmaster remote is now ready for testing to ensure that the battery replacement was successful.
Step 4: Test the Remote
After replacing the battery in your Liftmaster remote, it’s crucial to test its functionality to confirm that the battery replacement was successful. Testing the remote ensures that it is operational and ready for use, providing peace of mind that the new battery is functioning as intended.
To test the remote, stand within range of the garage door opener or the device the remote is designed to control. Press any button on the remote to trigger the transmission of the signal. As you press the button, observe the indicator lights on the remote, if applicable, to check for any signs of activation such as a flashing light or audible feedback.
Simultaneously, pay attention to the corresponding device, such as the garage door opener, to see if it responds to the signal from the remote. If the device receives the signal and operates as expected, such as opening or closing the garage door, it indicates that the battery replacement was successful, and the remote is fully functional.
If the remote does not appear to be working as intended, there are a few troubleshooting steps to consider. Firstly, double-check that the new battery is inserted correctly, with the polarity aligned according to the markings within the battery compartment. If the battery is correctly installed, ensure that the battery cover is securely fastened to maintain proper contact and protection.
If the remote still does not function after confirming the battery and cover, it may be helpful to reset the remote or reprogram it according to the manufacturer’s instructions. This process can vary depending on the model of the remote and is typically outlined in the user manual or available through the manufacturer’s website.
By thoroughly testing the remote and addressing any potential issues, you can ensure that the battery replacement process is successful and that your Liftmaster remote is ready to reliably operate your garage door opener or other compatible devices.