
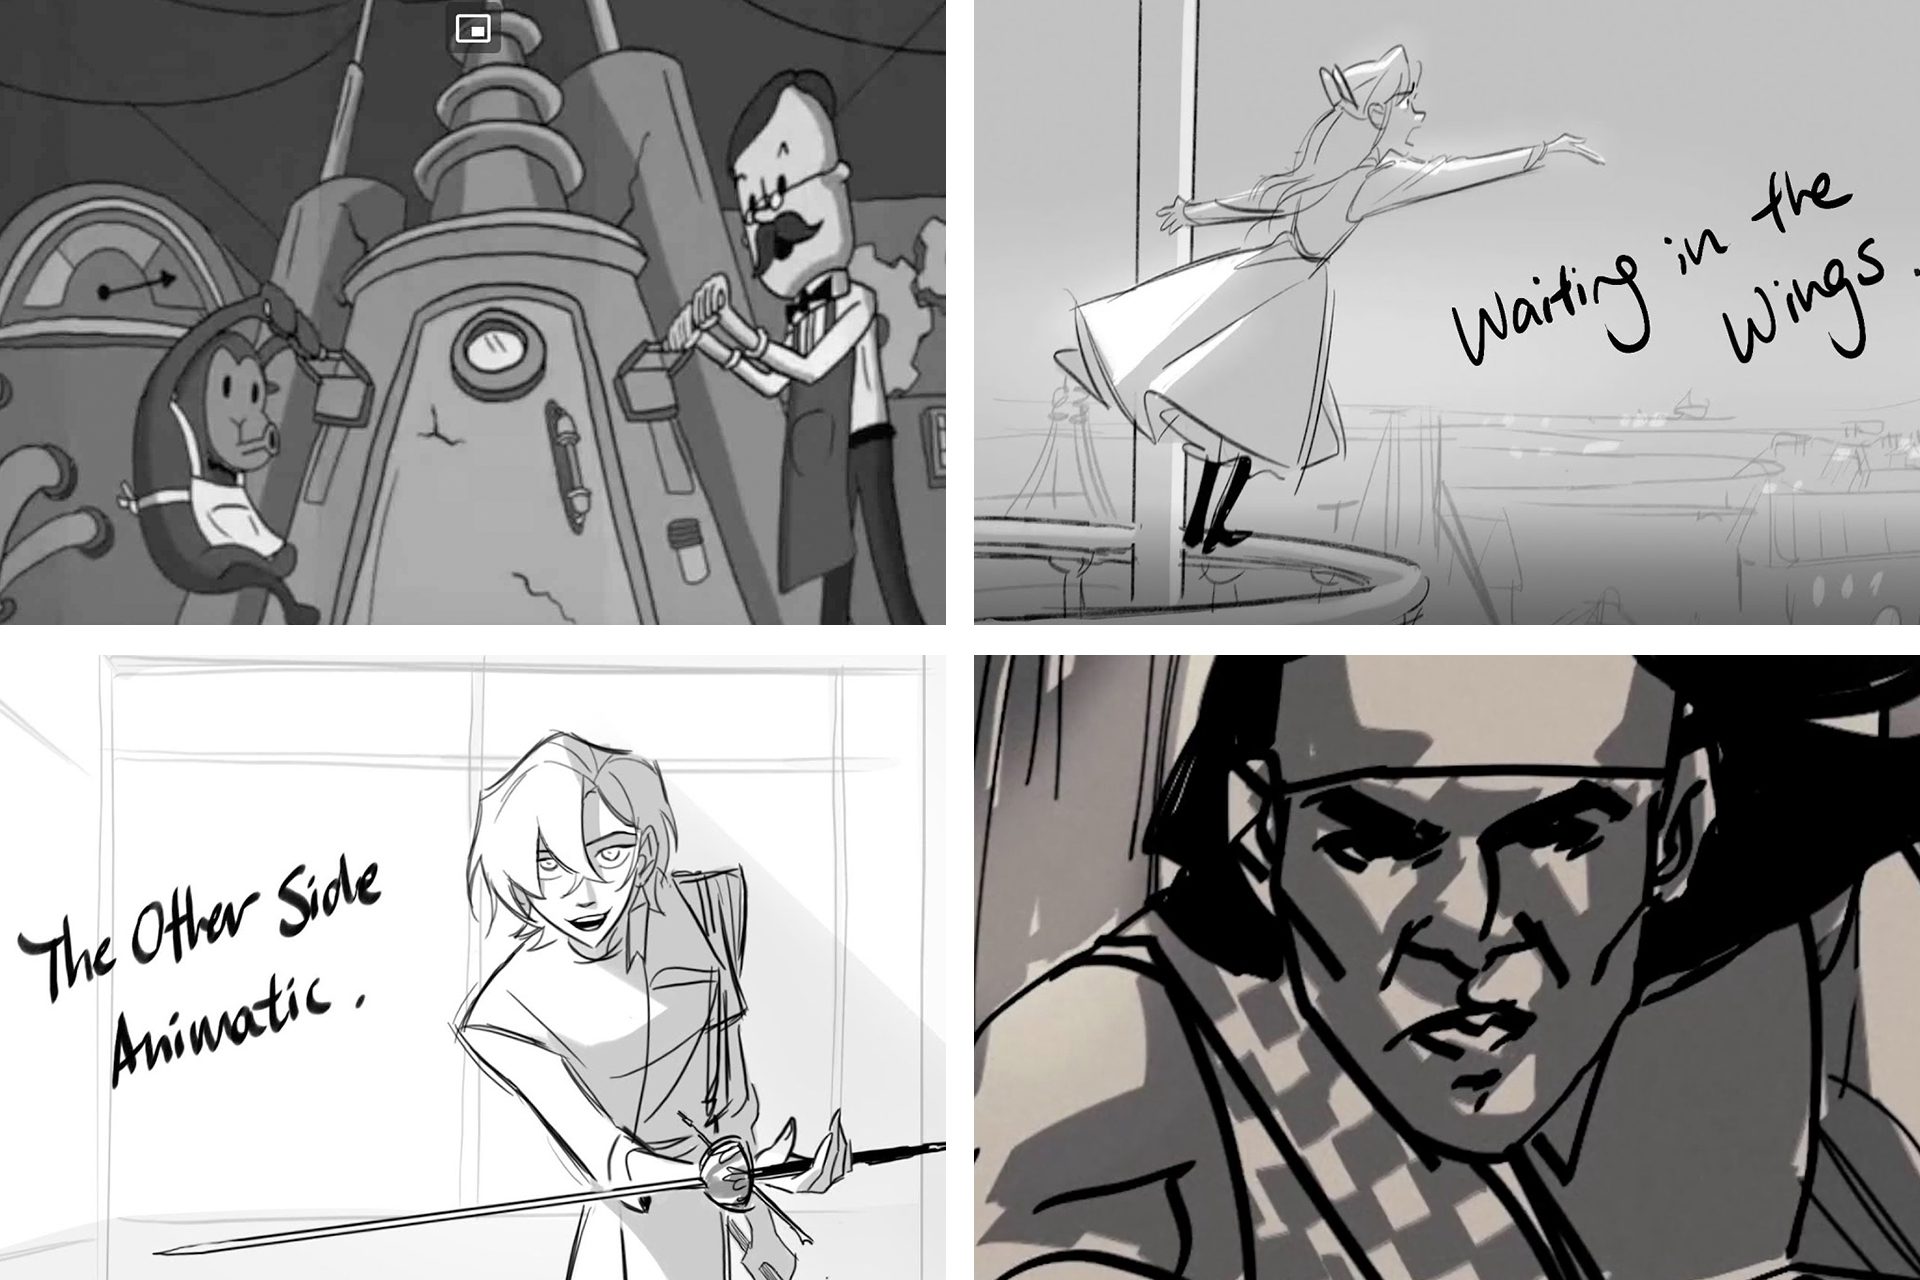
What is an Animatic?
An animatic is a pre-visualization tool used in film and animation production. It is essentially a rough, low-fidelity version of the final product, consisting of a sequence of still images or storyboards accompanied by sound and timing. It serves as a visual blueprint that helps convey the intended shot composition, camera angles, scene transitions, and overall flow of the final project.
Animatics are commonly created during the initial stages of film and animation projects to provide a clear vision for the story and help align the creative team’s ideas. By bringing together static images, sound effects, dialogue, and music, animatics allow stakeholders to evaluate and refine the project before committing to costly production and post-production processes.
At its core, an animatic functions as a dynamic storyboard, presenting the narrative in a sequence of frames. However, unlike traditional storyboards, animatics incorporate elements such as timing, motion, and audio, making it easier to assess how the visuals and audio work together to tell the story.
When creating an animatic, the focus is on conveying the key moments, pacing, and flow of the project without the need for intricate animations or detailed visuals. Instead, it aims to capture the essence of each scene and provide a foundation for the production team to work from.
Animatics also serve as a valuable communication tool between directors, producers, storyboard artists, animators, and other team members. It allows everyone involved to visualize and discuss the project’s direction, identify potential issues, and make necessary adjustments before moving forward.
Overall, an animatic provides a comprehensive overview of the project and plays a crucial role in ensuring that the final film or animation accurately reflects the creative vision. By establishing the visual and narrative elements early on, it helps streamline the production process and minimize errors or costly revisions later on.
Why Use an Animatic?
An animatic offers numerous benefits and serves as an invaluable tool in the film and animation industry. Let’s explore why it’s essential to use animatics during the production process.
1. Visualization and Concept Development: Animatics allow filmmakers and animators to visualize and refine their ideas before committing to the final production. By creating a rough representation of the project, it becomes easier to assess the story, identify any gaps or inconsistencies, and make necessary adjustments.
2. Communication and Collaboration: Animatics serve as a common language for the creative team, enabling effective communication and collaboration. They provide a visual reference that ensures everyone involved is on the same page, allowing for better feedback, brainstorming, and decision-making.
3. Pacing and Timing: One of the key advantages of using an animatic is the ability to control the pacing and timing of the project. By incorporating sound effects, music, and dialogue, animatics help determine the appropriate length of scenes and the overall rhythm of the story.
4. Cost and Time Efficiency: Animatics save time and resources by allowing potential issues and revisions to be identified early in the production process. This prevents costly changes during the later stages of production and ensures a smoother overall workflow.
5. Audience Testing: Animatics can be shared with a test audience to gauge their reactions and gather feedback. This early feedback helps filmmakers and animators refine their work, ensuring that the final product resonates with the target audience.
6. Investor and Stakeholder Presentation: Animatics serve as a powerful tool when presenting a project to potential investors and stakeholders. They provide a glimpse into the final product and help convey the vision, increasing the chances of securing financial support and partnerships.
7. Creative Freedom: Animatics allow for experimentation and creative exploration. By quickly visualizing different options and variations, filmmakers and animators can make informed decisions and take risks while staying true to their artistic vision.
8. Troubleshooting: Animatics help identify potential technical and logistical challenges early on. By seeing how different elements come together, such as camera movements or complex visual effects, filmmakers can address any potential obstacles before entering the production phase.
The use of animatics throughout the production process offers numerous advantages, both creatively and practically. By harnessing the power of visualization, communication, and iterative refinement, animatics help streamline the production process, save time and resources, and ensure the final film or animation accurately reflects the initial vision.
Steps in Creating an Animatic
Creating an animatic involves several key steps that help transform the concept into a visual representation. While the exact process may vary depending on individual preferences and project requirements, the following steps provide a general framework for creating an animatic:
1. Script and Concept Development: Begin by developing a script or concept for your film or animation. This lays the foundation for the story, dialogue, and overall direction of your project.
2. Storyboarding: Create a series of rough sketches or storyboards representing each scene in your script. These storyboards should capture the key moments and shot compositions for each scene, serving as a visual guide for the animatic.
3. Timing and Pacing: Determine the desired timing for each scene in your animatic. Consider the pacing, transitions, and overall flow of the story. This will help establish the rhythm and tempo of your animatic.
4. Adding Sound and Music: Select appropriate sound effects, dialogue, and music to enhance the visuals and convey the desired mood or atmosphere. This step helps bring life to your animatic and provides a clearer representation of the final project.
5. Iterative Process: Iterate and refine your animatic through multiple revisions. Seek feedback from the creative team or test audience and make necessary modifications to improve the storytelling and visual representation.
6. Fine-tuning and Polish: Once you have incorporated feedback and made necessary adjustments, focus on fine-tuning the details of your animatic. Pay attention to character expressions, camera movements, and other visual elements to ensure they effectively convey the intended emotions and story.
7. Review and Evaluation: Take time to review and evaluate your animatic to ensure it aligns with the project’s goals and vision. Look for areas of improvement and make final adjustments to create a cohesive and engaging animatic.
8. Export and Presentation: Export your animatic in a suitable format for easy sharing and presentation. This allows you to showcase your work to stakeholders, test audiences, or potential collaborators for further feedback and collaboration.
By following these steps, you can create a well-crafted animatic that effectively communicates your vision, captures the essence of your story, and serves as a guide throughout the production process.
Storyboarding
Storyboarding is a vital step in creating an animatic as it serves as the visual foundation for the entire project. It involves creating a sequence of rough sketches or images that represent each key moment and shot in the script.
1. Translating the Script: Begin by reading the script and visualizing each scene. Sketch out the key moments, actions, and camera angles that will effectively convey the story. Focus on capturing the essence of each scene rather than worrying about detailed illustrations.
2. Shot Composition: Determine the optimal shot composition for each scene. Consider factors such as camera angles, framing, and the placement of characters and objects within the frame. This helps create visually appealing and dynamic compositions that enhance the storytelling.
3. Sequential Flow: Arrange the storyboard frames in the proper sequence to ensure a smooth flow of the story. Think about how one shot leads to the next, creating logical progression and visual continuity.
4. Visualizing Action and Emotion: Use simple but expressive drawings to convey the action and emotions of the characters. Focus on capturing their body language, facial expressions, and gestures to effectively communicate their thoughts and feelings to the audience.
5. Annotations and Notes: Include annotations and notes alongside the storyboard frames to provide additional context or instructions for animators, editors, or other team members. This helps ensure a clear understanding of the intended visuals and actions.
6. Thumbnail Sketches: Start by creating rough thumbnail sketches for each scene before refining them into more detailed frames. Thumbnail sketches allow for quick exploration of multiple compositions and ideas, helping to find the most visually interesting and compelling approach.
7. Collaboration and Feedback: Storyboarding is a collaborative process where input from the director, producers, and other team members is essential. Share the storyboard with the team and gather feedback to fine-tune the visuals and ensure the aesthetic and storytelling goals are met.
8. Dynamic Panels: Experiment with panel layouts to create visually dynamic compositions. Vary the sizes and shapes of the panels, incorporating diagonal lines or perspective to add depth and visual interest to the storyboard frames.
Remember, the purpose of storyboarding is to create a visual representation that effectively communicates the story and serves as a blueprint for the animatic. It provides a guiding framework for the production team, allowing them to understand the intended visuals, composition, and narrative flow.
Timing and Pacing
Timing and pacing are vital elements in creating an engaging and effective animatic. They dictate the rhythm, tempo, and overall flow of the story, ensuring that the visuals and audio work together harmoniously.
1. Scene Length: Consider the appropriate length for each scene in your animatic. Determine how long each shot should last to effectively convey the desired emotions, actions, and story progression. Reflect on the pacing of the story and adjust scene lengths accordingly.
2. Transitions: Plan transitions between scenes to create seamless and smooth storytelling. Consider techniques such as crossfades, dissolves, or cuts that best fit the tone and mood of your animatic. Smooth transitions help maintain the viewer’s attention and prevent any disruptions in the narrative flow.
3. Mood and Atmosphere: Utilize timing and pacing to evoke specific emotions and enhance the overall atmosphere of the animatic. Determine the speed of transitions and the duration of shots to create suspense, build tension, or convey a sense of urgency or calmness.
4. Syncing with Sound: Consider the audio elements, including dialogue, sound effects, and music, and synchronize them with the visuals. Ensure that the timing of the visuals aligns with the appropriate audio cues, enhancing the impact and effectiveness of the storytelling.
5. Dynamic and Static Shots: Vary the timing and pacing of shots to create a dynamic and visually engaging animatic. Use faster cuts, shorter shots, and quick movements for intense or action-packed scenes. Conversely, slow down the pace and use longer shots for more contemplative or emotional moments.
6. Establishing a Rhythm: Create a rhythm that suits the narrative and engages the viewer. Consistency in timing, pacing, and scene lengths helps establish a natural flow and allows the story to unfold in a captivating manner.
7. Experimentation and Iteration: Be willing to experiment with different timing and pacing techniques during the creation of your animatic. Iterate and refine as needed based on feedback and your own artistic intuition to find the pacing that best serves the story.
8. Viewer Engagement: Consider the attention span and expectations of the audience. Maintain a balance between fast-paced and slower-paced moments to prevent monotony or overwhelming the viewer. Keep them engaged by strategically controlling the timing and pacing of your animatic.
Timing and pacing are powerful tools in creating an effective animatic. They allow for the precise control of emotions, build tension, and drive the narrative forward. Through careful manipulation of these elements, you can guide the audience through a compelling visual experience that effectively conveys your story.
Adding Sound and Music
Sound and music play a critical role in enhancing the storytelling and overall impact of an animatic. They add depth, emotion, and atmosphere to the visuals, creating a more immersive and engaging experience for the viewer.
1. Sound Effects: Choose appropriate sound effects that complement the actions and events depicted in your animatic. Whether it is footsteps, door creaks, or explosions, sound effects help bring the visuals to life and add realism to the scenes.
2. Dialogue: If your animatic includes dialogue, ensure that the speech is clear, concise, and helps move the story forward. Carefully consider the timing of the dialogue to make sure it aligns with the visuals and helps convey the intended message effectively.
3. Music: Select suitable music that sets the tone and enhances the emotional impact of your animatic. Consider the genre, tempo, and mood of the scene to choose music that effectively conveys the desired atmosphere or evokes specific emotions in the viewer.
4. Sound Mixing: Pay attention to the balance between dialogue, sound effects, and music. Ensure that each element is audible and well-balanced, allowing the viewer to clearly hear and understand the intended sounds without overpowering the visuals.
5. Tempo and Rhythm: Align the timing and pacing of the sound elements with the visuals to create a seamless and cohesive experience. Sync significant sound events with key visual moments to enhance the impact and emotional resonance of the animatic.
6. Enhancing Narrative: Sound and music should complement and reinforce the narrative of your animatic. Use them strategically to heighten suspense, evoke specific emotions, or emphasize important story beats. The right combination of sound and visuals can create a powerful and memorable animatic.
7. Audible Cues: If your animatic requires specific audio cues, make sure they are clear and distinct. Audible cues can help guide the viewer’s attention or indicate important actions or events in the story.
8. Impact and Engagement: Utilize sound and music to captivate and engage the viewer. A well-crafted audio experience can immerse the audience in the world of the animatic, making it more memorable and impactful.
By carefully selecting and integrating sound effects, dialogue, and music into your animatic, you can elevate the overall storytelling and create a more immersive and emotionally resonant experience for the viewer. Sound and music serve as powerful tools in enhancing the visuals, conveying the intended mood, and effectively communicating your story.
Iterative Process
The creation of an animatic is an iterative process that involves multiple rounds of refinement and feedback. This iterative approach allows for continuous improvement and ensures that the animatic accurately represents the intended vision for the final film or animation.
1. Initial Draft: Begin by creating an initial draft of the animatic, incorporating the storyboards, timing, and audio elements. This draft serves as a starting point for further refinement.
2. Feedback and Review: Share the initial draft with the creative team, including the director, producers, and other key stakeholders. Gather feedback and insights on the overall flow, pacing, storytelling, and visual representation.
3. Revisions and Adjustments: Based on the feedback received, make necessary revisions and adjustments to the animatic. Fine-tune the timing, pacing, and composition of shots to better align with the intended vision and storytelling goals.
4. Testing and Evaluation: Show the revised animatic to a test audience or select individuals for evaluation. Gather feedback on their understanding of the story, emotional engagement, and any areas that may require further improvement.
5. Iterative Refinements: Incorporate the feedback and insights gained from the testing and evaluation phase. Make further refinements to enhance the visual storytelling, timing, audio elements, and overall impact of the animatic.
6. Collaboration and Communication: Maintain a collaborative approach throughout the iterative process. Regularly communicate with the creative team, discuss challenges, and brainstorm ideas to ensure that everyone is aligned and working towards the same vision.
7. Attention to Detail: Pay attention to the finer details of the animatic during each iteration. Focus on improving character expressions, camera movements, transitions, and other visual elements to effectively convey the intended emotions and story.
8. Finalizing the Animatic: Continue the iterative process until the animatic reaches a stage where it accurately represents the intended vision and goals of the project. This final animatic serves as a blueprint for the production team moving forward.
By embracing an iterative process, you allow for continuous improvement, honing the animatic to effectively convey your story and visualize the desired aesthetic and narrative elements. Collaboration, feedback, and attention to detail are key in ensuring a successful iterative process and achieving an animatic that aligns with the overall vision of the final film or animation.
Tools and Software for Creating Animatics
Creating animatics requires the use of specific tools and software that facilitate the process and enhance the visualization and storytelling aspects. Here are some commonly used tools and software options:
1. Storyboarding Tools: Various digital tools are available specifically for creating storyboards. These include software like Storyboarder, Toon Boom Storyboard Pro, and Adobe Photoshop, which offer features such as customizable panels, drawing tools, and the ability to add annotations.
2. Video Editing Software: Video editing software like Adobe Premiere Pro, Final Cut Pro, and DaVinci Resolve are commonly used for assembling the storyboard frames into a sequence, fine-tuning timing, and adding sound effects or music to create a cohesive and dynamic animatic.
3. Animation Software: Animation software such as Adobe Animate, Toon Boom Harmony, and Autodesk Maya can be used to add motion and basic animation to the storyboard frames, bringing them to life and offering a more dynamic representation of the final project.
4. Sound Editing Software: Sound editing software like Adobe Audition, Audacity, or Pro Tools helps manipulate and refine audio elements, adjust volume levels, synchronize dialogue, and add sound effects. These tools are crucial for enhancing the impact and effectiveness of the animatic’s audio components.
5. Digital Drawing Tablets: Digital drawing tablets, such as Wacom Intuos or Huion tablets, provide a natural and intuitive way to create hand-drawn storyboards digitally. They offer pressure sensitivity and allow for more precise and fluid illustrations, making the storyboarding process more efficient and flexible.
6. Online Collaboration Tools: Various online platforms and tools, like Frame.io or Wipster, facilitate collaboration and feedback exchange between team members. These platforms allow for easy sharing of animatic files, as well as making annotations and providing comments to ensure effective communication and collaboration during the creation process.
7. 3D Pre-Visualization Software: For projects that require complex 3D scenes or visual effects, 3D pre-visualization software like Blender or Autodesk 3ds Max can be used to create animated blocking or rough 3D renders. This helps visualize camera movements, lighting, and the placement of characters or objects within a 3D environment.
8. Mobile Apps: There are also several mobile apps available for creating animatics on smartphones or tablets. Apps like Storyboard Composer, RoughAnimator, or Toon Boom Storyboard allow for quick sketching, sequencing, and adding audio on the go, making it convenient to work on animatics anytime and anywhere.
The choice of tools and software will depend on personal preferences, project requirements, and budget considerations. Experimenting with different tools and finding the ones that best suit your needs can enhance the efficiency and quality of your animatic creation process.
Examples of Animatics in Film and Animation
Animatics play a significant role in the development and production of films and animations. Here are some notable examples of animatics that have had a significant impact on their respective projects:
1. Pixar Animatics: Pixar Animation Studios is known for their meticulous storyboard and animatic process. They create detailed and dynamic animatics that effectively convey the story, timing, and character performances. These animatics serve as a blueprint for their films and contribute to the seamless storytelling and emotional impact seen in movies like “Toy Story,” “Up,” and “Finding Nemo.”
2. Marvel Cinematic Universe: The Marvel Studios team utilizes animatics extensively during the pre-production phase of their superhero films. They create detailed animatics for complex action sequences and visual effects-heavy scenes. These animatics allow for precise planning and coordination between the directors, stunts, and VFX teams, resulting in breathtaking and well-choreographed action sequences.
3. “The Lion King” (1994): The animatic created for the animated film “The Lion King” played a vital role in setting the visual tone and pacing of the story. The animatic helped the filmmakers fine-tune the emotional beats, comedy timings, and musical cues, ensuring a cohesive and engaging experience throughout the film.
4. “The Incredibles” (2004): The animatics for “The Incredibles” showcased the dynamic action sequences and helped create a sense of excitement and energy in the final film. The animatics allowed the filmmakers to experiment with camera angles, compositions, and pacing, resulting in visually stunning and exhilarating action scenes that connected with the audience.
5. “Spider-Man: Into the Spider-Verse” (2018): The animatics for “Spider-Man: Into the Spider-Verse” played a crucial role in developing the unique animation style and dynamic visual language of the film. The animatics helped the filmmakers experiment with comic book-inspired visuals, frame compositions, and innovative animation techniques, contributing to its groundbreaking and visually stunning final product.
6. “Frozen” (2013): The animatics for “Frozen” helped the filmmakers refine the character interactions, musical numbers, and emotional arcs of the story. The animatic process allowed them to explore different visual storytelling techniques, such as staging, camera movements, and transitions, resulting in the captivating and heartwarming final film.
7. “The Nightmare Before Christmas” (1993): The animatics for “The Nightmare Before Christmas” were crucial in visualizing the unique stop-motion animation style and ensuring the smooth integration of the music, dialogue, and visuals. The animatics helped the director and animators plan the intricate puppet movements, transitions, and choreography, resulting in the film’s distinct visual and narrative experience.
These examples highlight the importance of animatics in the production of films and animations. Animatics serve as a valuable tool in visualizing the story, planning complex scenes, and refining the timing and pacing of the final product. They play an integral role in creating cohesive and visually captivating films and animations.