
Checking the SIM Card Slot Location
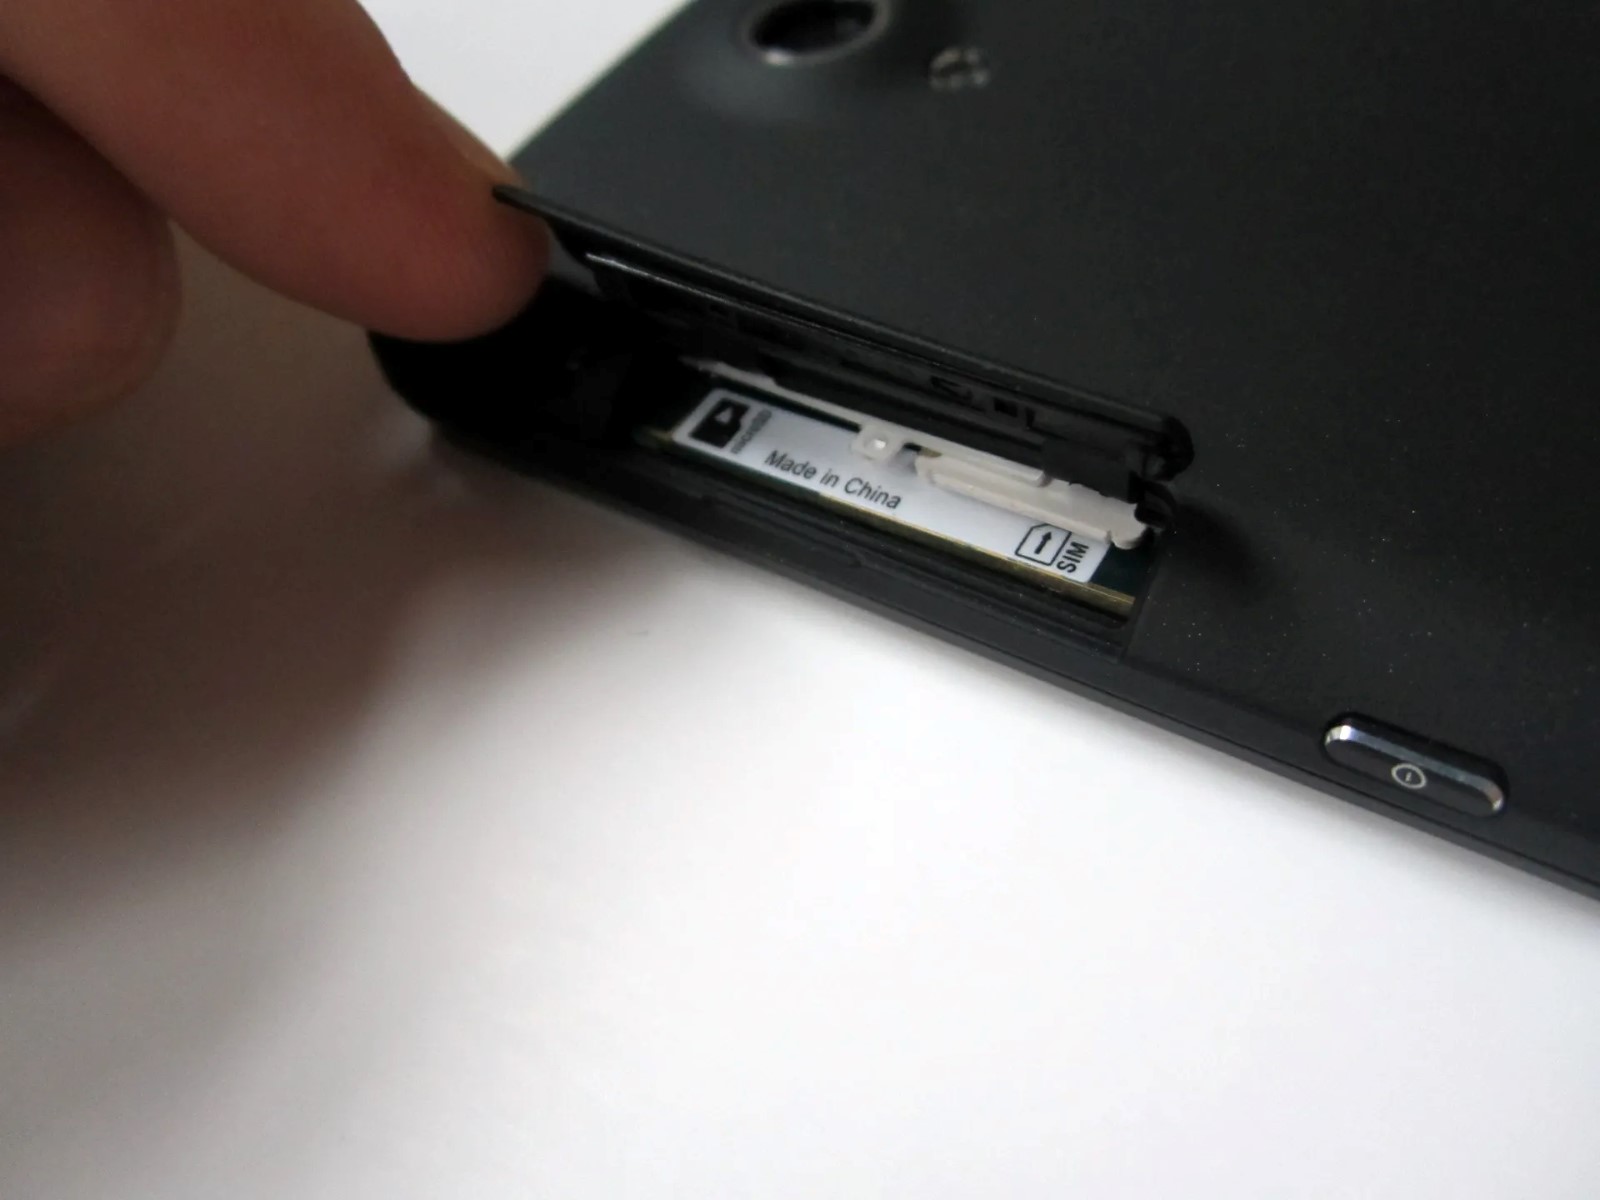
Before diving into the process of inserting a SIM card into your Sony Xperia, it's crucial to locate the SIM card slot. This small but vital component is where your SIM card will reside, allowing your device to connect to a mobile network. The SIM card slot's location may vary depending on the specific model of your Sony Xperia, but it is commonly found on the side of the device.
To begin, gently examine the edges of your Sony Xperia. You may notice a small, inconspicuous slot with a pinhole nearby. This pinhole is the entry point for the SIM eject tool, which is essential for accessing the SIM card slot. In some models, the SIM card slot may be located near the top or bottom edge of the device. Taking a moment to familiarize yourself with the location of the SIM card slot will streamline the subsequent steps and ensure a seamless SIM card insertion process.
Once you have identified the SIM card slot, it's important to ensure that your Sony Xperia is powered off. This precautionary measure mitigates the risk of disrupting the device's functionality during the SIM card insertion process. By powering off your device, you create a safe environment for handling the SIM card and prevent any potential interference with the device's internal components.
By taking the time to locate the SIM card slot and power off your device, you are setting the stage for a smooth and successful SIM card insertion experience. This initial step not only familiarizes you with the physical aspects of your Sony Xperia but also demonstrates the importance of careful preparation when handling delicate hardware components. With the SIM card slot identified and the device powered off, you are now ready to proceed to the next step in the process of inserting a SIM card into your Sony Xperia.
Preparing the SIM Card and SIM Eject Tool
Before embarking on the task of inserting a SIM card into your Sony Xperia, it is essential to prepare the SIM card and the SIM eject tool. These preparatory steps are pivotal in ensuring a seamless and successful insertion process.
The SIM card, a small, rectangular chip that stores crucial information for connecting to a mobile network, is a fundamental component in enabling communication and data services on your device. When handling a SIM card, it is important to exercise caution and delicacy to prevent any damage to the card or the device.
Begin by retrieving the SIM card from its packaging. Carefully handle the SIM card, avoiding any bending or scratching of its surface. It is important to note that SIM cards come in different sizes, including standard, micro, and nano SIM cards. Ensure that the SIM card you have matches the SIM card slot on your Sony Xperia. If the SIM card is too large for the slot, it may require a SIM card adapter to fit properly.
Next, locate the SIM eject tool that is typically provided by the manufacturer alongside the Sony Xperia. This small, metallic tool is designed to facilitate the removal and insertion of the SIM card. If the SIM eject tool is not readily available, a paperclip can serve as a suitable alternative. The SIM eject tool features a slender, pointed end that is inserted into the pinhole adjacent to the SIM card slot, allowing for the ejection of the SIM card tray.
Once you have the SIM card and SIM eject tool at hand, take a moment to familiarize yourself with the specific orientation of the SIM card within the SIM card tray. Most SIM card trays have a designated area for placing the SIM card, often with a visual guide indicating the correct positioning. Aligning the SIM card correctly within the tray is crucial for ensuring proper connectivity and functionality.
By carefully preparing the SIM card and SIM eject tool, you are laying the groundwork for a smooth and successful SIM card insertion process. These preparatory steps underscore the importance of attention to detail and precision when handling delicate hardware components. With the SIM card and SIM eject tool ready, you are now poised to proceed to the next phase of the SIM card insertion process for your Sony Xperia.
Inserting the SIM Card into the Sony Xperia
With the SIM card and SIM eject tool prepared, it's time to proceed with the pivotal step of inserting the SIM card into your Sony Xperia. This process requires a steady hand and careful attention to detail to ensure a seamless and successful insertion.
Begin by holding the Sony Xperia firmly, ensuring a stable grip to prevent any accidental slips or fumbles during the insertion process. Take the SIM eject tool and insert its slender, pointed end into the pinhole adjacent to the SIM card slot. Apply gentle pressure to engage the mechanism, causing the SIM card tray to partially eject from the device.
Once the SIM card tray is partially ejected, carefully grasp it and pull it out from the Sony Xperia. Take a moment to inspect the SIM card tray, noting the designated area for placing the SIM card. Align the SIM card with the corresponding guides or markings on the tray, ensuring that it fits snugly without any forceful insertion.
When placing the SIM card into the tray, it's important to orient it correctly to match the shape of the designated area. Most SIM cards and trays are designed with notches or corners that facilitate proper alignment. Avoid forcing the SIM card into the tray, as this may cause damage to both the card and the tray.
Once the SIM card is securely placed in the tray, carefully slide the tray back into the SIM card slot of the Sony Xperia. Apply gentle pressure to ensure that the tray is fully inserted and flush with the device's exterior. Take a moment to verify that the SIM card tray sits evenly and does not protrude from the device.
With the SIM card successfully inserted into your Sony Xperia, you have completed a critical step in enabling mobile connectivity and communication on your device. This process underscores the significance of precision and delicacy when handling essential hardware components. By following these steps attentively, you have seamlessly integrated the SIM card into your Sony Xperia, paving the way for uninterrupted access to mobile services.
As the SIM card is securely in place, you are now ready to power on your Sony Xperia and verify the recognition of the SIM card by the device. This final phase will confirm the successful insertion of the SIM card and ensure that your Sony Xperia is ready to harness the full spectrum of its mobile capabilities.
Powering On the Device and Checking SIM Card Recognition
After successfully inserting the SIM card into your Sony Xperia, the next crucial step is to power on the device and verify the recognition of the SIM card. This pivotal phase ensures that the SIM card is seamlessly integrated into the device, enabling access to mobile networks and communication services.
To initiate this process, press and hold the power button on your Sony Xperia. As the device powers on, it undergoes a series of startup procedures, initializing its hardware and software components. Once the device is powered on, navigate to the home screen to begin the verification of SIM card recognition.
Upon reaching the home screen, observe the device's status bar or notification panel. Here, you can check for indicators related to the SIM card, such as signal strength and network connectivity. A prominent signal strength icon and network provider name signify the successful recognition and connection of the SIM card to the mobile network.
In addition to the visual indicators, you can further verify the recognition of the SIM card by accessing the device's settings. Navigate to the "Settings" menu, then select "Network & Internet" or "Connections," depending on your device's specific interface. Within these settings, locate the "SIM card" or "Mobile network" section to view detailed information about the detected SIM card, including its phone number, network status, and data connectivity.
As you navigate through the device settings, take note of any prompts or notifications related to the SIM card. Your Sony Xperia may display messages confirming the successful detection of the SIM card and its readiness for use. These prompts serve as affirmative indicators of the SIM card's seamless integration and functionality within the device.
In the event that the SIM card recognition process encounters any issues, such as a lack of signal or connectivity, it is advisable to restart the device. A simple restart can often resolve temporary software glitches or connectivity challenges, allowing the device to re-establish communication with the mobile network and recognize the SIM card effectively.
By meticulously verifying the recognition of the SIM card, you ensure that your Sony Xperia is fully equipped to leverage its mobile capabilities. This final phase of the SIM card insertion process solidifies the seamless integration of the SIM card, empowering your device to harness the full spectrum of mobile communication and data services.
With the SIM card recognized and the device powered on, you have completed the essential steps to enable mobile connectivity on your Sony Xperia, setting the stage for uninterrupted communication and seamless access to mobile networks.