
Creating a Netflix DVD Account
Netflix offers an excellent DVD rental service that allows you to enjoy a wide range of movies delivered right to your doorstep. To get started, you need to create a Netflix DVD account. Follow these simple steps to begin your movie-watching adventure:
1. Visit the Netflix website: Open your preferred web browser and go to the Netflix homepage. Look for the option to sign up for a DVD account. Click on it to begin the account creation process.
2. Choose a plan: Netflix offers various DVD rental plans to suit different preferences. Select the plan that fits your needs, whether it’s a basic plan with limited rentals or a more comprehensive plan with multiple discs at a time.
3. Provide personal information: Fill in the required fields with accurate personal information, including your name, email address, and billing information. Ensure that your billing address is correct to avoid any issues with DVD deliveries.
4. Set up your queue: Once your account is created, you can start building your movie queue. Browse the extensive catalog and add the films you want to watch to your queue. The DVDs will be sent to you in the order specified in your queue.
5. Wait for your DVDs: Once you’ve set up your queue, sit back and relax as Netflix prepares your DVD shipments. They will be sent to your registered address via mail. Keep in mind that delivery times may vary depending on your location.
6. Enjoy your movies: Upon receiving your DVDs, you can watch them at your own pace. There are no due dates or late fees, allowing you to savor each film and indulge in a movie-watching experience without any rush.
Creating a Netflix DVD account is a straightforward process that unlocks a world of entertainment possibilities. Whether you’re a film enthusiast or simply enjoy movie nights at home, Netflix’s DVD rental service offers a convenient and flexible way to access a vast library of films. So, sign up today and start enjoying an extensive collection of movies right in the comfort of your own home.
Browsing the DVD Catalog
One of the key advantages of the Netflix DVD rental program is the vast and diverse DVD catalog it offers. With thousands of movies available, browsing the DVD catalog is an exciting experience for movie lovers. Here’s how you can easily explore and discover the films you’re interested in:
1. Visit the Netflix website: Access the Netflix DVD website and log in to your account using your credentials. Once logged in, you’ll be able to access the DVD catalog.
2. Use the search function: If you have a specific movie in mind, use the search bar to type in the title or keywords related to the movie. Netflix will display a list of relevant results for you to choose from.
3. Explore different genres: Netflix offers an extensive collection of movies spanning various genres, from action and comedy to drama and documentary. Navigate through the different genres to discover movies that align with your preferences and interests.
4. Check out recommendations: Netflix provides personalized movie recommendations based on your viewing history and ratings. These suggestions can be found in the “Recommendations” section, offering you a quick and easy way to explore films tailored to your taste.
5. Read movie descriptions and reviews: For each movie listed in the catalog, Netflix provides a detailed description, along with information such as the director, cast, and release year. Reading these descriptions can give you a better understanding of the film and help you make informed choices. Additionally, you can also find user reviews and ratings to gauge the popularity and quality of a movie.
6. Discover new releases and popular titles: Netflix highlights new releases and popular movies in dedicated sections of the website. Take advantage of these features to stay updated with the latest films or to catch up on the buzzworthy ones that everyone’s talking about.
Browsing the Netflix DVD catalog is an enjoyable journey that allows you to explore a wide array of movies and discover hidden gems. Whether you have a specific movie in mind or want to branch out and try something new, the extensive catalog ensures there’s something for everyone. So, start browsing the DVD catalog today and prepare to embark on a cinematic adventure from the comfort of your own home.
Adding Movies to Your Queue
Once you’ve browsed the extensive Netflix DVD catalog and found movies that pique your interest, it’s time to start adding them to your queue. The queue is where you prioritize the order in which you want to receive and watch the DVDs. Here’s how you can easily add movies to your Netflix DVD queue:
1. Search for movies: Use the search bar or browse through the different genres and categories to find movies you want to add to your queue. Click on the movie’s title to open its details page.
2. Click on “Add to Queue”: On the movie’s details page, you’ll find an option to “Add to Queue.” Click on this button to add the movie to your queue. You can repeat this process for as many movies as you like.
3. Prioritize your queue: Once you’ve added movies to your queue, you can arrange them in the order you want to watch them. Drag and drop the movies to rearrange them according to your preference. The movie at the top of the queue will be the next one shipped to you.
4. Manage your queue: From the Queue page in your Netflix DVD account, you can view and manage your movie queue. You can remove movies from the queue, change their priority, or even add notes to remind yourself of specific details about a movie.
5. Automatic additions: Netflix also offers an automatic addition feature called “Recommendations.” When enabled, Netflix will automatically add movies to your queue based on your viewing history and preferences. This feature can help you discover new and interesting films you might not have considered.
6. Keep an eye on availability: Some movies may have limited availability due to high demand or stock availability. Netflix will provide information on the availability status of each movie, allowing you to plan your movie choices accordingly.
Adding movies to your Netflix DVD queue is a simple and convenient process that lets you curate your own personalized movie-watching experience. Whether it’s catching up on classics, exploring new releases, or indulging in your favorite genres, the queue ensures you receive the DVDs you’re most excited to watch. So, start building your queue today and get ready for a fantastic movie marathon.
Managing Your Queue
Once you’ve added movies to your Netflix DVD queue, it’s important to know how to effectively manage it. Managing your queue allows you to make changes, add new movies, and ensure you receive the DVDs you’re most eager to watch. Here are some tips on how to manage your Netflix DVD queue:
1. Reordering movies: Your queue reflects the order in which DVDs will be shipped to you. If you have a change of plans or want to watch a specific movie sooner, you can easily reorder your queue. Simply click and drag the movies to arrange them in the desired order.
2. Removing movies: If you change your mind about watching a particular movie or have already seen it, you can remove it from your queue. From the Queue page, locate the movie you want to remove and click on the X icon or the “Remove” button next to it.
3. Adding new movies: As you continue to discover new movies that catch your interest, you can add them to your queue. Utilize the search function or browse through genres to find movies you want to watch. Click on their titles and then the “Add to Queue” button to include them in your list.
4. Customizing movie notes: Each movie in your queue comes with a note section where you can add personalized notes or reminders. Use this feature to jot down any specific details you want to remember about a movie, such as recommended viewing order for a series or a particular scene you’re excited to see.
5. Changing delivery address: If you need to update the address where your DVDs are shipped, go to your account settings and locate the delivery address section. Make the necessary changes and save them to ensure seamless delivery.
6. Checking availability: Movie availability may change due to demand or other factors. Keep an eye on the availability status of movies in your queue to plan your movie-watching accordingly. If a movie you wanted to watch becomes temporarily unavailable, you can prioritize other movies in your queue.
Managing your Netflix DVD queue allows you to have full control over your movie-watching experience. By prioritizing, adding, and removing movies, you can ensure that the DVDs you receive match your viewing preferences and maximize your enjoyment. So, take a few minutes to organize and customize your queue, and get ready to dive into an incredible lineup of movies.
Receiving and Returning DVDs
Once you’ve added movies to your Netflix DVD queue and eagerly await their arrival, it’s essential to understand how the process of receiving and returning DVDs works. Here’s a breakdown of what to expect:
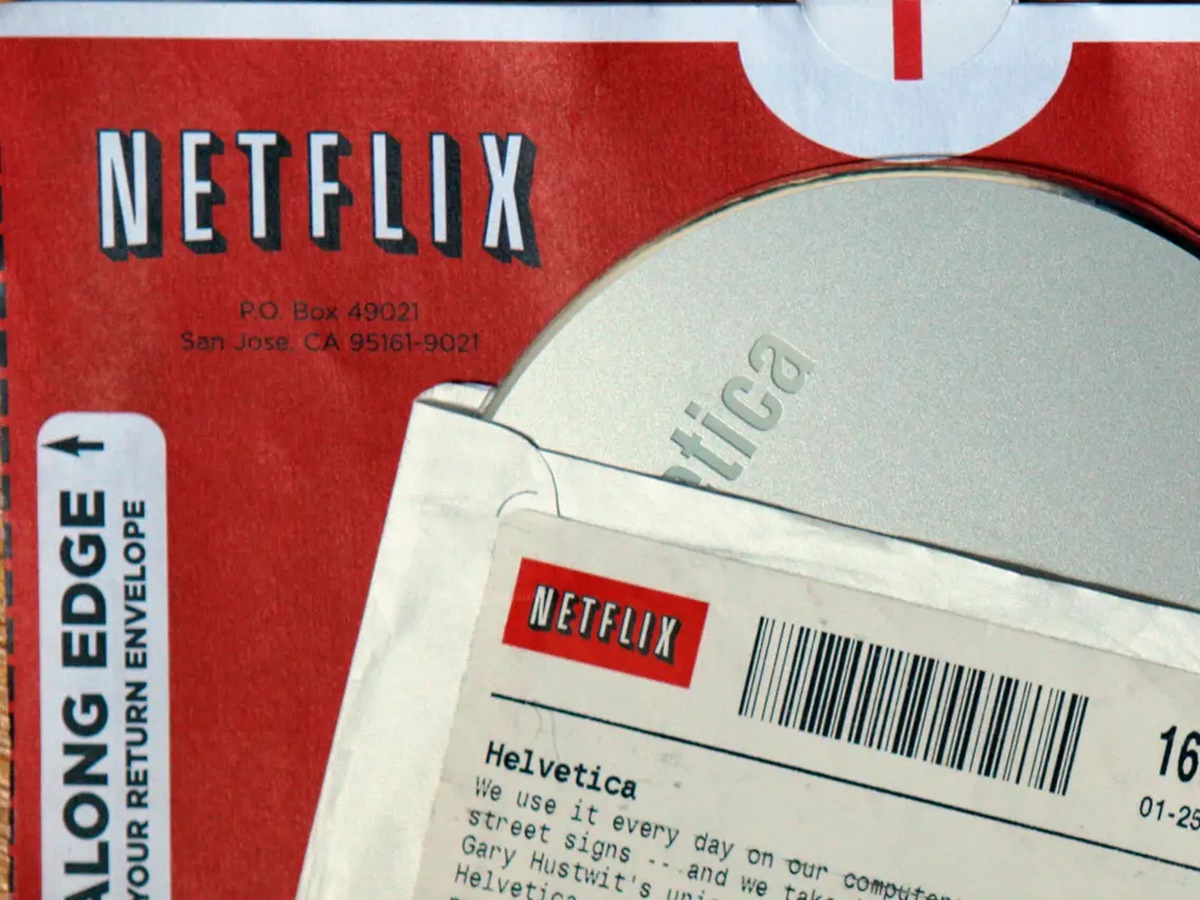
1. Receiving DVDs: When a DVD is available and ready to be shipped, Netflix will send it to the address listed on your account. The DVD will arrive in a white envelope with a red Netflix logo. Open the envelope to retrieve the DVD and enjoy your movie.
2. Playback and viewing: Play the DVD on a compatible device, such as a DVD player or a computer with a DVD drive. Enjoy the movie at your convenience, without any due dates or late fees. Take your time to watch and savor each film.
3. Return envelope: Once you’re done watching a DVD, place it back into the provided return envelope. Keep in mind that it’s crucial to return DVDs promptly to ensure a smooth rental experience.
4. Returning the DVD: Seal the return envelope securely and make sure to affix the appropriate postage. Use a mailbox or drop it off at a post office to return the DVD. Netflix recommends using USPS First-Class Mail to ensure the quickest return and delivery of your next movie.
5. DVD acknowledgment: Netflix will send you an email notification once they receive the returned DVD. This acknowledgment confirms the safe return of the DVD and prepares your account for the next movie in your queue.
6. Next movie shipped: Once Netflix receives and processes the returned DVD, they will automatically send you the next available movie in your queue. The process continues seamlessly as you enjoy a continuous stream of movies.
7. Multiple DVDs: If your Netflix DVD plan allows for multiple DVDs at a time, you can receive and return multiple movies simultaneously. This enables you to have a diverse selection of films to enjoy and a faster turnover rate in your movie-watching experience.
Receiving and returning DVDs with Netflix is a straightforward process that ensures you have a consistent supply of movies to watch. By promptly returning DVDs, you can receive the next movies in your queue without delay. So, sit back, relax, and let Netflix handle the logistics while you indulge in an abundant selection of cinematic entertainment.
Understanding DVD Rental Plans
Netflix offers different DVD rental plans to accommodate various preferences and movie-watching habits. Understanding these plans is essential to choose the one that best suits your needs. Here’s an overview of the different DVD rental plans available:
1. Basic Plan: The Basic plan allows you to rent one DVD at a time. You can have unlimited rentals per month, but you can only have one DVD checked out at a time. This plan is suitable for those who prefer a more relaxed movie-watching pace or have limited time for watching movies.
2. Standard Plan: The Standard plan offers the ability to rent two DVDs at a time. You can have unlimited rentals per month and enjoy the flexibility of watching multiple movies concurrently. This plan is ideal for movie enthusiasts who enjoy a broader selection and have a greater capacity for movie-watching.
3. Premium Plan: The Premium plan provides the opportunity to rent three DVDs simultaneously. With unlimited rentals per month, you can indulge in a diverse range of movies, ensuring a constant supply of entertainment. This plan is perfect for dedicated cinephiles or households with multiple individuals interested in DVD rentals.
4. Pricing: Each DVD rental plan is priced differently, with the cost increasing as you move from the Basic to Standard and Premium plans. The pricing structure takes into account the number of DVDs you can have checked out at a time and the unlimited rental benefit.
5. Upgrading and Downgrading Plans: If you find that you need to change your DVD rental plan, Netflix allows you to upgrade or downgrade your plan based on your requirements. You can make these changes easily from your account settings.
Understanding the DVD rental plans offered by Netflix will help you make an informed decision and select the plan that aligns with your movie-watching preferences. Whether you prefer a slower pace or want access to an extensive collection of movies, Netflix has a plan to suit your needs. So, explore the available options and choose the plan that allows you to enjoy a seamless and satisfying DVD rental experience.
Changing Your DVD Rental Plan
As your movie-watching preferences or circumstances change, you may find the need to modify your Netflix DVD rental plan. Netflix understands the importance of flexibility and offers a straightforward process to change your DVD rental plan. Here’s how you can easily make changes to your plan:
1. Log in to your account: Visit the Netflix DVD website and log in with your account credentials. Once logged in, navigate to your account settings.
2. Select “Plan Details”: Locate the “Plan Details” or “Manage DVD Plan” section in your account settings. Click on it to access the options for changing your rental plan.
3. Choose a new plan: From the available options, select the new DVD rental plan that suits your needs. Consider factors such as the number of DVDs you want to rent simultaneously and the monthly cost of the plan.
4. Confirm the changes: After selecting your new plan, review the changes to ensure they accurately reflect your desired modifications. Take note of any changes in pricing or features that come with the new plan.
5. Save the changes: Once you are satisfied with the changes, save them by clicking on the “Save” or “Update Plan” button. Netflix will automatically update your account with the new rental plan.
6. Plan activation: The new rental plan will go into effect immediately after you save the changes. If you were on a different plan previously, the changes will take place from the next billing cycle.
7. Enjoy the new plan: With the new DVD rental plan in place, you can explore a broader range of movies or adjust your movie-watching pace to match your preferences. Take advantage of the flexibility that Netflix offers to tailor your movie experience.
Changing your Netflix DVD rental plan is a hassle-free process that allows you to adapt your subscription to your evolving needs. Whether you want to upgrade to a higher-tier plan, downgrade to a more basic plan, or simply make adjustments to better align with your movie-watching habits, Netflix’s easy-to-use account settings ensure a seamless transition. So, explore the available options, make the desired changes, and enjoy a personalized DVD rental plan that suits your movie preferences.
Dealing with Lost or Damaged DVDs
Occasionally, DVDs may become lost or damaged during the rental process. If you find yourself in such a situation, it’s important to know how to handle it. Netflix understands that accidents happen, and they have guidelines in place to assist you. Here’s what you can do if you encounter a lost or damaged DVD:
1. Reporting the issue: If a DVD is lost or damaged, immediately report it to Netflix. Visit your account settings or contact their customer support to inform them about the situation. Promptly reporting the issue allows Netflix to take necessary actions and assist you accordingly.
2. Lost DVDs: In the case of a lost DVD, Netflix will charge a replacement fee, which is typically the retail value of the DVD. This fee will be charged to the payment method on your account. It’s important to notify Netflix about the loss as soon as possible to avoid any additional charges.
3. Damaged DVDs: In situations where a DVD is damaged, you should return it to Netflix as usual. Netflix understands that ordinary wear and tear may occur during use. However, if the damage is excessive or renders the DVD unplayable, you may be charged a replacement fee. Contact Netflix to discuss the specific circumstances and resolve any potential charges.
4. Returning damaged DVDs: If a DVD arrives from Netflix in a damaged condition, contact their customer support to inform them about the issue. Netflix will provide guidance on returning the damaged DVD, and they will usually waive any associated fees or charges in these situations.
5. DVD sleeves and envelopes: It’s important to handle DVDs with care, as damage to the DVDs due to mishandling or improper storage may result in replacement fees. Always return the DVDs in their original sleeves and envelopes to protect them during transit.
6. Quality control: Netflix ensures their DVDs are of high quality before sending them to customers. If you encounter playback issues or believe a DVD is defective, contact Netflix’s customer support for assistance. They will provide guidance on troubleshooting or arranging a replacement if necessary.
Dealing with lost or damaged DVDs requires prompt communication with Netflix. Reporting the issue ensures that they have the necessary information to assist you and resolve the matter effectively. Remember to handle DVDs with care and return them in their original sleeves and envelopes to minimize the risk of damage in transit. By working together with Netflix, you can swiftly address any issues and continue to enjoy an exceptional DVD rental experience.
Tracking Your Rentals
Keeping track of your Netflix DVD rentals is essential to ensure a seamless movie-watching experience. Netflix provides various tools and features to help you easily track and manage your rentals. Here’s how you can effectively keep tabs on your DVD rentals:
1. Rental history: Netflix keeps a record of your rental history, allowing you to review the movies you have rented in the past. This feature is helpful if you want to reminisce about the films you’ve watched or need to keep track of the movies you have already seen.
2. My List: In addition to your rental history, you can create a separate list of movies you want to watch in the future. This list, known as “My List,” is a convenient way to keep track of movies you want to add to your DVD queue at a later time.
3. Queue status: Your DVD queue provides real-time updates on the status of your rentals. You can see which movies are currently checked out to you, which are in transit, and which are still in your queue waiting to be shipped.
4. Shipping notifications: Netflix sends notifications to keep you informed about the status of your DVD shipments. You’ll receive an email notification when DVDs are prepared for shipment and when they are received back by Netflix. These notifications help you stay updated on the progress of your rentals.
5. Account activity: Within your account settings, you can access an activity log that provides detailed information about your rentals. This log includes dates and times of DVD shipments, returns, and any status updates related to your rentals.
6. Communication with Netflix: If you have any questions or concerns regarding the status of your rentals, Netflix’s customer support is readily available to assist you. They can provide additional information or resolve any issues you may encounter.
By taking advantage of the tracking tools and features provided by Netflix, you can stay organized and always know the status of your DVD rentals. Whether you want to review your rental history, manage your queue, or receive notifications about the progress of your shipments, these tracking mechanisms give you full control over your movie-watching experience. So, make use of these resources and enjoy a seamless and informed DVD rental process.
Troubleshooting Common Issues
While using the Netflix DVD rental program, you may encounter some common issues that can affect your overall experience. Fortunately, there are various troubleshooting techniques you can employ to resolve these issues and continue enjoying your movie rentals. Here are some common problems and their solutions:
1. Disc playback problems: If you experience issues playing a DVD, ensure that the disc is clean and free of scratches or smudges. Wipe the disc gently with a soft cloth to remove any dirt or fingerprints. If playback issues persist, try using a different device or DVD player to see if the problem lies with the player itself.
2. Slow delivery or missing DVDs: If your DVDs are taking longer than usual to arrive or if you suspect a DVD is missing in the mail, check the delivery address listed on your account to ensure its accuracy. Contact Netflix’s customer support to report any extended delivery delays or missing DVDs for further assistance.
3. DVD not in my queue: If you receive a DVD that you did not have in your queue or if a movie you were expecting doesn’t arrive, check your queue settings and rental activity log to verify that you added the movie to your queue correctly. If the issue persists, contact Netflix’s customer support to address the discrepancy.
4. Error messages: If you encounter error messages while using the Netflix DVD rental program, write down the exact wording of the error message and contact Netflix’s customer support. They will be able to provide specific guidance to resolve the issue based on the error message received.
5. Damaged or unplayable DVDs: If you receive a damaged or unplayable DVD from Netflix, report the issue to their customer support immediately. They will provide instructions on returning the damaged DVD and arrange for a replacement to be sent. Be sure to handle DVDs with care to prevent damage during transit.
6. Account or billing issues: If you encounter any account or billing-related issues, such as incorrect charges or problems with plan changes, contact Netflix’s customer support. They have dedicated teams to assist with account inquiries and can help resolve any billing discrepancies promptly.
Remember, if you experience any issues or have questions about your Netflix DVD rental service, it’s always best to reach out to their customer support. They are equipped to troubleshoot and address any problems you may encounter, ensuring a smooth and enjoyable movie-watching experience. So, don’t hesitate to seek assistance and get back to enjoying an extensive collection of movies with Netflix DVD.
Canceling Your DVD Rental Subscription
If you find yourself no longer needing or wanting the Netflix DVD rental service, you have the option to cancel your subscription. Canceling your DVD rental subscription is a straightforward process that can be done through your Netflix account. Here’s how you can cancel your DVD rental subscription:
1. Log in to your account: Visit the Netflix DVD website and log in to your account using your credentials.
2. Access account settings: Once logged in, navigate to your account settings. Look for the section that allows you to manage your membership or subscription.
3. Cancel membership: In the membership or subscription section, you will find the option to cancel your DVD rental subscription. Click on the cancel membership or cancel subscription button.
4. Confirmation: Netflix will prompt you to confirm your decision to cancel the DVD rental subscription. Read through the information provided and consider any possible consequences or implications of canceling.
5. Finalize cancellation: If you are certain about canceling your DVD rental subscription, click on the confirm or finalize cancellation button. Netflix will immediately process your cancellation request.
6. Return DVDs: After canceling your subscription, Netflix will provide instructions on returning any DVDs you still have in your possession. Follow the instructions carefully to return the DVDs promptly and avoid any additional charges.
Once you have canceled your DVD rental subscription, you will no longer have access to the rental service. Your account will revert to a streaming-only account if you have one, or you may choose to entirely discontinue your Netflix account if you do not require any of their services.
Canceling your DVD rental subscription with Netflix allows you to have control over your subscription preferences. If you ever decide that you want to rejoin the DVD rental service in the future, you can easily reactivate your account and resume enjoying their extensive DVD catalog. So, if you no longer have a need for DVD rentals, follow these steps to cancel your subscription and explore other entertainment options available.