
Overview of Garmin Connect
Garmin Connect is a powerful online platform designed to enhance your fitness journey and help you achieve your health and wellness goals. It is an essential tool for Garmin device users, as it allows you to analyze, track, and share your activity data. With Garmin Connect, you can monitor your workouts, set personalized goals, join challenges, and connect with a global community of fitness enthusiasts.
One of the standout features of Garmin Connect is its Course Creator tool, which enables you to create custom courses for running, cycling, hiking, and more. Whether you’re exploring a new city or training for a specific event, the Course Creator tool allows you to design routes and navigate your way with ease.
With a user-friendly interface and a range of advanced features, Garmin Connect makes it easy to plan and follow your fitness adventures. Whether you prefer roads or trails, long distances or short bursts of activity, Garmin Connect has something to offer for everyone.
By linking your Garmin device to your Garmin Connect account, you can seamlessly sync your activities and courses. This allows you to access detailed data, including distance covered, pace, elevation, heart rate, and much more. This data helps you track your progress, identify areas for improvement, and stay motivated on your fitness journey.
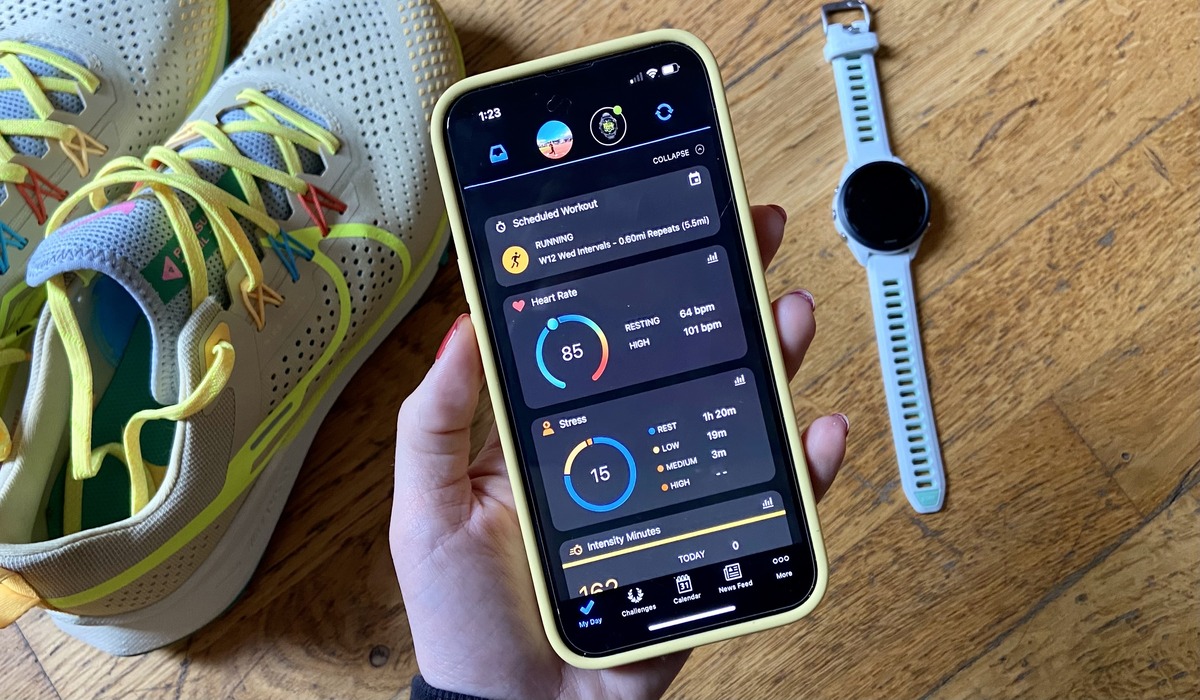
In addition to tracking your activities, Garmin Connect provides insights into your overall fitness. It calculates your daily step count, calories burned, and even offers personalized insights to help you optimize your performance and reach your goals faster.
Whether you’re a beginner or a seasoned athlete, Garmin Connect offers a wealth of features and tools to support your fitness endeavors. From tracking your daily activities to creating and exploring new courses, Garmin Connect is an indispensable companion for all your fitness adventures.
Accessing the Course Creator Tool
Accessing the Course Creator Tool in Garmin Connect is a simple process that allows you to unleash your creativity and plan your own custom routes. Follow these steps to access the Course Creator tool:
- Launch the Garmin Connect app or visit the Garmin Connect website on your computer.
- Sign in to your Garmin Connect account or create a new account if you don’t have one.
- Once logged in, navigate to the main menu and select “Training” from the options.
- In the Training menu, you will find various options. Look for the “Courses” section and click on it.
- Within the Courses section, you will see an option for “Course Creator.” Click on it to access the Course Creator tool.
Upon accessing the Course Creator tool, you will be presented with an interactive map interface. This map allows you to visualize your routes and plan your courses with precision.
Please note that the availability and features of the Course Creator tool may vary depending on the device and software version you are using. Ensure that you have the latest version of Garmin Connect and that your device supports the Course Creator functionality.
By accessing the Course Creator tool, you gain the ability to design routes that match your specific preferences and requirements. Whether you want to run through scenic trails, bike along a picturesque route, or hike through challenging terrains, the Course Creator tool puts the power in your hands.
Next, let’s explore the steps involved in creating a new course using the Course Creator tool.
Creating a New Course
Creating a new course using the Garmin Connect Course Creator tool allows you to design a custom route tailored to your preferences and requirements. Follow these steps to create a new course:
- After accessing the Course Creator tool in Garmin Connect, you will see an interactive map interface.
- To start creating your course, you can zoom in or out on the map to locate the starting point of your route.
- Click on the map at your desired starting location to set the first waypoint of your course.
- Continue clicking on the map to set additional waypoints along your desired route.
- As you set waypoints, Garmin Connect will automatically create a course line connecting them.
- You can edit the course line by dragging and dropping waypoints to adjust your route as needed.
- If you want to create a looped course, click on the first waypoint you set to close the loop.
- For additional customization, you can adjust the opacity of the course line to make it more or less visible.
- Once you are satisfied with your course, click the “Save” button to save it to your Garmin Connect account.
When creating a new course, it can be helpful to have a specific distance or time goal in mind. Garmin Connect allows you to set these parameters for your course, giving you a clear target to work towards during your activities.
Additionally, the Course Creator tool allows you to add annotations to your course. These annotations can include important landmarks, notes about the terrain, or any other details you want to remember about your route.
It’s worth noting that Garmin Connect also offers the option to import courses created by other users or exported from third-party sources. This allows you to explore and try out courses created by fellow Garmin users, giving you even more variety in your fitness adventures.
Now that you know how to create a new course, let’s move on to the next section to learn how to import existing courses into Garmin Connect.
Importing a Course
In addition to creating new courses from scratch, Garmin Connect also allows you to import existing courses into your account. This feature is particularly useful if you want to explore routes previously created by other Garmin users or if you have routes stored in a compatible file format. Here’s how you can import a course into Garmin Connect:
- Start by accessing the Course Creator tool in Garmin Connect. If you haven’t done so already, follow the steps outlined in the previous section to access the Course Creator.
- In the Course Creator interface, look for the option to import a course. This may be displayed as an upload button or an import icon.
- Click on the import option and select the file or source from which you want to import the course.
- If you have the course file saved on your device or computer, click on the appropriate file to upload it.
- If the course is stored in an external source or website, you may need to provide the URL or link to access and import the course.
- Once you have selected or provided the necessary information, Garmin Connect will begin importing the course into your account.
- After the import is complete, you will be able to view and access the imported course within your Garmin Connect courses section.
It’s important to note that Garmin Connect supports various file formats for course import, including GPX, TCX, and FIT. Ensure that your course file is in one of these compatible formats to successfully import it into Garmin Connect.
By importing courses, you can easily access and incorporate routes that have been recommended by other users or shared through online communities. This expands your options for exploring new areas and trying out different routes during your fitness activities.
The ability to import courses also comes in handy if you have previously exported a course from Garmin Connect and want to re-import it into your account.
Now that we have covered how to create new courses and import existing ones, let’s move on to the next section to learn about editing course details in Garmin Connect.
Editing Course Details
Once you have created or imported a course in Garmin Connect, you may find the need to edit certain details or make adjustments to better align with your preferences or changing circumstances. The Course Creator tool in Garmin Connect allows you to easily edit course details. Here’s how you can do it:
- Access the Garmin Connect Course Creator tool by following the steps outlined in the previous sections.
- In the Course Creator interface, navigate to the list of courses and select the course that you want to edit.
- Click on the course to open its details page, where you can view and modify various aspects of the course.
- On the details page, you will find options to edit the course name, description, distance, estimated completion time, and other relevant information.
- Make the necessary changes to the course details based on your preferences or any updated information.
- After editing the course details, remember to save the changes to update the course in your Garmin Connect account.
In addition to editing basic course details, Garmin Connect also offers more advanced editing options. These options include adjusting the course type (e.g., running, cycling, hiking), changing the terrain type, and adding difficulty levels to indicate the level of challenge associated with the course.
Editing course details is particularly useful if you want to track your progress accurately, set realistic goals, or share more information about your courses with the Garmin Connect community.
It’s important to note that while you can edit various aspects of a course, the actual course route remains intact. If you wish to make significant changes to the route itself, it is recommended to create a new course or import a different one that better aligns with your desired route.
Now that you know how to edit course details in Garmin Connect, let’s continue to the next section to learn how to set waypoints and course points for added navigation assistance.
Setting Waypoints and Course Points
In Garmin Connect, the Course Creator tool allows you to enhance your courses by adding waypoints and course points. Waypoints and course points serve as navigation aids, helping you stay on track and providing additional information during your activities. Here’s how you can set waypoints and course points in Garmin Connect:
- Access the Garmin Connect Course Creator tool as described in the previous sections.
- Select the course for which you want to set waypoints or course points.
- In the course details page, you will find options to add waypoints or course points along your route.
- Waypoints are specific locations that you want to mark on your course, such as landmarks, water stations, or other points of interest. To add a waypoint, simply click on the desired location on the map.
- Course points, on the other hand, are markers that indicate important segments or instructions within the course. They can serve as reminders of specific actions or prompts to change direction. To add a course point, click on the location on the map where you want to place the course point.
- You can set multiple waypoints or course points along your course by repeating the previous steps.
- Once you have added waypoints or course points, you can edit them by clicking on each individual point. This allows you to modify the name, description, or other details associated with the waypoint or course point.
- Remember to save the changes after setting and editing waypoints or course points to update the course in your Garmin Connect account.
By setting waypoints and course points, you can enhance your navigation experience during your activities. These points can help you stay on course, follow specific directions, or remind you of important landmarks or instructions. They provide an additional layer of guidance to ensure you have a smooth and enjoyable fitness journey.
It’s worth noting that waypoints and course points are especially useful when following a course during an outdoor activity without a predefined route. They act as virtual signposts, guiding you through your course and helping you stay focused on your fitness goals.
Now that you know how to set waypoints and course points in Garmin Connect, let’s move on to the next section to learn how to edit and customize these points.
Editing Course Points
After setting waypoints and course points in Garmin Connect, you may find the need to edit or customize these points to better suit your needs or provide more accurate guidance during your activities. The Course Creator tool in Garmin Connect offers flexibility in editing and customizing course points. Here’s how you can do it:
- Access the Garmin Connect Course Creator tool as explained in the previous sections.
- Select the course that contains the course points you want to edit or customize.
- In the course details page, you will find a list of waypoints and course points that have been set along the route.
- Click on the specific course point you want to edit to display its details and options.
- Within the course point details, you can modify various aspects such as the name, description, type, or associated actions.
- To change the course point location, you can click and drag it on the map to a new position.
- Additionally, you can customize the appearance of course points by choosing different symbols or icons to represent them on the map.
- Make the necessary changes and updates to the course points, and remember to save your changes to ensure they are applied to the course.
Editing and customizing course points allows you to tailor the navigation experience according to your preferences and requirements. You can provide more detailed instructions, add helpful tips, or rename course points to make them more meaningful to you.
It’s important to note that while editing course points, keep in mind that they should be clear and concise to ensure they are easily understandable during your activities. Avoid overcrowding the map with too many course points, as this can become overwhelming and affect the overall navigation experience.
By taking the time to edit and customize course points, you can optimize your fitness journey, ensuring a smooth and guided experience throughout your course.
Now that you know how to edit and customize course points in Garmin Connect, let’s move on to the next section to learn about adding annotations to your courses.
Adding Annotations to the Course
Annotations are a valuable tool in Garmin Connect’s Course Creator, as they allow you to add additional information, notes, or reminders to your courses. These annotations serve as helpful references during your activities and can enhance your overall fitness experience. Here’s how you can add annotations to your course in Garmin Connect:
- Access the Garmin Connect Course Creator tool, following the steps outlined in the previous sections.
- Select the course to which you want to add annotations.
- In the course details page, you will find an option to add annotations or notes.
- Click on the annotation option to open a text box where you can enter your desired annotation.
- Enter the text or description for your annotation, providing any information that you deem helpful or informative.
- You can add multiple annotations along your course by repeating the previous steps.
- To edit or delete an existing annotation, simply click on the annotation in the course details and make the necessary changes.
- After adding or editing annotations, don’t forget to save your changes to update the course in your Garmin Connect account.
Annotations can be used to mark important landmarks, highlight challenging sections, or provide instructions for specific parts of your course. They can also serve as reminders for necessary actions or cautionary notes to ensure a safe and enjoyable fitness journey.
By utilizing annotations, you can customize your courses with personalized information and insights, tailoring them to match your unique preferences and needs. This level of customization enhances the clarity and understanding of your courses, ultimately improving your overall navigation and performance.
It’s important to remember that annotations should be concise and clear, as they are meant to provide quick and easy references while on the move. Keeping annotations concise ensures that they do not clutter the map or distract you during your activities.
Now that you know how to add annotations to your courses in Garmin Connect, let’s move on to the next section to learn about adjusting course settings.
Adjusting Course Settings
In Garmin Connect’s Course Creator tool, you have the flexibility to adjust various settings for your courses. These settings allow you to fine-tune and personalize your courses to match your preferences and requirements. Here’s how you can adjust the course settings in Garmin Connect:
- Access the Garmin Connect Course Creator tool as explained in the previous sections.
- Select the course for which you want to adjust the settings.
- In the course details page, you will find options to modify the course settings.
- Adjust the desired settings according to your preferences.
- Some of the common course settings you can adjust include the course type (e.g., running, cycling, hiking), terrain type, difficulty level, and privacy settings.
- You may also have the option to enable or disable features like auto-pause or alerts during your activities.
- Ensure that you save your changes to update the course settings in your Garmin Connect account.
Adjusting course settings allows you to optimize your courses for specific activities, tailor the terrain type to match your desired difficulty level, and customize privacy settings to control who can view or access your courses.
Advanced settings, such as enabling or disabling features like auto-pause or alerts, give you more control over your navigation and activity tracking experience. You can choose to have the device automatically pause your activity when you come to a stop, or receive alerts for milestones, turns, or other important information during your activities.
It’s worth noting that the available course settings may vary based on your Garmin device model and software version. Ensure that you have the most up-to-date firmware and compatible device settings to access all the available course settings.
By adjusting course settings, you can fine-tune your courses to match your fitness goals, preferences, and the specific requirements of each activity.
Now that you understand how to adjust course settings, let’s continue to the next section to learn how to save and share your courses in Garmin Connect.
Saving and Sharing Courses
Once you have created or customized a course in Garmin Connect’s Course Creator, it’s important to save and share it to make the most of your efforts. Saving your courses ensures that they are securely stored in your Garmin Connect account, ready to be accessed whenever you need them. Additionally, sharing your courses allows you to inspire and collaborate with others in the Garmin Connect community. Here’s how you can save and share your courses in Garmin Connect:
- After completing the course creation or customization process, ensure that all the desired changes and settings have been made.
- In the course details page, you will find an option to save the course. Click on the “Save” or “Save Course” button to save it to your Garmin Connect account.
- You may be prompted to enter a name or description for the course. Provide relevant and descriptive information to help you easily identify and locate the course later.
- After saving the course, it will be available in your list of courses within your Garmin Connect account for future access and use.
- To share your course with others, navigate to the course details page and look for a sharing option or button.
- Click on the sharing option and choose the method through which you want to share the course. This can include sharing it with specific Garmin Connect users, posting it on social media, or generating a shareable link.
- Follow the instructions provided to complete the sharing process based on your chosen sharing method.
Saving your courses ensures that you have easy access to them whenever you need to refer to them or plan your activities. Having your courses securely stored in your Garmin Connect account provides peace of mind, knowing that your hard work is safely preserved.
Sharing your courses with others allows you to inspire and motivate fellow Garmin Connect users by showcasing your favorite routes or challenging courses. Sharing courses can also foster a sense of community and enable collaborative exploration of new experiences.
It’s important to note that when sharing your courses, you have control over the privacy settings. You can choose to share them publicly, only with specific individuals, or keep them private for personal use.
Now that you understand how to save and share your courses in Garmin Connect, let’s explore the process of publishing courses to your Garmin device in the next section.
Publishing Courses to Your Device
Once you have created or customized a course using Garmin Connect’s Course Creator tool, you may want to publish it to your Garmin device for easy access and navigation during your activities. Publishing courses to your device allows you to take advantage of the built-in navigation features and guidance offered by Garmin devices. Here’s how you can publish courses to your Garmin device:
- In Garmin Connect, navigate to the course you want to publish and access its details page.
- Look for the option to publish the course to your device. This may be displayed as a “Publish to Device” button or under a device-specific menu.
- Click on the publish option and select the Garmin device to which you want to send the course.
- Ensure that your Garmin device is connected to your computer or smartphone and that it is recognized by Garmin Connect.
- Follow the on-screen prompts and instructions to complete the course publishing process.
- Once the course has been successfully published to your device, you can disconnect the device from your computer or smartphone.
Once published, the course will be available directly on your Garmin device for you to access and navigate. Depending on the device model and software version, you may be able to view turn-by-turn directions, track your progress, and receive real-time guidance during your activities.
By publishing courses to your device, you eliminate the need to carry paper maps or rely on external navigation apps. Instead, you can enjoy the convenience of having all your courses and navigation information directly on your Garmin device.
It’s important to note that the availability of course publishing may vary depending on your Garmin device model and software version. Ensure that you have the latest firmware updates and compatible device settings to access the course publishing feature.
Now that you know how to publish courses to your Garmin device, let’s move on to the next section to learn about syncing and using courses with Garmin devices.
Syncing and Using Courses with Garmin Devices
Garmin Connect offers seamless syncing capabilities that allow you to transfer your courses from the online platform to your Garmin device. Once synced, you can access and use these courses directly on your device for navigation and guidance during your activities. Here’s how you can sync and use courses with Garmin devices:
- Ensure that your Garmin device is connected to the same Garmin Connect account that contains the courses you want to sync.
- On your Garmin device, navigate to the courses or activities menu.
- Find the option to sync or retrieve courses from Garmin Connect.
- Select the syncing option and follow the instructions provided on your device’s screen to initiate the sync process.
- Once the sync is complete, you will see the list of courses available on your Garmin device.
- You can now select the desired course from your device’s course list to start using it during your activities.
- Depending on your Garmin device model and software version, you may have access to turn-by-turn directions, elevation profiles, and other navigational features.
Syncing your courses with your Garmin device ensures that you have quick and convenient access to your routes while on the go. You no longer have to manually transfer or enter course details into your device, saving you time and effort.
Using courses on your Garmin device provides you with real-time navigation and guidance, helping you stay on track and navigate through waypoints, course points, and other important markers.
It’s important to regularly sync your device with Garmin Connect to ensure that your courses are up to date and reflect any changes you may have made on the online platform.
Now that you know how to sync and use courses with Garmin devices, you are equipped to take advantage of the powerful navigation features that Garmin provides.
Troubleshooting Tips
While using the Garmin Connect Course Creator tool and syncing courses with your Garmin device, you may encounter some occasional challenges or issues. Here are some troubleshooting tips to help you overcome common problems:
- Ensure that you have a stable internet connection: A weak or unstable internet connection can hinder the syncing process and cause delays or errors. Make sure you are connected to a reliable network before attempting to sync or access your courses.
- Check for firmware and software updates: Outdated firmware or software on either your Garmin device or Garmin Connect may lead to compatibility issues. Regularly check for firmware and software updates and install them as necessary to ensure optimal performance.
- Verify device compatibility: Not all Garmin devices support the same features or have the Course Creator tool. Double-check that your device is compatible with the Course Creator and course syncing functionalities to avoid any potential frustrations.
- Restart your device: Sometimes, a simple restart can resolve temporary glitches or issues. Try restarting both your Garmin device and the Garmin Connect app or website to see if that resolves the problem.
- Clear cache and data: If you are experiencing persistent syncing issues, clearing the cache and data of the Garmin Connect app on your smartphone or computer can help. This can be done through the app settings or browser settings.
- Reset your device settings: If you are encountering persistent issues with your Garmin device, consider resetting the device settings to their factory defaults. However, note that this will erase all personal data and settings, so make sure to back up any important information beforehand.
- Reach out to support: If you have tried the troubleshooting steps above and are still experiencing issues, don’t hesitate to reach out to Garmin customer support. They can provide further assistance and guidance specific to your device and software version.
By following these troubleshooting tips, you can overcome common challenges and ensure a smooth experience while using the Garmin Connect Course Creator tool and syncing courses with your Garmin device.
Remember, it’s normal to encounter occasional difficulties, but with perseverance and the right resources, you can resolve most issues and continue enjoying the benefits of Garmin Connect and your Garmin device.