
Creating and Setting Up a Skype Account in Your Browser
Setting up a Skype account in your browser is a simple and straightforward process. Follow these steps to create your account and start enjoying all the features and benefits of Skype:
- Open your preferred web browser and visit the Skype website. Look for the option to “Sign up” or “Create an account.” Click on it to get started.
- You’ll be prompted to enter your personal information. Provide your first and last name, as well as a valid email address. Choose a strong password to ensure the security of your account.
- Once you’ve filled in the required fields, click on the “Next” or “Continue” button to proceed.
- Verify your email address. Skype will send you an email with a verification link. Go to your email inbox, open the email from Skype, and click on the link to verify your account.
- After verifying your email, you may need to provide additional details, such as your location or phone number, for account security purposes. Fill in the required information and proceed.
- Choose a username for your Skype account. This will be the unique identifier for your account, so choose something that represents you or your business.
- Review and agree to the terms and conditions of Skype. Make sure you read them carefully before proceeding.
- Complete the sign-up process by clicking on the “Create Account” or similar button. Congratulations! You have successfully created your Skype account.
Now that you have set up your Skype account in your browser, you can start exploring the various features and functionalities it offers. Next, we will learn how to log into Skype on your browser.
Logging into Skype on Your Browser
Once you have created your Skype account, logging in to use the application on your browser is a breeze. Simply follow the steps below to access your Skype account:
- Open your preferred web browser and visit the Skype website.
- Look for the “Sign in” or “Log in” option on the homepage, usually located at the top-right corner. Click on it.
- You will be redirected to the login page. Enter the username or email address associated with your Skype account in the provided field.
- After entering your username or email address, click on the “Next” or “Sign in” button.
- On the next page, enter your password in the designated field. Make sure to enter it correctly to avoid any login issues.
- If you want to stay logged in to your Skype account on that particular browser, check the “Keep me signed in” option. However, it’s advisable not to use this option on public or shared devices for security reasons.
- Once you have entered your password and selected the appropriate options, click on the “Sign in” or “Log in” button.
Skype will then verify your login credentials and if they are correct, you will be redirected to your Skype homepage. Here, you can access your contacts, messages, and other Skype features directly from your browser.
Please note that if you have two-factor authentication enabled on your Skype account, you may be required to provide an additional security code during the login process. This code will be sent to your registered email or phone number for verification.
Now that you know how to log in to Skype on your browser, it’s time to explore the Skype interface and get familiar with its navigation.
Understanding and Navigating the Skype Interface in Your Browser
Once you have logged in to Skype on your browser, it’s important to familiarize yourself with the interface to make the most out of your Skype experience. Here’s a breakdown of the key components of the Skype interface:
1. Navigation Bar: The navigation bar is usually located at the top of the page and offers easy access to different sections of Skype, such as Contacts, Chats, Calls, and Notifications. You can click on these options to navigate between different features.
2. Contacts List: The contacts list is typically situated on the left side of the interface. It displays your contacts and their online status. You can search for specific contacts, create groups, and manage your contacts from this section.
3. Chat Conversation Window: The chat conversation window occupies the main area of the interface. It shows your ongoing conversations with contacts. You can send messages, emoticons, files, and make voice or video calls directly from the chat window.
4. Calling Options: Skype provides various calling options, such as audio calls, video calls, and conference calls. You can access these options by clicking on the respective icons or buttons, usually located within the chat conversation window.
5. Settings: The settings menu allows you to customize your Skype experience. It enables you to manage your account, modify notification settings, adjust audio and video settings, and more. You can usually find the settings menu by clicking on your profile picture or a gear icon.
6. Notifications: Skype notifies you about incoming calls, messages, and other activities through notifications. These notifications are usually displayed as pop-ups or badges on the Skype interface. You can manage your notification preferences in the settings menu.
To navigate through the Skype interface, simply click on the desired options, icons, or buttons within the respective sections. Take some time to explore the different features and functionalities to understand how Skype works on your browser.
Now that you have gained a better understanding of the Skype interface, let’s move on to the next section to learn how to add and manage contacts in Skype on your browser.
Adding and Managing Contacts in Skype on Your Browser
Skype allows you to connect and communicate with friends, family, colleagues, and clients from around the world. Adding and managing contacts in Skype on your browser is a simple process. Follow these steps to expand your contact list:
- Open Skype in your browser and log in to your account.
- In the navigation bar, click on the “Contacts” option. This will open your contacts list.
- Click on the “Add Contact” button, usually represented by a person icon with a “+” symbol.
- Enter the Skype username, email address, or phone number of the person you want to add as a contact. You can also search for contacts by their name.
- Click on the “Search” button and Skype will display a list of matching results.
- Select the correct contact from the list and click on the “Add to Contacts” button next to their name.
- You may be prompted to enter a brief message introducing yourself or explaining why you would like to add them as a contact. Fill in the message if desired and click on the “Send Invitation” or similar button.
- The contact will receive a notification and can choose to accept or decline your invitation to connect on Skype.
- Once the contact accepts your invitation, they will be added to your contacts list and you can start communicating with them.
To manage your contacts in Skype on your browser, you have various options available:
- To view your contact details, click on the contact’s name in your contacts list. This will open a profile window displaying their information.
- To delete a contact, hover over their name in your contacts list and click on the three-dot menu icon that appears. From the dropdown menu, select “Remove from Contacts” or a similar option.
- To organize your contacts into groups, click on the “Create New Group” button in your contacts list. Give the group a name and then drag and drop contacts into the group.
- To search for specific contacts within your contacts list, use the search bar provided in the contacts section.
Managing your contacts effectively in Skype ensures that you can easily find and communicate with the people you need to connect with. Now that you know how to add and manage contacts in Skype on your browser, let’s move on to the next section to learn about making and receiving calls in Skype.
Making and Receiving Calls in Skype on Your Browser
Skype provides a convenient way to make and receive calls, whether it’s a traditional audio call or a video call. Here’s how you can make and receive calls in Skype on your browser:
Making Calls:
- Log in to your Skype account on your browser.
- In the navigation bar, click on the “Calls” option to access the calling features.
- Click on the “New Call” button, usually represented by a phone icon with a “+” symbol.
- Enter the Skype username, email address, or phone number of the person you want to call.
- Click on the “Call” button to initiate the call.
If the person you are calling is online and available, the call will be connected. During the call, you can utilize additional features such as mute, speakerphone, and add participants. Once the call is completed, you can end it by clicking the “End Call” button.
Receiving Calls:
- When someone calls you on Skype, a pop-up notification will appear on your screen.
- To answer the call, click on the “Answer” button within the notification.
- If you want to decline or ignore the call, you can click on the “Decline” or “Ignore” button.
During the call, you can engage in a conversation, use the mute option if needed, and utilize other call features. To end the call, click on the “End Call” button.
Skype also allows you to make group calls and start conference calls with multiple participants. To do this, you can create a group or select multiple contacts before initiating the call.
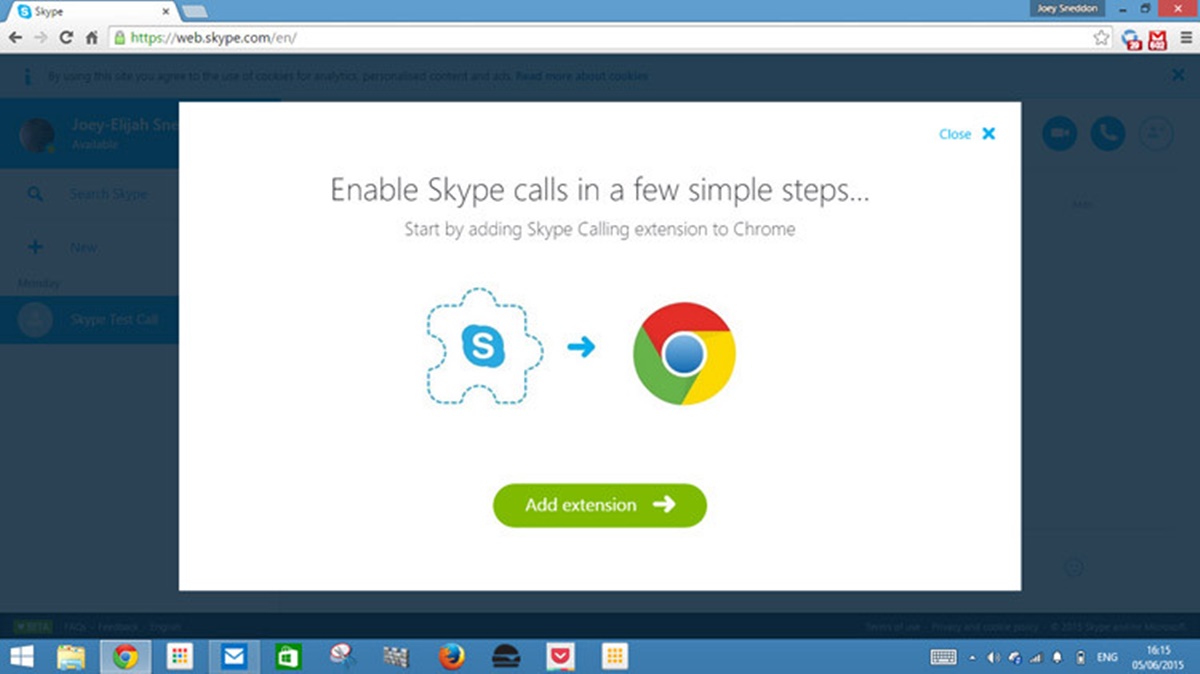
It’s important to note that making and receiving calls in Skype on your browser requires a stable internet connection and audio input/output devices, such as a microphone and speakers/headphones, to ensure clear communication.
Now that you know how to make and receive calls in Skype on your browser, let’s move on to the next section to learn about sending messages and files on Skype.
Sending Messages and Files in Skype on Your Browser
Skype provides a versatile platform for sending instant messages and sharing files with your contacts. Here’s how you can send messages and files in Skype on your browser:
Sending Messages:
- Log in to your Skype account on your browser.
- In the navigation bar, click on the “Chats” option to access your chat conversations.
- Select the chat conversation with the contact or group you want to message.
- Type your message in the text input field at the bottom of the chat window.
- Press the “Enter” or “Return” key on your keyboard to send the message. It will be instantly delivered to the recipient(s).
You can continue to have a real-time conversation by sending messages back and forth. Skype also allows you to send emojis, stickers, and even react to specific messages within the chat conversation.
Sending Files:
- To send a file in Skype, open the chat conversation with the contact or group.
- Click on the paperclip icon or the “More Options” button (usually represented by three dots or lines) within the chat window.
- Select the “Send File” or “Share File” option.
- Locate and select the file you want to send from your computer.
- Click on the “Open” or “Send” button. The file will be uploaded and sent to the recipient(s).
Skype allows you to send various file types, including documents, images, videos, and more. The recipient(s) will be able to download and access the file directly within the Skype interface.
It’s important to note that when sending files, there might be limitations on file size and restrictions on certain file types for security purposes. If the file is too large or of an unsupported format, you may need to compress it or choose an alternative method for sharing the file.
Now that you know how to send messages and files in Skype on your browser, let’s move on to the next section to learn about customizing your Skype settings.
Customizing Your Skype Settings in Your Browser
Skype offers a range of customizable settings that allow you to personalize your experience and tailor it to your preferences. Here’s how you can customize your Skype settings in your browser:
Accessing the Settings:
- Log in to your Skype account on your browser.
- In the navigation bar, click on your profile picture or an icon representing your account settings.
- From the dropdown menu, select “Settings” or a similar option.
Modifying General Settings:
Under the general settings, you can customize various aspects of your Skype account, including:
- Profile Picture: Upload a new profile picture or remove the existing one.
- Display Name: Change your display name that appears to your contacts.
- Language: Select your preferred language for the Skype interface.
Adjusting Privacy Settings:
Privacy settings allow you to control your communication and visibility on Skype. You can:
- Choose who can contact you and see your online status.
- Decide whether to allow Skype to use your microphone and camera.
- Manage your blocked contacts and privacy preferences.
Tweaking Notification Settings:
You can customize the notifications and alert settings to suit your preferences:
- Choose how you want to be notified for incoming calls, messages, and other activities.
- Enable or disable sounds, pop-up notifications, and other notification options.
Personalizing Display and Sounds:
Skype allows you to personalize the visual and audio aspects of the interface:
- Customize the theme and color scheme of Skype to your liking.
- Enable or disable animations, emojis, and other display options.
- Adjust the volume and audio settings for calls, notifications, and other sounds.
Managing Account Security:
You can enhance the security of your Skype account by:
- Enabling two-factor authentication for an extra layer of protection.
- Managing your linked accounts and connected apps.
- Reviewing the recent sign-in activity of your Skype account.
- Changing your password or updating your account recovery options.
Remember to save your changes after customizing each setting to ensure they are applied to your Skype account.
Now that you know how to customize your Skype settings in your browser, you can personalize your Skype experience according to your preferences. Let’s move on to the next section, where we’ll explore how to manage your Skype notifications.
Managing Your Skype Notifications in Your Browser
Skype notifications help you stay informed and updated about your contacts’ activities, messages, and calls. You can manage your notifications in Skype on your browser to control how and when you receive alerts. Here’s how to manage your Skype notifications:
Accessing Notification Settings:
- Log in to your Skype account on your browser.
- In the navigation bar, click on your profile picture or an icon representing your account settings.
- From the dropdown menu, select “Settings” or a similar option.
- Navigate to the “Notifications” or “Notification Settings” section.
Choosing the Type of Notifications:
Skype offers different types of notifications that you can manage:
- Message Notifications: Decide if you want to receive notifications for new messages or chats.
- Call Notifications: Control the notifications for incoming calls or missed calls.
- File Transfer Notifications: Customize the notifications for file transfers sent or received in chat conversations.
- Other Notifications: Manage notifications for various Skype activities, such as friend requests, birthdays, and more.
Setting Notification Preferences:
Skype allows you to choose the preferences for each type of notification:
- Sound: Enable or disable sound notifications for each type of notification.
- Pop-up: Choose whether to show pop-up notifications for each type of notification.
- Badge Count: Decide if you want Skype to display a badge count on the application icon indicating the number of unread notifications.
Managing Notification Sounds:
You can customize the sounds associated with each type of notification:
- Message Sound: Select a specific sound or a default sound for message notifications.
- Call Sound: Choose a sound for incoming call notifications.
- File Transfer Sound: Set a sound for notifications related to file transfers.
- Other Sounds: Customize sounds for other Skype activities, such as friend requests or birthday notifications.
Enabling or Disabling Notifications:
If you want to temporarily disable all notifications, you can use the “Quiet mode” or “Do not disturb” option in the notification settings. This will mute all notifications until you manually enable them again.
Remember to save your changes after managing your notification settings to ensure they are applied to your Skype account.
By managing your Skype notifications in your browser, you can stay updated with important messages and calls while customizing your notification preferences to suit your needs and preferences.
Now that you know how to manage your Skype notifications, let’s move on to the next section where we’ll explore how to troubleshoot common issues and errors in Skype on your browser.
Troubleshooting Common Issues and Errors in Skype on Your Browser
While Skype on your browser generally runs smoothly, you may encounter occasional issues or errors that can disrupt your communication experience. Here are some common problems and their troubleshooting steps:
1. Connectivity Issues:
If you’re experiencing connectivity issues with Skype on your browser, try the following:
- Check your internet connection: Ensure that you have a stable internet connection and try restarting your modem or router if necessary.
- Clear cache and cookies: Clearing your browser’s cache and cookies can resolve temporary issues. Go to your browser settings and clear the cache and cookies.
- Try a different browser: If the issue persists, try accessing Skype on a different browser to rule out any browser-specific problems.
- Disable browser extensions: Some browser extensions or plugins might interfere with Skype. Disable them temporarily and see if it resolves the issue.
2. Audio or Video Issues:
If you’re having problems with audio or video during calls, consider these troubleshooting steps:
- Check your device settings: Ensure that your microphone, speakers, and camera are properly connected and configured. Adjust the audio and video settings in Skype accordingly.
- Test your audio and video: Use Skype’s built-in audio and video testing feature to check if your devices are working correctly.
- Update browser and device drivers: Make sure your browser and device drivers are up to date, as outdated versions can affect Skype’s performance.
- Close bandwidth-intensive applications: Close any other applications that consume a significant amount of bandwidth, as it can impact the quality of your audio and video calls.
3. Login or account issues:
If you’re having trouble logging in or accessing your account, try the following steps:
- Verify your username and password: Double-check that you have entered the correct username and password. Remember that passwords are case-sensitive.
- Reset your password: If you have forgotten your password, use the account recovery options provided by Skype to reset your password.
- Clear stored credentials: In your browser’s settings, clear any stored credentials for Skype and try logging in again.
4. Call or message syncing issues:
If you’re experiencing issues with call or message syncing across devices, consider these steps:
- Ensure all devices are connected to the internet: Make sure that all devices you’re using with Skype are connected to a stable internet connection.
- Update Skype on all devices: Keep your Skype application and browser extensions up to date to ensure compatibility and syncing across devices.
- Sign out and sign in again: Sign out of Skype on all devices, then sign in again to trigger a sync between your devices.
If the issue persists after trying these troubleshooting steps, consider reaching out to Skype’s customer support for further assistance. They can provide personalized guidance to resolve specific problems you might be facing.
By troubleshooting common issues and errors in Skype on your browser, you can quickly resolve any technical difficulties and continue enjoying seamless communication with your contacts.
Now that you’re equipped with troubleshooting knowledge, you’re ready to navigate and resolve any challenges that may arise while using Skype in your browser.