
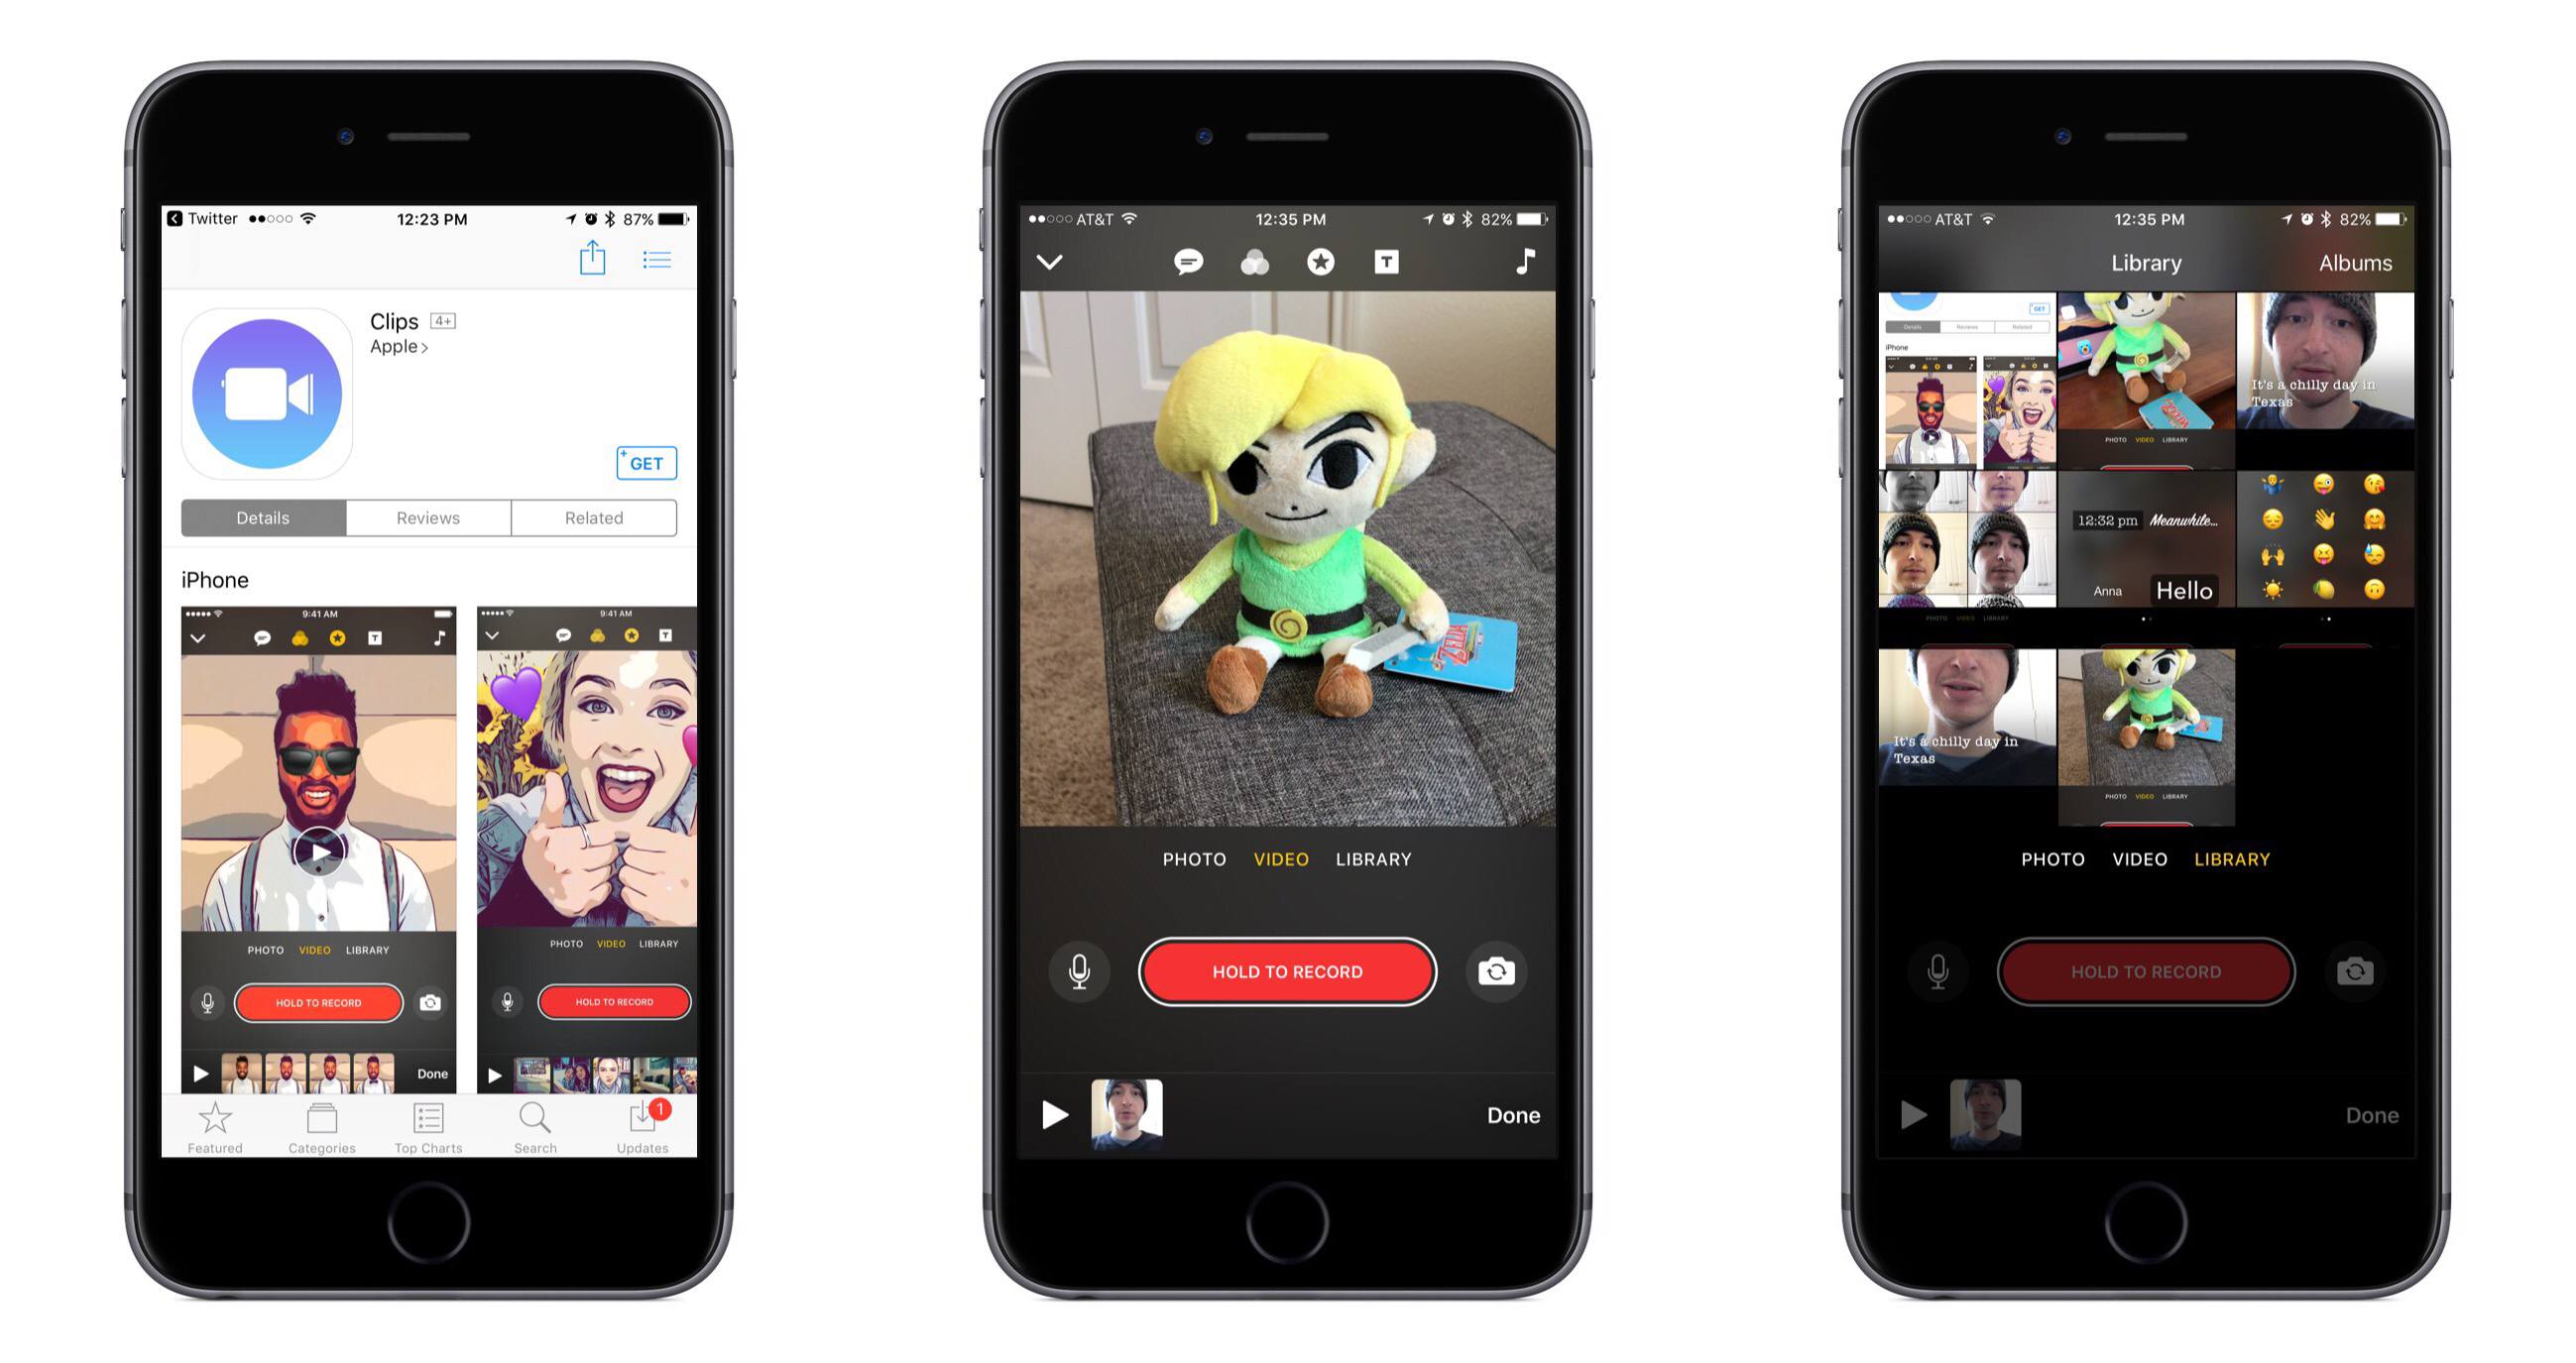
What is Apple’s Clips App?
Apple’s Clips App is a user-friendly mobile video editing application that allows you to create and share impressive videos using your iPhone or iPad. With Clips, you can combine photos, videos, and music into beautifully crafted videos, complete with filters, effects, and text. Whether you want to document your daily adventures, share a special moment, or create engaging social media content, Clips App provides you with the tools needed to bring your stories to life.
One of the standout features of Clips App is its intuitive interface, designed to make video editing accessible for users of all skill levels. The app offers a streamlined and easy-to-navigate interface with a variety of creative options and effects at your fingertips.
Another great aspect of Clips App is its seamless integration with other Apple products and services. You can effortlessly access your photo and video library directly from the app and share your creations via Messages, Instagram, Facebook, and other popular social media platforms.
Whether you’re a professional content creator or simply looking to add a personal touch to your videos, Clips App provides a range of editing options and customization features. From adding text and emojis to incorporating music and sound effects, you have full control over how your videos look and feel.
Additionally, Clips App offers innovative features such as Live Titles, which automatically generates captions based on your speech, allowing you to create dynamic and engaging videos without having to manually add text.
Overall, Apple’s Clips App is a versatile and powerful tool that allows you to unleash your creativity and transform ordinary videos into captivating visual stories. With its user-friendly interface and robust editing features, Clips App is a must-have for anyone looking to create impressive videos on their Apple devices.
How to Download and Install Clips App
If you’re eager to start creating amazing videos with Apple’s Clips App, here’s a step-by-step guide to help you download and install the app on your iPhone or iPad.
- Open the App Store: Launch the App Store on your device. You can find the App Store icon on your home screen.
- Search for Clips App: Tap on the search bar at the bottom of the screen and type in “Clips App”. Hit the search button to begin searching for the app.
- Select Clips App: From the search results, locate the Clips App and tap on it to open the app page.
- Tap “Get” or the Download icon: On the Clips App page, you’ll find a button that says “Get” or a cloud icon with a downward arrow. Tap on it to start the download and installation process.
- Authenticate and Install: Depending on your device settings, you may be prompted to authenticate the download with your Apple ID password, Touch ID, or Face ID. Follow the on-screen instructions to complete the installation.
- Wait for the Installation: Once you’ve authenticated the download, the app will begin to install. You’ll see a progress bar on the app icon indicating the installation progress. Wait for the process to complete.
- Launch Clips App: Once the installation is complete, you can find the Clips App icon on your home screen. Tap on the icon to launch the app.
- Sign in with your Apple ID: Upon launching the app for the first time, you may be prompted to sign in with your Apple ID. Provide your Apple ID and password to log in.
And there you have it! You’ve successfully downloaded and installed Apple’s Clips App on your device. Now you’re ready to explore the app’s features and start creating stunning videos.
How to Navigate the Clips App Interface
Once you’ve downloaded and installed Apple’s Clips App, it’s time to familiarize yourself with the app’s interface. Navigating the Clips App is a breeze, and by understanding its layout and functions, you’ll be able to effortlessly create and edit your videos. Here’s a step-by-step guide on how to navigate the Clips App interface:
- Home Screen: Upon launching the Clips App, you’ll land on the home screen. Here, you’ll find the Create button at the bottom center, which allows you to start a new video project.
- Capturing Mode: Tap the Create button to access capturing mode. The camera viewfinder will appear, and you can start recording a video by pressing and holding the red record button. To capture a photo, tap the white shutter button.
- Recorded Clips: After capturing a clip, it will appear at the bottom of the screen as a thumbnail. You can swipe left or right to view your recorded clips and tap on any clip to select and edit it.
- Editing Tools: Once you’ve selected a clip, various editing tools will appear on the screen. You can swipe left or right to access different editing options, such as adding filters, text, emojis, and more. Tap on any tool to apply it to the selected clip.
- Timeline: As you add multiple clips to your project, they will appear in the timeline at the bottom of the screen. You can drag and rearrange the clips as desired to create a seamless video flow.
- Preview: To preview your video, tap the play button located in the center of the screen. This will allow you to review your creation and make any necessary adjustments.
- Additional Options: At the top right corner of the screen, you’ll find the More Options button (three dots). Tapping on it will provide you with additional settings and options, including adjusting video settings, adding music, and accessing project settings.
- Share and Save: Once you’re satisfied with your video, tap the Share button at the bottom right corner of the screen. From here, you can choose to share your video directly to social media platforms, save it to your device, or send it via Messages or email.
With these simple navigation tips, you’ll be able to move through the Clips App interface effortlessly, allowing you to create, edit, and share your videos with ease.
How to Capture Video Using Clips App
One of the key features of Apple’s Clips App is its ability to capture videos in a user-friendly and interactive way. Whether you’re documenting a special moment or capturing a fun adventure, here’s a step-by-step guide on how to capture video using the Clips App:
- Launch the Clips App: Find the Clips App on your device and tap on its icon to launch the app.
- Tap the Create Button: On the home screen of the Clips App, locate the Create button at the bottom center of the interface. Tap on it to enter capturing mode.
- Position your iPhone or iPad: Hold your device in the desired orientation – landscape or portrait – and make sure the subject you want to capture is within the frame.
- Press and Hold to Record: To start recording, press and hold the red record button located at the bottom center of the screen. Release it to stop recording. You can record multiple clips by repeating this process.
- Use Creative Tools: While recording, you can enhance your video by using various creative tools. Swipe left or right on the screen to access options such as filters, effects, and stickers. Tap on any tool to apply it to your recording.
- Add Live Titles: If you want to add captions to your video, tap the Live Titles button (the microphone icon) and start speaking. Clips App will automatically generate captions based on your speech, adding a dynamic element to your videos.
- Switch Cameras: To switch between the front and rear cameras of your device, tap the camera-switching button located at the top right corner of the screen.
- Review and Edit: After capturing your video clips, you’ll find them displayed at the bottom of the screen as thumbnails. You can tap on any clip to select it and make edits such as trimming, duplicating, or removing parts of the clip.
- Preview and Finalize: Once you’re satisfied with your captured clips and edits, tap the Play button in the center of the screen to preview your video. Make any further adjustments if needed.
- Save and Share: When you’re ready to share your video, tap the Share button located at the bottom right corner of the screen. Choose your desired sharing options from the menu, such as sharing directly to social media platforms, saving to your device, or sending it via Messages or email.
With these simple steps, you can capture stunning videos using Apple’s Clips App and unleash your creativity in a fun and engaging way. Experiment with the various creative tools and features to make your videos truly stand out!
How to Edit Video Clips in Clips App
After capturing video clips using Apple’s Clips App, you have the option to edit and enhance them to create impressive and professional-looking videos. Here is a step-by-step guide on how to edit video clips in Clips App:
- Select a Video Clip: Open the Clips App and locate the video clip you want to edit. The captured clips will appear as thumbnails at the bottom of the screen. Tap on the desired clip to select it.
- Trim the Clip: To remove any unwanted sections from the clip, tap on the scissor icon that appears above the selected clip. Drag the yellow handles on the timeline to adjust the starting and ending points of the clip. Tap the “Done” button to confirm the trim.
- Apply Filters: Swipe left or right on the clip to browse through the available filters. Tap on a filter to apply it to the clip. This can help enhance the visual appeal and create a specific mood for your video.
- Add Text: Tap on the “Text” button, represented by a capital “T” icon, to add text to your clip. Choose from a variety of fonts, styles, and colors. You can place the text anywhere on the screen and adjust its duration.
- Include Emojis and Stickers: Make your video more fun and expressive by adding emojis and stickers. Tap on the smiley face icon to access the library of emojis and stickers. Choose the desired ones and place them on the clip as per your preference.
- Apply Effects: Clips App offers various effects to enhance your video. Swipe left or right to explore options like comic book filters, speech bubbles, arrows, and more. Tap on an effect to apply it and adjust its placement and duration.
- Add Music and Sound Effects: To add background music or sound effects, tap on the “Music” button represented by a music note icon. Choose music from your device’s library or select from the built-in soundtracks. Adjust the volume and timing as needed.
- Use Live Titles: With the Live Titles feature, you can automatically generate captions based on your speech. Tap the microphone icon, then start speaking. The captions will appear on the screen, synchronized with your voice.
- Adjust Clip Speed: For creative effects, you can modify the speed of your clip. Tap on the speedometer icon to access the speed controls. You can slow down or speed up the clip to match the desired tempo.
- Preview and Fine-tune: Tap the Play button in the center of the screen to preview your edited clip. Watch for any further adjustments you want to make, such as tweaking the timing or fine-tuning the visual effects.
- Save and Share: Once you are satisfied with your edited clip, tap the Share button at the bottom right corner of the screen. Choose the sharing options that suit your preferences, such as social media platforms, messaging apps, or saving it to your device.
With the editing features of Clips App, you can transform your video clips into professional-looking videos that capture attention and tell your story effectively. Experiment with different effects, text styles, and music choices to add your personal touch and make your videos stand out.
How to Add Photos to Your Clips App Video
Apple’s Clips App allows you to enhance your videos by incorporating photos into your projects. Whether you want to showcase memorable moments or add visual interest to your video, here’s a step-by-step guide on how to add photos to your Clips App video:
- Open the Clips App: Launch the Clips App on your iPhone or iPad. The app’s icon can usually be found on the home screen of your device.
- Create a New Project: Tap on the Create button located at the bottom center of the screen to start a new video project. This will take you to the capturing mode.
- Capture a Video Clip: Press and hold the red record button to capture a video clip. You can also tap the white shutter button to capture a photo if needed. These clips will serve as the base for adding photos.
- Add a Photo: After capturing the video clip, tap on the Photo button represented by a landscape image located at the bottom left corner of the screen. This will allow you to access your device’s photo library.
- Select a Photo: Browse through your photo library and tap on the photo you want to add to your video. The selected photo will be displayed as a thumbnail on the screen.
- Adjust the Photo: Once the photo is added, you can adjust its duration by dragging the edges of the thumbnail on the timeline. You can also move the photo to a different position by dragging it on the screen.
- Apply Filters and Effects: To enhance the appearance of the photo, swipe left or right on the photo thumbnail to browse through available filters and effects. Tap on a filter or effect to apply it to the photo.
- Add Text, Emojis, and Stickers: If desired, you can add text, emojis, or stickers to the photo. Tap on the Text or Stickers button, represented by the “T” or smiley face icon, respectively. Select the desired options and position them on the photo.
- Make Further Adjustments: Tap the play button in the center of the screen to preview your video with the added photo. If necessary, make any further adjustments to the duration, positioning, or effects of the photo to ensure it fits seamlessly.
- Continue Editing: You can repeat the process to add more photos to your video if desired. Capture additional video clips and follow the same steps to insert photos, adjusting them in the timeline as needed.
- Save and Share: Once you are satisfied with your video, tap the Share button at the bottom right corner of the screen. Choose your preferred sharing options, such as social media platforms, messaging apps, or saving the video to your device.
By adding photos to your Clips App video, you can create engaging visuals that complement your story and capture memorable moments. Experiment with filters, effects, and creative elements to make your videos visually captivating.
How to Add Filters and Effects to Your Clips App Video
Apple’s Clips App offers a wide range of filters and effects to enhance the visual appeal of your videos. Whether you want to add a vintage look, apply artistic effects, or create a specific mood, here’s a step-by-step guide on how to add filters and effects to your Clips App video:
- Launch the Clips App: Open the Clips App on your iPhone or iPad. You can find the app’s icon on your device’s home screen.
- Create a New Project: Tap on the Create button located at the bottom center of the screen to start a new video project in the capturing mode.
- Capture Video Clips: Press and hold the red record button to capture video clips for your project. You can also tap the white shutter button to capture photos if desired.
- Select a Video Clip: Once you’ve captured video clips, they will appear as thumbnails at the bottom of the screen. Tap on the desired video clip to select it for editing.
- Access Filters and Effects: Swipe left or right on the video clip to browse through the available filters and effects. These options are represented by icons and names displayed at the bottom of the screen.
- Apply a Filter: Tap on a filter icon to apply it to your video clip. You can preview the effect in real-time to see how it alters the appearance of your footage. Experiment with different filters to find the one that best suits your video’s style or theme.
- Add Effects: In addition to filters, Clips App offers various effects to enhance your video. Tap on the effect icon to apply it to your clip. These effects can range from overlays, graphics, transitions, and artistic enhancements, all designed to elevate the visual impact of your video.
- Adjust Effect Intensity: Some effects may come with adjustable parameters, such as intensity or speed. If applicable, look for options or sliders that allow you to fine-tune the effect’s appearance. Drag the sliders or adjust the settings to achieve the desired effect’s intensity.
- Multiple Filters and Effects: Remember that you can apply multiple filters and effects to a single video clip. Experiment with layering different effects to create unique looks and visual styles. Simply repeat the above steps to add additional filters and effects.
- Preview and Fine-tune: After applying filters and effects, tap the play button in the center of the screen to preview your edited video clip. Watch for any adjustments you want to make, such as editing the duration, reordering effects, or refining their intensity.
- Save and Share: Once you are satisfied with the filters and effects applied to your video clip, tap the Share button at the bottom right corner of the screen. Choose your preferred sharing options, such as social media platforms, messaging apps, or saving the video to your device.
By adding filters and effects to your Clips App video, you can transform ordinary footage into visually stunning creations. Experiment with different options and unleash your creativity to make your videos stand out and leave a lasting impression.
How to Add Text and Emojis to Your Clips App Video
Apple’s Clips App offers a range of creative options to add text and emojis to your videos, adding a personal touch and enhancing your storytelling. Here’s a step-by-step guide on how to add text and emojis to your Clips App video:
- Launch the Clips App: Open the Clips App on your iPhone or iPad by tapping on its icon, located on your device’s home screen.
- Create a New Project: Tap on the Create button at the bottom center of the screen, which will take you to the capturing mode to start a new video project.
- Capture Video Clips: Press and hold the red record button to capture video clips for your project. Alternatively, you can tap the white shutter button to capture photos if desired.
- Select a Video Clip: Once you have recorded your video clips, they will appear as thumbnails at the bottom of the screen. Tap on the desired video clip to select it for further editing.
- Add Text: Tap on the Text button, represented by a capital “T” icon. This will bring up a variety of text options, including font styles, colors, and formatting options.
- Enter Text: Tap anywhere on the screen to enter the desired text. A text box will appear, allowing you to type in your message. You can also customize the text box’s position, size, and orientation by dragging and resizing it.
- Format Text: Adjust the font style, size, and color of the text by selecting the desired options from the available text formatting tools. You can also add emphasis by making text bold, italic, or underlined.
- Use Emojis: To add emojis to your video, tap on the smiley face icon. This will open the emoji library, where you can browse through various categories and select the desired emoji to add to your video clip.
- Position and Customize Emojis: Once you’ve chosen an emoji, place it on the video screen by tapping and dragging it to the desired location. You can resize or rotate the emoji to fit your preferences.
- Multiple Text and Emojis: You can add multiple text elements and emojis to your video clip. Repeat the above steps to include additional text overlays or emojis as needed.
- Preview and Fine-tune: After adding text and emojis, tap the play button in the center of the screen to preview your edited video clip. Make any necessary adjustments, such as timing, positioning, or resizing of the overlays to ensure they complement your video seamlessly.
- Save and Share: Once you are satisfied with the text and emojis added to your video clip, tap the Share button at the bottom right corner of the screen. Choose your preferred sharing options, such as social media platforms, messaging apps, or saving the video to your device.
With text and emojis, you can personalize your Clips App videos and convey your message in a fun and engaging way. Experiment with different fonts, styles, and emoji combinations to make your videos truly expressive and impactful.
How to Add Music and Sound Effects to Your Clips App Video
Adding music and sound effects can greatly enhance the mood and atmosphere of your Clips App videos. Whether you want to create a captivating soundtrack or add fun sound effects, here’s a step-by-step guide on how to incorporate music and sound effects into your Clips App videos:
- Launch the Clips App: Open the Clips App on your iPhone or iPad by tapping on its icon located on your device’s home screen.
- Create a New Project: Tap on the Create button at the bottom center of the screen to start a new video project in the capturing mode.
- Capture Video Clips: Press and hold the red record button to capture video clips for your project. You can also tap the white shutter button to capture photos if desired.
- Select a Video Clip: Once you’ve recorded your video clips, they will appear as thumbnails at the bottom of the screen. Tap on the desired video clip to select it for further editing.
- Add Music: Tap on the Music button, represented by a music note icon, located at the bottom left corner of the screen. This will give you access to your device’s music library.
- Select a Music Track: Scroll through your music library and tap on the desired music track to add it to your video clip. You can preview the track before adding it to ensure it fits the desired mood or tempo of your video.
- Trim the Music Track: Once the music track is added, you can trim its duration by dragging the yellow handles at the ends of the track. This allows you to select the specific portion of the track that best complements your video clip.
- Adjust the Music Volume: Use the volume slider located next to the music track to adjust the volume of the music. You can increase or decrease the volume to ensure it blends well with the audio captured with your video clip.
- Add Sound Effects: To create a more immersive audio experience, tap on the Sound Effects button. This will open a library of sound effects, categorized by types such as “Nature,” “Animals,” or “Technology.” Browse through the options and tap on the desired sound effect to add it to your video.
- Customize Sound Effects: Once a sound effect is added, you can adjust its volume using the volume slider located next to the sound effect. You can also trim its duration to synchronize it with specific moments in your video clip.
- Preview and Fine-tune: After adding music and sound effects, tap the play button in the center of the screen to preview your video clip with the enhanced audio. Make any necessary adjustments, such as timing or volume levels, to achieve the desired audio mix.
- Save and Share: Once you are satisfied with the music and sound effects added to your video clip, tap the Share button at the bottom right corner of the screen. Choose your preferred sharing options, such as social media platforms, messaging apps, or saving the video to your device.
By adding music and sound effects, you can elevate the overall impact of your Clips App videos and create a more immersive viewing experience. With the right audio choices, you can evoke emotions, enhance storytelling, and engage your audience in a more dynamic way.
How to Use Live Titles in Clips App
Live Titles is a unique feature in Apple’s Clips App that automatically generates captions based on your speech as you record your videos. This feature adds a dynamic element to your videos, making them more accessible and engaging. Here’s a step-by-step guide on how to use Live Titles in Clips App:
- Launch the Clips App: Open the Clips App on your iPhone or iPad. You can find the app’s icon on your device’s home screen.
- Create a New Project: Tap on the Create button located at the bottom center of the screen to start a new video project in the capturing mode.
- Enable Live Titles: Before starting your recording, ensure that Live Titles is enabled. Tap on the microphone icon located at the top right corner of the screen. If the icon is colored, Live Titles is already enabled. If not, tap on the icon to activate it.
- Record Your Video: Press and hold the red record button to start recording your video. As you speak, the app will transcribe your words into captions in real-time, which will appear on the screen as you record.
- Customize Live Titles Appearance: Once you’ve finished recording, you can customize the appearance of the Live Titles. Tap on the Text button represented by a capital “T” icon. Here, you can choose from different fonts, sizes, and colors for the captions. You can also adjust their position on the screen.
- Edit the Captions: If there are any mistakes or inaccurate transcriptions, you can manually edit the captions. Tap on the Edit button (represented by a pencil icon) and make the necessary adjustments by modifying the text directly.
- Change Language: By default, Live Titles uses the system language for captioning. If you prefer to use a different language, you can change it by going to the Settings App on your device. Navigate to General > Language & Region, and select the desired language for Live Titles.
- Preview and Fine-tune: After adjusting the appearance and editing the captions, tap the Play button in the center of the screen to preview your video with Live Titles. Make any further adjustments, such as timing or positioning, to ensure the captions enhance the overall viewing experience.
- Save and Share: Once you are satisfied with your video and the Live Titles, tap the Share button at the bottom right corner of the screen. Choose your preferred sharing options, such as social media platforms, messaging apps, or saving the video to your device.
Using Live Titles in Clips App allows you to create videos with automatic captions, making your content more accessible to a wider audience. Whether you want to enhance comprehension or engage viewers who prefer captions, Live Titles offers an easy and convenient way to add dynamic captions to your videos.
How to Create Animated Captions Using Clips App
Clips App offers a variety of ways to make your captions more visually appealing and engaging by adding animations. Animated captions can bring your text to life, adding a dynamic element to your videos. Here’s a step-by-step guide on how to create animated captions using Clips App:
- Launch the Clips App: Open the Clips App on your iPhone or iPad by tapping on its icon located on your device’s home screen.
- Create a New Project: Tap on the Create button at the bottom center of the screen to start a new video project. This will take you to the capturing mode, where you can begin recording your video clips.
- Capture Video Clips: Press and hold the red record button to capture video clips for your project. You can also tap the white shutter button to capture photos as needed. These clips will serve as the base for adding animated captions.
- Add a Caption: After capturing a video clip, tap on the Text button represented by a capital “T” icon. Enter the desired text in the text box that appears on the screen. Customize the appearance of the text by selecting different fonts, sizes, and colors.
- Apply Animation: With the caption selected, swipe left or right on the text box to browse through the available animation options. Clips App offers various animated styles, such as fade in, slide, pop, and more.
- Preview and Fine-tune: Tap the Play button in the center of the screen to preview your video with the animated caption. Adjust the timing and position of the caption as needed to ensure it complements the video and enhances the overall storytelling.
- Add Multiple Animated Captions: Repeat the above steps to add additional animated captions to your video clips. You can have multiple captions with different animations throughout your video for added impact and visual appeal.
- Adjust Caption Duration: By default, each caption on a clip has the same duration as the clip itself. However, you can customize the duration by tapping on the caption and dragging its edges on the timeline. This allows you to control when the caption appears and disappears during the clip.
- Editing Captions: To edit the text or appearance of a caption, tap on it to select it, and make the desired changes using the editing options that appear on the screen. You can modify the text, animation, font, size, color, and position of the selected caption.
- Save and Share: Once you are satisfied with the animated captions in your video clips, tap the Share button at the bottom right corner of the screen. Choose your preferred sharing options, such as social media platforms, messaging apps, or saving the video to your device.
With animated captions in Clips App, you can add a visually captivating element to your videos and grab the attention of your viewers. Experiment with different animations and styles to create dynamic and engaging captions that enhance your storytelling.
How to Adjust Video Settings in Clips App
To get the most out of your videos in Clips App, it’s important to understand how to adjust video settings. Whether you want to change the aspect ratio, resolution, or frame rate, here’s a step-by-step guide on how to adjust video settings in Clips App:
- Launch the Clips App: Open the Clips App on your iPhone or iPad by tapping on its icon located on your device’s home screen.
- Create a New Project: Tap on the Create button at the bottom center of the screen to start a new video project. This will take you to the capturing mode, where you can begin recording your video clips.
- Capture Video Clips: Press and hold the red record button to capture video clips for your project. You can also tap the white shutter button to capture photos as needed.
- Access Video Settings: After capturing a video clip, tap on the camera settings button located at the top right corner of the screen. It looks like three horizontal lines.
- Adjust Aspect Ratio: Choose the desired aspect ratio for your video by selecting from the available options. You can opt for square (1:1), widescreen (16:9), or other aspect ratios depending on your preference and platform requirements.
- Change Resolution: Tap on the Resolution option to choose the resolution at which your video will be recorded. Select from the available resolution options that best suit your needs, such as 720p, 1080p, or 4K.
- Modify Frame Rate: The frame rate determines how many frames per second your video captures. Tap on the Frame Rate option to select the desired frame rate for your video, such as 24fps, 30fps, or 60fps.
- Adjust Exposure: To control the brightness of your video, you can manually adjust the exposure. Tap on the Exposure button and drag the exposure slider left or right to increase or decrease the brightness level.
- Enable or Disable Flash: Depending on your video’s lighting conditions, you might want to use the flash. Tap on the flash button to enable or disable the flash function for your video captures.
- Set Live Photos: Clips App supports Live Photos, which capture a few seconds of video before and after the photo is taken. Tap on the Live Photos button to enable or disable this feature as desired.
- Save and Apply Settings: Once you have adjusted the video settings to your liking, tap the Apply button to save the settings and apply them to your future video captures.
- Continue Recording: Go back to the capturing mode by tapping the camera exit button located at the top right corner of the screen. You can now continue recording video clips with your new video settings in place.
- Review and Edit: After capturing your video clips with the adjusted settings, you can review and edit them as needed using the various editing tools available in the Clips App.
- Save and Share: Once you are satisfied with your edited video, tap the Share button at the bottom right corner of the screen. Choose your preferred sharing options, such as social media platforms, messaging apps, or saving the video to your device.
By adjusting the video settings in Clips App, you can capture your videos in the desired aspect ratio, resolution, and frame rate to achieve the look and feel you envision. Remember to choose settings that are compatible with your device’s capabilities and the platform on which you plan to share your videos.
How to Save and Share Your Clips App Video
Once you have finished creating and editing your video in Clips App, it’s time to save and share it with others. Here’s a step-by-step guide on how to save and share your Clips App video:
- Finalize Your Video: Before saving and sharing your video, review it to ensure that it meets your desired vision and all necessary edits have been made.
- Tap the Share Button: Located at the bottom-right corner of the screen, tap the Share button to bring up the sharing options for your video.
- Select Sharing Method: Choose the preferred method for sharing your video. Clips App offers a variety of options, including sharing directly to social media platforms, sending via Messages or email, and saving the video to your device’s camera roll.
- Customize Sharing Options: Depending on the sharing method you choose, you may have the option to customize the sharing settings. This can include adding captions or descriptions, selecting specific recipients, or choosing the quality or size of the shared video.
- Share to Social Media: If you opt to share your video directly to social media platforms like Instagram, Facebook, or YouTube, tap on the specific platform’s icon and follow the prompts to log in and authorize sharing.
- Send Via Messages or Email: If you prefer to send your video through Messages or email, tap on the respective share option and enter the recipient’s contact information. You can add a message or subject line to accompany the video if desired.
- Save to Camera Roll: If you want to save the video to your device’s camera roll, select the Save Video option. This saves a copy of the video directly to your device for future viewing or sharing.
- Alternate Saving Options: Depending on your device’s capabilities, you may have alternative saving options available, such as saving to iCloud or other cloud storage services. Explore the available options to choose the best method for storing your video.
- Confirm and Share: Once you have selected your desired sharing method or saving option, confirm your selection. The video will be saved, shared, or sent according to your chosen settings. Allow the process to complete before proceeding.
- Monitor Progress: While saving or sharing your video, you might see a progress indicator as the app processes the video and finalizes the sharing process. Be patient and allow the process to complete.
- Successful Sharing: Once your video has been saved or shared successfully, you will receive a confirmation or notification. You can now view, rewatch, or access the shared video on the respective platform or device.
- Celebrate and Enjoy: Congratulations! Your Clips App video is now saved and shared. Sit back, relax, and enjoy the reactions and feedback from those who watch your masterpiece.
By following these steps, you can easily save and share your Clips App video with friends, family, or your desired audience. Whether you choose to share it on social media, send it directly, or save it for future viewing, sharing your video allows you to showcase your creativity and connect with others.