
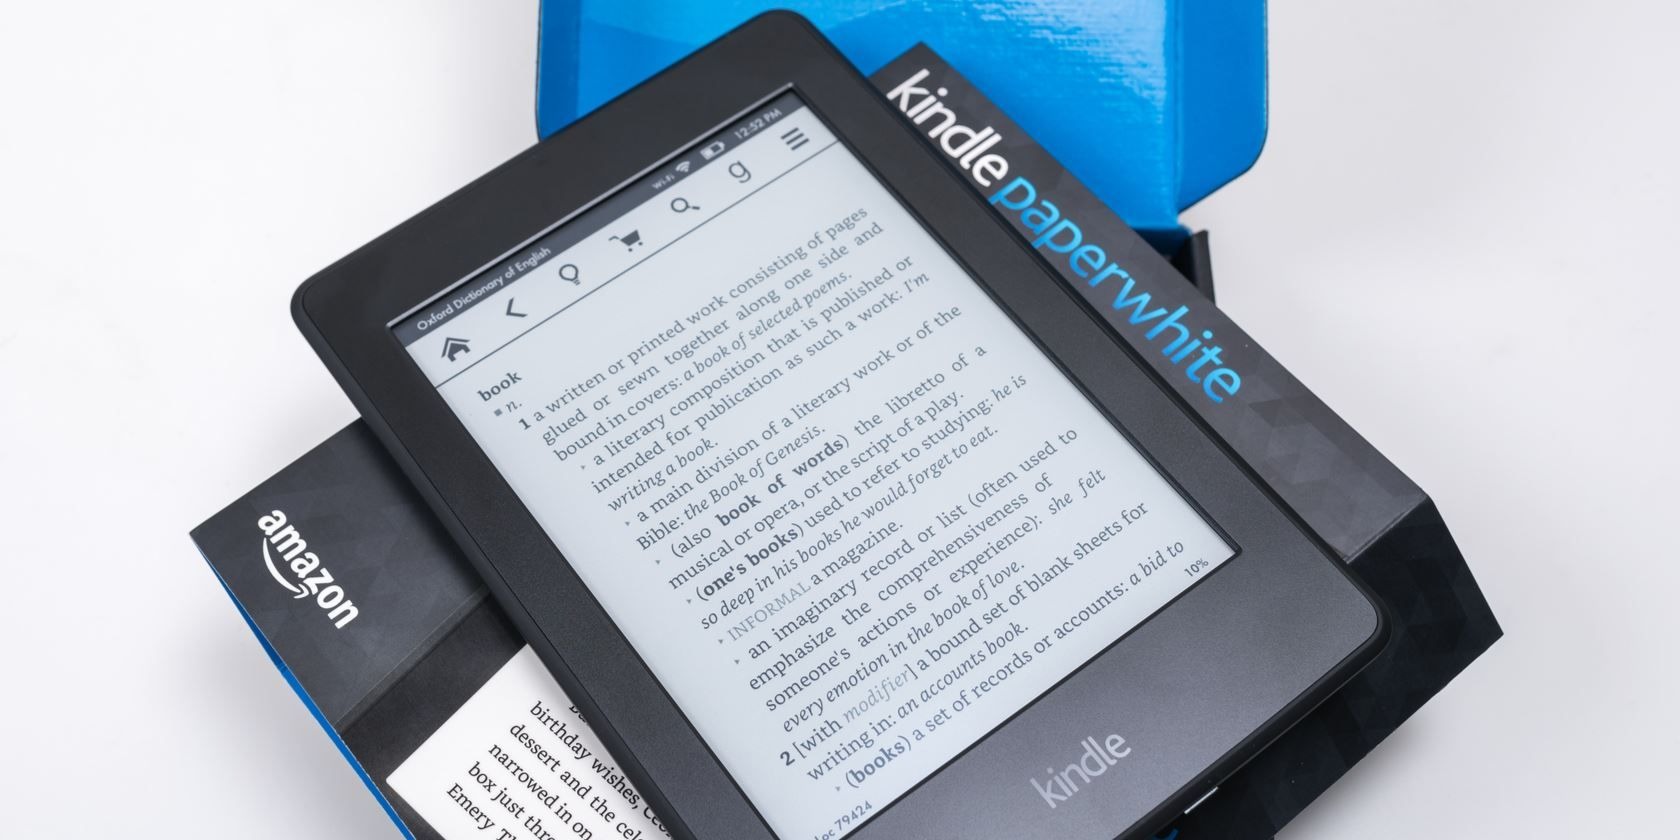
Charging the Kindle Paperwhite
One of the first steps in using your Kindle Paperwhite is ensuring that it is fully charged. The device comes with a USB charging cable and an adapter that you can use to connect it to a power source. To charge your Kindle Paperwhite:
- Connect one end of the USB cable to the charging port on the bottom of your Kindle Paperwhite, and the other end to the provided adapter.
- Plug the adapter into a wall socket or connect it to a USB port on your computer.
- The Kindle Paperwhite’s battery indicator will show a lightning bolt icon, indicating that it is charging. The battery icon will gradually fill up as the device charges.
- It is recommended to charge your Kindle Paperwhite for at least four hours to ensure a full battery.
- Once the device is fully charged, the battery indicator will show a complete icon.
Charging your Kindle Paperwhite at regular intervals will ensure that you have sufficient battery power for uninterrupted reading. Depending on your usage, a fully charged battery can last weeks.
If you need to check the battery level while your Kindle Paperwhite is on, simply swipe down from the top of the screen to access the toolbar. The battery percentage will be displayed on the top right corner of the screen.
Remember to use the provided USB cable and adapter when charging your Kindle Paperwhite, as using third-party chargers may not provide optimal charging conditions and could potentially damage the device.
Now that you’ve learned how to charge your Kindle Paperwhite, you’re ready to turn it on and set it up for a personalized reading experience.
Turning on and Setting Up the Device
After charging your Kindle Paperwhite, it’s time to turn it on and set it up for your reading pleasure. Follow these simple steps to get started:
- Locate the power button on the bottom of your Kindle Paperwhite.
- Press and hold the power button for a few seconds until the screen displays the Kindle logo.
- Release the power button and wait for the device to boot up.
- Once the device has turned on, you will be guided through a series of setup screens.
- Select your preferred language using the touch screen. Simply tap on the language you want to use.
- Next, choose your Wi-Fi network from the available options. If you don’t have a Wi-Fi network at the moment, you can skip this step and connect later.
- Enter your Wi-Fi password if prompted and tap “Connect” to establish a connection.
- The Kindle Paperwhite will now connect to the Wi-Fi network and download any available software updates.
- Once the software updates are completed, you will be asked to sign in to your Amazon account or create a new one. Follow the prompts to access your personal library and take advantage of Kindle features.
- If you already have an Amazon account, enter your email address and password, and tap “Sign In.” If you’re new to Amazon, tap “Create a new Amazon account” and follow the instructions to set up your account.
- Once you’ve signed in, your Kindle Paperwhite will sync with your Amazon account, and you’ll have access to your purchased books and other content.
That’s it! Your Kindle Paperwhite is now set up and ready to use. Take a moment to explore the device’s features and customize it to your preferences.
Throughout the setup process, you can tap the “Back” button at any time to go back to a previous screen or make changes to your selections.
Now that your Kindle Paperwhite is properly set up, you can navigate the home screen and start downloading and reading your favorite books.
Navigating the Home Screen
Once your Kindle Paperwhite is turned on and set up, you will be greeted with the home screen. This is where you can access your library, browse the Kindle Store, and manage various settings. Here’s how to navigate the home screen:
- At the top of the screen, you will see the Kindle logo, the battery indicator, and the Wi-Fi signal strength.
- Beneath that, you will find different sections, such as “All,” “Books,” “Collections,” and “Recent.” These sections allow you to filter and organize your content based on different criteria.
- To browse through your library, simply swipe up or down using your finger. As you scroll, the titles of your books will be displayed in a list format.
- If you have a large library, you can use the search bar at the top of the screen to find specific titles, authors, or keywords. Just tap on the search bar and enter your search terms.
- By default, the home screen displays book covers in a grid format. To switch to a list view, tap on the three-dot menu icon at the top right corner of the screen and select “List View” from the drop-down menu.
- To open a book and start reading, simply tap on its cover or title in the home screen. The book will open at the last page you were reading.
- Swiping left or right on the screen will take you to the previous or next page in a book you are currently reading.
- To access additional options and features, tap on the top or bottom edges of the screen while reading a book. This will reveal the toolbar, where you can adjust settings, add bookmarks, highlight text, and more.
- At the bottom of the home screen, you will find the navigation menu. This menu allows you to access different areas of your Kindle Paperwhite, such as the library, store, settings, and more. Tap on the menu icon to open it, and then select the desired option.
- Lastly, the home screen also provides recommendations based on your reading habits. These recommendations can be found towards the bottom of the screen, and they offer suggestions for books you might enjoy.
By familiarizing yourself with the layout and options of the home screen, you’ll be able to easily navigate through your library, find your favorite books, and explore new titles on your Kindle Paperwhite.
Adjusting the Brightness and Font Size
Your Kindle Paperwhite allows you to customize the reading experience by adjusting the brightness and font size. This ensures optimal readability and comfort for your eyes. Here’s how to adjust these settings:
Adjusting the Brightness:
- While reading a book, tap anywhere on the screen to bring up the toolbar.
- Tap on the “Aa” icon located at the top-right corner of the screen to open the display settings menu.
- To increase or decrease the brightness, tap on the sun icon and drag the slider left or right. You can see the changes in real-time on the screen.
- Find the right brightness level for your reading environment. For low-light conditions, you might want to reduce the brightness, while in well-lit areas, increasing the brightness can improve visibility.
- Once you’re satisfied with the brightness level, tap anywhere outside the display settings menu to close it and continue reading.
Adjusting the Font Size:
- While reading a book, tap anywhere on the screen to bring up the toolbar.
- Tap on the “Aa” icon located at the top-right corner of the screen to open the display settings menu.
- To change the font size, tap on the letter “A” icons: the smaller “A” decreases the font size, while the larger “A” increases it.
- As you adjust the font size, the text in the book will change accordingly, allowing you to find the most comfortable reading size.
- If you prefer a specific font style, you can also select different font options from the display settings menu.
- Once you’ve set your preferred font size and style, tap anywhere outside the display settings menu to close it and resume reading.
Experiment with different brightness levels and font sizes to find the settings that suit your personal preferences. Don’t hesitate to make adjustments as needed to ensure a comfortable reading experience on your Kindle Paperwhite.
Connecting to Wi-Fi
To fully unlock the features of your Kindle Paperwhite, you’ll need to connect it to a Wi-Fi network. This will allow you to download books, sync your progress across devices, and browse the web. Here’s how to connect your Kindle Paperwhite to Wi-Fi:
- From the home screen, swipe down from the top of the screen to access the toolbar.
- Tap on the “Settings” icon, which looks like a gear.
- In the settings menu, tap on “Wi-Fi” to open the Wi-Fi settings.
- Make sure that Wi-Fi is turned on by sliding the switch to the right. If the switch is already green, it’s already enabled.
- Your Kindle Paperwhite will then scan for available Wi-Fi networks. Once the list populates, select your desired network from the options displayed.
- If the network is secured, you will be prompted to enter the password. Use the on-screen keyboard to type in the password and tap “Connect” to establish the connection.
- If the connection is successful, your Kindle Paperwhite will show a confirmation message and the Wi-Fi symbol will appear in the top-right corner of the screen.
If you don’t have access to a Wi-Fi network at the moment, you can still read books that are already downloaded on your Kindle Paperwhite. However, you won’t be able to access the Kindle Store, download new books, or sync your progress across devices until you connect to Wi-Fi.
Remember, when connecting to public Wi-Fi networks, exercise caution and only connect to secure and trusted networks to protect your personal information.
Once your Kindle Paperwhite is connected to Wi-Fi, you can start exploring the Kindle Store, browsing for new books, and enjoying the various online features available on your device.
Browsing and Purchasing Books from the Kindle Store
With your Kindle Paperwhite connected to Wi-Fi, you can easily browse and purchase a vast selection of books from the Kindle Store. Here’s how to find and buy books on your device:
- From the home screen, tap on the “Store” icon located at the top right corner. This will open the Kindle Store.
- Once in the Kindle Store, you can explore various sections like “Best Sellers,” “Recommended for You,” or browse by categories such as fiction, non-fiction, or genre-specific lists.
- Tap on a book cover to view its details, including the title, author, description, customer reviews, and sample chapters.
- If you decide to purchase the book, tap on the “Buy Now” button. If the book is available for borrowing via Kindle Unlimited or Prime Reading, you may see the option to “Read for Free” or “Borrow.” You can choose the desired option.
- If prompted, enter your Amazon account credentials to confirm the purchase. If you have enabled one-click purchasing, you can skip this step for future purchases.
- Once the purchase is complete, the book will be automatically downloaded to your Kindle Paperwhite, and you can start reading it immediately.
Browsing the Kindle Store provides a seamless and user-friendly experience. You can discover new authors, explore different genres, and find books that align with your reading preferences.
If you want to search for a specific title, author, or keyword, you can use the search bar at the top of the Kindle Store. Tap on the bar, enter your search terms, and the results will display books that match your criteria.
It’s worth noting that some books may offer additional features such as X-Ray, which provides insights into characters, places, and terms throughout the book. Take advantage of these features to enhance your reading experience.
With the Kindle Store at your fingertips, you can easily build an extensive digital library of books and indulge in a wide range of literary adventures.
Managing Your Library and Organizing Books
As your digital book collection grows on your Kindle Paperwhite, it’s essential to know how to manage and organize your library for easy access and navigation. Here are some tips on managing your library:
- From the home screen, you can view all your books in the “All” section. This section displays your entire library in alphabetical order by title.
- If you prefer to view your books by a specific category or genre, you can create collections. Collections allow you to group related books together. To create a collection, tap on “My Library” on the home screen, then tap on the “+” icon at the top right corner. Give your collection a name and select the books you want to include.
- To add books to an existing collection, simply tap and hold on a book cover, then select “Add to Collection” and choose the appropriate collection.
- To delete a book from your device, tap and hold on the book cover, then select “Remove from Device.” The book will still be available in your Amazon account and can be re-downloaded in the future if needed.
- If you want to delete a book permanently from your library, you can do so by accessing your Amazon account on a web browser and managing your content and devices.
- You can also customize the view of your home screen by tapping on the three-dot menu icon at the top right corner and selecting “Settings.” From there, you can choose to display or hide certain sections like “Recently Read” or “Books,” depending on your preferences.
- If you have a large library, you can use the search bar at the top of the home screen to find specific titles, authors, or keywords.
By organizing your books into collections and customizing your home screen, you can easily find and access the books you want to read. Take advantage of these features to create a personalized and organized digital library.
Remember that any changes made to your library or collections on your Kindle Paperwhite will be synced with your Amazon account. This means that if you access your library on another Kindle device or through the Kindle app, you will see the same organization and collections.
Enjoy managing your library and effortlessly finding your beloved books on your Kindle Paperwhite!
Reading Books on the Kindle Paperwhite
One of the primary purposes of the Kindle Paperwhite is to provide an exceptional reading experience. With its high-resolution display and adjustable settings, you can immerse yourself in the world of your favorite books. Here’s how to make the most of your reading experience on the Kindle Paperwhite:
- To open a book, simply tap on its cover or title from the home screen. The book will open at the last page you were reading.
- Once inside a book, you can swipe left or right on the screen to turn pages. Alternatively, you can tap on either side of the screen to go to the previous or next page.
- To access additional reading options, tap on the top or bottom edges of the screen while reading. This will reveal the toolbar, where you can adjust settings, add bookmarks, highlight text, and more.
- To change the font size or adjust the text display, tap on the “Aa” icon located at the top right corner of the screen. This will allow you to modify the font size, font type, line spacing, and margins.
- If you come across a word you’re unfamiliar with, simply tap and hold on the word. A definition will pop up, providing you with the meaning of the word.
- Use the table of contents to navigate through the book. Tap on the center of the screen to reveal the toolbar, then tap on the “Go To” icon. From there, you can jump to different chapters or sections of the book.
- To adjust the reading progress and check how much time is left in a chapter or book, tap on the bottom left corner of the screen. This will show you the reading progress and estimated time left.
- If you want to take a break from reading, the Kindle Paperwhite will automatically save your place. When you return to the book, it will open to the page where you left off.
- While reading, you can also customize the page appearance to your liking. For example, you can change the background color to suit your reading preferences or enable the built-in dark mode for a more comfortable reading experience in low-light conditions.
The Kindle Paperwhite offers a range of features and settings that can be adjusted to provide a personalized and enjoyable reading experience. Take the time to explore these options, experiment with different settings, and find what works best for you.
With its lightweight design and E Ink technology, the Kindle Paperwhite is designed to provide hours of comfortable reading pleasure, allowing you to read for extended durations without straining your eyes.
Get lost in your favorite books and explore new worlds with the Kindle Paperwhite’s exceptional reading experience.
Using the Dictionary and Other Reading Features
The Kindle Paperwhite offers various reading features that enhance your reading experience and help you delve deeper into the content. Here’s a look at some key features and how to use them:
- Dictionary: If you come across a word you don’t know while reading a book, simply tap and hold on the word. The Kindle Paperwhite’s built-in dictionary will provide you with the definition of the word, helping you expand your vocabulary and understanding.
- X-Ray: Many books on the Kindle Paperwhite come with the X-Ray feature, which provides insights into characters, terms, and places in the book. To access X-Ray, tap on the top of the screen to display the toolbar, then tap on the “X-Ray” icon. From there, you can explore the X-Ray information and gain a deeper understanding of the book.
- Progress Tracking: The Kindle Paperwhite allows you to track your reading progress. When reading a book, tap on the bottom left corner of the screen to view the reading progress bar. This shows you how far you are into the book and provides an estimate of the time remaining in the chapter or book.
- Bookmarks: To mark a specific page for future reference, tap on the top of the screen to display the toolbar and tap on the “Bookmark” icon. This will add a bookmark to the page, allowing you to easily revisit it later.
- Highlighting and Notes: The Kindle Paperwhite allows you to highlight passages, sentences, or words that you find important or want to remember. Simply tap and drag your finger across the text to select the desired portion, then choose “Highlight” from the options that appear. You can also add notes to your highlights for further annotation and reflection.
- Syncing: If you have multiple Kindle devices or use the Kindle app on other devices, the Kindle Paperwhite syncs your reading progress across all platforms. This means you can seamlessly switch between devices and continue reading without losing your place.
These reading features on the Kindle Paperwhite provide valuable tools for better understanding and engagement with the content you are reading. Take advantage of these features to enhance your reading experience, expand your knowledge, and make the most out of your digital library.
Experiment with different features, such as the dictionary and highlighting, to personalize your reading experience and make reading on the Kindle Paperwhite an interactive and enriching journey.
Highlighting and Taking Notes
One of the great features of the Kindle Paperwhite is the ability to highlight passages and take notes while reading. This allows you to mark important or memorable sections and jot down your own thoughts and reflections. Here’s how to make the most of the highlighting and note-taking features:
- Highlighting: To highlight a specific passage or word, simply tap and drag your finger across the text. This will highlight the selected portion in a color of your choice. You can easily change the highlight color by tapping on the highlighted text and selecting a different color from the available options.
- Managing Highlights: All your highlighted passages are automatically saved and accessible for future reference. To view and manage your highlights, tap on the top of the screen to display the toolbar, then tap on the “Notebook” icon. From there, you can see a list of your highlights organized by book. Tap on a highlight to view it in its context within the book. You can also filter highlights by color or go directly to specific highlights and notes.
- Taking Notes: In addition to highlighting, you can add your own notes to passages in the book. Simply highlight the desired text, and instead of selecting a color, tap on the “Add Note” option. This will open a text box where you can input your own thoughts, comments, or reminders related to the selected passage. Your notes will be saved alongside the highlighted text.
- Syncing and Sharing: The Kindle Paperwhite automatically syncs your highlights and notes across devices, allowing you to access them on other Kindle devices or through the Kindle app. This makes it easy to review your highlights and notes on various platforms. You can also share your highlights and notes with others by exporting them as a file or sharing directly from your Kindle device.
- Organizing and Exporting: If you have a large collection of highlights and notes, you can organize them into collections within the “Notebook” section. This allows you to categorize your highlights and notes based on different themes or subjects. You can also export your highlights and notes as a file, which can be useful for reference purposes or for further analysis and study.
The highlighting and note-taking features on the Kindle Paperwhite give you the ability to engage with the text, make personal connections, and revisit important passages at a later time. Whether you’re reading for leisure, study, or research, taking advantage of these features can greatly enhance your reading experience and help you get the most out of your books.
So go ahead, highlight those meaningful passages, jot down your thoughts, and create a personal archive of insights with the Kindle Paperwhite’s highlighting and note-taking capabilities.
Syncing Your Kindle with Other Devices
One of the key advantages of using a Kindle Paperwhite is the ability to sync your reading progress and content across multiple devices. This ensures a seamless reading experience and allows you to pick up where you left off, regardless of which device you’re using. Here’s how to sync your Kindle with other devices:
- Sign in to your Amazon account: To enable syncing, make sure you are signed in to the same Amazon account on all your devices. This includes your Kindle Paperwhite, Kindle app on smartphones or tablets, and other Kindle devices.
- Connect to Wi-Fi: Ensure that all your devices are connected to Wi-Fi. Syncing requires an internet connection to transfer data between devices.
- Open the Kindle app: If you’re using the Kindle app on a different device, launch the app and sign in with your Amazon account credentials.
- Access your library: Once you’re signed in, your Kindle app or device will automatically sync with your Kindle Paperwhite. This will update your library and display the same books and content across devices.
- Sync your reading progress: When you switch devices, your reading progress, bookmarks, highlights, and notes will be synced automatically. For example, if you read a few chapters on your Kindle Paperwhite and then switch to your Kindle app, your app will open to the same page.
- Manually sync: If you want to force a manual sync, you can do so by selecting the “Sync” or “Refresh” option within the settings or menu of your Kindle app or device. This will ensure the latest changes and updates are reflected across all devices.
- Sync across Kindle devices: If you have multiple Kindle devices, such as a Kindle Paperwhite and a Kindle Oasis, you can sync your content between them. This allows you to access the same library and reading progress on both devices. Simply sign in to the same Amazon account and connect both devices to Wi-Fi.
Syncing your Kindle Paperwhite with other devices gives you the freedom of choice in terms of where and how you read. Whether you’re at home, on the go, or switching between devices, your reading experience remains seamless and connected.
Now you can enjoy uninterrupted reading and easily switch between devices, knowing that your content and progress will always be in sync.
Managing Battery Life
Battery life is an important consideration when using any electronic device, including the Kindle Paperwhite. While the device has an impressive battery life, it’s still beneficial to manage it efficiently to ensure that it lasts as long as possible. Here are some tips to help you manage the battery life of your Kindle Paperwhite:
- Adjust the screen brightness: The screen brightness can consume a significant amount of battery power. Lowering the brightness level, especially in well-lit environments, can help conserve battery life. To adjust the brightness, swipe down from the top of the screen, tap on the “Settings” icon, and then select “Display.” From there, you can adjust the brightness slider to your desired level.
- Disable wireless connections: Wi-Fi or 3G connections can drain battery life, especially if the device is constantly searching for networks. If you’re not actively using Wi-Fi to download books or sync your Kindle, turning it off can help conserve battery power. To disable Wi-Fi, swipe down from the top of the screen, tap on the “Settings” icon, select “Wireless,” and toggle the Wi-Fi switch to the off position.
- Minimize usage of battery-intensive features: Certain features like X-Ray, web browsing, and audio playback can consume more power than normal reading. If you’re experiencing battery drain, consider reducing the usage of these features or using them sparingly.
- Keep your Kindle Paperwhite updated: Periodically check for software updates for your Kindle Paperwhite. These updates often include improvements and optimizations that can enhance battery performance. To check for updates, swipe down from the top of the screen, tap on the “Settings” icon, select “Device Options,” and then choose “Software Updates.”
- Put your Kindle Paperwhite to sleep: When you’re not actively using your Kindle Paperwhite, putting it to sleep can help preserve battery life. Simply press the power button briefly to put the device to sleep. This will turn off the screen but keep the device in a low-power state, allowing you to resume reading quickly when you wake it up.
- Charge your Kindle Paperwhite strategically: Instead of charging your device in short intervals, it’s recommended to charge it for extended periods whenever possible. Fully charging the battery and then using it until it’s nearly depleted before charging again can help maintain the overall battery health and performance.
With these battery management tips in mind, you can enjoy long-lasting reading sessions on your Kindle Paperwhite without worrying about running out of power. Conserving and managing battery life ensures that your device is always ready for your next great reading adventure.
Customizing Settings and Preferences
The Kindle Paperwhite offers a wide range of customizable settings and preferences, allowing you to personalize your reading experience to suit your preferences. Here are some key settings and preferences that you can customize:
- Font Size and Style: Adjusting the font size and style can greatly enhance readability. To customize these settings, tap on the top of the screen to display the toolbar, then tap on the “Aa” icon. From there, you can select your desired font size, font type, line spacing, and margins.
- Screen Brightness: The Kindle Paperwhite’s screen brightness can be adjusted to match your reading environment. Swipe down from the top of the screen, tap on the “Settings” icon, and select “Display.” From there, you can adjust the brightness slider to your desired level.
- Page Orientation: You can choose to read in portrait or landscape mode. To switch between orientations, simply rotate your Kindle Paperwhite, and the screen will adjust automatically.
- Reading Progress and Time: Customize the display of your reading progress, including the ability to view time left in a chapter or book. Tap on the bottom left corner of the screen while reading to access reading progress options.
- Language and Dictionary: Change the default language or add additional dictionaries to enhance your reading experience. Tap on the top of the screen to display the toolbar, then tap on the “Aa” icon. From there, you can select your preferred language and dictionary options.
- Parental Controls: If you’re sharing your Kindle Paperwhite with others, you can set up parental controls to restrict access to certain features or content. Access the settings menu, tap on “Device Options,” and select “Parental Controls” for customization options.
- Display and Screen Saver: Customize the display and screen saver settings to your liking. You can choose from various screen saver images or create your own using personal photos. Access the settings menu, tap on “Device Options,” and select “Screen Saver” to customize these settings.
- Wireless Networks: Manage and connect to available Wi-Fi networks. Swipe down from the top of the screen, tap on the “Settings” icon, and select “Wireless” to customize Wi-Fi settings.
- Time Zone and Language Settings: Personalize your device’s time zone and language preferences. Access the settings menu, tap on “Device Options,” and select “Language and Dictionaries” or “Time and Date” to make any necessary adjustments.
By customizing these settings and preferences on your Kindle Paperwhite, you can create a reading experience that aligns with your preferences and needs. Take some time to explore these options and tailor your device to optimize your enjoyment of books and other content.
Remember, you can always revisit these settings and make adjustments as per your evolving preferences to create a truly tailored reading experience on your Kindle Paperwhite.
Troubleshooting Common Issues
While the Kindle Paperwhite is a reliable device, you may encounter occasional issues that can be resolved with some troubleshooting steps. Here are some common issues that users may face and how to troubleshoot them:
- Device Freezing or Not Responding: If your Kindle Paperwhite becomes unresponsive or freezes, try performing a restart. Simply press and hold the power button for 20 seconds until the device restarts. This can help resolve temporary software glitches.
- Battery Draining Quickly: If you notice that your battery is draining faster than usual, check if any power-intensive features are enabled, such as an active Wi-Fi connection or excessive brightness. Adjust your settings accordingly and disable features that you’re not actively using to conserve battery life.
- Wi-Fi Connectivity Issues: If you’re having trouble connecting your Kindle Paperwhite to a Wi-Fi network, ensure that you have entered the correct password and that the network is functioning properly. Try restarting your device and router, and make sure you’re in range of the Wi-Fi network you want to connect to. If the problem persists, try forgetting the network and reconnecting from scratch.
- Screen Glitches or Display Issues: If you notice any screen glitches or display abnormalities, such as flickering or distorted text, try adjusting the brightness level or restarting your device. If the issue persists, contact Kindle support for further assistance.
- Book Not Downloading or Opening: If you’re unable to download a book or encountering issues opening a specific book, ensure that you have a stable internet connection. Try restarting your device and initiating the download again. If the problem persists, remove the book from your device and re-download it from your library.
- Slow Performance or Lagging: If your Kindle Paperwhite is experiencing slow performance or lagging, try clearing the device cache. Go to the settings menu, tap on “Device Options,” and select “Advanced Options.” From there, choose “Storage Management” and then “Clear Cache.” This can help improve device performance.
- Book Formatting Issues: If a book appears with formatting issues or if the text is difficult to read, try adjusting the font size and style. You can also explore the formatting options available in the reader settings to find the most suitable view for your reading preferences.
- Unresponsive Touchscreen: If the touchscreen on your Kindle Paperwhite is not responding, make sure your hands and screen are clean and free from any moisture. You can also try wiping the screen gently with a microfiber cloth. If the problem persists, perform a restart or contact Kindle support for assistance.
These troubleshooting steps should help resolve many common issues you may encounter while using your Kindle Paperwhite. If you’re unable to resolve an issue on your own, reach out to Kindle support for further assistance.
Remember to keep your device updated with the latest software version and regularly charge your Kindle Paperwhite to ensure optimal performance and a seamless reading experience.
Updating the Kindle Software
Updating the software on your Kindle Paperwhite is important to ensure that you have access to the latest features, enhancements, and bug fixes. Amazon periodically releases software updates for their Kindle devices, including the Kindle Paperwhite. Here’s how you can update the software on your Kindle Paperwhite:
- Connect to Wi-Fi: Before updating the software, make sure your Kindle Paperwhite is connected to a Wi-Fi network. This will ensure a stable internet connection for the update download.
- Check for Available Updates: From the home screen, swipe down from the top of the screen to access the toolbar. Tap on the “Settings” icon, which looks like a gear. In the settings menu, tap on “Device Options” and then select “Device Info.”
- Check for Updates: In the Device Info page, you will find the “Check for Updates” option. Tap on it to search for available software updates for your Kindle Paperwhite.
- Download and Install the Update: If an update is available, your Kindle Paperwhite will prompt you to download it. Tap on the “Download” button to begin the update process. Ensure that your device is connected to a power source or has sufficient battery level to complete the update.
- Installation and Restart: Once the update is downloaded, your Kindle Paperwhite will automatically install it. It may take a few minutes for the installation to complete. After the installation, your device will restart to apply the update.
- Verify the Update: After the restart, you can confirm if the software update was successful. Go back to the settings menu and navigate to “Device Options” > “Device Info.” Check the version number displayed to confirm that it matches the latest software version specified by Amazon.
It’s recommended to keep your Kindle Paperwhite up to date by regularly checking for software updates. These updates not only deliver new features and improvements but also address any potential software issues and enhance the overall performance of your device.
By staying up to date with the latest software, you can ensure a smooth and efficient reading experience on your Kindle Paperwhite.