
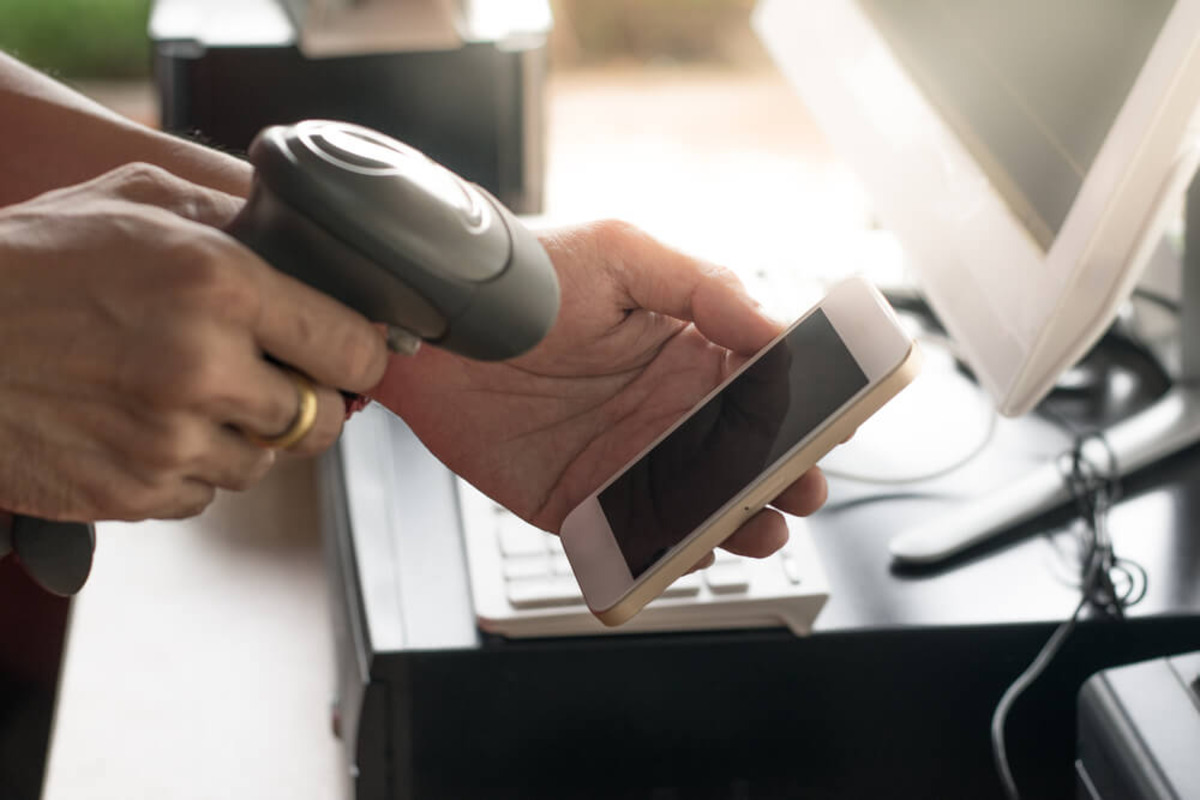
What is a Handheld Scanner?
A handheld scanner is a portable electronic device that allows you to scan and digitize documents, photos, and other paper-based materials. Unlike traditional flatbed scanners, which require the document to be placed face-down on a glass pane, handheld scanners are designed to be held and moved over the surface of the document. They are compact, lightweight, and incredibly convenient, making them a popular choice for professionals, students, and individuals who are always on the go.
Handheld scanners utilize optical sensors and advanced image processing technology to capture a high-resolution digital image of the document being scanned. Some models even have the ability to scan in color, while others specialize in black and white or grayscale scanning. The scanned image can then be saved in various file formats, such as JPEG or PDF, and transferred to a computer or mobile device for further editing, sharing, or archiving.
These scanners often come with a built-in display screen that allows you to preview the scanned image in real time, ensuring that you have captured the entire document and that it is in focus. Additionally, many handheld scanners offer features like automatic document detection and correction, image enhancement, and the ability to scan receipts, business cards, and even 3D objects.
Handheld scanners are not only convenient but also offer a range of benefits. They allow for quick and efficient scanning of documents wherever you are, eliminating the need for bulky scanning equipment and making it easy to digitize important papers on the spot. Whether you need to scan documents for work, digitize old family photos, or keep track of receipts for tax purposes, a handheld scanner provides a portable solution that saves time, space, and effort.
In the next sections, we will explore the different types of handheld scanners, their benefits, and how to select the right one for your needs. We will also delve into the setup, scanning process, maintenance, troubleshooting, and best practices for using a handheld scanner effectively.
Types of Handheld Scanners
When it comes to handheld scanners, there are a few different types to choose from, each catering to specific needs and preferences. Let’s take a closer look at the most common types:
- Single Sheet Scanners: These scanners are designed to scan individual sheets of paper. They are compact and lightweight, making them ideal for scanning documents on the go. Single sheet scanners can quickly digitize contracts, receipts, notes, and other important papers without the need for a computer or additional equipment.
- Pen Scanners: As the name suggests, pen scanners are shaped like a pen and can be used to scan text lines or small portions of a document. They are great for capturing quotes, specific paragraphs, or even a word or two from a book or magazine. Pen scanners are popular among researchers, students, and anyone who needs to extract information from printed materials quickly.
- Document Scanners: Document scanners are designed to handle larger volumes of paper. They often come with a feeder tray or automatic document feeder (ADF) that allows you to scan multiple pages in one go. These scanners are commonly used in offices, libraries, and other environments where there is a need to process a large number of documents efficiently.
- 3D Scanners: Unlike other handheld scanners, 3D scanners capture the spatial information of an object to create a three-dimensional model. These scanners are used in a variety of fields, including architecture, product design, and even the entertainment industry. They can replicate objects digitally and are useful for capturing intricate details and dimensions.
It’s important to consider your specific scanning needs when choosing a handheld scanner. If you primarily need to scan documents on the go, a single sheet scanner or pen scanner may be the right choice. However, if you frequently deal with a large volume of papers, a document scanner with an automatic feeder will save you time and effort.
Additionally, keep in mind the resolution and scanning capabilities of the scanner. Some models offer higher resolutions for crisp and detailed scans, while others specialize in scanning different types of materials, such as business cards or receipts. Consider the file formats you need for saving the scanned documents, as well as compatibility with your computer or mobile device.
In the following sections, we will explore the benefits of using a handheld scanner, tips on choosing the right one, and how to set it up for optimal performance.
Benefits of Using a Handheld Scanner
Using a handheld scanner offers numerous advantages that make it a valuable tool for individuals and professionals alike. Let’s explore some of the key benefits:
- Portability: One of the primary advantages of a handheld scanner is its portability. These devices are compact and lightweight, allowing you to easily carry them with you wherever you go. You can scan documents on the spot, eliminating the need to carry physical copies or rely on access to a traditional scanner. Whether you’re in the office, attending a meeting, or traveling, a handheld scanner ensures that you can capture important documents or images with ease.
- Convenience: Handheld scanners eliminate the need for bulky scanning equipment and intricate setups. With a simple swipe or pass over the document, you can quickly capture high-quality digital images. This convenience not only saves time but also streamlines your workflow. You can digitize documents on the fly, enabling you to organize, share, or store them digitally without any hassle.
- Efficiency: Handheld scanners offer efficiency by allowing you to scan documents without the need for a computer or additional equipment. Thanks to their built-in memory or SD card slots, you can save scanned images directly to the device and transfer them to your computer or mobile device later. This flexibility gives you the freedom to scan documents even when you’re away from your workspace.
- Versatility: Handheld scanners come in various types to cater to different scanning needs. From single sheet scanners for quick document scans to pen scanners for capturing specific text, there is a wide range of options available. Some handheld scanners can even scan business cards, receipts, or 3D objects. This versatility ensures that you can scan a diverse range of materials, making it a versatile tool for both personal and professional use.
- Space-saving: Unlike traditional scanners that take up considerable desk space, handheld scanners have a small footprint. They can easily fit into a bag or drawer when not in use, freeing up valuable space in your workspace. Whether you have limited desk space or prefer a clutter-free environment, a handheld scanner allows you to maintain a clean and organized setup.
Overall, using a handheld scanner provides the flexibility, convenience, and efficiency that traditional scanners may lack. Whether you need to digitize documents on the go, streamline your paperwork, or simply reduce clutter, a handheld scanner is a valuable tool that offers a range of benefits.
Next, we will discuss how to choose the right handheld scanner that suits your specific scanning needs.
How to Choose the Right Handheld Scanner for You
With so many handheld scanners available on the market, it’s important to consider your specific needs and features that will best suit your scanning requirements. Here are some factors to consider when choosing the right handheld scanner:
- Scanning Needs: Determine what types of documents or materials you will be scanning most frequently. If you primarily need to scan single sheets of paper, a single sheet scanner or pen scanner may be sufficient. On the other hand, if you frequently handle a large volume of documents, consider a document scanner with an automatic document feeder (ADF).
- Resolution: The resolution of a handheld scanner determines the level of detail and clarity in the scanned images. Higher resolution scanners are ideal for scanning documents that require intricate details or for reproducing images with sharpness and accuracy. Consider the resolution specifications and choose a scanner that meets your specific requirements.
- Connectivity Options: Evaluate the connectivity options available with the handheld scanner. Most scanners come with USB connectivity, allowing you to connect to a computer for easy file transfer. However, some scanners also offer wireless connectivity options, such as Bluetooth or Wi-Fi, which provide greater flexibility and convenience for scanning and transferring files directly to your mobile devices.
- File Formats: Ensure that the handheld scanner supports the file formats you need for saving the scanned documents. Common file formats include JPEG, PDF, and TIFF. Check the compatibility of the scanner with your computer or mobile device to ensure seamless file transfer and compatibility.
- Size and Portability: Consider the size and weight of the handheld scanner, especially if portability is a priority. A compact and lightweight scanner can easily fit into your bag or pocket, allowing you to take it with you wherever you go. This is particularly useful for people who frequently travel for work or need to scan documents on the move.
- Additional Features: Take note of any additional features that may enhance your scanning experience. Some handheld scanners offer features like image enhancement, automatic document detection and correction, and compatibility with OCR (Optical Character Recognition) software. These features can help improve the quality of your scanned documents and streamline your workflow.
It’s also helpful to read customer reviews and compare different models to get an idea of their performance and reliability. Consider your budget and prioritize the features that are most important to you.
By carefully considering your scanning needs, resolution, connectivity options, file formats, portability, and additional features, you can select the handheld scanner that best fits your requirements. In the following sections, we will guide you through the setup process and provide tips for scanning and maintaining your handheld scanner.
Setting Up Your Handheld Scanner
Setting up a handheld scanner is a straightforward process that typically involves a few simple steps. Here’s a guide to help you get your handheld scanner up and running:
- Read the Manual: Start by reading the user manual that comes with your handheld scanner. The manual will provide specific instructions on how to set up and operate your scanner, as well as any important guidelines or safety precautions to follow.
- Charge or Insert Batteries: Depending on the model, your handheld scanner may feature a rechargeable battery or require disposable batteries. Charge the battery fully before using the scanner or insert fresh batteries as per the manufacturer’s instructions.
- Install the Software: Some handheld scanners require the installation of specific software on your computer or mobile device. Follow the instructions provided to install the necessary software and drivers. This software enables communication between the scanner and your device, allowing you to control and manage the scanning process.
- Connect the Scanner: Connect the handheld scanner to your computer using the provided USB cable, or establish a wireless connection if supported. Ensure that your computer recognizes the scanner and is ready to receive scanned documents.
- Configure Scanner Settings: Access the settings of your handheld scanner through the provided software interface or by using buttons or touch controls on the device itself. Configure the desired scan resolution, file format, color mode, and other settings based on your preferences and requirements.
- Test the Scanner: Before you start scanning important documents, perform a test scan to ensure that the scanner is functioning correctly. Place a test document on a flat surface and smoothly glide the scanner over it, following the manufacturer’s instructions. Check the scanned image on your computer or mobile device to ensure it meets your expectations.
- Calibrate Scanner (If Required): Some handheld scanners may require occasional calibration to maintain optimal performance. Consult the user manual or software instructions to determine if calibration is necessary for your specific model. Follow the calibration process outlined to ensure accurate and reliable scans.
- Update Firmware (If Required): Manufacturers often release firmware updates to enhance features or fix any performance issues. Check if there are any firmware updates available for your handheld scanner and follow the instructions provided by the manufacturer to update the firmware if required.
By following these steps, you can set up your handheld scanner and ensure that it is ready to scan documents efficiently. In the next section, we will guide you through the process of scanning documents with your handheld scanner.
Scanning Documents with a Handheld Scanner
Scanning documents with a handheld scanner is a simple process that allows you to quickly digitize physical documents for easy storage, editing, or sharing. Follow these steps to get the most out of your handheld scanner:
- Prepare the Document: Ensure that the document you want to scan is clean and free of any creases or folds. If necessary, flatten the document or use a paperweight to hold it in place to prevent movement while scanning.
- Configure Scanner Settings: Access the settings on your handheld scanner through the provided software or device controls. Configure the desired resolution, color mode, file format, and any other settings based on your preferences and the nature of the document being scanned.
- Position the Scanner: Place the handheld scanner at the top of the document with the scanning area facing down. Make sure the scanner is parallel to the document surface to capture a clear and accurate scan.
- Start Scanning: Slowly move the handheld scanner along the document, maintaining a steady and consistent speed. Follow the manufacturer’s instructions for optimal scanning technique. Some scanners may require a single swipe, while others may recommend multiple passes for larger documents.
- Monitor Scanned Images: If your handheld scanner has a built-in display, monitor the scanned images in real time to ensure you have captured the entire document and that it is in focus. Adjust your scanning technique as needed to achieve the desired results.
- Save and Transfer Files: Once you have finished scanning the document, save the scanned image to the desired location. Depending on your handheld scanner, you may be able to save the image directly to a connected computer or mobile device, or to an SD card or internal memory of the scanner itself. It’s important to follow the manufacturer’s instructions for file saving and transfer processes.
- Review the Scanned Document: After saving the scanned image, review it on your computer or mobile device to ensure it meets your expectations. Verify the clarity, resolution, and color accuracy of the scan. If necessary, you can make adjustments or enhancements using image editing software.
- Organize and Manage Scanned Documents: To maintain a well-organized and easily accessible digital archive, create folders or a system for categorizing and storing your scanned documents. Consider using descriptive filenames or adding metadata to make it easier to search for specific documents in the future.
By following these steps, you can successfully scan documents with your handheld scanner and create high-quality digital copies for various purposes. In the next section, we will discuss the importance of cleaning and maintaining your handheld scanner to ensure optimal performance and longevity.
Cleaning and Maintaining Your Handheld Scanner
To keep your handheld scanner in optimal condition and ensure consistent performance, regular cleaning and maintenance are essential. Follow these guidelines to effectively clean and maintain your handheld scanner:
- Power Off and Disconnect: Before cleaning your handheld scanner, ensure that it is powered off and disconnected from any power source or device to prevent any potential damage.
- Use a Soft, Lint-Free Cloth: Use a soft, lint-free cloth, such as a microfiber cloth, to gently wipe the scanning surface and exterior of the handheld scanner. Avoid using abrasive materials or rough cloths that may scratch the scanner’s surface.
- Avoid Liquid Cleaners: Avoid using liquid cleaners or solvents directly on the scanner as they may damage the internal components. If necessary, lightly dampen the cloth with water or a mild, non-abrasive cleaning solution and then wipe the scanner surfaces. Ensure that no liquid enters the scanner’s openings or connectors.
- Remove Dust and Debris: Dust and debris can accumulate on the scanner’s scanning surface and sensors. Use a small, soft brush or a can of compressed air to gently remove any loose particles. Take care not to touch the sensors directly to avoid any damage or smudging.
- Regularly Clean the Rollers (if applicable): If your handheld scanner has rollers, they may accumulate dirt and debris over time, affecting the scanning process. Check the manufacturer’s instructions on how to clean the rollers properly. Typically, it involves using a lint-free cloth or special cleaning sheets designed for scanners.
- Avoid Excessive Force: When cleaning or handling the handheld scanner, avoid applying excessive force or pressure. Gentle and careful cleaning is sufficient. Applying excessive force may damage the delicate components of the scanner.
- Store in a Safe Place: When not in use, store your handheld scanner in a clean and dry place. Use a protective pouch or case to prevent dust, dirt, or scratches from accumulating on the scanner’s surface. Avoid storing the scanner in extreme temperatures or humid environments.
- Follow Manufacturer’s Guidelines: It’s important to follow the specific cleaning and maintenance instructions provided by the manufacturer. Each handheld scanner may have unique requirements, and following the guidelines will help ensure the longevity and optimal performance of your device.
Regular cleaning and proper maintenance of your handheld scanner will help maintain its functionality and prolong its lifespan. By incorporating these practices into your routine, you can enjoy consistent, high-quality scans for years to come.
In the next section, we will address some common handheld scanner issues and provide troubleshooting tips to overcome them.
Troubleshooting Common Handheld Scanner Issues
While handheld scanners are generally reliable and easy to use, you may encounter some common issues during their operation. Here are some troubleshooting tips to help you overcome these problems:
- Poor Image Quality: If you notice that your scanned images have low resolution, are blurry, or lack clarity, check the scanner’s settings. Ensure that the resolution is set to an appropriate level for your scanning needs. Clean the scanning surface and sensors to remove any dust or debris that may be affecting the image quality.
- Failure to Scan: If your handheld scanner fails to scan a document, first check the battery or power source. Ensure that the battery is adequately charged or replace it with new batteries if needed. Verify that the scanner is properly connected to your device, and that the scanning surface is clean and free of any obstruction.
- Jamming or Feeding Issues: If the scanner encounters jamming issues or has trouble feeding documents through properly, check for any obstructions or debris in the paper path. Remove any loose particles, straighten any folded or creased documents, and ensure that the document is properly aligned with the scanner. If the problem persists, consult the manufacturer’s instructions for specific troubleshooting steps.
- Connection Problems: If your handheld scanner is not connecting to your computer or mobile device, ensure that the USB cable is securely plugged in, or that the wireless connection is properly established. Restart both the scanner and your device, and check for any software updates that may resolve compatibility issues.
- Inaccurate Scanning: If the scanned document appears skewed, cut off, or misaligned, make sure that the document is placed flat and aligned properly on the scanner. Check the scanner’s settings to ensure that the correct size and orientation are selected. If the issue persists, try calibrating the scanner or consult the manufacturer’s troubleshooting guide.
- Software or Driver Issues: If you encounter problems with the handheld scanner’s software or drivers, ensure that you have the latest versions installed. Check the manufacturer’s website for any available updates and download them as needed. Reinstall the software or drivers if necessary, following the instructions provided by the manufacturer.
- Excessive Battery Drain: If you notice that the battery of your handheld scanner drains quickly, consider adjusting the power settings to optimize battery usage. Lower the brightness or disable any unnecessary features or connectivity options that may consume excessive power.
- Overheating: If your handheld scanner becomes excessively warm during use, take a break and allow it to cool down. Overheating may indicate a heavy workload or a need for a firmware update. If the problem persists, contact the manufacturer for further assistance.
If you continue to experience issues with your handheld scanner despite troubleshooting attempts, consult the user manual or reach out to the manufacturer’s customer support for professional assistance.
In the next section, we will explore how to use your handheld scanner with different devices and operating systems.
Using Your Handheld Scanner with Different Devices
Handheld scanners are designed to be versatile and compatible with various devices and operating systems. Here’s how you can use your handheld scanner with different devices:
- Computers: Connect your handheld scanner to your computer using the provided USB cable. Ensure that the necessary software and drivers are installed on your computer. Once connected, you can use the scanning software to control and manage the scanning process. Scan documents directly into applications such as image editors, document management software, or email clients.
- Laptops and Ultrabooks: Handheld scanners are well-suited for use with laptops and ultrabooks due to their compact and portable nature. Connect the handheld scanner to your laptop via USB or Bluetooth, depending on the scanner’s connectivity options. Follow the same steps as you would with a desktop computer to scan documents directly into your preferred applications.
- Mobile Devices: Many handheld scanners offer wireless connectivity options that allow you to scan documents directly into your mobile devices, such as smartphones or tablets. Install the dedicated scanning app on your mobile device from the app store, and pair it with your handheld scanner via Bluetooth or Wi-Fi. Use the app to control the scanning process and save scanned documents to your device’s memory or cloud storage.
- Operating Systems: Handheld scanners are compatible with various operating systems, including Windows, macOS, iOS, and Android. Ensure that you choose a handheld scanner that supports your specific operating system. Check the manufacturer’s website or product specifications to confirm compatibility. Install the necessary software or scanning app that is compatible with your device’s operating system to ensure seamless integration.
It’s important to note that the compatibility and functionality may vary depending on the specific handheld scanner model and device operating system. Always refer to the manufacturer’s instructions and recommendations for the most accurate and up-to-date guidance.
By using your handheld scanner with different devices and operating systems, you can enjoy the convenience of scanning documents on-the-go and easily integrate the scanned images into your preferred digital workflow.
In the next section, we will provide best practices for using a handheld scanner to optimize your scanning experience.
Best Practices for Using a Handheld Scanner
To maximize the efficiency and accuracy of your scanning process, it’s important to follow some best practices when using a handheld scanner. Here are some tips to help you get the best results:
- Ensure Proper Lighting: Adequate lighting is crucial for clear and accurate scans. Make sure the area where you are scanning is well-lit, preferably with natural light or evenly distributed artificial lighting. Avoid scanning in direct sunlight, as it may create unnecessary shadows or glare on the document.
- Steady and Smooth Movement: When scanning with your handheld scanner, maintain a steady and smooth movement to achieve clean and sharp scans. Avoid jerky or erratic movements that may result in blurred or distorted images. Practice a consistent and controlled scanning motion to capture the document evenly.
- Maintain a Steady Hand: Keep your hand steady while scanning to prevent any unnecessary shaking or vibrations. A stable hand ensures that the scanned image remains sharp and focused. If needed, rest your elbow on a stable surface or use a tripod or handheld stabilizer to further stabilize your scanning motion.
- Align the Document Properly: Ensure that the document is aligned correctly within the scanning area. Keep the document straight and flush against the scanning surface to avoid skewed or misaligned scans. Take the time to align the document properly before making the scanning pass.
- Use the Preview Feature (if available): If your handheld scanner has a preview feature, utilize it to check the scanned image before saving it. This allows you to make any necessary adjustments or rescan the document while still in the scanning process, saving you time and effort later.
- Practice Document Management: Organize and manage your scanned documents efficiently. Develop a filing system or use a document management software to keep track of your digital files. Properly name and categorize your scanned documents, making it easier to locate and retrieve specific files when needed.
- Regularly Back Up Scanned Files: Back up your scanned files regularly to ensure they are protected from data loss. Consider using cloud storage, external hard drives, or other backup methods to preserve your digital documents. Regular backups are essential for safeguarding your important files and preventing potential loss due to device failure or accidents.
- Keep Your Scanner Clean: Regularly clean your handheld scanner to maintain optimal performance. Follow the manufacturer’s guidelines for cleaning and maintenance. Keep the scanning surface and sensor area free of dust, debris, or smudges that may affect the quality of your scans.
By following these best practices, you can ensure that your handheld scanner delivers consistent, high-quality scans and improves your overall scanning experience. Remember to refer to the user manual and specific instructions provided by the scanner manufacturer for additional guidance.
In the final section, we will offer a summary of the key points covered in this article.