
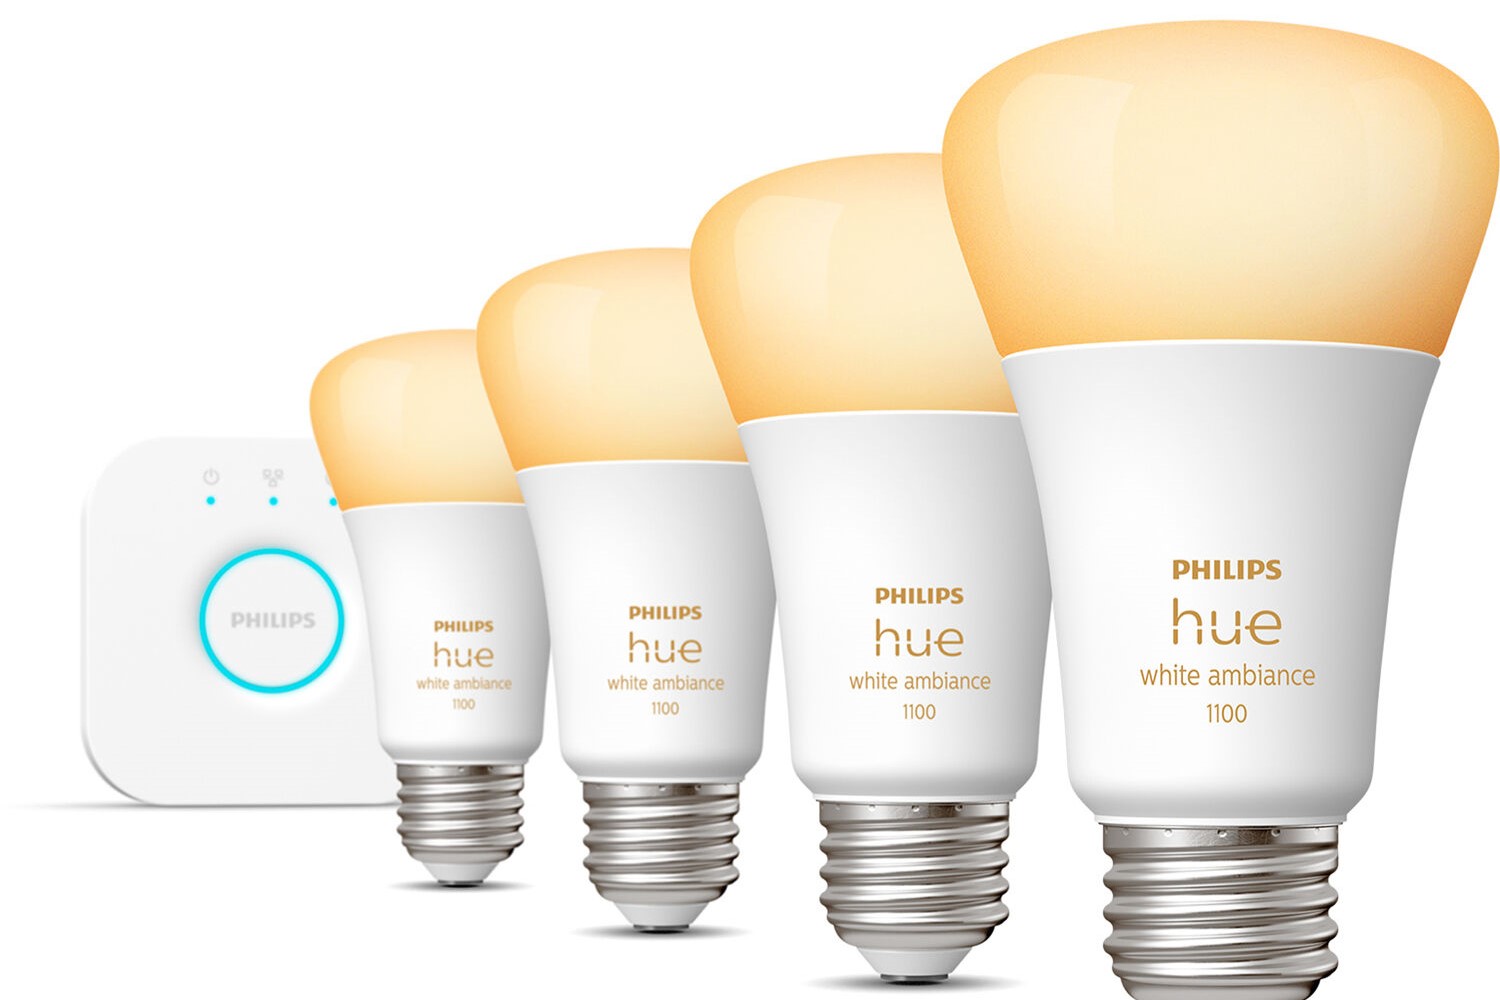
Preparing to Upgrade Philips Hue Bulbs
Before embarking on the journey to upgrade your Philips Hue bulbs, it’s essential to make necessary preparations to ensure a smooth and successful process. Here are the key steps to take before diving into the upgrade:
1. Checking Compatibility: First and foremost, check the compatibility of your existing Philips Hue bulbs with the latest firmware and software updates. Visit the official Philips Hue website or consult the user manual to verify if your bulbs can be upgraded.
2. Gathering Necessary Tools: To proceed with the upgrade, ensure you have the required tools at hand. This generally includes a stable internet connection, a compatible smartphone or tablet, the Philips Hue app, and the Hue Bridge connected to your home network.
3. Updating the Hue Bridge Firmware: Before upgrading the bulbs, it’s crucial to update the firmware of your Hue Bridge. This will ensure compatibility with the latest features and improvements offered by Philips. Open the Philips Hue app, navigate to the settings menu, and check for available firmware updates for your Hue Bridge.
By following these preparatory steps, you’ll set the stage for a successful Philips Hue bulb upgrade. With everything in place, you can proceed to the next phase – upgrading the bulbs themselves.
Checking Compatibility
Before upgrading your Philips Hue bulbs, it’s crucial to ensure their compatibility with the latest firmware and software updates. Taking the following steps will help you determine if your bulbs can be upgraded:
1. Check the Official Philips Hue Website: Visit the official Philips Hue website and navigate to the support or product page. Look for information about firmware and software updates for your specific Philips Hue bulbs. Philips often provides detailed compatibility information, allowing you to determine if your bulbs can be upgraded.
2. Consult the User Manual: If you still have the user manual that came with your Philips Hue bulbs, refer to it for any information regarding firmware updates and compatibility. The manual may provide specific instructions or requirements for upgrading your bulbs.
3. Use the Philips Hue App: Open the Philips Hue app on your smartphone or tablet and navigate to the settings or support section. Look for options related to firmware updates or bulb compatibility. The app may provide notifications or prompts indicating whether your bulbs can be upgraded.
4. Consider the Age of Your Bulbs: Older Philips Hue bulbs may not be compatible with the latest software updates. Manufacturers often provide compatibility limitations based on the age and model of the bulbs. Take into account the manufacturing date or year when assessing the upgrade potential of your bulbs.
5. Contact Philips Hue Support: If you’re still uncertain about the compatibility of your bulbs, reach out to Philips Hue support. They have knowledgeable representatives who can provide guidance and assist you in determining whether your bulbs can be upgraded.
By following these steps, you’ll gain a clearer understanding of the compatibility of your Philips Hue bulbs with the latest firmware and software updates. Once you’ve verified that your bulbs can be upgraded, you can proceed to the next steps in the upgrading process.
Gathering Necessary Tools
Before diving into the process of upgrading your Philips Hue bulbs, it’s important to gather the necessary tools and equipment. Having everything ready will help streamline the upgrade process. Here are the essential tools you’ll need:
1. Stable Internet Connection: Ensure that you have a reliable and stable internet connection. Upgrading your Philips Hue bulbs often involves downloading firmware updates and syncing data with the Philips Hue app. A stable internet connection will ensure a smooth and uninterrupted upgrade process.
2. Compatible Smartphone or Tablet: You’ll need a compatible smartphone or tablet to interact with the Philips Hue app and control your bulbs. Make sure your device meets the minimum requirements specified by Philips, such as the operating system version and hardware specifications.
3. Philips Hue App: Install the Philips Hue app on your smartphone or tablet. The app is available for both iOS and Android devices. It serves as the main interface for controlling and managing your Philips Hue bulbs. You can download the app from the respective app stores.
4. Hue Bridge: The Hue Bridge is a central component of the Philips Hue system, acting as a hub to connect your bulbs to your home network. Make sure your Hue Bridge is connected and functioning properly. If needed, consult the Hue Bridge user manual for troubleshooting tips or firmware updates.
5. Home Network: Ensure that your home network is stable and accessible. The Philips Hue bulbs and the Hue Bridge communicate over your home network. A reliable and strong Wi-Fi signal will help facilitate a seamless upgrade process.
6. Power Source: Keep the power source for your Hue Bridge and bulbs readily available. This might include power outlets or an uninterruptible power supply (UPS) to prevent any power interruptions during the upgrade process.
By gathering these necessary tools and ensuring they are in good working condition, you’ll be well-equipped to proceed with the upgrade of your Philips Hue bulbs. With everything in place, you can move forward with updating the firmware and enjoying the latest features and improvements.
Updating the Hue Bridge Firmware
To ensure optimal performance and compatibility, it’s essential to update the firmware of your Hue Bridge before upgrading your Philips Hue bulbs. Follow these steps to update the firmware:
1. Open the Philips Hue App: Launch the Philips Hue app on your smartphone or tablet that is connected to the same Wi-Fi network as your Hue Bridge.
2. Navigate to the Settings Menu: Look for the settings icon within the app. It is usually located in the top or bottom right corner of the screen. Tap on it to access the settings menu.
3. Select the Hue Bridge: Within the settings menu, you will see a list of connected devices. Locate and select your Hue Bridge from the list.
4. Check for Firmware Updates: Look for an option like “Firmware Update” or “Software Update” within the Hue Bridge settings. Tap on it to check for any available updates. The app will automatically search for the latest firmware version.
5. Download and Install the Update: If a firmware update is available, the app will prompt you to download and install it. Follow the on-screen instructions to complete the update process. Make sure to keep your smartphone or tablet connected to a stable internet connection during the update.
6. Wait for the Update to Complete: The firmware update process may take a few minutes. Avoid interrupting the process by closing the app or disconnecting from Wi-Fi. Allow the update to complete before proceeding.
7. Confirm Successful Update: After the update is complete, the app will display a confirmation message or notification. It will indicate that the firmware update was successful. You can now proceed to upgrade your Philips Hue bulbs.
Updating the firmware of your Hue Bridge ensures that it can properly communicate with the upgraded bulbs and take advantage of the latest features and improvements. By following these steps, you’ll ensure a smoothly functioning and up-to-date bridge for your Philips Hue system.
Upgrading Philips Hue Bulbs
Now that you have prepared by checking compatibility and updating the firmware of your Hue Bridge, it’s time to proceed with the upgrade of your Philips Hue bulbs. Follow these steps to ensure a successful bulb upgrade:
1. Resetting the Hue Bulbs: Before upgrading, reset your Philips Hue bulbs to their default settings. This can usually be done by turning the bulbs on and off in a specific pattern or using a Hue Dimmer Switch. Consult the user manual or the Philips Hue website for instructions on how to reset your specific bulbs.
2. Updating the Firmware: With the Hue Bridge firmware up to date, use the Philips Hue app to check for any available firmware updates for your bulbs. Follow the instructions within the app to download and install the updates. Ensure that your smartphone or tablet is connected to a stable internet connection throughout the process.
3. Installing New Features and Improvements: Once the firmware updates are installed, you can explore and enjoy the new features and improvements offered by Philips. These may include enhanced color options, improved performance, or additional functionality. Take some time to explore the updated capabilities of your upgraded bulbs.
4. Troubleshooting Upgrade Issues: In case you encounter any issues during the upgrade process or experience difficulties with your upgraded bulbs, consult the troubleshooting resources provided by Philips Hue. This could include the official website, user forums, or contacting the Philips Hue support team for assistance. They can guide you through any troubleshooting steps or provide solutions for common upgrade-related problems.
By following these steps, you’ll be able to successfully upgrade your Philips Hue bulbs and take advantage of the latest features and improvements. Remember to take your time, read the instructions carefully, and reach out for support if needed. Once the upgrade is complete, you can enjoy the enhanced lighting experience and customize your home ambiance to suit your preferences.
Resetting the Hue Bulbs
Before upgrading your Philips Hue bulbs, it’s important to reset them to their default settings. This process ensures a clean slate for the upgrade and helps resolve any potential issues that may arise. Follow these steps to reset your Hue bulbs:
1. Check the User Manual: Consult the user manual or reference guide that came with your Philips Hue bulbs. Look for specific instructions on how to reset the bulbs. Different models may require different reset procedures, so it’s important to follow the manufacturer’s guidelines.
2. Power On the Bulbs: Ensure that the bulbs are connected to a power source and turned on. This can be done by gently twisting the bulb into its socket or plugging it into a compatible fixture. Make sure the bulbs are receiving power before proceeding to the next step.
3. Perform the Reset: Depending on the model, you may need to perform a specific sequence of actions to reset the bulbs. This typically involves turning the bulbs on and off in a particular pattern or using a Hue Dimmer Switch to initiate the reset. Refer to the user manual for the correct procedure.
4. Observe the Bulb Behavior: After initiating the reset, pay attention to any visual or auditory cues from the bulbs. They may blink or change color to indicate that the reset process has been successful. If the bulbs do not respond as expected, repeat the reset procedure or consult the troubleshooting resources provided by Philips.
5. Test the Reset: Once the reset is complete, test the bulbs by turning them on and off to ensure they are functioning properly. You can also try controlling them using the Philips Hue app or any compatible smart home devices you have connected to your Hue system. If the bulbs respond as expected, you can proceed with the firmware update and upgrade process.
Resetting your Philips Hue bulbs before upgrading is an important step to ensure a smooth transition and optimal performance. It allows the bulbs to start anew and prepares them for the firmware updates and improvements that come with the upgrade. By following the manufacturer’s instructions and observing the bulb behavior, you’ll reset your bulbs successfully and be ready to move forward with the upgrade process.
Updating the Firmware
Once you have reset your Philips Hue bulbs and ensured they are ready for the upgrade, the next step is to update the firmware. Keeping the firmware up to date is essential for compatibility with the latest features and improvements. Here’s how you can update the firmware of your Philips Hue bulbs:
1. Open the Philips Hue App: Launch the Philips Hue app on your smartphone or tablet. Ensure that your device is connected to the same Wi-Fi network as your Hue Bridge.
2. Access the Settings Menu: Look for the settings icon within the app interface, usually located in the top or bottom right corner. Tap on it to access the settings menu.
3. Select the Hue Bulb: Within the settings menu, browse the list of connected devices and locate the specific Hue bulbs you want to update. Tap on the desired bulb to access its settings.
4. Check for Firmware Updates: Look for an option like “Firmware Update” or “Software Update” within the settings of the selected bulb. Tap on it to check for available updates.
5. Download and Install Updates: If a firmware update is available for the selected bulb, the app will prompt you to download and install it. Follow the on-screen instructions to complete the update process. It’s crucial to keep your smartphone or tablet connected to a stable internet connection throughout the download and installation.
6. Repeat for Each Bulb: Repeat the above steps for each Philips Hue bulb you wish to update. Ensure that all bulbs are updated individually to ensure they have the latest firmware version.
7. Confirm Successful Update: After the firmware updates have been installed, the app may display a confirmation message or notification indicating the successful update. Take a moment to verify that all the desired bulbs have been updated to the latest firmware version.
By following these steps, you’ll ensure that your Philips Hue bulbs are equipped with the latest firmware updates. These updates are crucial for accessing new features, bug fixes, and overall performance improvements. Once the firmware update process is complete, you can proceed with the next steps of the upgrade process and enjoy the enhanced functionality of your upgraded Philips Hue bulbs.
Installing New Features and Improvements
Now that you’ve updated the firmware of your Philips Hue bulbs, it’s time to explore and install the new features and improvements that come with the upgrade. Philips regularly releases updates that enhance the functionality and user experience of their smart lighting system. Here’s how you can install and take advantage of these new features:
1. Explore the Philips Hue App: Open the Philips Hue app on your smartphone or tablet. Take some time to familiarize yourself with any new features or options that have been added as part of the firmware update. Dig into the different menus and settings to discover what’s new.
2. Customize Lighting Scenes: With the updated firmware, you may have access to new lighting scenes or the ability to create more personalized scenes. Experiment with different color combinations, brightness levels, and effects to create the perfect ambiance for any occasion or mood.
3. Check for Additional Functionality: Some firmware updates may introduce new functionality to the Philips Hue system. This could include improved integration with smart home devices, voice control support, or enhanced scheduling options. Explore the app to see if these features are available and activate them if desired.
4. Experiment with Color Palette: If your bulbs support color options, take advantage of the updated firmware to experiment with a wider range of colors. Fine-tune the color temperature, saturation, and brightness to create unique lighting atmospheres in your home.
5. Test Performance and Responsiveness: As part of the latest firmware update, Philips may have made performance improvements, ensuring faster response times and smoother transitions between colors and effects. Test the overall performance of your upgraded bulbs and observe any noticeable enhancements.
6. Consult Philips Hue Resources: If you need more guidance or information about the new features and improvements, consult the official Philips Hue website or user forums. These resources can provide insights, tips, and answers to frequently asked questions about the firmware update and its accompanying features.
By exploring and installing the new features and improvements offered by Philips, you can truly maximize the potential of your upgraded Philips Hue bulbs. Take the time to experiment, customize, and fine-tune your lighting settings to create a personalized and immersive lighting experience in your home.
Troubleshooting Upgrade Issues
During the upgrade process of your Philips Hue bulbs, you may encounter some difficulties or experience issues. It’s important to address these problems promptly to ensure a successful upgrade. Here are some troubleshooting steps to help you resolve potential upgrade issues:
1. Consult the Official Philips Hue Resources: If you encounter any difficulties during the upgrade, start by visiting the official Philips Hue website. Look for their support section, where you’ll find troubleshooting guides specific to common upgrade issues. Refer to these resources for step-by-step instructions and solutions.
2. Check the Internet Connection and Power: Verify that your smartphone or tablet is connected to a stable internet connection during the upgrade process. Unstable or weak internet connections may lead to update failures. Additionally, ensure that the Hue Bridge and your bulbs are receiving power and properly connected to the power source.
3. Reboot the Hue Bridge: If you experience connectivity or functionality issues after the upgrade, try rebooting the Hue Bridge. Disconnect the power supply, wait for a few seconds, and then reconnect it. Wait for the Hue Bridge to fully restart before attempting the upgrade again.
4. Reset the Bulbs and Start Over: If the upgrade process fails or if the bulbs do not function correctly after the update, consider resetting the bulbs and starting the upgrade process from scratch. Follow the manufacturer’s instructions to reset the bulbs to their default settings and then repeat the firmware update steps.
5. Contact Philips Hue Support: If you have followed the troubleshooting steps and still experience issues with the upgrade, reach out to the Philips Hue support team. They have knowledgeable representatives who can provide further assistance and guidance in resolving the specific issues you are facing.
Remember, troubleshooting is a normal part of the upgrade process, and it’s always better to address any issues as soon as possible. By following these troubleshooting steps and seeking assistance if needed, you can resolve potential upgrade problems and ensure the successful functioning of your upgraded Philips Hue bulbs.
Tips for a Successful Upgrade
To ensure a smooth and successful upgrade of your Philips Hue bulbs, it’s helpful to keep in mind some useful tips and recommendations. These tips will help you navigate the upgrade process and maximize the benefits of your upgraded bulbs. Here are some tips to consider:
1. Making Sure the Bridge is Connected: Before starting the upgrade, verify that your Hue Bridge is connected to your home network properly. Confirm that the necessary cables are securely plugged in and that the appropriate lights are illuminated on the Hue Bridge. A stable connection is essential for a successful upgrade.
2. Keeping the Bulbs Powered On: During the firmware update process, it’s crucial to keep your Philips Hue bulbs powered on. Avoid manually switching off the bulbs or cutting power to the fixtures while the upgrade is in progress. This will prevent any interruptions that could potentially disrupt the upgrade process.
3. Following the Manufacturer’s Instructions: Always refer to the official Philips Hue user manual or the support resources provided by Philips for detailed instructions on upgrading your specific Hue bulbs. Following the manufacturer’s guidelines will ensure that you’re taking the correct steps and using the recommended techniques for a successful upgrade.
4. Avoiding Simultaneous Updates: If you have multiple Hue bulbs to upgrade, consider updating them one at a time. This allows you to focus on each bulb individually and ensures a smoother process. Trying to update multiple bulbs simultaneously may cause network congestion or conflicts, leading to potential upgrade issues.
5. Checking for App Updates: Alongside the firmware updates, it’s essential to keep the Philips Hue app updated on your smartphone or tablet. App updates often come with bug fixes, performance enhancements, and additional features that can enhance your overall user experience with the upgraded bulbs.
6. Patience and Allow Sufficient Time: Firmware updates can take some time to download and install, especially if you have a large number of bulbs or a slower internet connection. Exercise patience and allow sufficient time for the upgrade process to complete. Avoid interrupting the process or rushing through the steps to ensure a stable and successful upgrade.
7. Logging Out and Logging Back In: If you encounter any unusual behavior or connectivity issues after the upgrade, try logging out of the Philips Hue app and then logging back in. This can sometimes resolve minor software glitches and reestablish a stable connection between the app and your upgraded bulbs.
By following these tips, you can enhance your upgrade experience and ensure a successful transition to the latest firmware and features offered by Philips. Taking the time to prepare, be patient, and follow best practices will lead to a seamless upgrade of your Philips Hue bulbs and an enhanced lighting experience in your home.
Making Sure the Bridge is Connected
Before embarking on the upgrade process for your Philips Hue bulbs, it’s essential to ensure that your Hue Bridge is properly connected to your home network. A stable and reliable connection is crucial for a successful upgrade. Follow these steps to verify the connection of your Hue Bridge:
1. Check the Physical Connection: Ensure that all necessary cables are securely connected to your Hue Bridge. Check that the power adapter is plugged into a power source and that the Ethernet cable is properly connected to your home router or modem. Confirm that the necessary lights on the Hue Bridge are illuminated, indicating a power supply and network connection.
2. Test the Network Connection: Access the settings of your router or modem to verify that the Hue Bridge is recognized and connected to your home network. This can generally be done by accessing the router’s web interface or using a dedicated mobile app provided by the manufacturer. Look for a list of connected devices and confirm that the Hue Bridge is listed.
3. Troubleshoot Connectivity Issues: If the Hue Bridge is not showing up on the list of connected devices, restart the Hue Bridge and your router or modem. Unplug the power supply from both devices, wait for a few seconds, and then plug them back in. Allow the devices to reboot and establish a fresh connection. After the reboot, check the network connection again to ensure that the Hue Bridge is properly recognized.
4. Check for Firmware Updates: Within the Philips Hue app, navigate to the settings menu and check for any available firmware updates for your Hue Bridge. Keeping the firmware up to date ensures compatibility with the latest features and improvements. Follow the instructions provided in the app to download and install any available updates.
5. Verify Bridge Connection in the App: Open the Philips Hue app on your smartphone or tablet. Ensure that your device is connected to the same Wi-Fi network as your Hue Bridge. Within the app, navigate to the settings menu and confirm that the Hue Bridge is recognized and properly connected. This should be indicated by a “Connected” or “Online” status next to the Hue Bridge.
6. Contact Philips Hue Support: If you’re still experiencing issues with the connectivity of your Hue Bridge, reach out to the Philips Hue support team for further assistance. They can provide specific troubleshooting steps for your situation and help you resolve any connectivity issues that may be hindering the upgrade process.
By ensuring that your Hue Bridge is connected to your home network, you lay a strong foundation for a successful upgrade of your Philips Hue bulbs. A stable and reliable connection allows for seamless communication between the Hue Bridge, the Philips Hue app, and your upgraded bulbs, enabling you to fully enjoy the enhanced lighting experience.
Keeping the Bulbs Powered On
During the upgrade process of your Philips Hue bulbs, it’s crucial to ensure that the bulbs remain powered on. Maintaining a constant power supply throughout the upgrade is essential to prevent any interruptions and ensure a successful upgrade. Here are some steps to follow:
1. Avoid Manually Switching Off the Bulbs: Once you have started the upgrade process, refrain from manually switching off the bulbs or cutting power to the fixtures. Interrupting the power supply to the bulbs can disrupt the upgrade process and potentially cause issues or incomplete updates.
2. Do Not Disconnect the Bulbs: It’s important not to disconnect the bulbs from their fixtures or the Hue Bridge while the upgrade is in progress. Removing the bulbs from their power source can disrupt the upgrade process and may lead to unexpected behavior or firmware corruption.
3. Check Power Outages: Monitor your home for any foreseeable power outages or fluctuations during the upgrade process. If you anticipate a power interruption, it’s advisable to postpone the upgrade until you have a stable power supply. Power outages can disrupt the upgrade process and potentially result in incomplete firmware updates.
4. Utilize Uninterruptible Power Supply (UPS): If you have a UPS or battery backup system, consider connecting your Hue Bridge and any essential devices to it. In the event of a power outage, the UPS will provide temporary power, allowing the upgrade process to continue uninterrupted, protecting your bulbs from potential issues due to sudden power loss.
5. Be Patient: Firmware updates can take some time to download and install, depending on the number of bulbs and your internet speed. Stay patient and allow sufficient time for the upgrade process to complete. Rushing through the process or interrupting it may result in incomplete updates or compromise the stability of your upgraded bulbs.
6. Monitor Progress: If your Philips Hue app indicates the progress of the upgrade for each bulb, keep an eye on it to ensure that the updates are proceeding smoothly. The app may display a progress bar or percentage to indicate the status of each bulb’s firmware update. Monitor each bulb’s progress until all updates are completed successfully.
7. Take Note of Failed Updates: If any of the bulbs fail to update during the process or if you encounter any errors, take note of the specific bulbs that failed and any error messages displayed in the Philips Hue app. This information will be useful for troubleshooting any update issues with those particular bulbs later on.
By ensuring that your Philips Hue bulbs remain powered on throughout the upgrade process, you minimize the risk of incomplete updates or firmware corruption. This allows for a smooth transition to the upgraded firmware and ensures that all bulbs fully benefit from the latest features and improvements provided by Philips.
Following the Manufacturer’s Instructions
When upgrading your Philips Hue bulbs, it’s essential to follow the manufacturer’s instructions provided in the user manual or official documentation. Adhering to these instructions ensures that you take the correct steps throughout the upgrade process and maximize the success of your bulb upgrade. Here are some reasons why it’s crucial to follow the manufacturer’s instructions:
1. Proper Procedure: The manufacturer’s instructions are designed to guide you through the specific upgrade process for your Philips Hue bulbs. They provide step-by-step details, ensuring that you follow the proper procedure for a successful upgrade. Deviating from these instructions may result in errors or incomplete updates.
2. Compatibility Considerations: The instructions from the manufacturer often include information about compatibility requirements and limitations. They may outline specific firmware versions supported by your bulbs or provide guidance on updating bulbs of different generations. Following these instructions ensures that you choose the right firmware updates and avoid compatibility issues.
3. Safety Guidelines: The manufacturer’s instructions often include safety guidelines to protect both you and your bulbs during the upgrade process. These guidelines may cover topics such as proper handling of the bulbs, precautions to avoid electrical hazards, or recommended environments for the upgrade. Adhering to these guidelines minimizes the risk of accidents or damage to your bulbs and ensures your safety.
4. Troubleshooting Assistance: The manufacturer’s instructions often provide troubleshooting steps or solutions for common upgrade issues. Following these instructions helps you troubleshoot and resolve minor issues that may arise during the upgrade process. The guidance provided by the manufacturer can help you overcome challenges and ensure a successful upgrade.
5. Firmware Specifics: The manufacturer’s instructions may include important information about the specific firmware updates and improvements for your bulbs. They can provide insights into new features, bug fixes, performance enhancements, or other significant changes introduced in the firmware. Understanding these specifics allows you to better utilize and appreciate the upgraded capabilities of your Philips Hue bulbs.
6. Support and Warranty: By following the manufacturer’s instructions, you maintain compliance with their guidelines, potentially preserving your warranty coverage. In case of any issues or concerns during the upgrade process, you can rely on the manufacturer’s support resources and seek further assistance, knowing that you have followed their instructions diligently.
Ultimately, following the manufacturer’s instructions is vital for a successful upgrade and ensuring a smooth transition to the latest firmware and features offered by Philips. By doing so, you minimize the risk of errors, compatibility issues, or safety hazards, and maximize the benefits of your upgraded Philips Hue bulbs.