
What is a Snap-On Scanner?
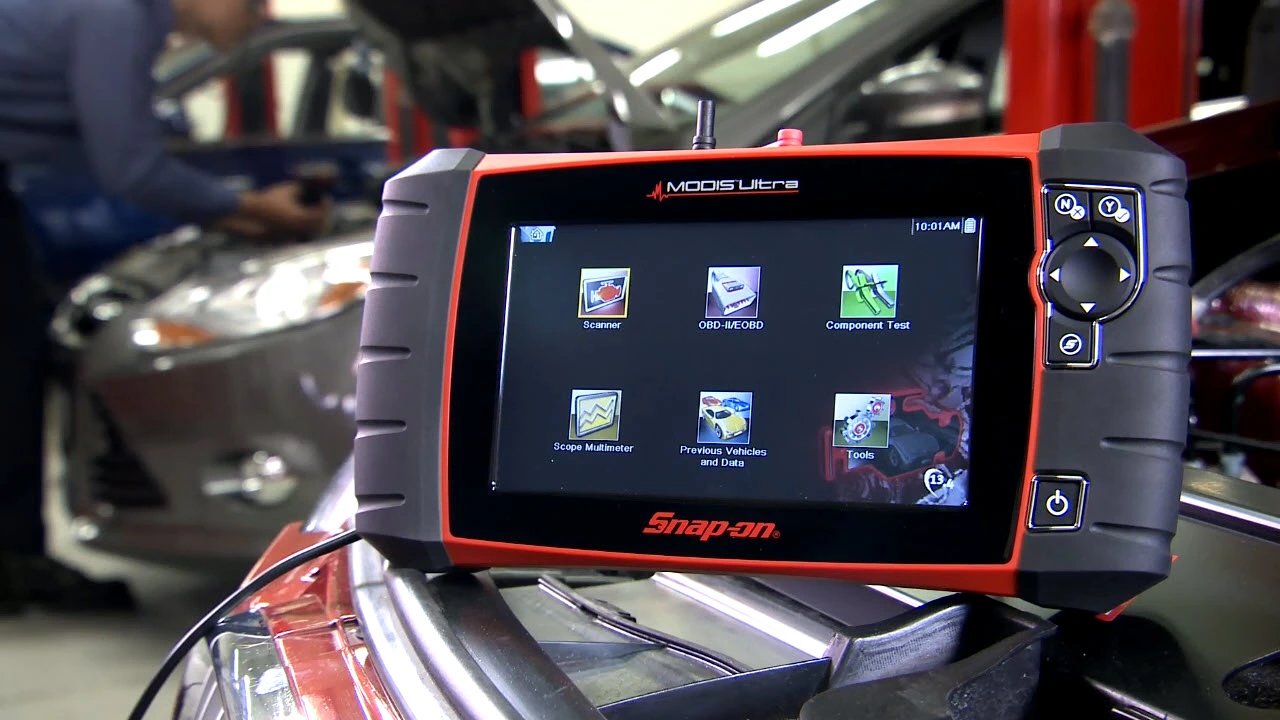
A Snap-On Scanner is a diagnostic tool used by automotive technicians to troubleshoot and diagnose problems in vehicles. It is a handheld device that connects to the vehicle’s onboard computer system, allowing the technician to retrieve fault codes, view live data, perform tests, and make adjustments to various vehicle systems. Snap-On Scanners are known for their accuracy, reliability, and ease of use, making them an essential tool in the automotive industry.
Equipped with advanced features and a user-friendly interface, Snap-On Scanners provide comprehensive information about the vehicle’s condition, helping technicians identify issues quickly and accurately. They support a wide range of vehicle makes and models, making them suitable for use in various automotive repair shops, dealerships, and even by DIY enthusiasts.
The Snap-On Scanner offers a multitude of functions, such as reading and clearing trouble codes, performing system tests, viewing freeze frame data, graphing live data, resetting service indicators, and much more. It provides valuable insights into the vehicle’s performance, allowing technicians to pinpoint the root cause of problems and make necessary repairs efficiently.
What sets the Snap-On Scanner apart from other diagnostic tools is its constant software updates. The manufacturer regularly releases new software versions that include bug fixes, performance enhancements, and expanded vehicle coverage. These updates ensure that the scanner remains up-to-date with the latest automotive technologies and can effectively diagnose newer vehicle models.
With the ability to keep pace with evolving automotive technology, the Snap-On Scanner is an indispensable tool for automotive technicians who strive for accuracy and efficiency in their diagnostic processes.
Why is it important to keep the Snap-On Scanner updated?
Keeping your Snap-On Scanner updated is crucial for several reasons:
Access to the latest features and enhancements: Regular software updates for the Snap-On Scanner introduce new features and enhancements that improve its functionality and diagnostic capabilities. These updates may include expanded vehicle coverage, additional diagnostic tests, improved data graphing, and more. By staying updated, you can take advantage of these advancements to provide more accurate and efficient diagnostic services.
Bug fixes and performance improvements: Software updates often address known bugs and issues to enhance the overall performance and reliability of the Snap-On Scanner. These updates can fix software glitches, improve stability, and ensure consistent performance. By keeping your scanner updated, you reduce the risk of encountering software-related problems while diagnosing vehicles.
Compatibility with newer vehicles: Automobile manufacturers constantly introduce new vehicle models with advanced technologies and systems. To effectively diagnose these newer models, it is essential to have the latest software update for your Snap-On Scanner. The updates typically include vehicle-specific software enhancements and diagnostic routines that enable compatibility with the latest vehicle systems. This ensures that you can accurately diagnose and troubleshoot issues with the latest vehicles that come into your shop.
Maximizing diagnostic capabilities: The diagnostic capabilities of the Snap-On Scanner are continually evolving to keep up with the ever-changing automotive industry. By installing the latest software updates, you can access new diagnostic features and tools that can improve your ability to identify and resolve complex issues in vehicles. This helps you provide more comprehensive and accurate diagnostic services to your customers.
Support and technical assistance: When you keep your Snap-On Scanner updated, you also ensure that you have access to technical support and assistance from Snap-On. If you encounter any issues or need guidance while using the scanner, having the latest software version makes it easier for the support team to assist you effectively and provide solutions to any problems you may encounter.
Overall, keeping your Snap-On Scanner updated not only enhances its performance and diagnostic capabilities but also ensures compatibility with newer vehicle models. Regular updates help you stay on top of the latest automotive technologies and systems, enabling you to provide top-notch diagnostic services to your customers.
Checking the current software version
Before updating your Snap-On Scanner, it’s important to check the current software version to determine if an update is needed. Follow these steps to verify the software version:
- Turn on your Snap-On Scanner and navigate to the home screen.
- Locate the “Settings” or “System” option on the main menu and select it.
- Within the settings menu, look for an option that indicates the current software version. It may be labeled as “Software Version,” “System Information,” or something similar.
- Note down the software version, which is usually a combination of letters and numbers.
- Compare the software version you noted with the latest version available from Snap-On’s website or software update platform.
If the software version on your Snap-On Scanner is outdated compared to the latest version, it’s time to proceed with updating the software. However, if you already have the most recent software version, there is no need for an update at this time.
It’s essential to stay vigilant and regularly check for software updates as Snap-On releases new versions periodically. Keeping your scanner’s software up to date ensures that you have access to the latest features, diagnostic capabilities, and compatibility with newer vehicle models.
Remember to visit the official Snap-On website or contact their customer support for accurate information regarding the latest software version for your specific Snap-On Scanner model.
Finding the latest software update
Once you have determined that an update is required for your Snap-On Scanner, the next step is to find the latest software update. Here are the steps to help you locate the most recent update:
- Visit the official Snap-On website on your computer or mobile device.
- Look for a section or tab related to software updates or downloads. This might be located under the “Support” or “Downloads” section of the website.
- Choose the appropriate category or search for your specific Snap-On Scanner model. This will help narrow down the available software updates.
- Review the list of software updates available for your scanner model. The updates are typically arranged in chronological order, with the latest update at the top.
- Check the release notes or description of each software update to identify any specific improvements, bug fixes, or added features that are relevant to your diagnostic needs.
- Make a note of the latest software version number that corresponds to the update you wish to download.
In addition to the official Snap-On website, you can also check for software updates through Snap-On’s software update platform, such as the ShopStream Connect or Snap-On Diagnostics Product Update software. These platforms often provide a more streamlined and user-friendly approach to finding the latest software update for your Snap-On Scanner.
Always ensure that you are downloading software updates from the official Snap-On sources to guarantee their authenticity and reliability. This helps protect your scanner from potentially harmful or unauthorized software versions.
If you have any trouble finding the latest software update or have questions regarding the update process, don’t hesitate to reach out to Snap-On’s customer support for assistance. They can provide guidance and ensure you have the correct update for your specific Snap-On Scanner model.
Downloading the update file
Once you have identified the latest software update for your Snap-On Scanner, the next step is to download the update file. Follow these steps to download the update:
- On the official Snap-On website or software update platform, locate the specific software update file that corresponds to your scanner model and the desired software version.
- Click on the download link or button associated with the update file. This will begin the download process.
- Save the update file to a location on your computer or a USB flash drive that can be easily accessed. Make sure to remember the location for future reference.
- Depending on the size of the update file and your internet connection speed, the download process may take a few minutes to complete. Ensure that you have a stable internet connection during the download to avoid any interruptions.
- If you are using a USB flash drive to download the update, ensure that the drive is formatted correctly and has enough free space to store the update file.
It’s important to note that the update file may be in a compressed format, such as a ZIP file. If this is the case, extract the contents of the ZIP file using a file extraction tool, such as WinRAR or 7-Zip, to access the actual update file.
Remember to verify that the download was successful and that the update file is intact. Check the file size and compare it to the file size mentioned on the Snap-On website or software update platform. This ensures that the file was downloaded completely without any errors.
By following these steps, you can safely and securely download the update file for your Snap-On Scanner, preparing it for the installation process in the next steps.
Transferring the update file to the scanner
After successfully downloading the update file for your Snap-On Scanner, the next step is to transfer the update file from your computer or USB flash drive to the scanner itself. Here’s how you can accomplish this:
- If you downloaded the update file directly to your computer, connect your Snap-On Scanner to your computer using a USB cable. Make sure the scanner is powered on.
- If you saved the update file to a USB flash drive, insert the flash drive into the appropriate USB port on the scanner.
- On your computer, locate the downloaded update file or the extracted update file if it was in a compressed format.
- Copy the update file by right-clicking on it and selecting “Copy” or by using the keyboard shortcut Ctrl+C (Windows) or Command+C (Mac).
- Open the directory or folder that corresponds to your connected Snap-On Scanner. This may be displayed as a removable storage device on your computer.
- Paste the update file into the directory or folder of the scanner by right-clicking in the directory window and selecting “Paste” or by using the keyboard shortcut Ctrl+V (Windows) or Command+V (Mac).
- Wait for the file transfer to complete. This may take a few moments depending on the size of the update file and the connection speed.
- Once the file transfer is finished, disconnect the USB cable or remove the USB flash drive from the scanner.
It is crucial to ensure the update file is transferred to the correct location on the scanner and is not placed within any system or application folders. Refer to the user manual or documentation of your specific Snap-On Scanner model for detailed information on the proper transfer method.
By following these steps, you can transfer the downloaded update file from your computer or USB flash drive to your Snap-On Scanner, preparing it for the installation process in the next steps.
Installing the update on the scanner
With the update file transferred to your Snap-On Scanner, it’s time to proceed with the installation process. Follow these steps to install the update:
- Ensure that your Snap-On Scanner is powered on and ready.
- Navigate to the settings or system menu on your scanner. The location of this menu may vary depending on your specific model.
- Look for an option that allows you to initiate the update process or install software updates. This option may be labeled as “Software Update,” “Program Update,” or something similar.
- Select the update option to begin the installation process.
- Follow the on-screen instructions provided by the scanner to initiate the update installation. These instructions may prompt you to confirm the update, accept any terms of service, or provide additional input.
- During the installation, your Snap-On Scanner may display progress bars, status messages, or other indicators to keep you informed about the update process. Be patient and wait for the installation to complete.
- Do not interrupt the update process or power off the scanner until the installation is finished. This could potentially cause software errors or corrupt the update.
- Once the update installation is complete, your Snap-On Scanner may automatically restart. If it does not, manually restart it to ensure the update takes effect.
- After restarting, your Snap-On Scanner should now be running the latest software version, equipped with the new features, bug fixes, and diagnostic enhancements provided by the update.
It’s important to note that during the update installation, it’s recommended to keep your scanner connected to a stable power source to avoid any unexpected power loss that could disrupt the installation process.
If you encounter any issues or errors during the update installation, refer to the troubleshooting section in the user manual or contact Snap-On’s customer support for assistance.
By following these steps, you can successfully install the update on your Snap-On Scanner, ensuring that it is running the latest software version for optimal diagnostic performance.
Tips for a successful update installation
To ensure a smooth and successful update installation on your Snap-On Scanner, consider the following tips:
- Read the instructions: Carefully read and understand the update instructions provided by Snap-On before starting the installation process. Familiarize yourself with any specific requirements, warnings, or recommendations.
- Backup your scanner: Prior to the update, consider backing up any important data or settings on your Snap-On Scanner. This will help you restore your scanner to its previous state if needed.
- Ensure a stable power supply: Make sure your scanner is connected to a stable power source during the update installation. Uninterrupted power supply prevents any unexpected power loss that could potentially damage the scanner’s software.
- Check available memory: Ensure that your Snap-On Scanner has sufficient available memory to accommodate the update file. If needed, free up space by removing any unnecessary files or applications.
- Disable antivirus software: Temporarily disable any antivirus software running on your computer before transferring the update file to your scanner. Some antivirus programs may interrupt or quarantine the update file, causing installation issues.
- Follow update prompts: During the installation process, carefully follow any prompts or instructions provided by the scanner. Do not skip steps or interrupt the installation process before it is completed.
- Ensure strong signal or internet connection: If the update is being downloaded directly to your scanner over the internet, make sure you have a strong and stable internet connection. A poor internet connection may result in incomplete downloads or update errors.
- Allow ample time: Depending on the size of the update file and the speed of your scanner, the installation process may take some time. Allow sufficient time for the update to complete without interruptions or external disturbances.
- Keep your scanner updated regularly: To avoid major update installations or potential compatibility issues in the future, make it a habit to regularly check for and install smaller software updates released by Snap-On. This will keep your scanner up to date with the latest improvements and fixes.
- Seek assistance if needed: If you encounter any difficulties during the update installation process, do not hesitate to reach out to Snap-On’s customer support for guidance and assistance.
By following these tips, you can increase the likelihood of a successful update installation on your Snap-On Scanner, ensuring it remains up to date with the latest software enhancements and diagnostic capabilities.
Verifying the update was successful
After completing the update installation on your Snap-On Scanner, it is crucial to verify that the update was successful. Here are some steps to help you confirm the update’s success:
- Power on your Snap-On Scanner and navigate to the system or settings menu.
- Check for an option that displays the software version or system information of your scanner.
- Compare the software version displayed on the scanner with the version of the update you installed. They should match, indicating that the update was applied successfully.
- If available, review the release notes or documentation provided with the update to familiarize yourself with any new features or changes that the update brings.
- Perform a test scan or diagnostic procedure on a vehicle to ensure that the scanner is working correctly with the updated software. Verify that all essential functions, such as reading and clearing codes, live data display, and system tests are functioning as expected.
- Pay attention to any improvements in performance, compatibility, or added functionality that the update was intended to provide.
- If you encounter any issues or abnormalities during the verification process, consult the user manual or contact Snap-On’s customer support for further assistance.
It is important to note that a successful update should result in a properly functioning Snap-On Scanner, with improved features and enhanced diagnostic capabilities. Verification ensures that the update was applied correctly and that your scanner is ready for use.
Regularly check for future updates from Snap-On to continue benefiting from the latest improvements and advancements in automotive diagnostics.
By following these steps, you can confidently verify that the update on your Snap-On Scanner was successful and that your scanner is ready to provide accurate and efficient diagnostic services.
Troubleshooting common update issues
While updating your Snap-On Scanner, you may encounter certain issues or errors. Here are some common update issues and troubleshooting tips to help you resolve them:
- Incomplete update: If the update process gets interrupted or stops before completion, try restarting the update from the beginning. Ensure that you have a stable internet connection or a reliable power source, depending on the update method.
- Error messages: If you receive an error message during the update process, take note of the specific error code or message displayed. Consult the user manual or contact Snap-On’s customer support for assistance in troubleshooting and resolving the specific error.
- Storage space: If your Snap-On Scanner does not have enough available storage space for the update, consider freeing up space by removing unnecessary files or applications. Ensure that you have sufficient space before attempting the update again.
- Compatibility issues: If you encounter compatibility issues during the update process, ensure that you have downloaded the correct update file for your specific Snap-On Scanner model. Verify that the update file is compatible with your scanner’s hardware and software requirements.
- Antivirus software: Antivirus software can sometimes interfere with the update process. Temporarily disable any active antivirus software on your computer before proceeding with the update. Remember to re-enable the antivirus software once the update is complete.
- Incorrect update procedure: Follow the instructions provided by Snap-On carefully. Ensure that you are following the correct procedure for your specific Snap-On Scanner model. Refer to the user manual or contact Snap-On’s customer support if you are uncertain about the correct update process.
- Weak or unstable internet connection: If you are updating your scanner over the internet, ensure that you have a strong and stable internet connection. A weak connection can lead to incomplete downloads or update errors. Consider using a wired connection or relocating closer to the router for a more stable connection.
- Software conflicts: Check for any conflicting software or programs that might hinder the update. Close any unnecessary applications or processes that may interfere with the update installation. Restart your computer before attempting the update again.
- Seek assistance if needed: If you encounter persistent issues or are unable to resolve the problem on your own, it is recommended to contact Snap-On’s customer support. They can provide specific guidance and troubleshooting steps tailored to your situation.
Remember to exercise caution and patience when troubleshooting update issues. It is essential to follow instructions carefully and seek appropriate assistance to ensure a successful update process.
By troubleshooting common update issues, you can overcome obstacles and ensure that your Snap-On Scanner is running the latest software version for optimal diagnostic performance.
Frequently Asked Questions about Updating the Snap-On Scanner
Here are answers to some common questions about updating the Snap-On Scanner:
- Can I update my Snap-On Scanner myself?
- How often should I update my Snap-On Scanner?
- Do I need an internet connection to update my Snap-On Scanner?
- What should I do if the update process fails?
- Will updating my Snap-On Scanner erase my saved data?
- Can I roll back to a previous software version if I encounter issues?
- Can I update my Snap-On Scanner during a diagnostic or a vehicle scan?
- Is it necessary to update if my scanner is working fine?
- Where can I find the latest software updates for my Snap-On Scanner?
- Can I update my Snap-On Scanner using a Mac computer?
Yes, Snap-On Scanners can be updated by the user. Snap-On provides software updates that can be downloaded and installed following the instructions provided.
It is recommended to check for updates regularly and install them as they become available. By keeping your scanner up to date, you ensure compatibility with the latest vehicle models and benefit from bug fixes and performance improvements.
Not necessarily. In some cases, updates can be downloaded from the Snap-On website and transferred to the scanner using a USB flash drive. However, some updates may require an internet connection for downloading directly to the scanner.
If the update process fails, ensure that you have followed the correct update procedure and troubleshoot common issues such as a stable power source, sufficient storage space, and a strong internet connection. If the problem persists, consult the user manual or contact Snap-On’s customer support for further assistance.
Generally, updating your Snap-On Scanner should not erase any saved data or settings. However, it is always recommended to back up any important data before performing an update, just in case.
In most cases, Snap-On does not provide an official option to revert to a previous software version. It’s important to carefully consider the update and troubleshoot any issues before deciding to update.
No, it is recommended to avoid updating your Snap-On Scanner during a diagnostic or while a vehicle scan is in progress. Interrupting the update process could lead to software errors and data corruption.
While it’s not mandatory, updating your Snap-On Scanner is highly recommended. Updates provide bug fixes, performance improvements, expanded vehicle coverage, and new features, ensuring your scanner remains up to date with evolving automotive technologies.
You can find the latest software updates for your Snap-On Scanner on the official Snap-On website or through Snap-On’s software update platforms like ShopStream Connect or Snap-On Diagnostics Product Update software.
Yes, you can update your Snap-On Scanner using a Mac computer. The update files provided by Snap-On are generally compatible with both Windows and Mac operating systems.
If you have additional questions or concerns about updating your Snap-On Scanner, it is best to consult the user manual or reach out to Snap-On’s customer support for accurate and specific guidance tailored to your scanner model.