
Why Set a Timer on Your iPhone Camera?
The timer feature on your iPhone camera can be incredibly useful in a variety of situations. Whether you’re taking group photos, selfies, or experimenting with long exposure shots, using the timer can help you capture the perfect shot without the need for a camera remote or someone else to press the shutter button.
So, why should you consider setting a timer on your iPhone camera? Let’s explore a few reasons:
- Group Photos: When you’re taking a group photo, it’s often difficult to get everyone in the frame and still be the one to press the shutter button. With the timer, you can set up your iPhone on a tripod or prop it against a stable surface and join the group. You’ll have a few seconds to get into position, ensuring everyone is included in the shot.
- Selfies: Taking selfies has become increasingly popular, but it can be challenging to hold your iPhone steady and hit the shutter button at the same time. Using the timer allows you to position your iPhone at the desired angle and distance, then strike the perfect pose before the photo is taken.
- Long Exposure Shots: If you’re interested in capturing stunning long exposure shots, the timer function is indispensable. Long exposure photography requires a stable camera position, and any movement when pressing the shutter button can ruin the shot. By using the timer, you can eliminate any camera shake, resulting in clear and sharp long exposure images.
Overall, the timer feature on your iPhone camera offers convenience and flexibility, allowing you to capture a wide range of photos without the need for additional equipment or assistance. It empowers you to take creative shots and ensures that everyone is included in group photos, making it an essential tool for any iPhone photographer.
How to Access the Timer Feature
Accessing the timer feature on your iPhone camera is a straightforward process. Follow these simple steps to set up and use the timer:
- Open the Camera App: Locate the Camera app on your iPhone’s home screen and tap on it to open it. Ensure that you’re in photo mode.
- Swipe to the Timer Mode: Once the camera app is open, you’ll notice various shooting modes at the bottom of the screen, including Photo, Video, Time-Lapse, and Pano. Swipe through these modes until you find the Timer mode.
- Select the Desired Timer Duration: Once you’re in the Timer mode, you’ll see multiple timer options displayed on the screen, such as 3 seconds, 5 seconds, or 10 seconds. Tap on the timer duration that suits your needs.
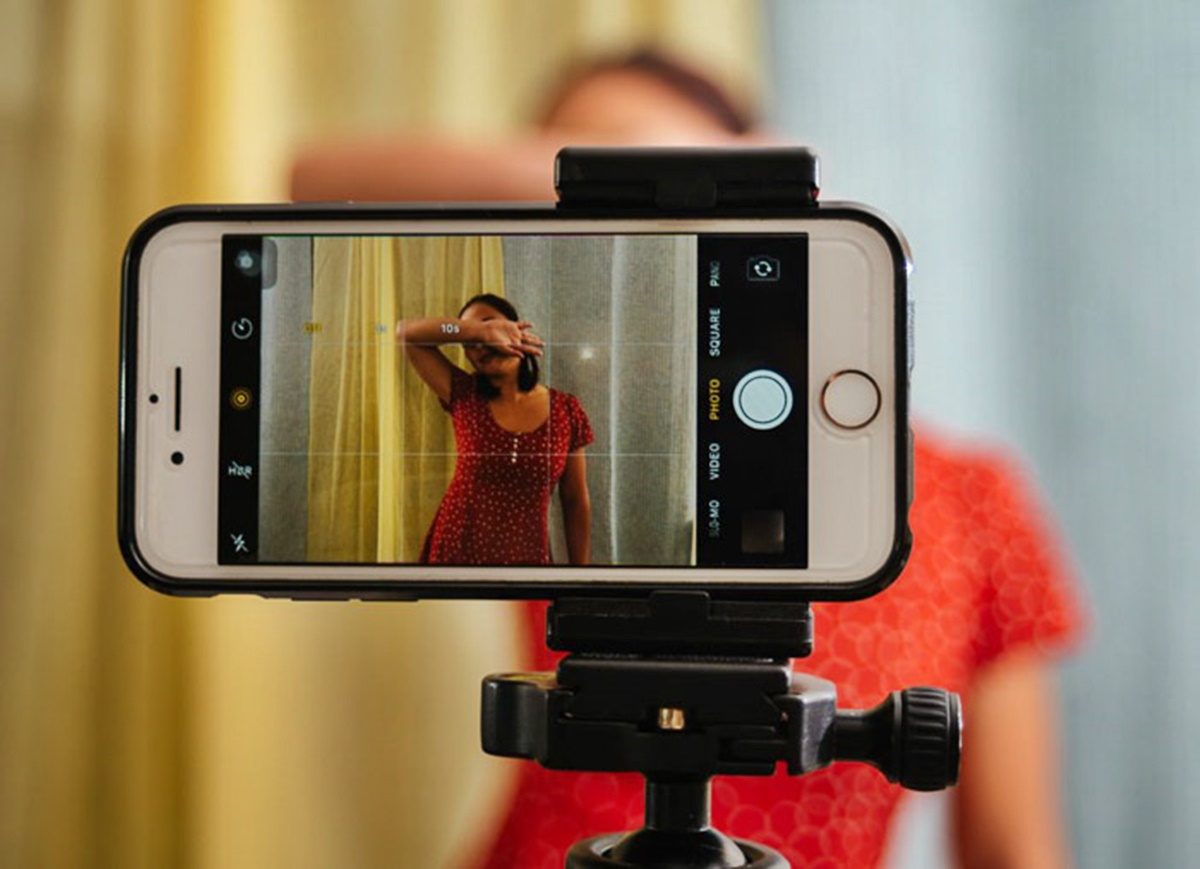
- Compose the Shot and Press the Shutter Button: Set up your iPhone on a stable surface or attach it to a tripod. Compose your shot by framing the subject in the camera’s viewfinder. When you’re ready, tap the shutter button. You’ll see a countdown on the screen, indicating the time remaining before the photo is captured.
Note: Some iPhone models may have additional options, such as burst mode, when selecting the timer duration. Burst mode allows you to capture a series of photos instead of just one, which can be useful for capturing action shots or ensuring that everyone’s eyes are open in a group photo.
Once the timer is set and the photo is captured, you can review, edit, and share the photo as you would with any other image captured on your iPhone.
Accessing the timer feature on your iPhone camera is a simple process that can greatly enhance your photography experience. So, next time you need to capture a group photo, snap a selfie, or experiment with long exposure shots, don’t forget to use the timer feature to capture the perfect shot.
Choosing the Timer Duration
Choosing the appropriate timer duration on your iPhone camera is essential to ensure that you have enough time to compose your shot and get into position. The timer duration can vary depending on the situation and the number of people involved. Here are some factors to consider when selecting the timer duration:
- Group Photos: For group photos, it’s advisable to choose a longer timer duration of 5 or 10 seconds. This will give everyone enough time to get into position and ensure that nobody is cut off from the frame.
- Selfies: When taking selfies, a shorter timer duration of 3 seconds is usually sufficient. This gives you a few seconds to strike a pose and allows for a more natural and spontaneous shot.
- Long Exposure Shots: For long exposure photography, you’ll need a longer timer duration to ensure stability and eliminate any camera shake. A timer duration of 10 seconds or more is recommended to give you ample time to set up your shot and prevent any accidental movement when pressing the shutter button.
It’s important to consider the specific requirements of your photography needs when choosing the timer duration. Keep in mind that you can always experiment with different timer durations to find what works best for you in different scenarios.
Additionally, it’s worth noting that some iPhone models offer burst mode as an option while selecting the timer duration. Burst mode allows you to capture a series of photos in rapid succession, which can be useful for capturing moving subjects or ensuring that you get the perfect shot in a dynamic situation.
Remember, the timer duration can be adjusted easily through the timer settings in the camera app. Take some time to familiarize yourself with the different timer options and experiment to find the durations that best suit your photography needs.
Choosing the right timer duration enables you to take well-composed, clear, and professional-looking photos. So, whether you’re capturing group photos, selfies, or long exposure shots, make sure to select the appropriate timer duration to enhance your photography experience.
Using the Timer for Group Photos
Group photos are a common scenario where using the timer feature on your iPhone camera can be incredibly helpful. Instead of relying on someone else to take the photo or trying to squeeze yourself into the frame while operating the camera, the timer allows you to set up the shot and join the group seamlessly. Here’s how to use the timer for group photos:
- Find a Stable Surface: Prop your iPhone on a stable surface or use a tripod to ensure that it remains steady during the photo-taking process. Alternatively, you can ask someone to hold the phone if a stable surface isn’t available.
- Select a Suitable Timer Duration: Depending on the size of the group and the time required to get everyone into position, choose a timer duration that allows sufficient time for everyone to gather. A timer duration of 5 or 10 seconds is typically recommended for group photos.
- Compose the Shot: Frame the group in the camera viewfinder, ensuring that everyone is well-positioned and visible. Consider factors like height differences and spacing between individuals to achieve a balanced composition.
- Start the Timer: Once you’re ready, start the timer by tapping the shutter button. You’ll see a countdown on the screen indicating the time remaining before the photo is captured.
- Get into Position: After starting the timer, quickly join the group and strike a pose. Make sure everyone is aware of the timer and knows when the photo will be taken, so they can be prepared and avoid any last-minute adjustments.
- Review and Retake if needed: After the photo is captured, review it to ensure that everyone is in frame and that the composition looks good. If necessary, take additional shots until you’re satisfied with the result.
Using the timer for group photos eliminates the need for someone to rush into the position of the photographer or to exclude themselves from the photo. It ensures that everyone can be a part of the picture, creating lasting memories of shared experiences and special moments.
Remember, when taking group photos with the timer, communication and coordination are key. Set clear instructions for everyone involved to ensure a smooth and efficient photo session. With a bit of practice and patience, you’ll be able to capture fantastic group photos using the timer feature on your iPhone camera.
Using the Timer for Selfies
Selfies have become an integral part of modern photography, allowing individuals to capture self-portraits and share moments of their lives with others. However, taking a selfie can be challenging when you need to hold your iPhone steady and press the shutter button at the same time. That’s where the timer feature on your iPhone camera comes in handy. Here’s how to use the timer for selfies:
- Set up your iPhone: Find a stable surface to prop your iPhone against or use a tripod. If neither option is available, consider using a phone grip or a selfie stick with a built-in tripod. Ensuring a stable position for your iPhone is crucial to avoid any blurriness or unwanted movement in the photo.
- Choose the appropriate timer duration: Depending on the time you’ll need to get into position and strike the perfect pose, select an appropriate timer duration. Typically, a timer duration of 3 seconds is sufficient for selfies.
- Compose your shot: Frame your selfie by positioning yourself within the camera’s viewfinder. Consider the background and lighting to enhance the overall composition of the photo.
- Start the timer: Once you’re satisfied with the composition, start the timer by tapping the shutter button. The timer countdown will appear on the screen, giving you a few seconds to prepare for the photo.
- Strike a pose: As the timer counts down, get into position and strike your desired pose. Be mindful of your facial expression and body posture to capture a selfie that reflects your personality and style.
- Review and retake if needed: After the photo is captured, take a moment to review it. Check for any blurriness, unwanted shadows, or other factors that might affect the quality of the selfie. If necessary, retake the photo until you’re satisfied with the result.
Using the timer for selfies allows you to have complete control over your self-portraits. It eliminates the need to rush or to rely on someone else to take the photo for you. With a bit of practice and experimentation, you can capture flattering and Instagram-worthy selfies using the timer feature on your iPhone camera.
Remember to make use of natural lighting, find interesting backgrounds, and showcase your unique personality and style when taking selfies. Embrace your creativity and have fun capturing the perfect self-portraits!
Using the Timer for Long Exposure Shots
Long exposure photography allows you to capture stunning images that showcase movement, create light trails, or capture smooth water effects. However, achieving the perfect long exposure shot requires a stable camera position to prevent any unwanted movement. This is where the timer feature on your iPhone camera becomes invaluable. Here’s how to use the timer for long exposure shots:
- Select a stable camera position: Find a stable surface or use a tripod to ensure that your iPhone remains steady throughout the long exposure process. This stability is essential in capturing sharp and blur-free images.
- Choose a longer timer duration: Longer timer durations, such as 10 seconds or more, are recommended for long exposure shots. This allows you enough time to get into position and eliminates any camera shake when pressing the shutter button.
- Compose your shot: Determine the subject or scene that you want to capture in your long exposure photo. Consider elements like movement, lighting, and composition to create a visually appealing image.
- Start the timer: Once you’re satisfied with the composition, start the timer by tapping the shutter button. The countdown will appear on the screen, giving you ample time to get ready and minimize any camera shake.
- Ensure stability during the exposure: Once the timer starts, avoid touching or moving the camera to prevent blurriness in the image. Stay still during the exposure duration to capture clean and sharp long exposure effects.
- Review the image: After the exposure is complete, take a moment to review the image on your iPhone’s screen. Check for any unwanted movement or blurriness. If necessary, make adjustments and try again until you achieve the desired long exposure effect.
The timer feature plays a crucial role in long exposure photography by ensuring that your iPhone remains steady throughout the exposure duration. This helps to eliminate camera shake and allows you to capture clear and visually mesmerizing long exposure shots.
Keep in mind that the effectiveness of long exposure shots can be greatly enhanced by experimenting with different subjects, locations, and exposure times. Whether you’re capturing light trails, smooth water, or other dynamic elements, using the timer feature will help you achieve professional-looking long exposure shots with ease.
So, the next time you’re out shooting long exposure photography with your iPhone, remember to use the timer feature for optimal stability and stunning results.
Tips for Using the Timer Feature Effectively
Using the timer feature on your iPhone camera can greatly enhance your photography experience and help you capture the perfect shot. To make the most out of this feature, consider the following tips:
- Prepare in advance: Before using the timer, make sure to set up your shot, compose the frame, and adjust any necessary settings such as exposure or focus. This will ensure that you’re ready to capture the photo as soon as the timer starts.
- Utilize burst mode: Some iPhone models offer burst mode as an additional option when choosing the timer duration. Burst mode captures a series of photos in rapid succession, allowing you to choose the best one from the sequence. This is especially useful for capturing action shots or ensuring that everyone’s eyes are open in a group photo.
- Experiment with different timer durations: Depending on the situation and photography needs, try out different timer durations to find the one that works best for your specific scenario. For group photos, longer timer durations are usually recommended, while shorter durations work well for selfies or quick shots.
- Make use of accessories: Consider using accessories like tripods, phone grips, or selfie sticks to further stabilize your iPhone when using the timer feature. These accessories provide additional stability, allowing you to capture sharper and clearer photos.
- Take advantage of burst selfies: When taking selfies, especially in dynamic situations, use burst mode to capture multiple shots in quick succession. This will increase your chances of getting the perfect selfie with the right expression and pose.
- Use the self-timer for more than just photos: Don’t limit the use of the timer feature to just taking photos. You can also use it to capture time-lapse videos or record yourself in a video while giving yourself a few seconds to get into position before recording starts.
- Stay aware of the timer countdown: During the countdown, keep an eye on the screen so you’re prepared when the photo is about to be captured. This will help you strike the right pose or be in the right position at the right time.
By following these tips, you can use the timer feature on your iPhone camera effectively and capture high-quality photos in various scenarios. Remember to experiment with different settings and be creative with your shots to truly make the most of this versatile feature.
Now that you’re armed with these helpful tips, go ahead and start exploring the world of photography with the timer feature on your iPhone camera!
Troubleshooting Timer Issues
While the timer feature on your iPhone camera is generally reliable, there may be instances where you encounter some issues. Here are a few troubleshooting tips to help you overcome potential problems when using the timer:
- Timer not working: If the timer feature is not working as expected, start by ensuring that you’re using the latest version of the iOS operating system. Software updates often include bug fixes that can resolve any timer-related issues.
- Timer countdown not visible: Occasionally, the timer countdown may not be visible on the screen while using the timer feature. In this case, try restarting the camera app or your iPhone to see if the issue resolves itself. If the problem persists, consider reaching out to Apple support for further assistance.
- Stability issues: If you’re experiencing stability issues with your iPhone while using the timer, make sure that it’s placed on a solid and level surface or secured on a tripod. If needed, use external accessories such as a phone grip or selfie stick for added stability.
- Camera shake: When using the timer, be cautious of any unintentional camera shake as you press the shutter button. This can lead to blurry photos, especially in low-light or long exposure situations. To minimize camera shake, lightly tap the shutter button or consider using a remote shutter-release accessory.
- Delayed timer response: If you experience a delay between tapping the shutter button and the timer starting, make sure you’re not holding down the button for too long. A quick tap is sufficient to activate the timer feature. Additionally, check if any other camera settings or apps are causing any lag that might affect the timer’s response time.
- Storage space concerns: If you’re unable to take photos using the timer, it’s possible that your iPhone’s storage is full. Ensure that you have sufficient free space on your device to store new photos. If necessary, delete unwanted files or transfer them to a computer or cloud storage to free up space.
If you continue to encounter issues with the timer feature despite troubleshooting, it may be worth considering a software update or contacting the Apple support team for further assistance. They can provide additional guidance to resolve any specific problems you may be experiencing with the timer feature on your iPhone camera.
Remember, troubleshooting issues with the timer feature is essential to ensure that you can use it effectively and capture stunning photos. With a bit of patience and troubleshooting, you’ll be able to overcome any obstacles and make the most out of the timer feature on your iPhone camera.