
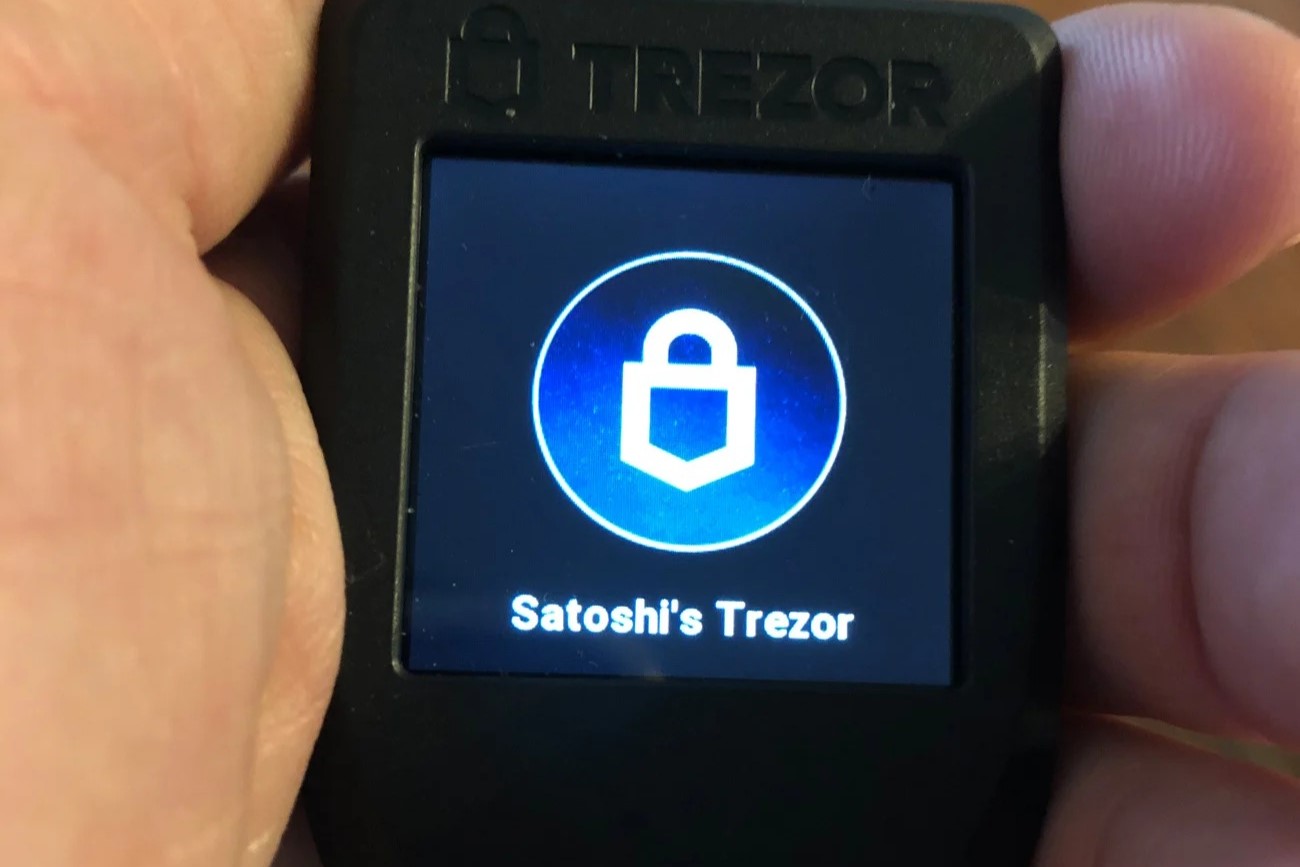
Setting up your Trezor Wallet
Setting up your Trezor wallet is the first step to selling Bitcoin securely. Trezor is one of the most reputable hardware wallets in the market, providing robust security measures to protect your digital assets. Follow these steps to set up your Trezor Wallet and get ready to sell your Bitcoin.
1. Purchase a Trezor Wallet: Visit the official Trezor website or authorized resellers to purchase a genuine Trezor wallet. Ensure that you’re getting it from a trustworthy source to avoid any counterfeit devices.
2. Unbox and Connect: Once you have your Trezor wallet, unbox it carefully and connect it to your computer or smartphone using the provided USB cable. Make sure the device is properly connected and powered on.
3. Install Trezor Bridge: To interact with your Trezor wallet, you need to install Trezor Bridge, a secure communication channel between your device and the wallet. Visit the Trezor website and download the appropriate version of Trezor Bridge for your operating system. Follow the installation instructions to complete the process.
4. Set up the Trezor Wallet: After installing Trezor Bridge, visit Trezor’s official wallet interface (wallet.trezor.io) using your preferred web browser. Follow the on-screen instructions and create a new wallet. Be sure to choose a strong, unique password for your wallet and remember it or store it securely. It’s recommended to enable two-factor authentication for an additional layer of security.
5. Backup your Seed: Trezor will provide you with a 12 or 24-word recovery seed upon wallet creation. This seed is crucial for recovering your wallet in case of device loss or damage. Write down the seed on the provided recovery card and store it in a safe place, preferably offline. Do not share your recovery seed with anyone.
6. Update Firmware: To ensure the latest security features and bug fixes, it’s essential to keep your Trezor firmware up to date. Check for any available firmware updates on the Trezor wallet interface and follow the instructions to install them.
Once you have set up your Trezor wallet, you’re ready to transfer your Bitcoin into it and proceed with the selling process. Trezor provides a user-friendly interface that makes it easy to manage your cryptocurrencies securely. Remember to always double-check the receiving address on your Trezor device before initiating any transactions, and keep your wallet and recovery seed safe from unauthorized access.
Transferring Bitcoin to your Trezor Wallet
Now that you have set up your Trezor wallet, it’s time to transfer your Bitcoin into it. Transferring your cryptocurrency to a hardware wallet like Trezor ensures added security and puts you in full control of your digital assets. Follow these steps to transfer your Bitcoin to your Trezor wallet.
1. Open your Bitcoin wallet: If you already have a Bitcoin wallet on an exchange or another software wallet, log in to it using your credentials. If you don’t have a Bitcoin wallet yet, sign up for one on a reputable exchange that supports Bitcoin.
2. Generate a receiving address: In your Bitcoin wallet, locate the option to generate a receiving address. This is the address where you will send your Bitcoin from your current wallet to your Trezor wallet. Click on the button to generate a new address.
3. Copy the receiving address: Once the receiving address is generated, copy it to your clipboard. Double-check the address to ensure its accuracy, as any mistakes can result in the loss of your Bitcoin.
4. Initiate the transfer: In your current Bitcoin wallet, look for the option to send or withdraw funds. Paste the receiving address from your Trezor wallet and specify the amount of Bitcoin you want to transfer. Review the details and confirm the transaction.
5. Verify the transaction: Depending on the platform you’re using, you may be required to verify the transaction by entering a code or confirming through email or SMS. Follow the instructions provided to complete the transaction.
6. Wait for confirmations: After initiating the transfer, you will need to wait for the Bitcoin network to confirm the transaction. This process typically takes a few minutes to a few hours, depending on the network congestion. You can track the progress of the transaction using the transaction ID provided by your current Bitcoin wallet.
7. Check your Trezor wallet: Once the transaction is confirmed, open your Trezor wallet interface and navigate to the Bitcoin section. You should see the transferred Bitcoin reflected in your wallet balance. Your Trezor wallet is now securely storing your Bitcoin, allowing you to sell it whenever you desire.
By transferring your Bitcoin to your Trezor wallet, you have taken an important step in ensuring the security and control of your digital assets. Remember to always double-check the receiving address when initiating transactions and keep your Trezor wallet and recovery seed in a safe place. With your Bitcoin safely stored in your Trezor wallet, you can proceed with the process of selling it through an exchange.
Selling Bitcoin through an Exchange
Selling Bitcoin through a cryptocurrency exchange is one of the most common methods to convert your digital assets into fiat currency. Exchanges provide a platform where buyers and sellers can trade cryptocurrencies, including Bitcoin. Follow these steps to sell your Bitcoin through an exchange.
1. Researching Exchanges: Start by researching different cryptocurrency exchanges that offer Bitcoin trading services. Consider factors such as reputation, trading fees, available trading pairs, security measures, and user experience. Look for exchanges that have a good track record and positive user reviews.
2. Choosing the right exchange: Based on your research, choose the exchange that best fits your requirements. Ensure that the exchange supports your country of residence and has a user-friendly interface. It’s also important to check if the exchange requires you to complete a verification process, as this can affect the withdrawal limits and trading options available to you.
3. Signing up and creating an account: Once you have chosen an exchange, visit their website and sign up for an account. Provide the required information and complete the registration process. Some exchanges may require you to verify your identity by submitting scanned documents such as ID cards or proof of address.
4. Verifying and securing your exchange account: After signing up, follow the exchange’s instructions to verify your account. This step typically involves confirming your email address and setting up two-factor authentication to enhance the security of your account. Enable all available security measures to protect your Bitcoin and personal information.
5. Linking your Trezor wallet to the exchange: In your exchange account settings, look for the option to add a cryptocurrency wallet. Choose Bitcoin (BTC) as the currency and input your Trezor wallet’s receiving address. By linking your Trezor wallet, you will be able to send your Bitcoin from your wallet to the exchange when you’re ready to sell.
6. Selling Bitcoin on the exchange: Navigate to the trading section of the exchange and search for the Bitcoin trading pair you want to use, such as BTC/USD or BTC/EUR. Choose the “Sell” option and enter the amount of Bitcoin you wish to sell. Review the details and confirm the sell order. Depending on the exchange, you may have the option to set the price or choose a market order, which sells at the best available price.
7. Confirming the transaction and receiving payment: After placing the sell order, the exchange will process the transaction. You will receive a confirmation once the Bitcoin is successfully sold. The fiat currency equivalent will be credited to your exchange account balance. You can choose to keep the funds on the exchange for further trading or withdraw them to your bank account.
8. Withdrawing funds to your bank account: If you wish to convert your cryptocurrency into fiat currency, navigate to the withdrawal section of the exchange and choose the option to withdraw funds to your linked bank account. Follow the instructions provided, input the necessary details, and confirm the withdrawal. The funds should be transferred to your bank account within a few business days, depending on the exchange’s processing time.
Selling Bitcoin through an exchange provides a convenient way to convert your digital assets into traditional currency. It’s important to choose a reputable exchange and take necessary security precautions to protect your funds. Always double-check transaction details and be aware of any applicable fees before proceeding with the sale. With proper research and caution, you can successfully sell your Bitcoin and access the funds in your desired currency.
Researching Exchanges and choosing the right one for you
When it comes to selling Bitcoin through an exchange, it’s crucial to do your research and choose the right platform for your needs. With numerous cryptocurrency exchanges available, each offering different features and services, it’s important to consider certain factors before making a decision. Here are some key points to consider when researching exchanges and finding the right one for you.
1. Reputation: Start by looking into the reputation of the exchange. Check online reviews, user feedback, and forums to get a sense of the experiences others have had with the platform. Look for exchanges that have been operating for a significant period of time and have a strong track record in terms of security and customer support.
2. Trading Fees: Exchanges typically charge fees for trading activities. These fees can vary significantly between different platforms, so it’s important to understand the fee structure of each exchange you are considering. Look for exchanges that offer competitive fees while ensuring transparency in their pricing structure.
3. Available Trading Pairs: Consider the trading pairs available on each exchange. While Bitcoin trading is common on most platforms, you may have other cryptocurrencies you want to sell alongside Bitcoin. Ensure that the exchange you choose supports the trading pairs you require.
4. Security Measures: Security should be a top priority when selecting an exchange. Look for exchanges that have strong security measures in place, such as two-factor authentication (2FA), encryption protocols, and secure wallet storage. Additionally, check if the exchange has a history of any security breaches or hacks.
5. User Experience: A user-friendly interface and intuitive trading platform can make a significant difference in your experience with an exchange. Look for exchanges that offer a well-designed and easy-to-navigate interface, as this can streamline the selling process and make it more efficient.
6. Geographic Restrictions: Not all exchanges are available to users in every country. Ensure that the exchange you choose supports your country of residence and allows you to create an account and participate in trading activities.
7. Customer Support: Consider the level and quality of customer support provided by the exchange. Look for exchanges that offer multiple channels of support, such as live chat, email, or phone, and have responsive and knowledgeable support staff to assist you with any issues or inquiries.
8. Exchange Regulations: Different countries have varying regulations and compliance requirements for cryptocurrency exchanges. It’s important to choose an exchange that is compliant with the regulations in your country to ensure legal and secure transactions.
By taking the time to research and consider these factors, you can find the exchange that aligns with your trading goals and preferences. Remember that everyone’s needs are different, so it’s important to choose an exchange that suits your specific requirements. Once you have chosen the right exchange, you can move forward with the process of registering, verifying your account, and selling your Bitcoin securely and efficiently.
Signing up and creating an account on the chosen Exchange
Once you have done your research and chosen the cryptocurrency exchange that fits your needs, the next step is to sign up and create an account. This process may vary slightly depending on the exchange you have selected, but the general steps are outlined below.
1. Visit the Exchange Website: Start by visiting the official website of the chosen exchange. Make sure you are on the correct website and not an imposter site to protect yourself from potential scams.
2. Account Registration: Locate the “Sign Up” or “Register” button on the exchange’s homepage and click on it. This will take you to the account registration page where you will need to provide some basic information to create an account.
3. Fill in Personal Information: The exchange will require you to provide personal information, such as your full name, email address, and phone number. Some exchanges may require additional information for verification purposes, such as your residential address or a copy of an identification document.
4. Create a Strong Password: Choose a strong, unique password for your account. It should be a combination of letters, numbers, and special characters to ensure maximum security. Avoid using easily guessable passwords and consider using a password manager to securely store your login credentials.
5. Read and Accept Terms of Service: Take the time to read through the exchange’s terms of service and any other legal agreements they may have. It’s essential to understand the platform’s rules, fees, and security measures before proceeding. If you agree to the terms, check the box indicating your acceptance.
6. Enable Two-Factor Authentication (2FA): Two-factor authentication adds an extra layer of security to your account. It typically involves linking your account to a mobile application, such as Google Authenticator, Authy, or a hardware token. Follow the instructions provided by the exchange to set up 2FA for your account.
7. Account Verification: Depending on the exchange’s policies, you may need to complete an account verification process. This is often done to comply with Know Your Customer (KYC) and Anti-Money Laundering (AML) regulations. The verification process may require you to provide additional documents such as a government-issued ID or proof of address. Follow the instructions provided by the exchange to complete this step.
8. Account Activation: After completing the registration process and any necessary verification, your account will be activated. You will usually receive a confirmation email or notification confirming that your account is ready for use.
9. Set Up Additional Security Measures: In addition to 2FA, the exchange may offer other security features such as withdrawal whitelisting, IP address whitelisting, or email notifications for account activities. Take advantage of these features to further secure your account.
By following these steps, you can successfully sign up and create an account on your chosen cryptocurrency exchange. It’s important to ensure that you are providing accurate information and taking the necessary steps to protect your account and personal data. Once your account is set up, you will be ready to move forward with linking your Trezor wallet and selling your Bitcoin on the exchange.
Verifying and securing your Exchange account
Verifying and securing your exchange account is crucial to ensure the safety of your funds and personal information. Most reputable cryptocurrency exchanges have implemented verification processes to comply with Know Your Customer (KYC) and Anti-Money Laundering (AML) regulations. Follow these steps to verify and secure your exchange account.
1. Complete the verification process: Once you have created an account on the exchange, you may be required to complete a verification process. This process typically involves providing additional information and documents to confirm your identity. Follow the instructions provided by the exchange to complete the verification process.
2. Prepare necessary documents: The exchange may require various documents for verification, such as a government-issued ID, proof of address, or a selfie with your ID. Ensure that you have these documents ready in digital format to expedite the verification process.
3. Submit the required documents: Upload the necessary documents through the exchange’s verification interface. Take care to provide clear and legible copies to avoid any delays in the verification process. Double-check the submission to ensure all documents are complete and accurate.
4. Wait for verification: The verification process can take some time, ranging from a few hours to several days. Be patient and refrain from making any significant transactions until your account is verified. Some exchanges allow limited functionality for unverified accounts, so review the platform’s limitations during this period.
5. Enable two-factor authentication (2FA): Two-factor authentication is an additional security measure that requires you to provide a second form of verification, such as a unique code from a mobile app, in addition to your password. Enable 2FA on your exchange account to enhance its security. Use authenticator apps like Google Authenticator or Authy instead of SMS-based authentication for better protection against SIM swap attacks.
6. Set a strong password: Ensure that your exchange account has a strong, unique password. Avoid using common passwords or reusing passwords from other accounts. Use a combination of letters, numbers, and special characters to create a password that is hard to guess.
7. Enable withdrawal whitelisting: Some exchanges offer withdrawal whitelisting as an additional security feature. This feature allows you to specify a list of wallet addresses that are authorized to receive funds from your account. Enable withdrawal whitelisting and add your Trezor wallet addresses to ensure that only authorized addresses can withdraw funds from your account.
8. Regularly review account activity: Keep a close eye on your account activity and regularly review your transaction history. If you notice any suspicious activity or unauthorized access attempts, report them to the exchange’s customer support immediately.
9. Stay vigilant against phishing attempts: Be cautious of phishing attempts, which involve malicious actors impersonating an exchange or its representatives to gain access to your account. Avoid clicking on suspicious links, and always access the exchange’s website directly instead of through an email or message link.
By verifying and securing your exchange account, you reduce the risk of unauthorized access and potential loss of funds. Follow the exchange’s recommended security practices and stay updated on the latest security measures to protect your account. With a verified and secured account, you can confidently proceed with linking your Trezor wallet and selling your Bitcoin on the exchange.
Linking your Trezor Wallet to the Exchange
Linking your Trezor wallet to the exchange is an essential step in the process of selling Bitcoin. By connecting your Trezor wallet to the exchange, you can securely transfer your Bitcoin for selling purposes. Follow these steps to link your Trezor wallet to the exchange of your choice.
1. Log in to your Exchange Account: Start by logging in to your exchange account using your credentials. Ensure that you are on the correct exchange platform and that the website address is legitimate.
2. Navigate to Account Settings: Look for the account settings section or a similar option on the exchange platform. This is where you will find the features and settings related to your account.
3. Locate Wallet Settings: Within the account settings, search for the wallet settings or wallet management section. This is where you will be able to add or manage your cryptocurrency wallets.
4. Add a New Wallet: In the wallet settings, choose the option to add a new wallet or link an external wallet. Select Bitcoin (BTC) as the cryptocurrency for your new wallet.
5. Choose Trezor as the Wallet Type: When prompted to select the wallet type, choose Trezor or hardware wallet from the available options. This indicates that you will be linking a hardware wallet like Trezor to the exchange.
6. Connect your Trezor Wallet: Follow the instructions provided by the exchange to connect your Trezor wallet. This typically involves connecting your Trezor device to your computer using the USB cable and confirming the connection on the Trezor device itself.
7. Confirm Connection on the Trezor Device: On your Trezor device, you may be prompted to confirm the connection request by the exchange. Verify that the exchange name and URL match what you see on your device, then confirm the connection.
8. Create a Label for your Wallet: Assign a label or a nickname to your Trezor wallet on the exchange. This can help you differentiate between multiple wallets or accounts if you have them.
9. Generate a Receiving Address: Once your Trezor wallet is successfully linked, the exchange will provide you with a unique receiving address. This is the address you will use to send Bitcoin from your Trezor wallet to the exchange when you are ready to sell.
10. Verify the Receiving Address: Double-check the receiving address on both the exchange and your Trezor device to ensure they match exactly. This is a crucial step to prevent any accidental transfers to the wrong address.
11. Complete the Process: Once the link between your Trezor wallet and the exchange is established, you have successfully completed the process of linking your Trezor wallet. Your Trezor wallet is now ready to send Bitcoin to the exchange for selling.
By linking your Trezor wallet to the exchange, you can securely transfer your Bitcoin for selling purposes when the time is right. Always verify the authenticity of the exchange and the receiving address to ensure the security of your funds. With the connection established, you can proceed with the selling process on the exchange, confident that your Bitcoin is stored securely in your Trezor wallet.
Selling Bitcoin on the Exchange
Now that your Trezor wallet is linked to the exchange, you can proceed with the process of selling your Bitcoin. Selling Bitcoin on the exchange involves placing a sell order and executing the transaction. Follow these steps to sell your Bitcoin on the exchange of your choice.
1. Log in to your Exchange Account: Start by logging in to your exchange account using your credentials. Ensure that you are on the correct exchange platform and that the website address is legitimate.
2. Navigate to the Trading Section: Look for the trading section or trading platform on the exchange. This is where you will find the tools and options to buy and sell cryptocurrencies.
3. Choose the Bitcoin Trading Pair: In the trading section, locate the Bitcoin (BTC) trading pair you wish to use. This could be BTC/USD, BTC/EUR, or any other trading pair offered by the exchange.
4. Select the “Sell” Option: Once you have chosen the desired Bitcoin trading pair, select the “Sell” option. This will open up a sell order form where you can enter the details of your sell order.
5. Enter the Amount to Sell: Specify the amount of Bitcoin you want to sell. You can enter the amount in BTC or select a percentage of the total balance in your Trezor wallet. Make sure you review the amount carefully to avoid any mistakes.
6. Choose the Order Type: Depending on the exchange, you may have different order options available. The two most common are market orders and limit orders. Market orders execute the sell order at the current market price, while limit orders allow you to set a specific price at which to sell your Bitcoin. Select the appropriate order type for your needs.
7. Set the Price (for Limit Orders): If you choose to place a limit order, enter the desired price at which you want to sell your Bitcoin. The order will only execute if the market price reaches or exceeds the price you have set.
8. Review and Confirm the Order: Before finalizing the sell order, thoroughly review the order details, including the amount, price (if applicable), and any associated fees. Confirm that everything is correct, and then submit the order.
9. Monitor the Order Status: After placing the sell order, monitor its status in the order book or trading interface. Depending on market conditions, the order may execute immediately or take some time to be matched with a buyer. You may also have the option to cancel the order if needed.
10. Confirm the Transaction: Once your sell order is executed, you will receive a confirmation notification from the exchange. Verify that the Bitcoin has been successfully sold and the corresponding funds have been credited to your exchange account.
11. Update Your Balances: Check your exchange account balance to ensure that the funds from the Bitcoin sale are accurately reflected. This may take a few moments for the balance to update, depending on the exchange’s processing time.
By following these steps, you can successfully sell your Bitcoin on the exchange of your choice. The timing and execution of the sell order will depend on market conditions and the specific exchange platform. Always keep an eye on the market price and be prepared to adjust your sell order accordingly.
Confirming the transaction and receiving payment
After you have successfully sold your Bitcoin on the exchange, the next step is to confirm the transaction and ensure that you receive the payment for your sold Bitcoin. Follow these steps to confirm the transaction and receive your payment.
1. Verify the Transaction Details: Once your sell order is executed, double-check the transaction details on the exchange. Confirm that the amount of Bitcoin sold, the price at which it was sold, and any associated fees are accurately reflected. Take note of the transaction ID or reference number provided by the exchange.
2. Review the Payment Method: Depending on your chosen exchange and the options available, you may receive the payment in different forms. Common payment methods include bank transfers, PayPal, or cryptocurrency deposits to your exchange account.
3. Choose your Preferred Payment Method: Select the payment method that is most convenient for you and matches your financial preferences. Ensure that you have provided the necessary details or set up the appropriate payment account on the exchange.
4. Follow the Exchange’s Withdrawal Process: Each exchange has its own withdrawal process for converting your cryptocurrency funds into fiat currency or transferring them to your desired payment method. Navigate to the withdrawal section of your exchange account and follow the instructions provided.
5. Enter the Payment Details: If you are withdrawing to a bank account, provide the necessary bank account details, including the account number and routing number. If you are receiving the payment through another cryptocurrency, provide the receiving wallet address. Double-check the details to ensure their accuracy.
6. Review any Withdrawal Limits or Fees: Pay attention to any withdrawal limits or fees imposed by the exchange. Some exchanges may have specific limits on the amount you can withdraw at once or may charge a fee for the withdrawal transaction. Take note of these limitations to avoid any surprises.
7. Initiate the Withdrawal: Once you have reviewed and entered all the necessary details, initiate the withdrawal process according to the instructions provided by the exchange. This may involve clicking a “Withdraw” or “Transfer” button and confirming the transaction on the exchange’s platform.
8. Monitor the Transaction Status: After initiating the withdrawal, monitor the transaction status on the exchange. Most exchanges provide a transaction history or status page where you can track the progress of your withdrawal. Keep an eye on the status and make sure there are no unexpected delays or issues.
9. Await Payment Processing: Depending on the chosen payment method and the exchange’s processing time, it may take some time for the payment to be processed and transferred to your designated account. Be patient and allow for sufficient time for the payment to be completed.
10. Verify Receipt of Payment: Once the payment is processed, check your designated account to confirm that the funds have been received. If you requested a bank transfer, check your bank account balance. If you received the payment in another cryptocurrency, verify that it has been credited to your designated wallet.
By carefully confirming the transaction details and following the exchange’s withdrawal process, you can ensure that you receive the payment for your sold Bitcoin. Remember, different payment methods may have varying processing times, so it’s important to be patient and monitor the transaction status. Once you have confirmed the receipt of payment, you can proceed with managing your funds as desired.
Withdrawing funds from the Exchange to your bank account
Once you have successfully sold your Bitcoin on the exchange and received payment, the next step is to withdraw your funds from the exchange to your bank account. Withdrawing funds ensures that you have access to your fiat currency and can use it as desired. Follow these steps to withdraw funds from the exchange to your bank account.
1. Confirm Available Withdrawal Methods: Before proceeding with the withdrawal, verify the withdrawal methods supported by the exchange. Most exchanges provide options such as bank transfer, wire transfer, or ACH transfer. Ensure that your desired withdrawal method is available and suitable for your needs.
2. Review Withdrawal Limits and Fees: Take note of any withdrawal limits or fees imposed by the exchange. Some exchanges may have minimum or maximum withdrawal amounts, as well as fees associated with the transaction. Consider these factors while planning your withdrawal.
3. Navigate to the Withdrawal Section: Log in to your exchange account and navigate to the withdrawal section. This is typically located in the account settings or funds management area. Find the option that allows you to withdraw funds to your linked bank account.
4. Select the Bank Account: If you have already linked your bank account to the exchange, select it from the available options. If you haven’t linked your bank account yet, follow the instructions provided by the exchange to add your bank account details.
5. Enter the Withdrawal Amount: Specify the amount you wish to withdraw. Review the available balance on the exchange and ensure that it covers the amount you want to withdraw. Take note of any minimum withdrawal requirements imposed by the exchange.
6. Confirm the Withdrawal: Double-check the withdrawal details, including the bank account information and the withdrawal amount. Confirm that all the information is accurate before finalizing the withdrawal request.
7. Review and Approve Additional Verification: Some exchanges may require additional verification steps before processing your withdrawal. This could include providing identification documents or verifying the destination bank account. Follow the instructions given by the exchange to complete the necessary verification steps, if applicable.
8. Initiate the Withdrawal: Once you have reviewed and confirmed the withdrawal details, initiate the withdrawal by clicking the “Withdraw” or “Submit” button. Check for any confirmation screens or prompts that may require your final approval.
9. Monitor the Withdrawal Status: After initiating the withdrawal, monitor the withdrawal status on the exchange. Most exchanges provide a transaction history or status page where you can track the progress of your withdrawal. Keep an eye on the status and make sure there are no unexpected issues or delays.
10. Verify Receipt of Funds: Once the withdrawal is processed by the exchange, verify that the funds have been transferred to your bank account. Check your bank account balance and ensure that the withdrawn amount is reflected correctly. Depending on the exchange and your bank, it may take a few business days for the funds to be fully available in your account.
By carefully following these steps, you can successfully withdraw funds from the exchange to your bank account. Make sure to review the withdrawal details and be aware of any withdrawal limits or fees that may be applied. Monitor the withdrawal status and verify the receipt of funds in your bank account to ensure a successful transaction.
Security measures to keep in mind when selling Bitcoin
When it comes to selling Bitcoin, it’s crucial to prioritize security to protect your funds and personal information. The cryptocurrency industry is susceptible to various threats, including hacking attempts, phishing attacks, and unauthorized access. By implementing the following security measures, you can enhance the safety of your Bitcoin transactions and minimize the risk of potential threats.
1. Secure your devices: Keep your devices, including your computer, smartphone, and hardware wallets, secured with strong passwords or biometric authentication. Regularly update your operating system, antivirus software, and all other applications to ensure they have the latest security patches.
2. Use two-factor authentication (2FA): Enable 2FA on your exchange account, email, and any other accounts associated with your Bitcoin transactions. This adds an additional layer of security by requiring a second verification factor, such as a unique code generated by an authenticator app, to access your accounts.
3. Be cautious of phishing attempts: Be vigilant against phishing attempts, which involve malicious actors impersonating legitimate entities to obtain your login credentials. Avoid clicking on suspicious links, and always access your exchange accounts directly from a secure web address. Never provide your login details or recovery phrases to anyone who requests them via email or other communication channels.
4. Use reputable exchanges: Only use reputable and trusted cryptocurrency exchanges to sell your Bitcoin. Research and read user reviews to ensure the exchange has a solid reputation for security and customer support. Avoid unregulated or unverified platforms that may pose higher cybersecurity risks.
5. Double-check addresses: Before initiating any transaction, double-check the destination address to ensure its accuracy. It’s advisable to use copy-paste functionality rather than manually typing the address to minimize the risk of human error. Verifying addresses can help prevent sending your Bitcoin to the wrong recipient.
6. Keep your private keys offline: Your private keys provide access to your Bitcoin funds. Store your private keys securely offline, such as on a hardware wallet like Trezor, rather than on exchange platforms or software wallets that are more vulnerable to hacking attempts.
7. Regularly backup your wallets: Make regular backups of your cryptocurrency wallets, including your software wallets and hardware wallets. Store these backups in secure and reliable locations, such as encrypted external storage devices or offline storage mediums, to protect against data loss or device damage.
8. Educate yourself: Stay informed about the latest security best practices and potential threats in the cryptocurrency industry. Keep up to date with security news, follow reputable sources for information, and join cryptocurrency forums or communities to learn from the experiences of others.
9. Limit personal information exposure: Be cautious about sharing personal information related to your Bitcoin transactions. Minimize the exposure of sensitive data such as your full name, home address, or financial details. Avoid discussing your Bitcoin holdings or transactions in public or on social media platforms, as it can make you a target for potential attacks or scams.
10. Secure your network connections: When conducting Bitcoin transactions, ensure that you are using secure and trusted network connections. Avoid using public Wi-Fi networks or unsecured networks that may expose your sensitive data to potential interception. Use VPNs (Virtual Private Networks) to add an extra layer of security when accessing your exchange accounts remotely.
By following these security measures, you can minimize the risks associated with selling Bitcoin and ensure the protection of your funds and personal information. Remember, security should always be a priority, and staying vigilant and proactive can significantly reduce the chance of falling victim to threats in the cryptocurrency ecosystem.