
Supplies Needed
When it comes to removing corrosion from electronics, having the right supplies can make the process much easier and more effective. Before you begin, gather the following items:
- Cotton swabs or soft cloth
- Isopropyl alcohol (at least 90%)
- Distilled water
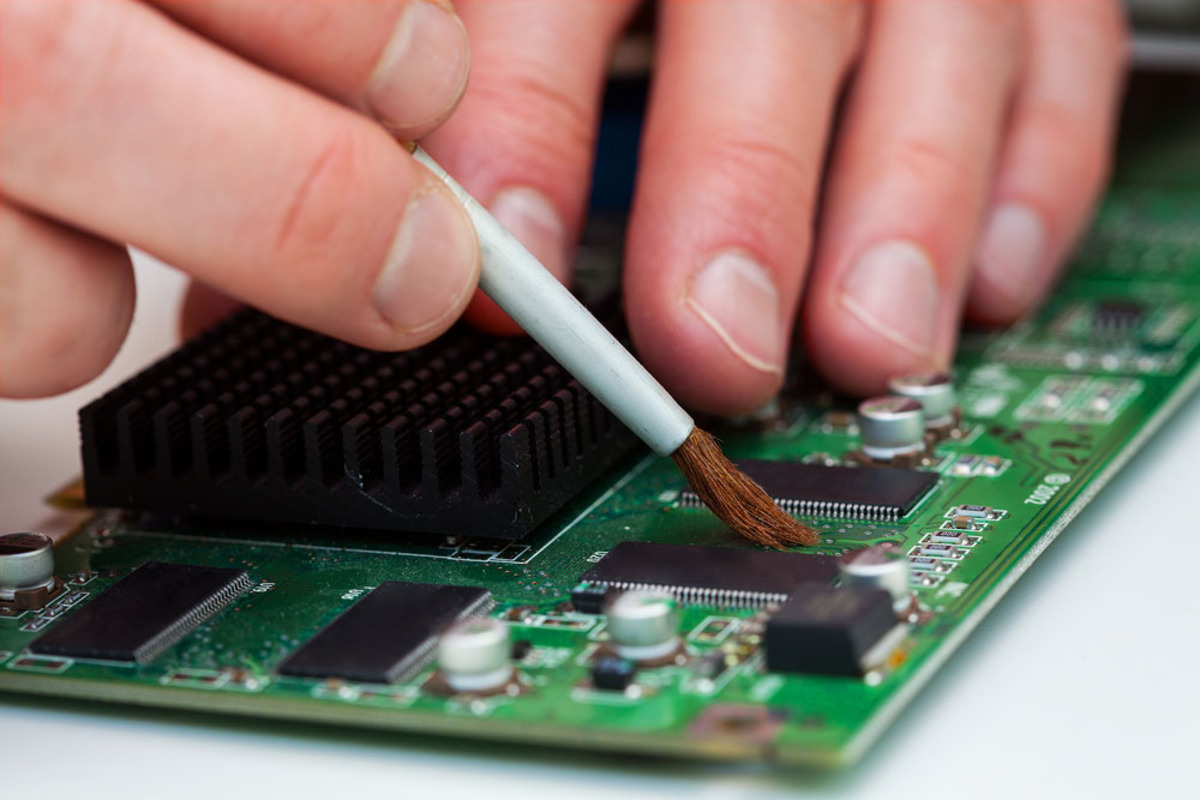
- Toothbrush or small brush with soft bristles
- Plastic container
- Disposable gloves
- Screwdriver or appropriate tools for device disassembly
These supplies will help you clean and remove the corrosion without causing any damage to the electronic components. It’s important to have them on hand before you begin the process.
Using cotton swabs or a soft cloth allows for gentle cleaning, while isopropyl alcohol is a common choice for removing corrosion due to its evaporative properties and ability to dissolve dirt and grime. Distilled water is crucial for rinsing off any residue after cleaning, as it does not contain impurities that can potentially cause further damage.
A toothbrush or small brush with soft bristles can be useful for scrubbing away stubborn corrosion in hard-to-reach areas. Additionally, having a plastic container to hold the cleaning solution will help prevent any accidental spills or damage to other surfaces.
Disposable gloves are recommended to protect your hands from any chemicals or debris during the cleaning process. They provide a barrier and ensure that no oil or dirt from your hands transfers onto the electronic components.
Lastly, make sure you have a screwdriver or appropriate tools to disassemble the device. This will enable you to access the affected areas and clean them properly. It’s important to use the correct tools to prevent any further damage to the device.
By having these supplies ready, you’re well-equipped to tackle the task of removing corrosion from your electronics. With the right tools and materials at hand, you can successfully restore your devices to their optimal functioning state.
Step 1: Gathering Information
Before you dive into the process of removing corrosion from your electronics, it’s important to gather some essential information. Understanding the type of corrosion, the affected components, and the potential risks involved will help you develop an effective cleaning plan. Here’s what you need to do:
- Identify the type of corrosion: Different types of corrosion can occur on electronic devices, such as battery leakage or white powdery deposits. By identifying the specific type of corrosion, you can determine the appropriate cleaning method and materials to use.
- Research the device: Every electronic device is unique, and it’s crucial to have a good understanding of its internal structure and components. Look for the device’s user manual online or find technical documentation that provides insights into how the device is designed and assembled.
- Check for warranty: If your device is still under warranty, it’s essential to check the terms and conditions. Attempting to remove corrosion yourself might void the warranty, so it’s best to consult the manufacturer or authorized service center for guidance.
- Assess the extent of the corrosion: Examine the affected device carefully to determine the scope and severity of the corrosion. This will help you plan your cleaning strategy and estimate the time and effort required to restore the device.
- Research cleaning methods: Different electronics may require specific cleaning techniques to remove corrosion effectively. Conduct research on reliable sources, such as manufacturer recommendations or reputable online forums, to find the most suitable cleaning methods for your particular device.
Gathering this information will give you a solid foundation for successfully tackling the corrosion removal process. By understanding the type of corrosion, researching your device, and assessing the extent of the damage, you’ll be equipped with the knowledge needed to proceed safely and effectively.
Remember, thorough preparation and knowledge gathering are the keys to successful corrosion removal. Skipping this step may lead to improper cleaning techniques or further damage to your electronics. Take the time to gather the necessary information, and let’s move on to the next step!
Step 2: Removing the Battery
Removing the battery is an essential step before you can clean the corroded components of your electronic device. This prevents potential electrical damage and ensures your safety during the cleaning process. Follow these steps to safely remove the battery:
- Power off the device: Before removing the battery, make sure your device is powered off. This will prevent any potential electrical shock or damage while handling the battery.
- Locate the battery compartment: Depending on the device, the battery compartment may be easily accessible or require removal of a back panel or screws. Refer to the device’s user manual or online resources to determine the exact location of the battery compartment.
- Remove the battery cover: If your device has a removable battery cover, gently pry it open using your fingers or a small tool like a screwdriver. Take care not to apply excessive force to avoid damaging the cover or the device.
- Disconnect the battery: Look for the battery connection points, usually metal terminals or connectors, that attach the battery to the device. Carefully detach the battery by gently pulling or sliding it out, ensuring you don’t put unnecessary pressure on the connection points.
- Set the battery aside: Once the battery is disconnected, place it in a safe and dry location away from any moisture or potential hazards. Properly storing the battery will help preserve its lifespan and prevent any accidental damage.
Removing the battery allows you to have better access to the corroded components and prevents any electrical interference during the cleaning process. Taking the time to safely remove the battery ensures a smooth and hassle-free cleaning experience.
Remember, each device may have specific instructions or precautions for removing the battery. Always refer to the manufacturer’s guidelines or user manual to ensure you follow the correct steps for your particular device.
With the battery successfully removed, we’re ready to move on to the next step of the corrosion removal process!
Step 3: Disassembling the Device
In order to effectively clean the corroded components, you’ll need to disassemble your electronic device. This will allow you to access all the affected areas and thoroughly clean them. Follow these steps to safely disassemble your device:
- Refer to the user manual: Consult the user manual or online resources specific to your device for instructions on disassembling. Look for any special tools or techniques recommended by the manufacturer.
- Gather the necessary tools: Depending on your device, you may need screwdrivers, pry tools, or other specialized tools. Make sure you have the appropriate tools on hand to avoid damaging the device or its components.
- Power off the device (if not done already): Double-check that your device is powered off to ensure your safety throughout the disassembly process.
- Remove any visible screws or fasteners: Examine the exterior of your device for any screws, clips, or fasteners. Use the appropriate screwdriver or tool to carefully remove them. Keep track of the screws and their locations to facilitate reassembly later.
- Pry open the device: Gently insert a pry tool or your fingers into the gaps or seams of the device to separate the outer casing. Apply even pressure and work your way around the edges until the device starts to separate.
- Take note of the disassembly process: As you remove the outer casing, take pictures or make notes of the order and orientation of the components. This will help you during the reassembly process.
- Continue disassembling as necessary: Depending on the severity of the corrosion, you may need to disassemble further to fully access the affected areas. Take your time and be gentle to avoid any accidental damage.
Disassembling your device allows you to thoroughly clean each component affected by corrosion. It also helps in identifying any additional damage and allows for a more comprehensive cleaning process.
Remember, each device has its own unique disassembly process, so it’s important to refer to the user manual or manufacturer’s instructions for specific guidance. Carefully disassembling your device will pave the way for effective corrosion removal and ensure a smooth reassembly process later on.
With your device safely disassembled, we can now move on to the next step of cleaning the corroded components!
Step 4: Cleaning the Corroded Components
Now that your device is disassembled, it’s time to clean the corroded components. Cleaning them properly will help remove the corrosion and restore the functionality of your electronic device. Follow these steps to effectively clean the corroded components:
- Inspect the components: Carefully examine each component for signs of corrosion. Look for any white or greenish deposits, discoloration, or rust. Identify the areas that need cleaning.
- Prepare the cleaning solution: In a plastic container, mix a solution of isopropyl alcohol and distilled water. The recommended ratio is one part alcohol to three parts water. This solution will act as a gentle cleaner.
- Dip a cotton swab or soft cloth: Submerge a cotton swab or soft cloth into the cleaning solution. Make sure it’s damp, not dripping wet. Avoid using excessive liquid to prevent damage to the components.
- Gently clean the corroded areas: Carefully rub the damp cloth or cotton swab over the corroded areas. Use gentle pressure and small circular motions to dissolve and remove the corrosion. Be thorough but cautious to avoid damaging any delicate components.
- Use a toothbrush for stubborn corrosion: If the corrosion is stubborn or hard to remove with a cloth or cotton swab, use a soft-bristled toothbrush. Dip the toothbrush in the cleaning solution and gently scrub the affected areas.
- Rinse with distilled water: After cleaning, dip a clean cotton swab or cloth in distilled water and gently wipe down the components to remove any residue from the cleaning solution. This step is crucial to prevent any further corrosion.
- Allow components to air dry: Set aside the cleaned components and let them air dry completely. Avoid using a hairdryer or any heat sources, as excessive heat can damage the components.
Cleaning the corroded components is a crucial step in the corrosion removal process. By using a gentle cleaning solution and taking time to thoroughly clean each component, you can effectively remove the corrosion and restore the functionality of your device.
Remember to be patient and gentle while cleaning the components, as any rough handling can cause further damage. Take your time and ensure that each component is cleaned thoroughly before moving on to the next step.
With the corroded components cleaned, we’re ready to proceed to the next step of the process: drying the components!
Step 5: Drying the Components
After cleaning the corroded components of your electronic device, it’s essential to ensure they are completely dry before reassembling the device. Proper drying is crucial to prevent moisture-related issues and further damage. Follow these steps to effectively dry the components:
- Pat dry with a soft cloth: Gently pat each component with a soft cloth to remove any excess moisture. Be careful not to apply too much pressure, as it could damage the delicate components.
- Air drying: Place the cleaned components in a well-ventilated area and allow them to air dry naturally. Ensure there is no direct sunlight or excessive heat, as it can cause damage. The drying time may vary depending on the size and complexity of the components. It’s generally recommended to leave them to air dry overnight.
- Use a desiccant: If you want to speed up the drying process, you can place the components in a sealed bag with a desiccant. Silica gel packs or uncooked rice can act as a desiccant by absorbing excess moisture. Make sure the components are not directly in contact with the desiccant, as it could cause damage.
- Inspect for any moisture: After the components have been drying for an adequate amount of time, carefully inspect them for any signs of remaining moisture. Look for any damp spots or residue. If any moisture is found, repeat the drying process until the components are completely dry.
Properly drying the components is crucial to prevent any residual moisture from causing further damage or corrosion. It’s essential to be patient and ensure that all components are thoroughly dried before proceeding to the reassembly phase.
Remember, rushing the drying process can lead to issues such as short circuits or component failure. Take the necessary time to ensure the components are completely dry before moving forward.
With the components properly dried, we can now move on to the exciting part: reassembling the device!
Step 6: Reassembling the Device
Now that the cleaned and dried components are ready, it’s time to reassemble your electronic device. Reassembling the device correctly is crucial to ensure its proper functioning and to protect it from further damage. Follow these steps to effectively reassemble your device:
- Refer to your documentation: Consult the user manual or any disassembly notes you made during the process to guide you in putting the device back together. Following the manufacturer’s guidelines will help you ensure the correct order and placement of components.
- Start with the main components: Begin the reassembly process by carefully placing the main components back into their respective positions. Take your time to align them correctly and ensure a proper fit.
- Reconnect any connectors or cables: As you reassemble the device, don’t forget to reconnect any connectors or cables that were detached during the disassembly process. Ensure they are securely attached and properly inserted.
- Reinstall screws or fasteners: Use the appropriate screwdriver to reinstall any screws or fasteners that were removed earlier. Refer to your documentation to ensure you are using the correct screws and placing them in their designated locations.
- Check for any loose connections: Before fully securing all the screws, perform a quick check to ensure all connections are properly aligned and secure. Wiggle the components gently to verify that they are snugly in place.
- Progressively secure all screws: Once you have confirmed everything is in order, proceed to tighten all the screws or fasteners in a progressive and even manner. This will ensure a balanced and secure assembly.
Reassembling your device correctly is essential to ensure its optimal functioning and longevity. Taking the time to carefully align and secure each component will help prevent any issues and optimize the device’s performance.
Remember, refer to your documentation, take note of the disassembly process, and follow any specific instructions provided by the manufacturer. Attention to detail and patience are key when reassembling your device.
With the device successfully reassembled, it’s time to move on to the final step: testing the device!
Step 7: Testing the Device
After reassembling your electronic device, it’s essential to test its functionality to ensure that the corrosion removal process was successful. Testing allows you to identify any remaining issues and make necessary adjustments. Follow these steps to effectively test your device:
- Power on the device: Turn on the device and check if it powers up properly. Listen for any unusual noises or observe any abnormal behavior as the device starts.
- Check all functions: Test each function and feature of your device to ensure they are working correctly. This includes buttons, switches, display, connectivity, and any other specific features your device may have.
- Observe for any issues: Pay close attention to any signs of malfunction or irregular behavior during the testing phase. Look for any errors, flickering screens, unexpected shutdowns, or anything out of the ordinary.
- Perform stress tests (if applicable): If your device is capable of handling intensive tasks, consider performing stress tests to ensure its stability. This can include running resource-intensive applications or performing tasks that push the device’s capabilities.
- Monitor for an extended period: After performing initial tests, monitor the device’s performance for an extended period. This can give you a better understanding of its stability and help identify any latent issues that may arise over time.
Thoroughly testing your device allows you to verify that the corrosion removal process was successful and that it functions as expected. It also provides an opportunity to identify any post-cleaning issues that may need attention.
If you encounter any problems or notice any unexpected behavior during the testing phase, you may need to revisit the cleaning process or seek professional assistance to address any underlying issues.
With the device tested and functioning properly, we’re ready to move on to the final step: preventing future corrosion!
Step 8: Preventing Future Corrosion
Now that you have successfully removed corrosion from your electronic device, it’s important to implement preventive measures to minimize the risk of future corrosion. By taking proactive steps, you can extend the longevity of your device and ensure its optimal performance. Follow these guidelines to prevent future corrosion:
- Keep your device clean and dry: Regularly clean your device using a soft cloth or compressed air to remove dust and dirt. Keeping your device dry and free from moisture will help minimize the chances of corrosion.
- Store your device properly: When not in use, store your device in a cool, dry place. Avoid exposing it to extreme temperatures, humidity, or direct sunlight, as these factors can contribute to corrosion.
- Use protective cases or covers: Invest in high-quality protective cases or covers to shield your device from environmental factors that can cause corrosion. Ensure that the cases or covers are well-fitted and allow for proper ventilation.
- Handle your device with clean hands: Before using your device, make sure your hands are clean to prevent transferring oils, dirt, or moisture onto the device, which can lead to corrosion over time.
- Avoid exposing your device to liquids: Minimize the exposure of your device to liquids such as water, beverages, or cleaning agents. Even small amounts of liquid can seep into the device and cause corrosion.
- Regularly inspect and maintain your device: Perform routine inspections to check for any signs of corrosion or damage. If you notice any issues, address them promptly to prevent further deterioration.
- Follow manufacturer recommendations: Read and follow the manufacturer’s guidelines for device care and maintenance. These recommendations are designed to help preserve the integrity of your device and prevent corrosion.
- Consider using corrosion inhibitors: For added protection, you may use specially formulated corrosion inhibitors or anti-corrosion sprays on the necessary components of your device. These products help create a barrier against moisture and corrosive elements.
By implementing these preventive measures, you can significantly reduce the risk of future corrosion and extend the lifespan of your electronic device. Being proactive in device maintenance and care will ensure its optimal performance and functionality for years to come.
With these preventive measures in mind, you have successfully completed all the necessary steps to remove corrosion from your electronic device and prevent its recurrence. Remember to follow these guidelines consistently to keep your device in top condition in the long term.