
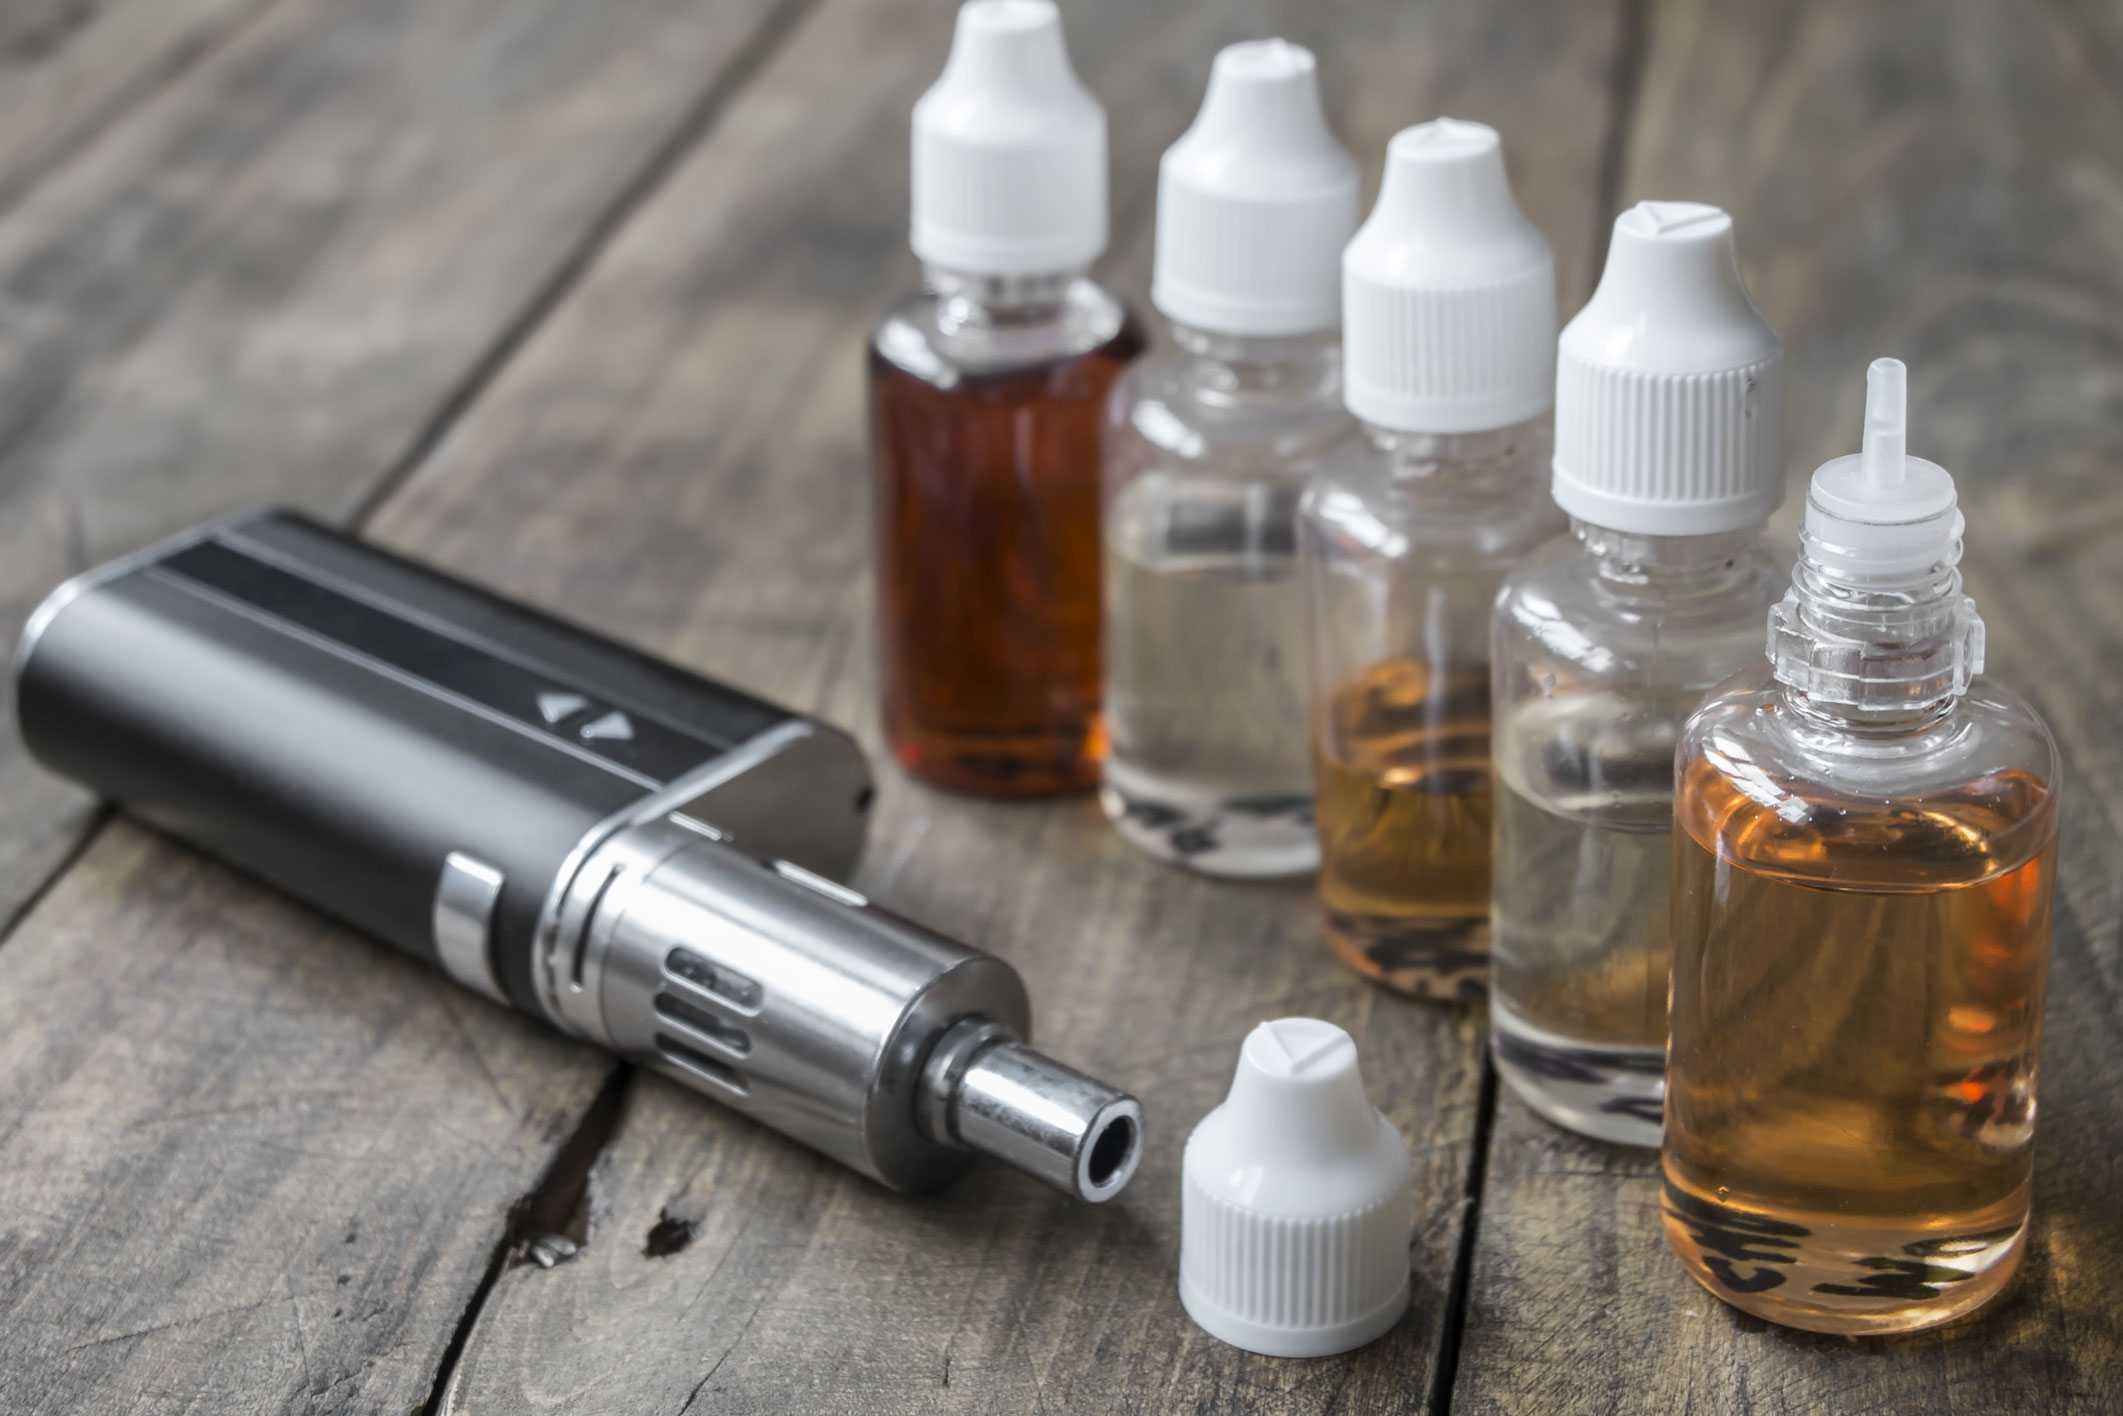
Choosing the right e-liquid
When it comes to refilling your electronic cigarette with e-liquid, one of the most important factors to consider is choosing the right e-liquid for your vaping preferences. With a wide range of flavors and nicotine strengths available, it can be overwhelming to make a choice. However, with a little research and experimentation, you can find the perfect e-liquid that suits your taste buds and vaping needs.
First and foremost, consider the flavor profile that appeals to you. E-liquids come in various flavors, ranging from traditional tobacco and menthol to fruity, dessert, and even exotic options. Think about the flavors you enjoy in other aspects of your life, such as your favorite desserts or fruits, and look for e-liquids that offer similar taste experiences.
In addition to flavor, think about the nicotine strength you desire. E-liquids come in different nicotine concentrations, ranging from nicotine-free options to high-strength varieties. If you’re a light smoker or trying to quit smoking, you may start with a lower nicotine strength and gradually decrease it over time.
Another important aspect to consider is the PG/VG ratio. Propylene glycol (PG) and vegetable glycerin (VG) are the two primary ingredients in e-liquids. PG is known for providing a stronger throat hit and carrying flavors better, while VG produces denser vapor. Depending on your preference for throat hit, vapor production, and overall vaping experience, you can choose e-liquids with different PG/VG ratios.
Furthermore, it’s crucial to opt for high-quality e-liquids from reputable manufacturers. Look for brands that adhere to proper manufacturing standards and use high-grade ingredients. This ensures that you’re getting a safe and enjoyable vaping experience without any compromise on taste or quality.
Lastly, consider reading reviews and gathering feedback from other vapers. Online communities and forums can provide valuable insights into different e-liquids and help you make an informed decision. Personal recommendations can go a long way in finding e-liquids that suit your preferences.
Remember, choosing the right e-liquid is a personal journey. What works for one person may not work for another. Therefore, don’t be afraid to experiment and try out different flavors, nicotine strengths, and PG/VG ratios until you find the perfect match that satisfies your vaping cravings.
Preparing your e-cigarette for refill
Before you can refill your electronic cigarette with e-liquid, it’s essential to properly prepare the device. Preparing your e-cigarette for refill ensures that you have a clean and functioning device, maximizing the flavor and performance of your vaping experience. Follow these steps to prepare your e-cigarette for refill:
Step 1: Clean the device: Begin by cleaning the various components of your e-cigarette. This includes the mouthpiece, tank or cartridge, and the battery connection. Use a clean cloth or tissue to wipe away any residue or debris that may have accumulated. Proper cleaning helps prevent any cross-contamination of flavors and ensures a smoother vaping experience.
Step 2: Check the battery: Make sure your e-cigarette’s battery is fully charged or has enough power to accommodate the refill. A low battery level can affect the performance of the device and potentially lead to a poor vaping experience. If needed, charge the battery before proceeding.
Step 3: Disassemble the device: To refill your e-cigarette, you’ll need to disassemble the necessary parts. This typically involves unscrewing the tank or removing the cartridge from the device. Consult your device’s manual if you’re unsure about how to properly disassemble it.
Step 4: Check for any damages or wear: Take a moment to inspect the components of your e-cigarette for any signs of damage or wear. Look for cracks, leaks, or any other issues that may affect the functionality of the device. If you discover any problems, it’s best to address them or consult a professional before proceeding with the refill.
Step 5: Clean the tank or cartridge: If you’re refilling a tank or cartridge, it’s essential to clean it thoroughly before adding new e-liquid. Rinse the tank or cartridge under warm water and pat dry with a clean cloth. This helps remove any residual e-liquid or buildup, ensuring a fresh and pure taste when refilled.
Step 6: Check the coil: Take a look at the coil in your e-cigarette. If the coil is worn out or has a burnt taste, it’s recommended to replace it before refilling. A fresh coil ensures optimal flavor and vapor production.
By following these steps to prepare your e-cigarette for refill, you can ensure a clean, well-functioning device that is ready to deliver a satisfying vaping experience. Taking the time to properly prepare your e-cigarette helps maintain its longevity and enhances the performance of your chosen e-liquid.
Removing the cartridge or tank
When it’s time to refill your electronic cigarette with e-liquid, the first step is to remove the cartridge or tank from the device. Removing the cartridge or tank allows for easy access to the empty or depleted e-liquid and prepares it for a fresh refill. Here’s how to properly remove the cartridge or tank:
Step 1: Check the device: Before removing the cartridge or tank, ensure that your e-cigarette is turned off. This prevents any accidental activation or leakage during the removal process.
Step 2: Find the release mechanism: Depending on the design of your e-cigarette, there may be a release button, lock mechanism, or a simple unscrewing mechanism to remove the cartridge or tank. Refer to your device’s instruction manual for the specific method applicable to your e-cigarette.
Step 3: Release or unscrew the cartridge or tank: Once you have identified the release mechanism, proceed to release or unscrew the cartridge or tank from the device. Be gentle and avoid using excessive force, as this can damage the e-cigarette or its components.
Step 4: Set aside the cartridge or tank: Once the cartridge or tank is detached, set it aside in a safe and clean place. Avoid placing it on surfaces that may expose it to dirt, dust, or spillage. It’s also a good idea to place it on a tissue or cloth to catch any residual e-liquid that may drip during the removal process.
Step 5: Inspect the cartridge or tank: Take a moment to inspect the cartridge or tank for any signs of damage, leakage, or wear. If you notice any issues, it’s best to address them before proceeding with the refill. Clean the cartridge or tank if necessary to remove any residual e-liquid or buildup.
Step 6: Prepare for refill: With the cartridge or tank removed, you’re now ready to proceed with refilling your electronic cigarette with e-liquid. Ensure that you have your chosen e-liquid readily available and follow the manufacturer’s instructions for refilling.
By properly removing the cartridge or tank from your electronic cigarette, you can ensure a smooth and hassle-free refill process. Taking the time to handle the components gently and inspect them for any issues helps maintain the integrity of your device, ensuring a satisfying vaping experience with every refill.
Filling the e-cigarette with e-liquid
Once you have removed the cartridge or tank from your electronic cigarette, it’s time to fill it with your chosen e-liquid. Properly filling your e-cigarette ensures that you have enough e-liquid for a satisfying vaping experience. Follow these steps to fill your e-cigarette with e-liquid:
Step 1: Check the fill ports: Take a look at your cartridge or tank and locate the fill ports. These ports are specifically designed to allow the e-liquid to be poured into the device without any spillage or overflow. Ensure that the fill ports are clear and free from any debris or blockages.
Step 2: Shake the e-liquid bottle: Give your e-liquid bottle a gentle shake to ensure that the ingredients are properly mixed. This helps enhance the flavor and consistency of the e-liquid, providing a more enjoyable vaping experience.
Step 3: Align the bottle tip with the fill ports: Position the bottle tip directly over the fill ports of the cartridge or tank. Ensure that the tip is inserted properly and securely to prevent any leaks or spills during the filling process.
Step 4: Squeeze the bottle and fill the cartridge or tank: Gently squeeze the e-liquid bottle, allowing the e-liquid to flow into the cartridge or tank. Take care not to overfill, as this can lead to leakage or flooding. Fill the cartridge or tank until it’s nearly full, leaving a small space to allow for proper air circulation.
Step 5: Replace the fill plugs or caps: If your cartridge or tank has fill plugs or caps, securely replace them after filling to prevent any e-liquid from leaking out. Make sure they are tightened properly but be cautious not to overtighten, as this can cause damage to the device or its components.
Step 6: Wipe away any spills or drips: If any e-liquid has spilled or dripped onto the exterior of the cartridge or tank, or the device itself, use a clean cloth or tissue to wipe it away. Keeping your e-cigarette clean and free from any e-liquid residue helps maintain its performance and prevent any potential issues.
By following these steps to fill your e-cigarette with e-liquid, you can ensure a seamless and mess-free process. Take care to handle the e-liquid bottle and the device with precision to avoid any accidental spills or leaks, providing you with a properly filled e-cigarette ready for your vaping enjoyment.
Reattaching the cartridge or tank
After successfully filling your electronic cigarette with e-liquid, the next step is to reattach the cartridge or tank to the device. Properly reattaching the cartridge or tank ensures a secure connection and allows for a seamless vaping experience. Follow these steps to reattach the cartridge or tank:
Step 1: Align the cartridge or tank: Hold the cartridge or tank in your hand and align it with the corresponding slot or connector on the device. Ensure that the alignment is accurate to avoid any damage to the device or its components.
Step 2: Insert and secure: Once you have aligned the cartridge or tank, gently insert it into the slot or connector. Depending on the design of your device, this may involve sliding it in, twisting it, or screwing it back into place. Follow the manufacturer’s instructions for the specific reattachment process.
Step 3: Apply gentle pressure: While inserting the cartridge or tank, apply gentle pressure to ensure a secure and snug fit. Avoid using excessive force, as this can potentially damage the device or cause leakage.
Step 4: Double-check the connection: After reattaching the cartridge or tank, double-check the connection to ensure that it is secure. Give it a slight tug or wiggle to confirm that it is properly in place and won’t come loose during use.
Step 5: Test for functionality: Once the cartridge or tank is reattached, it’s time to test the functionality of your electronic cigarette. Make sure the device is turned on and take a few gentle puffs to ensure that everything is working as expected. If you notice any issues or irregularities, double-check the connections and troubleshoot if necessary.
Step 6: Clean any spills or drips: If any e-liquid has spilled or leaked during the reattachment process, use a clean cloth or tissue to wipe it away. Keeping your device clean and free from any e-liquid residue ensures optimal functionality and prevents any potential damage.
By following these steps to reattach the cartridge or tank, you can ensure a secure and reliable connection for your electronic cigarette. Taking the time to align and secure the components properly allows for a smooth vaping experience with minimal risk of leaks or malfunctions.
Priming the coil
One crucial step in ensuring a satisfying and flavorful vaping experience is priming the coil in your electronic cigarette. Priming the coil involves preparing it for use by saturating the wick with e-liquid, allowing for efficient vaporization and preventing dry hits. Follow these steps to effectively prime the coil in your device:
Step 1: Understand the coil: Before priming the coil, it’s important to understand its construction. The coil consists of a heating element surrounded by a wicking material, typically made of cotton or another absorbent material. The e-liquid is absorbed by the wick and vaporized by the heating element, creating the vapor you inhale.
Step 2: Preparing the coil: If you’re using a new coil, start by gently unscrewing it from the device. If it’s a replaceable coil, it’s recommended to check the manufacturer’s instructions on how to properly prepare it. Some coils may require an initial soaking in e-liquid or priming with a few drops on the wick to ensure proper saturation.
Step 3: Drip e-liquid onto the coil: If your coil requires additional priming, take a few drops of e-liquid and apply them directly onto the exposed cotton or wicking material. Ensure that the liquid is evenly distributed and saturates the wick. Be careful not to over-saturate, as this can result in flooding and reduced performance.
Step 4: Apply e-liquid to the exposed wick: If the coil has exposed wick ports, apply e-liquid directly onto these ports to further saturate the cotton. This helps ensure that the wick is fully soaked and ready to deliver consistent and flavorful vapor.
Step 5: Reassemble and wait for saturation: Once you have primed the coil, reassemble it back into the device according to the manufacturer’s instructions. It’s important to wait a few minutes to allow the e-liquid to fully saturate the wick. This ensures that the wick is completely soaked and prevents any dry hits or burnt taste.
Step 6: Test the coil: After the waiting period, you can test the coil by taking a few quick, gentle puffs without activating the device’s power. This helps further distribute the e-liquid and ensures proper saturation of the coil before activating it. If the taste is clean and flavorful, you can proceed to use the device as normal.
Priming the coil in your electronic cigarette is a vital step in optimizing the performance and longevity of your device. Properly saturating the wick with e-liquid ensures consistent vapor production and prevents any unpleasant dry hits or burnt tastes. By taking the time to prime the coil, you can enjoy a smooth and flavorful vaping experience with every puff.
Cleaning up any spills or drips
When refilling your electronic cigarette with e-liquid, spills and drips can sometimes occur. It’s important to clean up any spills or drips promptly to maintain the cleanliness of your device, prevent potential damage, and ensure a pleasant vaping experience. Follow these steps to effectively clean up any spills or drips:
Step 1: Act quickly: As soon as you notice a spill or drip, it’s important to act quickly to prevent the e-liquid from spreading or seeping into the device. The longer it sits, the more difficult it can be to clean up.
Step 2: Remove the cartridge or tank: If the spill has occurred on the cartridge or tank, remove it from the device to prevent any further leakage or contamination.
Step 3: Blot the spill: Using a clean cloth or tissue, gently blot the spill to absorb as much of the e-liquid as possible. Avoid rubbing or smearing the spill, as this can spread it further.
Step 4: Clean the affected area: Once you’ve blotted the spill, dampen a cloth or cotton swab with a small amount of water or isopropyl alcohol. Clean the affected area of the device, making sure to remove any traces of e-liquid. Be cautious not to let any liquid seep into the device’s internal components.
Step 5: Dry the device: After cleaning, use a dry cloth or tissue to thoroughly dry the device. Ensure that it is completely free from moisture before reattaching the cartridge or tank.
Step 6: Clean the cartridge or tank: If the spill has occurred inside the cartridge or tank, rinse it with warm water to remove any e-liquid residue. Allow it to dry completely before reattaching it to the device.
Step 7: Dispose of e-liquid and materials properly: If you have used disposable materials, such as tissues or cotton swabs, dispose of them properly in a designated waste bin. Empty e-liquid bottles should be disposed of according to local regulations for hazardous waste.
By promptly cleaning up any spills or drips, you can ensure the cleanliness and functionality of your electronic cigarette. Regular maintenance and cleaning will help extend the life of your device and provide you with a more enjoyable vaping experience.
Allowing the e-liquid to settle before use
After refilling your electronic cigarette with e-liquid, it’s important to allow the e-liquid to settle before using the device. Allowing the e-liquid to settle ensures that it is properly distributed throughout the cartridge or tank, optimizing the flavor, vapor production, and overall vaping experience. Follow these steps to allow the e-liquid to settle before use:
Step 1: Reattach the cartridge or tank: After filling the cartridge or tank with e-liquid, securely reattach it to the device according to the manufacturer’s instructions. Double-check the connection to ensure that it is properly sealed to prevent any leakage.
Step 2: Wait for a few minutes: Once the cartridge or tank is reattached, it’s important to wait for a few minutes before using the device. This allows the e-liquid to soak into the wick and saturate it fully, ensuring efficient vaporization.
Step 3: Give the device a few gentle shakes: During the waiting period, give the device a few gentle shakes or tilts to encourage the e-liquid to distribute evenly. This helps ensure that the e-liquid is properly distributed throughout the cartridge or tank, providing a consistent and flavorful vaping experience.
Step 4: Avoid using excessive force: While waiting for the e-liquid to settle, avoid using excessive force when handling or using the device. Rapid or forceful inhalations can potentially flood the coil and lead to leakage or poor performance. Take gentle, controlled puffs to allow the e-liquid to vaporize smoothly.
Step 5: Be patient: Patience is key when allowing the e-liquid to settle. The waiting time can vary depending on the device, the e-liquid’s viscosity, and other factors. It’s generally recommended to wait at least five minutes, but some vapers prefer waiting longer to ensure optimal performance.
Step 6: Test the device: Once the waiting period is over, take a few gentle puffs from your device to test its performance. If the flavor is clean and consistent, and vapor production is satisfactory, you can proceed to use the device as normal.
By allowing the e-liquid to settle before use, you ensure that it is properly distributed throughout the cartridge or tank, enhancing the flavor, vapor production, and overall satisfaction of your vaping experience. Take the time to allow the e-liquid to settle, and you’ll be rewarded with a more enjoyable and consistent vaping session.
Testing the e-cigarette
After refilling your electronic cigarette with e-liquid and allowing it to settle, it’s important to test the device before fully engaging in your vaping session. Testing the e-cigarette ensures that everything is functioning properly, the e-liquid is properly vaporized, and the flavor and vapor production meet your expectations. Follow these steps to effectively test your e-cigarette:
Step 1: Check the battery: Before testing, ensure that your e-cigarette’s battery is fully charged or has enough power to provide an optimal vaping experience. This ensures that the device can reach the desired temperature for efficiently vaporizing the e-liquid.
Step 2: Take a few gentle puffs: Begin by taking a few gentle puffs from the device without activating the power button. This helps to ensure that the e-liquid is properly vaporized, and there are no dry hits or burnt taste. If you notice any issues, double-check the connections and troubleshoot if necessary.
Step 3: Activate the device: After confirming that the initial puffs are smooth and flavorful, activate the device by pressing the power button (if applicable). Take a few more puffs and pay attention to the flavor and vapor production. Ensure that both meet your expectations.
Step 4: Adjust settings if necessary: Depending on your device, you may have adjustable settings such as wattage or voltage. If desired, make any necessary adjustments to customize the vaping experience to your preference. Test the device after each adjustment to find the optimal setting for your e-liquid and vaping style.
Step 5: Monitor battery life: While testing the e-cigarette, keep an eye on the battery life indicator if your device has one. If the battery level drops significantly during testing, it may be an indication that it needs recharging. Maintaining a sufficient battery level ensures consistent performance and avoids any interruptions in your vaping session.
Step 6: Evaluate the overall experience: After conducting the testing, take a moment to evaluate the overall experience. Pay attention to the flavor, throat hit, vapor production, and any other factors that are important to you. If satisfied, you can proceed to enjoy your vaping session.
By testing your e-cigarette before diving into a vaping session, you can ensure that it is functioning properly and meeting your expectations in terms of flavor and vapor production. Taking the time to evaluate your device’s performance allows for adjustments and troubleshooting, ensuring an enjoyable and satisfying vaping experience every time.
Maintaining your e-cigarette for optimal performance
Proper maintenance of your electronic cigarette is essential for ensuring optimal performance, longevity, and a consistent vaping experience. By following regular maintenance practices, you can keep your device in top shape and prolong its lifespan. Here are some key tips for maintaining your e-cigarette:
1. Clean your device regularly: Regular cleaning is crucial for keeping your e-cigarette free from dirt, debris, and e-liquid residue. Clean the exterior of the device, the tank or cartridge, and the mouthpiece using a soft cloth or tissue. Avoid using harsh chemicals or excessive moisture that can damage the device.
2. Replace coils and wicks as needed: Coils and wicks eventually wear out and can affect the flavor and vapor production of your e-cigarette. Replace them according to the manufacturer’s recommendations or when you notice a decrease in performance. Regularly changing coils and wicks ensures a clean and fresh vaping experience.
3. Store your device properly: When not in use, store your e-cigarette in a cool, dry place away from direct sunlight and extreme temperatures. Protect it from accidents or damage by using a carrying case or designated storage pouch.
4. Avoid overcharging your battery: Overcharging your battery can shorten its lifespan and potentially cause safety issues. Follow the manufacturer’s guidelines for charging and avoid leaving your device plugged in for extended periods beyond the recommended charging time.
5. Use the right e-liquids: Using high-quality e-liquids from reputable manufacturers can contribute to the performance and longevity of your e-cigarette. Low-quality e-liquids with impurities or improper ingredients can cause clogs, damage the coil, or affect the flavor and vapor production. Stick to well-known brands and check for proper labelling and ingredients.
6. Keep your connections clean: Regularly clean the connections between the battery and the tank or cartridge to ensure a good electrical connection. Wipe away any debris or e-liquid residue using a cotton swab or soft cloth. A clean connection promotes efficient power transmission and prevents issues like misfires or poor performance.
7. Stay on top of firmware updates: If your e-cigarette has firmware that can be updated, make sure to regularly check for and install any available updates. Firmware updates can enhance the device’s performance, fix bugs, and introduce new features to improve your vaping experience.
8. Follow device-specific guidelines: Different e-cigarette models and brands may have specific maintenance guidelines. Consult your device’s manual or the manufacturer’s website for any specific recommendations or precautions that should be followed for optimal performance and safety.
By incorporating these maintenance practices into your vaping routine, you can keep your e-cigarette performing optimally, extend its lifespan, and enjoy a consistent and satisfying vaping experience. Regular maintenance and care ensure that your device continues to deliver the flavor and vapor production you desire, allowing you to fully enjoy the benefits of vaping.