
Why Clean Headset Muffs?
Headset muffs, also known as ear pads or cushions, are an essential component of headphones and headsets. They provide comfort, support, and noise isolation, contributing significantly to the overall listening experience. Over time, these muffs can accumulate dirt, oil, sweat, and bacteria, leading to discomfort, unpleasant odors, and even skin irritation. Regularly cleaning headset muffs not only ensures hygiene but also prolongs the lifespan of the equipment and maintains audio quality.
Hygiene and Comfort
Headset muffs come into direct contact with the skin around the ears and, in some cases, the hair. This close proximity makes them susceptible to collecting sweat, oil, and dead skin cells, creating an ideal environment for bacteria and fungi to thrive. Failure to clean the muffs can result in the buildup of harmful microorganisms, leading to skin irritation, itching, and even infections. Moreover, neglected muffs can develop unpleasant odors, detracting from the overall enjoyment of using the headset.
Audio Quality and Longevity
Dirty and deteriorated muffs can compromise the acoustic performance of the headset. The accumulation of debris and oils on the muffs can muffle the sound, reduce noise isolation, and distort the audio. Additionally, neglecting to clean the muffs may lead to premature wear and tear, ultimately affecting the structural integrity of the headset. By maintaining clean and well-kept muffs, users can ensure optimal audio quality and extend the lifespan of their beloved headsets.
Overall Experience
Clean headset muffs contribute to a more pleasant and enjoyable listening experience. Whether used for professional purposes, gaming, or leisure activities, headsets with clean and well-maintained muffs offer enhanced comfort, superior audio quality, and a hygienic user experience. By incorporating regular cleaning into the headset maintenance routine, individuals can elevate their overall enjoyment and satisfaction with their audio equipment.
In essence, cleaning headset muffs is a simple yet crucial practice that promotes hygiene, comfort, audio quality, and the longevity of the equipment. By understanding the significance of maintaining clean muffs, users can ensure a seamless and enjoyable listening experience while preserving the condition and performance of their headsets.
Tools and Materials Needed
Before embarking on the process of cleaning headset muffs, it is essential to gather the necessary tools and materials to ensure a thorough and effective cleaning session. The following items are commonly required for this maintenance task:
1. Soft Cloth or Microfiber Towel
Utilizing a soft cloth or microfiber towel is crucial for gently wiping and cleaning the surface of the headset muffs. These materials are gentle on the fabric and help remove dirt and grime without causing damage.
2. Mild Cleaning Solution
A mild cleaning solution, such as a mixture of mild liquid soap and water, is ideal for removing oil, sweat, and dirt from the muffs. This solution should be gentle enough to clean the muffs without compromising their integrity or causing discoloration.
3. Cotton Swabs or Soft Brush
Cotton swabs or a soft brush can be used to clean the seams, crevices, and hard-to-reach areas of the muffs. These tools aid in thorough cleaning and ensure that all areas of the muffs are free from debris and buildup.
4. Warm Water
Warm water is effective for diluting the cleaning solution and rinsing the muffs. It helps in removing residual soap and dirt, leaving the muffs clean and refreshed.
5. Towel or Air Dryer
After cleaning, a clean towel or an air dryer can be used to gently dry the muffs. It is important to ensure that the muffs are completely dry before reattaching them to the headset to prevent the growth of mold or mildew.
6. Optional: Disinfectant Spray
For an extra layer of cleanliness, a mild disinfectant spray can be used to sanitize the muffs and eliminate bacteria and odors. However, it is important to ensure that the disinfectant is safe for the materials of the muffs.
By having these tools and materials readily available, individuals can effectively and safely clean their headset muffs, promoting hygiene, comfort, and the overall longevity of their audio equipment.
Step 1: Removing the Muffs
Before commencing the cleaning process, it is essential to carefully remove the muffs from the headset. This step requires precision and attention to prevent any damage to the muffs or the headset itself. The following steps outline the process of safely detaching the muffs:
1. Identify the Attachment Mechanism
Headset muffs are typically attached to the ear cups using various mechanisms, such as clips, adhesive strips, or a combination of snaps and fabric sleeves. It is important to identify the specific attachment method used in the particular headset to facilitate their safe removal.
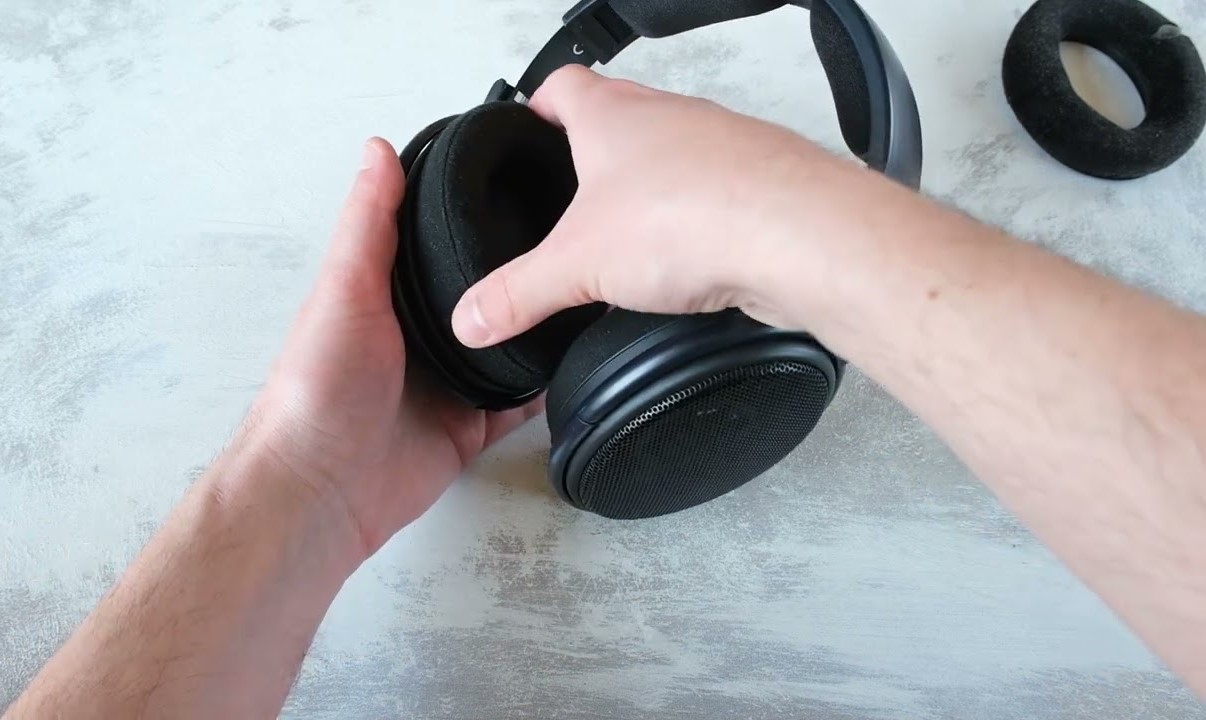
2. Gently Detach the Muffs
Once the attachment mechanism is identified, gently detach the muffs from the ear cups. Carefully release any clips, peel off adhesive strips, or unhook the snaps while ensuring that no excessive force is applied, which could potentially damage the muffs or the headset.
3. Note the Orientation
While removing the muffs, it is beneficial to note their orientation and the specific alignment with the ear cups. This observation will aid in correctly reattaching the muffs after cleaning, ensuring a proper fit and optimal comfort during future use.
4. Handle with Care
Throughout the removal process, handle the muffs with care, avoiding any unnecessary stretching, pulling, or twisting. By treating the muffs gently, the risk of causing damage to the attachment points or the fabric is minimized, preserving the integrity of the muffs.
5. Store Safely
Once the muffs are removed, store them in a clean and dry location, away from dust and potential contaminants. Proper storage helps maintain the cleanliness of the muffs and prepares them for the subsequent cleaning steps.
By following these steps, individuals can safely and effectively remove the muffs from their headsets, setting the stage for the thorough cleaning and maintenance process that will contribute to a hygienic and enjoyable listening experience.
Step 2: Preparing the Cleaning Solution
Before embarking on the cleaning process, it is crucial to prepare a suitable cleaning solution that effectively removes dirt, oils, and other contaminants from the headset muffs while preserving their integrity. The following steps outline the process of creating an appropriate cleaning solution:
1. Select a Mild Liquid Soap
Choose a mild liquid soap that is gentle on fabrics and safe for use on delicate materials. Avoid harsh detergents or cleaners that may cause discoloration or damage to the muffs.
2. Dilute the Soap in Water
In a small container, dilute the mild liquid soap with warm water. The ratio of soap to water should be such that the solution is effective in removing dirt and oils without leaving behind a soapy residue on the muffs.
3. Test the Solution
Prior to applying the cleaning solution to the entire muffs, perform a patch test on a small, inconspicuous area to ensure that the solution does not cause any adverse effects such as discoloration or fabric damage.
4. Adjust the Concentration if Needed
If the initial test indicates that the cleaning solution is too strong, dilute it further with water. Conversely, if the solution appears ineffective, a slightly stronger concentration may be necessary, but caution should be exercised to avoid damaging the muffs.
5. Optional: Add a Mild Disinfectant
For an added layer of cleanliness, a mild disinfectant that is safe for the material of the muffs can be added to the cleaning solution. This step is particularly beneficial for eliminating bacteria and odors from the muffs.
6. Mix Thoroughly
Ensure that the cleaning solution is thoroughly mixed to achieve a uniform composition. This step is essential to guarantee that the cleaning agents are evenly distributed and will effectively clean the entire surface of the muffs.
By following these steps, individuals can prepare a suitable cleaning solution that effectively removes dirt and oils from headset muffs while maintaining the integrity and cleanliness of the fabric, setting the stage for a thorough and successful cleaning process.
Step 3: Cleaning the Muffs
Once the cleaning solution is prepared, it’s time to proceed with the actual cleaning of the headset muffs. This step involves the careful application of the cleaning solution to remove dirt, oils, and contaminants from the muffs, restoring them to a clean and hygienic state. The following steps outline the process of effectively cleaning the muffs:
1. Apply the Cleaning Solution
Using a soft cloth or microfiber towel, apply a small amount of the prepared cleaning solution to the surface of the muffs. Gently work the solution into the fabric, focusing on areas with visible dirt, oil buildup, or discoloration.
2. Use Gentle Circular Motions
Employ gentle circular motions while cleaning the muffs to dislodge and lift dirt and oils from the fabric. Avoid aggressive scrubbing or excessive pressure, as this may damage the material or cause the cleaning solution to penetrate too deeply into the fabric.
3. Address Stubborn Stains Carefully
If the muffs have stubborn stains or heavily soiled areas, apply the cleaning solution directly to the affected areas and allow it to sit for a few minutes before gently blotting and working the solution into the fabric. Exercise caution to prevent excessive saturation and potential damage to the muffs.
4. Clean Seams and Crevices
Use cotton swabs or a soft brush to clean the seams, crevices, and hard-to-reach areas of the muffs. These areas often accumulate dirt and oils and require meticulous attention to ensure thorough cleaning.
5. Rinse with Warm Water
After cleaning, rinse the muffs with warm water to remove any residual cleaning solution and dirt. Ensure that the muffs are thoroughly rinsed to prevent the buildup of soap residue, which can compromise the fabric’s integrity and comfort.
6. Gently Squeeze Out Excess Water
Once rinsed, gently squeeze the muffs to remove excess water. Avoid wringing or twisting the fabric, as this can distort the shape and texture of the muffs.
By following these steps, individuals can effectively clean their headset muffs, removing dirt, oils, and contaminants to restore the fabric to a clean and hygienic state, ensuring a comfortable and enjoyable listening experience.
Step 4: Drying the Muffs
After the muffs have been thoroughly cleaned, it is essential to ensure that they are properly dried to prevent the growth of mold, mildew, and odors. Proper drying also helps maintain the shape and integrity of the muffs. The following steps outline the process of effectively drying the headset muffs:
1. Blot with a Dry Towel
Begin by gently blotting the muffs with a clean, dry towel to absorb excess water. Avoid rubbing the fabric vigorously, as this may damage the texture and shape of the muffs.
2. Air Dry in a Well-Ventilated Area
Place the muffs in a well-ventilated area away from direct sunlight and heat sources. Allowing air to circulate around the muffs aids in the evaporation of residual moisture and promotes thorough drying.
3. Ensure Proper Airflow
Arrange the muffs in a manner that allows for proper airflow on all sides. This may involve gently shaping the muffs and ensuring that they are not stacked or compressed during the drying process.
4. Use a Fan or Air Dryer (Optional)
If natural air drying is not feasible, a fan or air dryer set to a low, cool setting can be used to expedite the drying process. It is important to maintain a safe distance between the muffs and the airflow to prevent potential damage from excessive heat or force.
5. Monitor the Drying Progress
Periodically check the muffs to assess their drying progress. Gently touch the fabric to determine the level of moisture remaining and adjust the drying conditions as needed.
6. Ensure Complete Dryness
Before reattaching the muffs to the headset, ensure that they are completely dry. Even a small amount of residual moisture can lead to mold or mildew growth, which can compromise the cleanliness and integrity of the muffs.
By following these steps, individuals can effectively and safely dry their headset muffs, ensuring that they are thoroughly dried and ready for reattachment to the headset, maintaining a clean and hygienic listening experience.
Step 5: Reattaching the Muffs
Once the headset muffs are thoroughly cleaned and dried, the final step involves reattaching them to the headset. Proper reattachment ensures a secure and comfortable fit, allowing users to enjoy their headsets with restored cleanliness and optimal comfort. The following steps outline the process of reattaching the muffs to the headset:
1. Identify the Attachment Points
Before reattaching the muffs, identify the specific attachment points on the headset. These may include clips, adhesive strips, snaps, or fabric sleeves designed to secure the muffs to the ear cups.
2. Align the Muffs Correctly
Ensure that the muffs are aligned correctly with the ear cups. Note any markings or indicators that denote the proper orientation of the muffs to guarantee a symmetrical and comfortable fit.
3. Gently Press or Snap into Place
Using gentle pressure, press or snap the muffs into place, securing them to the ear cups. Exercise caution to avoid applying excessive force that could potentially damage the attachment points or the muffs themselves.
4. Verify the Secure Attachment
After reattaching the muffs, verify that they are securely and evenly attached to the ear cups. Ensure that the muffs sit flush against the headset, providing a snug and comfortable seal for an optimal listening experience.
5. Test the Fit
Put on the headset and test the fit and comfort of the reattached muffs. Ensure that they provide adequate noise isolation, comfort, and a secure seal around the ears, enhancing the overall listening experience.
6. Make Adjustments if Necessary
If the muffs feel uneven or uncomfortable, make necessary adjustments to ensure a proper fit. This may involve realigning the muffs or verifying the attachment points for any irregularities.
By following these steps, individuals can successfully reattach the cleaned and dried muffs to their headsets, ensuring a secure and comfortable fit that enhances the cleanliness and overall enjoyment of their audio equipment.
Additional Tips for Maintenance
Beyond the specific steps involved in cleaning and caring for headset muffs, several additional tips can contribute to the overall maintenance and longevity of these essential components. These tips encompass proactive measures and ongoing practices that can enhance the cleanliness, comfort, and performance of headset muffs:
1. Regular Cleaning Schedule
Establish a regular cleaning schedule for the headset muffs based on frequency of use and environmental factors. Consistent cleaning prevents the buildup of dirt, oils, and contaminants, preserving the cleanliness and comfort of the muffs.
2. Storage in a Clean, Dry Environment
When not in use, store the headsets in a clean, dry environment, away from dust, moisture, and direct sunlight. Proper storage prevents the accumulation of dirt and maintains the integrity of the muffs.
3. Use Protective Covers
Consider using removable and washable protective covers for the headset muffs. These covers act as an additional barrier against dirt, oils, and sweat, prolonging the time between thorough cleanings of the muffs.
4. Inspection for Wear and Tear
Regularly inspect the muffs for signs of wear and tear, including fraying, thinning, or deterioration of the fabric. Address any issues promptly to prevent further damage and maintain the comfort and performance of the muffs.
5. Avoid Harsh Cleaning Agents
Avoid using harsh cleaning agents, such as bleach or strong solvents, on the muffs, as these can damage the fabric and compromise the comfort and integrity of the muffs.
6. Gentle Spot Cleaning
For minor stains or localized dirt, employ gentle spot cleaning using a mild cleaning solution and a soft cloth. This targeted approach can address specific areas without the need for a full cleaning process.
7. Replacement of Worn Muffs
If the muffs show significant wear, discomfort, or a decline in performance, consider replacing them with new ones to maintain the optimal comfort and audio quality of the headset.
By incorporating these additional tips into the maintenance routine, individuals can ensure the ongoing cleanliness, comfort, and performance of their headset muffs, prolonging the lifespan and enhancing the overall listening experience.