Choosing the Right Printer
When it comes to printing your own photos, choosing the right printer is crucial in achieving high-quality results. With the variety of printers available on the market, it’s important to consider several factors before making your purchase.
First, determine the size of prints you want to create. If you mainly print small photos for albums or frames, a compact photo printer might be sufficient. However, if you plan on printing larger photos, you will need a printer capable of handling larger paper sizes.
Next, consider the type of printing technology that suits your needs. Inkjet printers are a popular choice for photo printing as they deliver vibrant colors and excellent detail. They are also versatile, allowing you to print on various types of paper. On the other hand, if you prefer more professional-grade prints and plan on printing large volumes, a dye-sublimation printer might be a better option.
Another important aspect to consider is the print resolution. Opt for a printer that offers high-resolution capabilities to ensure crisp and detailed prints. Look for a printer with a high DPI (dots per inch) value, as the higher the DPI, the better the print quality.
Connectivity options are also worth considering. If you frequently print from multiple devices such as your computer, smartphone, or tablet, look for a printer that supports wireless printing or has compatible apps for easy printing. This will make the printing process more convenient and hassle-free.
Lastly, it’s essential to consider the cost of consumables, such as ink cartridges or paper. Some printers may have a higher upfront cost but offer more affordable replacements, while others might have cheaper initial prices but higher ongoing costs. Evaluate your usage and budget to find a printer that strikes the right balance for you.
With these considerations in mind, take your time to research different printer models, read reviews, and compare features. Investing in a quality printer that meets your specific needs will ensure that your printed photos turn out beautifully and stand the test of time.
Selecting the Best Paper for Your Print
Choosing the right paper for your printed photos is just as important as selecting the right printer. The paper you use can greatly impact the final result, affecting the colors, sharpness, and overall aesthetic appeal of your prints. Here are some factors to consider when selecting the best paper for your print:
1. Paper Type: There are various types of photo papers available, including glossy, matte, satin, and metallic finishes. Glossy paper offers a shiny, reflective surface that enhances vibrant colors and creates a glossy finish. Matte paper, on the other hand, has a non-reflective surface and gives a more subdued and art-like feel to your prints. Satin paper is a mix between glossy and matte, providing a semi-glossy look. Metallic paper has a unique metallic sheen that adds a touch of elegance and depth to your photos.
2. Paper Weight: Paper weight is measured in terms of grams per square meter (gsm). A higher gsm indicates a thicker and heavier paper. If you want your prints to have a more substantial feel, opt for a higher gsm. However, keep in mind that heavier papers may require a printer that can handle thicker media.
3. Acid-Free and Archival Quality: If you want your prints to last for a long time without fading or yellowing, consider using acid-free and archival-quality papers. These papers are made with materials that resist deterioration, ensuring that your prints remain vibrant and beautiful for years to come.
4. Surface Texture: The surface texture of the paper can influence the overall look and feel of your prints. Some papers have a smooth, fine-textured surface, while others have a more textured or canvas-like feel. Consider the style of your photo and the desired outcome when choosing the appropriate texture.
5. Compatibility with Printer Inks: Different papers may respond differently to printer inks, affecting the color accuracy and drying time. Experiment with different papers to find the one that works best with your printer and delivers the desired color vibrancy.
Ultimately, the choice of paper depends on your personal preferences and the intended purpose of your prints. Take the time to explore different options, experiment with sample packs, and consider the characteristics of your photos to find the best paper that enhances the beauty of your printed images.
Understanding Image Resolution
Image resolution refers to the level of detail that can be captured and displayed in a digital image. It plays a crucial role in maintaining the quality and sharpness of your printed photos. Understanding image resolution will help you achieve the best results when printing your own photos.
Resolution is usually measured in pixels per inch (PPI) or dots per inch (DPI). PPI is used for digital images and refers to the number of pixels packed within a square inch of the image. DPI, on the other hand, is used for printed images and represents the number of dots that can fit within an inch on a printed page.
When it comes to printing, a higher resolution is desired for better detail and clarity. However, the required resolution depends on the intended size of the print. For small prints, like wallet-sized photos, a resolution of 300 PPI or DPI is generally sufficient. For larger prints, such as posters or wall art, you may need a higher resolution, such as 600 PPI or DPI, to ensure sharpness and intricate detail.
It’s important to note that simply increasing the resolution of an image in editing software does not add additional detail. It can lead to larger file sizes, but the actual level of detail remains the same. Therefore, it’s crucial to start with high-resolution images from your camera or select images with sufficient resolution to achieve the desired print size.
Resizing or resampling images can also impact the final resolution. When resizing images, make sure to maintain the proper aspect ratio to avoid distortion. If you need to increase the size of an image for a larger print, be aware that the image may lose some sharpness and detail. Consider resizing gradually and performing some post-processing sharpening to compensate for any loss of detail.
Lastly, always check the image resolution before printing to ensure the best quality results. Most photo editing software and printer settings allow you to view and adjust the resolution of your images. It’s recommended to save a separate high-resolution version of your image specifically for printing and keep a lower-resolution version for online sharing or digital display.
Understanding image resolution is essential for achieving clear, crisp prints. By selecting and preparing images with the appropriate resolution, you can ensure that the printed version of your photos accurately represents the original image and captures every detail beautifully.
Editing Your Photos for Print
Editing your photos before printing is a crucial step to ensure the best possible results. Whether you’re looking to enhance colors, adjust brightness and contrast, or make creative edits, here are some tips to help you prepare your photos for print:
1. Crop and Straighten: Start by cropping your photo to remove any unwanted elements or to improve the composition. Straighten the image if necessary to ensure that horizon lines or vertical structures are level. This will give your prints a polished and professional look.
2. Adjust Colors and Exposure: Fine-tune the colors and exposure of your photo to achieve the desired tone and mood. Experiment with contrast, saturation, and white balance to make the colors pop and ensure accurate representation. Remember that the appearance of colors on your computer screen may differ from the final printed result, so it’s always good to do test prints or consult printing experts for color calibration.
3. Sharpen and Enhance Details: Use sharpening tools to improve the overall clarity and detail in your photos. Be careful not to over-sharpen, as it can create unnatural artifacts. Adjusting the clarity or using selective sharpening techniques can help emphasize important details and make your prints stand out.
4. Resizing and Resampling: If you need to resize your photo for a specific print size, ensure that you maintain the proper aspect ratio and avoid distortion. Resampling can lead to a loss of image quality, so make sure to resize gradually and monitor the results closely. Additionally, consider the recommended resolution for the print size to maintain sharpness and detail.
5. Test and Proofread: Before sending your photos for printing, it’s essential to do a final review. Check for any flaws, dust spots, or errors that may have been overlooked during the editing process. Take the time to proofread any text or captions that will be included in the print to ensure accuracy and clarity.
6. Save in Printable Formats: When saving your edited photos, consider using file formats that are suitable for print, such as TIFF or JPEG. These formats preserve the image quality and ensure compatibility with most printing services and software. Avoid using compressed formats like PNG, as they may result in lower quality prints.
Editing your photos for print allows you to bring out the best in your images and create stunning prints that showcase your artistic vision. By following these tips and taking the time to fine-tune your photos, you can produce prints that accurately represent your original vision and captivate viewers.
Color Correction and Calibration
Color correction and calibration are essential steps in preparing your photos for print, ensuring that the colors are accurate and consistent across different devices and printing processes. Here are some tips to help you achieve optimal color results:
1. Understand Color Profiles: Different devices and software use different color profiles to interpret and display colors. It’s important to understand the color profile being used and match it across all your devices. The most commonly used color profiles for printing are sRGB and Adobe RGB. Ensure that your editing software and printer settings are set to the appropriate color profile.
2. Use a Color Calibrator: Consider investing in a color calibration device, such as a colorimeter or spectrophotometer, to accurately calibrate your monitor and printer. These devices measure and adjust color settings to ensure consistency between your screen and the final print. Regular calibration helps maintain accurate color representation over time.
3. Soft Proofing: Most photo editing software has a soft proofing feature that allows you to simulate how your photo will look when printed. By enabling soft proofing and selecting the appropriate printer profile, you can preview how the colors will appear in the final print. This helps you make any necessary adjustments to achieve the desired results.
4. Use a Color Checker: Consider using a color checker or color target during your photo shoots. These charts contain a range of color swatches that can be used as references for accurate color representation. By including a color checker in your photos, you can easily correct colors during the editing process by comparing them to the reference swatches.
5. Test Prints: It’s always a good idea to do test prints before finalizing a large print order. Printing a small version of your photo allows you to evaluate color accuracy and make any necessary adjustments. Compare the test print to your calibrated screen and make note of any discrepancies, adjusting the colors accordingly for optimal results.
6. Consider Professional Printing Services: If achieving precise color accuracy is critical for your prints, consider using professional printing services that offer color profiles and quality control measures. These services often provide color-managed workflows and use high-quality equipment to ensure the best possible results.
Color correction and calibration are important steps to ensure that the colors in your printed photos closely match your original vision. By being mindful of color profiles, calibrating your devices, using soft proofing and color checkers, and doing test prints, you can achieve vibrant and accurate colors in your final prints.
Printing in Black and White
Printing your photos in black and white can add a timeless and artistic touch to your prints. Whether you’re capturing stunning landscapes or portraying emotive portraits, black and white photography allows you to focus on shapes, contrast, and textures. Here are some tips for achieving the best results when printing in black and white:
1. Convert to Grayscale: Start by converting your color photo to grayscale in your photo editing software. This removes the color information and allows you to focus on tonal values and contrast. Pay attention to the different shades of gray to ensure a visually pleasing result.
2. Adjust Contrast and Tonal Range: Experiment with adjusting the contrast and tonal range to enhance the details and create a dynamic black and white image. Increasing the contrast can make your subjects pop, while adjusting the tonal range can help achieve a desired mood or atmosphere.
3. Opt for High-Quality Black and White Paper: Choose a high-quality black and white photo paper that provides the best tonal range and sharpness. Matte or semi-matte papers are commonly preferred for black and white prints as they minimize glare and give a more classic look. You can also consider specialty fine art papers that add texture and depth to your prints.
4. Consider Printing with Pigment Inks: Pigment inks are often preferred for black and white printing as they offer better longevity and fade resistance compared to dye-based inks. They tend to provide richer black tones and a wider range of gray shades. Check if your printer supports pigment inks for black and white printing.
5. Fine-Tune the Print Settings: Pay attention to the print settings to ensure optimal black and white results. Adjust the print density or brightness to achieve the desired level of black. Consider using a dedicated black and white printing mode or setting to optimize the grayscale output.
6. Test and Experiment: Black and white photography is subjective, and there are various ways to interpret and print your images. Experiment with different editing techniques, paper types, and print settings to find the style that best suits your vision. Don’t be afraid to try new things and let your creativity shine through.
Printing in black and white opens up a world of artistic possibilities. By converting your photos to grayscale, adjusting contrast and tonal range, choosing the right paper and inks, and fine-tuning the print settings, you can achieve stunning black and white prints that evoke emotions and leave a lasting impression on viewers.
Printing on Canvas
Printing your photos on canvas can add a touch of elegance and sophistication to your prints, giving them a unique and artistic look. Whether you want to display a cherished family portrait or showcase a breathtaking landscape, printing on canvas can elevate your images. Here are some considerations for achieving the best results when printing on canvas:
1. Choose the Right Canvas Material: Select a canvas material that is specifically designed for printing. Look for canvas that is made of high-quality cotton or polyester blend, as these materials provide durability and excellent image reproduction. Consider whether you prefer a smooth or textured canvas surface, as this can add an extra dimension to your prints.
2. Ensure Proper Image Resolution: As with any other type of printing, image resolution is crucial for canvas prints. To achieve sharp and detailed results, make sure your image has a high enough resolution. Typically, a resolution of 300 DPI (dots per inch) is recommended for canvas prints. Enlarge the image gradually to avoid any loss of quality.
3. Adjust Colors and Contrast: Before printing on canvas, adjust the colors and contrast of your image to ensure optimal results. Canvas has a unique texture that may impact the colors and overall appearance of your print. Make sure to calibrate your monitor and use ICC profiles to ensure accurate color representation.
4. Stretching and Mounting: Consider whether you want your canvas print to be stretched and mounted onto a wooden frame or if you prefer a rolled canvas that can be framed later. Stretching the canvas provides a gallery-wrapped finish, where the image extends around the edges of the frame, creating a seamless and finished look.
5. Protective Coatings: To enhance the longevity of your canvas print, consider applying a protective coating. A clear, archival-quality coating can protect the print from UV rays, moisture, and scratches. This not only preserves the quality of the print but also adds a professional, finished appearance.
6. Consider Professional Printing Services: If you want the best quality and have specific customization requirements, professional printing services specializing in canvas prints can provide excellent results. These services often offer a range of options such as different canvas materials, framing options, and additional finishes.
Printing on canvas allows you to transform your photos into stunning works of art. By selecting the right canvas material, ensuring proper image resolution, adjusting colors and contrast, considering stretching and mounting options, applying protective coatings, and exploring professional printing services, you can achieve beautiful canvas prints that bring your images to life.
Print Finishes and Coating Options
Choosing the right print finish and coating can enhance the overall look and protection of your printed photos. Whether you want to add a glossy sheen, a matte texture, or protect your prints from damage, considering the various options available can help you achieve the desired results. Here are some common print finishes and coating options to consider:
1. Matte Finish: A matte finish has a non-reflective surface and provides a smooth texture to your prints. It reduces glare and gives a classic, understated look. Matte finishes work well for a wide range of photos, including portraits, black and white images, and fine art prints. It adds a touch of elegance and sophistication to your prints.
2. Glossy Finish: A glossy finish is highly reflective, creating a shiny and vibrant look. It adds depth and richness to your colors, making your prints appear bold and eye-catching. Glossy finishes work well for images with vibrant colors and high contrast. Keep in mind that the glare from a glossy finish may impact the overall viewing experience, especially under bright lighting conditions.
3. Satin Finish: A satin finish falls between a matte and glossy finish, offering a subtle sheen. It provides a smooth texture while minimizing glare. Satin finishes are versatile and suitable for various types of images, from portraits to landscapes. They offer a balanced look that combines the best of both matte and glossy finishes.
4. Luster Finish: A luster finish is similar to a satin finish but with slightly more texture. It strikes a balance between a smooth and reflective surface, offering a subtle sheen without excessive glare. Luster finishes are popular among photographers as they provide good color vibrancy and help resist fingerprints and smudging.
5. Protective Coatings: Applying a protective coating to your prints can help prolong their lifespan and protect them from fading, moisture, UV rays, and scratches. Many professional printing services offer options for coatings such as UV protection or clear lacquer. These coatings not only provide added durability but can also enhance the visual appeal of your prints.
6. Consider Print Mounting: In addition to choosing a print finish and coating, you may also want to consider print mounting options. Mounting involves affixing the print onto a rigid backing material, such as foam board or acrylic, providing durability and stability. This can be especially beneficial if you plan to display your prints without framing.
When selecting print finishes and coatings, consider the style and subject matter of your photos, as well as your personal preferences. Experimenting with different finishes and coatings can help you achieve the desired aesthetic appeal and protection for your printed photos, ensuring that they look stunning and stand the test of time.
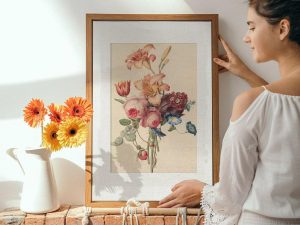
Mounting and Framing Your Prints
Mounting and framing your prints not only protects them but also enhances their presentation, transforming them into stunning pieces of art. Whether you’re displaying your prints at home, in a gallery, or as a gift, the right mounting and framing options can elevate the overall look and impact of your photos. Here are some considerations for mounting and framing your prints:
1. Mounting Options:
- Mat Board: Mat board is a popular mounting option that provides protection and a clean, finished look. It can be used to create a border around your print, adding dimension and visual separation between the print and frame.
- Foam Board: Foam board is a lightweight and rigid mounting option suitable for larger prints. It provides stability while keeping the print flat and protected against bending or warping.
- Acrylic Mounting: Acrylic mounting involves affixing the print to a piece of clear acrylic, giving it a modern and sleek appearance. It provides a durable and long-lasting display option while enhancing the colors and details of the print.
2. Framing:
- Frame Style: Choosing the right frame style depends on your personal preference and the aesthetic you want to achieve. Whether you opt for a classic wooden frame, a modern metal frame, or a minimalist frameless design, the frame should complement and enhance the overall look of your print.
- Frame Color: Consider the color of the frame in relation to your print. Black or white frames are versatile options that can work well with a range of images. Alternatively, you can choose a frame color that complements the dominant colors in your print, creating a cohesive and visually pleasing display.
- Frame Size and Proportions: Ensure that the frame size and proportions match the size and aspect ratio of your print. The frame should provide adequate support and properly fit the dimensions of your print, creating a balanced and professional presentation.
3. Positioning and Hanging:
- Matting and Spacing: If using a mat board, ensure that it is properly aligned and centered within the frame. Leave enough space between the print and the mat for visual breathing room. This can help draw attention to the print and maintain focus on the image itself.
- Proper Hanging: When hanging framed prints, use appropriate hardware and consider the weight of the frame. Use a level to ensure that the print is straight, and consider the spacing between multiple prints for an aesthetically pleasing arrangement. If in doubt, seek professional installation or guidance.
4. Consider Professional Services:
- Professional Framing Services: If you want a high-quality and custom framing solution, consider professional framing services. They can guide you through the various options available, help you choose the best materials, and provide expert craftsmanship to create a finished product that showcases your prints beautifully.
- Online Customization: There are also online platforms that offer customized framing options, allowing you to select the frame style, size, matting, and other details to suit your preferences. These services usually provide a wide range of choices and deliver the final product right to your doorstep.
Mounting and framing your prints not only adds protection but also enhances their visual impact. By carefully choosing the appropriate mounting options, selecting the right frame style and color, and properly positioning and hanging your prints, you can create a stunning display that showcases your photography in the best possible way.
Caring for Your Printed Photos
After investing time, effort, and possibly money into printing your photos, it’s important to take proper care of them to ensure their longevity and preservation. By following some simple guidelines, you can protect your printed photos and enjoy their beauty for years to come. Here are some tips for caring for your printed photos:
1. Handle with Clean Hands:
- When handling your printed photos, make sure your hands are clean and dry. Oils and moisture can damage the print surface, causing smudges or stains. Handle the photos by their edges or wear cotton gloves to avoid direct contact.
2. Store in Acid-Free Materials:
- Choose acid-free and archival-quality materials for storing your photos. Acidic materials can cause deterioration and discoloration over time. Acid-free photo sleeves, albums, or archival boxes provide a safe and protective environment for your prints.
3. Avoid Direct Sunlight:
- Exposure to direct sunlight can cause fading and discoloration of your prints over time. Display your prints in areas away from direct sunlight or use UV-protective glass or acrylic when framing to minimize the impact of UV rays.
4. Control Temperature and Humidity:
- Avoid storing your printed photos in areas with extreme temperature or humidity fluctuations. High humidity can lead to moisture damage, while extreme heat or cold can cause warping or curling of the prints. Find a cool, dry, and stable environment for storage.
5. Regular Cleaning:
- Dust and dirt can accumulate on the surface of your prints over time. Gently dust your prints using a soft, lint-free cloth or a soft brush to remove any loose particles. Avoid using water or harsh cleaning agents, as they can damage the print surface.
6. Rotate and Protect:
- If you have a collection of prints that you display, consider rotating them periodically to minimize exposure to light and potential damage. Additionally, use acid-free matting or backing boards when framing to keep the prints from direct contact with the glass or frame materials.
7. Avoid Environmental Hazards:
- Keep your prints away from environments with pollutants, fumes, or excessive moisture. Exposure to these hazards can cause irreversible damage to your prints.
By following these care tips, you can ensure the longevity and preservation of your printed photos. Remember that proper handling, storage in acid-free materials, protection from sunlight, control of temperature and humidity, regular cleaning, rotation, and protection from environmental hazards are all key factors in maintaining the beauty and quality of your printed memories.