
Installing a Virtual Machine
Running Windows games on a Mac can be a challenging task, but one reliable method is by installing a virtual machine. A virtual machine allows you to create a simulated Windows environment within your Mac, enabling you to run Windows applications, including games. Here’s how to get started:
1. Choose a Virtual Machine Software: There are several virtual machine software options available, such as VMware Fusion, VirtualBox, and Parallels Desktop. Research and choose the one that suits your needs best.
2. Download and Install the Virtual Machine: Once you’ve selected your preferred software, head to the official website and download the installation file. Follow the on-screen instructions to install the virtual machine on your Mac.
3. Obtain a Windows Installation: To run Windows on your virtual machine, you’ll need a Windows installation ISO file or a physical Windows installation disk. Make sure you have a valid copy of Windows before proceeding.
4. Create a Virtual Machine: Open your virtual machine software and create a new virtual machine. The software will guide you through the process, allowing you to allocate processor, memory, and storage resources to the virtual machine.
5. Install Windows on the Virtual Machine: Once the virtual machine is set up, it’s time to install Windows. Follow the prompts provided by the virtual machine software and select the Windows installation source. Proceed with the installation just as you would on a regular PC.
6. Install Game and Graphics Drivers: After Windows is installed, log in to your virtual machine and install the necessary graphics drivers. These drivers are essential for optimal gaming performance on the virtualized Windows environment. Additionally, install any required game files or software.
7. Launch and Enjoy Gaming: With your virtual machine set up and the game installed, you’re ready to start gaming. Launch the game within the virtual machine and enjoy playing Windows games on your Mac.
Remember to allocate sufficient resources to the virtual machine, as running resource-intensive games may require a higher amount of memory and processing power. Additionally, keep your virtual machine software and Windows installation up to date to ensure compatibility with the latest games and software updates.
Installing a virtual machine is a viable option for playing Windows games on a Mac. However, keep in mind that running a virtual machine may consume more system resources and impact overall performance. If you encounter any issues or experience lag during gameplay, refer to the troubleshooting section or consider alternative methods for running Windows games on your Mac.
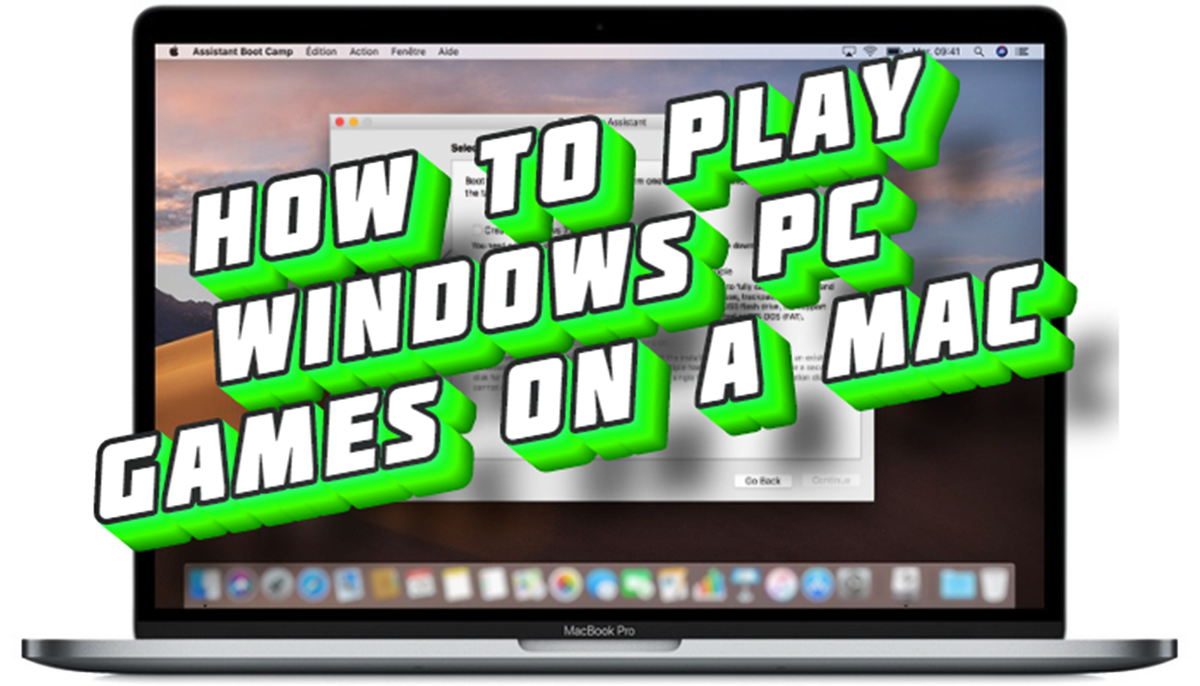
Using Boot Camp
Boot Camp is a built-in utility that allows Mac users to partition their hard drive and install Windows natively, creating a dual-boot environment. This means you can choose to boot your Mac either into macOS or Windows, providing a seamless and powerful Windows gaming experience on your Mac. Here’s how to use Boot Camp:
1. Check System Requirements: Before proceeding, ensure that your Mac meets the system requirements for running Boot Camp. You can find detailed information on Apple’s official website.
2. Backup Important Data: Partitioning your hard drive can potentially cause data loss. Therefore, it’s vital to back up all your important files and documents before starting the Boot Camp installation process.
3. Launch Boot Camp Assistant: Boot Camp Assistant is a utility pre-installed on macOS. You can find it by going to Finder > Applications > Utilities > Boot Camp Assistant. Open the utility to begin the installation process.
4. Create a Boot Camp Partition: With Boot Camp Assistant open, click on “Continue” to proceed. The utility will guide you through creating a Windows partition on your hard drive. Adjust the partition size according to your needs, but be aware that Windows requires a significant amount of storage space.
5. Install Windows: Once you’ve created the Boot Camp partition, you’ll be prompted to insert a Windows installation disk or connect a USB drive containing the Windows installation files. Follow the on-screen instructions to install Windows on the newly created partition.
6. Install Boot Camp Drivers: After Windows installation is complete, your Mac will automatically reboot into Windows. You’ll need to install Boot Camp drivers for proper hardware functionality. These drivers can be found on the macOS installation disk or downloaded from the Apple Support website.
7. Switch Between macOS and Windows: To switch between macOS and Windows, simply restart your Mac and hold down the Option key. This will bring up the Startup Disk selection screen, where you can choose the operating system you want to boot into.
8. Enjoy Windows Gaming on your Mac: With Boot Camp set up, you can now enjoy playing Windows games on your Mac without any virtualization or emulation. Simply boot into the Windows partition and install your favorite games to get started.
Remember to keep your Boot Camp installation and Windows installation up to date with the latest updates and drivers. This ensures optimal performance and compatibility with the latest games and software releases.
Boot Camp provides a native Windows environment on your Mac, enabling you to fully utilize your hardware for gaming purposes. However, keep in mind that switching between macOS and Windows requires a restart, so you may need to plan your game sessions accordingly.
Using Wine
If you’re looking for a way to run Windows games on your Mac without the need for a virtual machine or dual boot, Wine is a popular option. Wine is a compatibility layer software that allows you to run Windows applications, including games, directly on your Mac operating system. Here’s how to use Wine to play Windows games on your Mac:
1. Install Wine: Start by installing Wine on your Mac. There are different versions of Wine available, such as WineHQ and Wineskin. Download the version that suits your needs and follow the instructions provided in the installation process.
2. Download the Game: Once Wine is installed, you’ll need to have the game installer or setup file ready. Obtain a legal copy of the game and make sure it is compatible with Wine. Not all games are fully compatible, so it’s essential to research compatibility beforehand.
3. Configure Wine: Open Wine and configure its settings for optimal performance. Wine provides various configuration options that you can adjust based on your requirements. These options include audio settings, graphics settings, and compatibility settings. Experiment with these settings until you achieve the desired performance.
4. Install the Game: With Wine configured, you can now proceed with the game installation. Right-click on the game installer file and choose the option to “Open with Wine” or “Run with Wine.” Follow the on-screen instructions to install the game as you would on a Windows PC.
5. Launch the Game: Once the game installation is complete, you can launch it directly from the Wine interface. Find the game executable file and double-click on it to start playing. Wine will handle the necessary compatibility adjustments to run the game on your Mac.
6. Optimize Graphics and Performance: In some cases, you may experience performance issues or graphical glitches while running Windows games using Wine. To improve performance, you can adjust the graphics settings within the game itself or explore additional tools like WineBottler or PlayOnMac that provide advanced options for customizing Wine configurations.
7. Install Additional Libraries or Dependencies: Depending on the game, you may need to install additional libraries or dependencies to ensure smooth gameplay. Wine provides options to install various Windows libraries or tools that the game may require. Refer to the game’s documentation or online forums for any specific instructions.
8. Update Wine and Game Patches: To ensure the best compatibility and performance, regularly update both Wine and the game you’re playing. Wine developers frequently release updates and patches to improve compatibility with different games, while game developers often release updates to fix bugs and enhance gameplay.
Using Wine to play Windows games on a Mac offers a convenient and lightweight solution. However, keep in mind that not all games will work flawlessly with Wine due to differences in the macOS and Windows operating systems. It’s recommended to check compatibility reports or try the game on a trial basis before committing to a purchase.
Experiment with different Wine versions and configurations to find the optimal settings for your favorite games. Wine provides a vast library of supported applications, making it a versatile choice for running Windows games on your Mac without the need for virtualization or additional operating systems.
Using PlayOnMac
PlayOnMac is a user-friendly application that simplifies the process of running Windows games on a Mac. It is based on the Wine software, providing a more streamlined and intuitive interface for managing Windows applications. Here’s how to use PlayOnMac to play your favorite Windows games on your Mac:
1. Install PlayOnMac: Start by downloading and installing PlayOnMac from the official website. PlayOnMac is available for free and offers a simple installation process for Mac users.
2. Install Dependencies: PlayOnMac relies on Wine to run Windows applications. During the installation process, PlayOnMac will automatically download and install the required version of Wine and other dependencies. Follow the prompts and complete the installation.
3. Launch PlayOnMac: Once installed, launch PlayOnMac from your Applications folder or from the Launchpad. You’ll be greeted with a welcome screen and a series of options to choose from.
4. Install Windows Games: To install a Windows game, click on the Install button at the top or go to Tools > Manage Wine Versions. Here, you’ll find a list of supported Windows applications. Select the game you want to install and follow the on-screen instructions.
5. Configure Wine Settings: PlayOnMac allows you to configure Wine settings specific to each installed game. Right-click on the game in PlayOnMac, select Configure, and explore the various tabs to adjust compatibility options, graphics settings, and other options. Experiment with different settings to optimize your gaming experience.
6. Install Game Patches: It’s common for game developers to release updates or patches to address bugs and improve performance. Stay up to date with the latest game patches by checking the game’s official website or online forums. Download and install any available updates to ensure smooth gameplay.
7. Launch and Play: Once the game is installed and configured, you can launch it directly from PlayOnMac. Simply double-click on the game’s icon in the PlayOnMac main window, and the game will start running using the Wine compatibility layer. Enjoy playing your Windows game on your Mac.
8. Manage Multiple Games: PlayOnMac provides a convenient way to manage multiple Windows games on your Mac. The main window organizes all installed games, making it easy to switch between them and access their specific configurations.
9. Troubleshooting: If you encounter any issues while running a game through PlayOnMac, refer to the PlayOnMac website or community forums for troubleshooting guides. You can find tips and solutions for common problems that may arise during gameplay.
PlayOnMac offers a user-friendly interface and simplifies the process of running Windows games on a Mac. While it relies on Wine, PlayOnMac enhances the overall experience by providing a more intuitive way to install, configure, and manage your games. With PlayOnMac, you can enjoy a wide range of Windows games on your Mac without the need for complex configurations or additional software.
Using CrossOver
CrossOver is a powerful commercial application that allows you to run Windows games and applications on your Mac without the need for a Windows operating system. It is developed by CodeWeavers and is based on the Wine compatibility layer. Here’s how you can use CrossOver to play Windows games on your Mac:
1. Install CrossOver: Begin by downloading and installing CrossOver from the official CodeWeavers website. CrossOver offers a free trial, allowing you to test its compatibility with your favorite games before purchasing a license.
2. Launch CrossOver: Once installed, launch CrossOver from your Applications folder or the Launchpad. You’ll be presented with a simple and intuitive interface to manage your Windows applications.
3. Select a Windows Game: In CrossOver, click on the “+” button to add a new application. CrossOver maintains a comprehensive list of supported Windows games and applications. You can either search for your game using the search bar or browse through the available categories.
4. Install the Game: After selecting your game, CrossOver will guide you through the installation process. Follow the prompts and provide the game installer or setup file. CrossOver will create an isolated bottle, which is a self-contained environment for running the game on your Mac.
5. Configure CrossOver Settings: CrossOver provides various settings to optimize performance and compatibility. Click on your game in the CrossOver interface and select “Configure” to access these options. You can adjust settings such as DirectX support, audio devices, and specific compatibility tweaks.
6. Launch and Play: Once the game is installed and configured, you can launch it directly from CrossOver. The game will run in its isolated environment, utilizing the Wine compatibility layer provided by CrossOver. Enjoy your favorite Windows game on your Mac without the need for a virtual machine or dual boot.
7. Regularly Update CrossOver: To ensure the best compatibility and performance, it’s crucial to keep CrossOver up to date. CodeWeavers regularly releases updates and patches to improve compatibility with various games and software. Check for updates within the CrossOver application or visit the CodeWeavers website for the latest version.
8. Explore CrossTie and Community: CrossOver features a feature called CrossTie, which is a automated installer system that simplifies the installation process for certain games and applications. Additionally, CodeWeavers has an active online community where users share tips, troubleshoot problems, and provide recommendations for running games and software through CrossOver. Take advantage of these resources to enhance your gaming experience.
Using CrossOver provides a streamlined and user-friendly approach to play Windows games on a Mac. It eliminates the need for a full Windows installation or virtualization software, saving you time and resources. CrossOver’s compatibility and performance depend on the specific game and your Mac’s hardware, so it’s recommended to check the CodeWeavers website for compatibility reports and user reviews before purchasing a license.
Using Parallels Desktop
Parallels Desktop is a robust virtualization software that allows you to run Windows games and applications seamlessly on your Mac. It creates a virtual machine environment within your macOS, enabling you to access the full functionality of Windows without the need for dual booting or rebooting your system. Here’s how to use Parallels Desktop to play Windows games on your Mac:
1. Install Parallels Desktop: Start by downloading and installing Parallels Desktop from the official Parallels website. Parallels Desktop offers a free trial, allowing you to evaluate its performance and compatibility with your desired Windows games.
2. Create a New Virtual Machine: Launch Parallels Desktop and follow the prompts to create a new virtual machine. You’ll be asked to insert a Windows installation disk or select a Windows installation ISO file. Provide the necessary Windows installation media to proceed.
3. Install Windows: Parallels Desktop will guide you through the Windows installation process after creating the virtual machine. Follow the on-screen instructions, including entering your Windows product key and configuring settings such as disk size and memory allocation.
4. Install Parallels Tools: Once Windows is installed on the virtual machine, install Parallels Tools by going to the Parallels Desktop menu and selecting “Actions” > “Install Parallels Tools.” This installation provides enhanced integration between macOS and the virtual machine, improving performance and enabling seamless file sharing between the two environments.
5. Customize Virtual Machine Settings: Parallels Desktop allows you to customize various settings for your virtual machine. You can adjust hardware resources like memory, processor cores, and graphics memory to optimize performance for your games. Additionally, explore options such as shared folders and network settings based on your preferences.
6. Install and Launch Windows Games: With the virtual machine set up, install your preferred Windows games just as you would on a typical Windows PC. Insert or download the game installer, run it within the virtual machine, and follow the installation instructions. Once installed, you can launch the games directly from the Windows desktop within the virtual machine.
7. Adjust Display and Graphics Options: Parallels Desktop offers versatile display and graphics options to enhance your gaming experience. You can adjust screen resolution, enable full-screen or windowed mode, and configure DirectX support to ensure optimal graphics performance for your games.
8. Take Advantage of Coherence Mode: Parallels Desktop’s Coherence mode allows you to seamlessly integrate Windows applications into your macOS environment. When enabled, you can run Windows games alongside your Mac applications, making it convenient to switch between tasks without the need to switch operating systems.
9. Stay Updated and Maintain Virtual Machine Security: Regularly update both your macOS and the Windows operating system within the virtual machine to ensure compatibility, security, and performance. Additionally, install the latest graphics drivers and game updates to enjoy the best gaming experience.
Parallels Desktop offers a flexible and efficient way to play Windows games on your Mac, devoid of any significant hardware modifications. However, keep in mind that running games on a virtual machine may require higher hardware resources, and performance may vary depending on your Mac’s specifications. It’s recommended to check the Parallels website for compatibility reports and system requirements specific to the games you intend to play.
Configuring Graphics Settings
Configuring the graphics settings on your Mac is crucial for optimizing performance and enhancing the visual quality of your Windows games. Here are some essential steps to follow when adjusting graphics settings:
1. Display Resolution: Set the display resolution according to your preference and the capabilities of your Mac’s screen. Higher resolutions provide sharper visuals but may impact performance, especially on older machines. Strike a balance between visual quality and smooth gameplay.
2. Graphics Quality: Most games offer options to adjust the graphics quality settings. These settings control various graphical effects, textures, and details. Adjust them based on your hardware capabilities, ensuring a balance between visuals and performance. Higher settings provide more detailed visuals but may require more processing power.
3. Anti-Aliasing: Anti-aliasing smooths jagged edges on objects, improving the overall visual quality. It comes in different levels, such as off, low, medium, and high. Experiment with different anti-aliasing settings to find the right balance between visual quality and performance.
4. Texture Filtering: Texture filtering enhances the sharpness and clarity of textures in the game world. It helps reduce pixelation and blurry textures. Options typically include bilinear, trilinear, and anisotropic filtering. Higher settings improve image quality but increase the demand on your graphics card.
5. Shadows and Lighting: Adjusting shadows and lighting effects can significantly impact the visual atmosphere of the game. Higher shadow and lighting settings add realism but require more processing power. Experiment with different shadow and lighting options to find the right balance between visual fidelity and performance.
6. VSync: Vertical Sync (VSync) is a graphics setting that synchronizes the frame rate of the game with the refresh rate of your display. It helps prevent screen tearing but can introduce input lag. Enable VSync if screen tearing is noticeable but disable it if you prefer lower input lag for competitive games.
7. Frame Rate: Adjusting the frame rate allows you to control the number of frames per second (FPS) rendered by the game. Higher frame rates provide smoother gameplay but require more processing power. Aim for a stable frame rate that your hardware can consistently maintain without significant drops.
8. Experimental Features: Some games may offer experimental graphics features, such as dynamic reflections, motion blur, or depth of field effects. These features can enhance visual immersion but might have a significant impact on performance. Enable or disable these features based on personal preference and hardware capabilities.
9. Test and Tweak: After adjusting graphics settings, test the game and observe the performance and visual quality. If the game runs smoothly and the visuals are satisfactory, you’ve found the optimal settings. Otherwise, continue making adjustments until you strike a balance between performance and graphics quality.
Keep in mind that every game may have slightly different graphics settings to configure. Take the time to explore the options available within each game and refer to their documentation or online forums for additional guidance specific to that title.
Regularly updating your graphics card drivers is also essential for maintaining compatibility and improving performance. Check the manufacturer’s website for the latest driver updates and install them promptly.
Configuring graphics settings is a valuable step in tailoring your gaming experience to your preferences and hardware capabilities. By optimizing your graphics settings, you can enjoy smooth gameplay, stunning visuals, and an immersive gaming adventure on your Mac.
Troubleshooting Common Issues
Playing Windows games on a Mac may sometimes come with its own set of challenges and problems. To ensure a smooth gaming experience, it’s essential to be aware of common issues that may arise and know how to troubleshoot them. Here are some common issues you may encounter and potential solutions:
1. Game Crashes: If a game consistently crashes or freezes, ensure that your Mac meets the minimum system requirements for the game. Update your graphics card drivers to the latest version, as outdated drivers can often cause crashes. Additionally, check if the game has any patches or updates available that address known crash issues.
2. Performance Issues: If you experience low frame rates or sluggish gameplay, consider lowering the graphics settings in the game. Adjust options such as resolution, texture quality, and shadow details to reduce the strain on your hardware. Closing unnecessary background processes and freeing up system resources can also help improve performance.
3. Sound Issues: If the game has sound-related problems, ensure that your Mac’s audio drivers are up to date. Go to the sound settings in the game and check if the correct audio device is selected. If the issues persist, try restarting the game or reinstalling the sound drivers on your Mac.
4. Controller or Input Devices Not Working: If your gamepad, joystick, or other input devices are not working correctly, check if they are compatible with the game. Ensure that the correct drivers or software are installed for your input device. Try disconnecting and reconnecting the device or restarting your Mac to see if it resolves the issue.
5. Game Compatibility: Not all Windows games are fully compatible with macOS, even when using compatibility tools. Before purchasing or installing a game, research its compatibility with macOS and any specific requirements or workarounds. Check online forums, user reviews, or compatibility lists to determine if others have successfully played the game on a Mac.
6. Networking Issues: If a game requires online connectivity, ensure that your internet connection is stable and functioning properly. Disable any VPNs or firewall software that may interfere with the game’s network connectivity. If multiple players experience connectivity issues, check the game’s servers for any reported outages or maintenance.
7. Error Messages: Error messages can provide valuable information about the problem at hand. When encountering an error message, take note of the error code or message and search for it online. Often, other users have encountered similar issues and may have posted troubleshooting steps or solutions.
8. Game Updates: Developers frequently release updates and patches to address issues and improve game performance. Ensure that your game is up to date by checking for updates either within the game or on the game’s official website. Updating the game may resolve known issues and provide a smoother gaming experience.
9. Reinstalling the Game: If all else fails, consider reinstalling the game. Uninstall the game completely, including any related files or settings, and then reinstall it from scratch. This can help resolve any corrupted files or settings that may be causing issues.
If troubleshooting steps do not resolve the issues you’re experiencing, consider reaching out to the game’s official support channels or forums for further assistance. They may have specific guidance or recommendations based on the game you’re playing.
Troubleshooting common issues can be a trial-and-error process. Patience and persistence are key to finding the solutions that work best for your specific circumstances. By addressing and resolving common issues, you can enjoy a smoother and more enjoyable gaming experience on your Mac.