
Preparing Your iPhone and Hearing Aids
Before you can begin the process of pairing your hearing aids to your iPhone, it’s essential to make sure that both your device and your hearing aids are ready to connect. Here’s what you need to do to prepare:
- Check compatibility: The first step is to ensure that your hearing aids are compatible with your iPhone. Most modern hearing aids are designed to connect with smartphones, including iPhones, but it’s always a good idea to verify compatibility with your specific model. Refer to the user manual or contact the manufacturer if you’re uncertain.
- Enable Bluetooth: Bluetooth is the technology that allows your iPhone to communicate with your hearing aids. To enable Bluetooth, go to the “Settings” app on your iPhone and tap on “Bluetooth”. Ensure that the toggle switch is in the “On” position. You can also access the Control Center by swiping down from the top right corner of the screen and making sure that the Bluetooth icon is highlighted.
- Turn on your hearing aids: Make sure your hearing aids are powered on and in pairing mode. Every brand and model will have a slightly different process for turning on and activating pairing mode, so refer to the instruction manual provided by the manufacturer.
Once you have completed these preparatory steps, you are ready to move on to the next stage of pairing your hearing aids with your iPhone. Follow the instructions provided by the manufacturer for your specific hearing aids, as the pairing process may vary slightly between models.
Remember, the information provided here serves as a general guide. It’s always best to consult the user manual or contact the manufacturer for detailed instructions specific to your hearing aids and iPhone model.
Checking Compatibility
Before attempting to pair your hearing aids with your iPhone, it’s crucial to ensure that they are compatible with each other. This compatibility check will help you avoid any frustration or technical issues along the way. Here are the steps to verify compatibility:
- Review the manufacturer’s specifications: Start by consulting the user manual or visiting the manufacturer’s website to check if your hearing aids are specifically designed to work with iPhones. Look for any specific models or connectivity requirements mentioned in the specifications. If your hearing aids are listed as compatible, you can proceed with confidence.
- Contact the manufacturer: If you’re unsure about the compatibility or couldn’t find the information you needed, reach out to the manufacturer directly. They will be able to provide you with accurate and up-to-date details on whether your hearing aids can be paired with an iPhone. Many manufacturers have customer support teams that can assist you with any inquiries you may have.
- Visit an audiologist or hearing aid professional: Another option is to consult with an audiologist or hearing aid professional. They are well-versed in the different models and brands of hearing aids and can give you expert advice on compatibility. They may even be able to demonstrate the pairing process using your specific hearing aids and iPhone model, ensuring a seamless experience.
Remember, it’s crucial to verify compatibility before attempting to pair your hearing aids with your iPhone. This will save you time and frustration and ensure that you can take full advantage of the advanced features and functionality offered by your hearing aids when connected to your smartphone.
Enabling Bluetooth on Your iPhone
Before you can pair your hearing aids with your iPhone, you need to ensure that Bluetooth is enabled on your device. Bluetooth is the wireless technology that allows devices to connect and communicate with each other. Here’s how to enable Bluetooth on your iPhone:
- Open the Settings app: Tap on the Settings app on your iPhone’s home screen. The app icon looks like a gear.
- Go to Bluetooth settings: In the Settings menu, scroll down and tap on “Bluetooth”. The Bluetooth option will be located towards the top of the menu, typically below Wi-Fi.
- Toggle Bluetooth on: On the Bluetooth settings page, you will see a toggle switch at the top. If the switch is in the off position (grayed out), tap on it to turn Bluetooth on. When Bluetooth is enabled, the switch will turn green, indicating that it’s now active.
- Pair your hearing aids: With Bluetooth enabled on your iPhone, you’re now ready to pair your hearing aids. Keep them nearby and ensure they are in pairing mode according to the manufacturer’s instructions. Your iPhone will scan for available devices, and when it detects your hearing aids, they will appear on the list of available devices in the Bluetooth settings. Tap on your hearing aids to initiate the pairing process.
Note that the steps to enable Bluetooth may vary slightly depending on the iOS version of your iPhone. However, the basic process remains the same. If you’re unsure about the specific steps for your iOS version, you can explore the Apple Support website or consult the user manual that came with your iPhone.
Enabling Bluetooth on your iPhone is a simple yet essential step in the process of pairing your hearing aids. Once Bluetooth is enabled, you can connect your hearing aids and enjoy the convenience of streaming audio directly from your iPhone to your hearing aids, among other benefits.
Turning on Your Hearing Aids
Before you can start pairing your hearing aids with your iPhone, it’s important to ensure that your hearing aids are turned on and ready for the connection process. Here are the steps to turn on your hearing aids:
- Locate the power button: Depending on the model and brand of your hearing aids, the power button may be located in different places. It could be a small button on the hearing aid itself or a switch that you need to slide into the “On” position. Refer to the user manual provided by the manufacturer for exact instructions on locating the power button.
- Power on the hearing aids: Once you’ve located the power button, press or slide it to turn on the hearing aids. Some hearing aids may emit a tone or provide a visual indication, such as a blinking light, to confirm that they are powered on.
- Check the battery level: It’s a good idea to check the battery level of your hearing aids before starting the pairing process. If the batteries are low, consider replacing them to ensure a reliable connection with your iPhone. Refer to the user manual for information on how to check the battery status of your specific hearing aid model.
- Activate pairing mode: To initiate the pairing process, your hearing aids need to be in pairing mode. Pairing mode allows your hearing aids to be discoverable by your iPhone so they can establish a connection. Consult the user manual or contact the manufacturer to learn how to activate pairing mode for your specific hearing aid model.
Once your hearing aids are powered on and in pairing mode, you’re ready to move on to the next step of pairing them with your iPhone. Refer to the instruction manual provided by the manufacturer for detailed information on the pairing process for your specific hearing aid model.
It’s worth noting that the process of turning on your hearing aids might differ slightly between different models and brands. Always follow the manufacturer’s instructions to ensure successful activation and hassle-free pairing with your iPhone.
Pairing Your Hearing Aids with Your iPhone
Once you have prepared your iPhone and turned on your hearing aids, you are ready to pair them together. The pairing process establishes a wireless connection between your devices, allowing you to stream audio and adjust settings directly from your iPhone. To pair your hearing aids with your iPhone, follow these steps:
- Open the Settings app: Tap on the Settings app on your iPhone’s home screen to access the device settings.
- Select Bluetooth: In the Settings menu, scroll down and tap on “Bluetooth”. This will take you to the Bluetooth settings page.
- Turn on Bluetooth: If Bluetooth is not already enabled, tap the toggle switch to turn it on. It will appear green when activated.
- Put your hearing aids in pairing mode: Refer to the user manual or manufacturer’s instructions to activate pairing mode on your hearing aids. This step may involve specific button presses or switches to initiate the pairing process.
- Wait for your hearing aids to appear: Your iPhone will scan for available devices and display a list of nearby Bluetooth devices. Your hearing aids should appear on this list. Select your hearing aids from the list to continue.
- Complete the pairing process: Follow any additional on-screen prompts or instructions to complete the pairing process. This may involve inputting a PIN or verification code provided by your hearing aid manufacturer.
- Confirm successful pairing: Once the pairing is complete, you will see a confirmation message on your iPhone’s screen. Your hearing aids should now be connected to your iPhone, and you can begin enjoying the benefits of the wireless connection.
It’s important to note that the pairing process may vary slightly depending on the brand and model of your hearing aids. Always refer to the user manual provided by the manufacturer for specific instructions tailored to your hearing aids.
After successful pairing, you can adjust volume, manage settings, and even stream audio from your iPhone directly to your hearing aids. Take some time to explore the accessibility and hearing aid settings on your iPhone to customize the experience to your liking.
Troubleshooting Common Issues
While pairing your hearing aids with your iPhone is generally a straightforward process, you may encounter some common issues along the way. Here are some troubleshooting steps to help you resolve these issues:
- Ensure Bluetooth is enabled: Double-check that Bluetooth is turned on both on your iPhone and your hearing aids. If it’s not, toggle it off and on again to refresh the connection.
- Keep devices close together: Make sure your iPhone and hearing aids are in close proximity during the pairing process. Bluetooth connections can be weakened by distance, so keeping the devices within a few feet of each other can help ensure a solid connection.
- Restart both devices: Sometimes, a simple restart can resolve connectivity issues. Try turning off both your iPhone and hearing aids, then power them back on and attempt the pairing process again.
- Check for firmware updates: Visit the manufacturer’s website or contact their support team to inquire about any available firmware updates for your hearing aids. Updating the firmware can sometimes address compatibility or connectivity issues.
- Remove and re-pair devices: If the initial pairing attempt fails, try removing your hearing aids from the list of connected devices on your iPhone and then re-pair them. To do this, go to the Bluetooth settings on your iPhone, find your hearing aids, and select “Forget This Device”. Then, follow the steps outlined in the “Pairing Your Hearing Aids with Your iPhone” section to establish a new connection.
- Check battery levels: If you’re experiencing connectivity issues, check the battery levels of your hearing aids. Low batteries can impact the strength of the Bluetooth connection. Replace the batteries if necessary and try the pairing process again.
- Contact customer support: If you have exhausted all troubleshooting options and are still having issues, reach out to the customer support team of your hearing aid manufacturer or schedule an appointment with an audiologist for further assistance.
By following these troubleshooting steps, you can often resolve common issues and ensure a seamless connection between your hearing aids and iPhone. However, if the problems persist, it’s best to seek professional advice to address any potential technical or compatibility issues.
Adjusting Settings for Hearing Aids on Your iPhone
Once you have successfully paired your hearing aids with your iPhone, you can take advantage of the various settings and features that enhance your listening experience. Here’s how to adjust the settings for your hearing aids on your iPhone:
- Open the Settings app: Tap on the Settings app on your iPhone’s home screen to access the device settings.
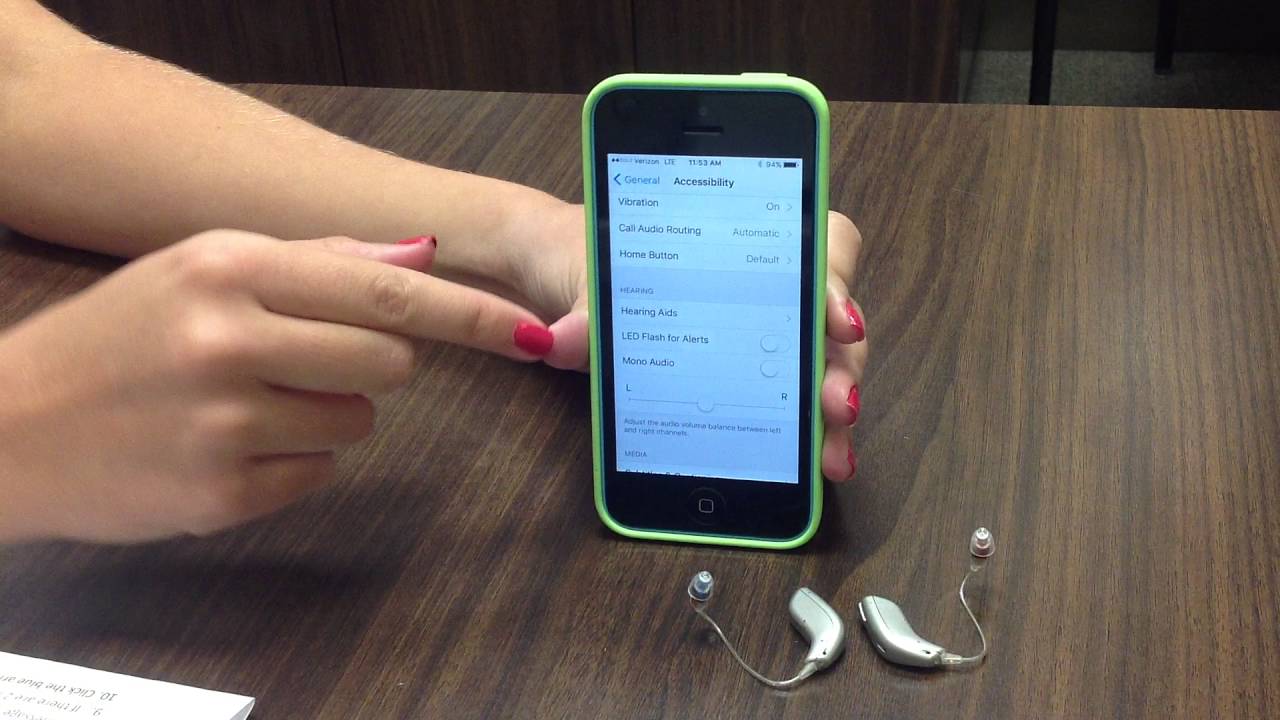
- Select Accessibility: In the Settings menu, scroll down and tap on “Accessibility”. This menu contains settings and features to enhance accessibility for various needs, including hearing aids.
- Tap on “Hearing Devices”: Within the Accessibility menu, locate and tap on “Hearing Devices”. This section is specifically dedicated to managing the settings for your connected hearing aids.
- Select your hearing aids: If your hearing aids are currently connected to your iPhone, you will see them listed under the “My Devices” section. Tap on your hearing aids to access their specific settings.
- Adjust volume and audio routing: Within the settings for your hearing aids, you can adjust the volume using the on-screen controls. Additionally, you can customize how audio is routed to your hearing aids, choosing between both ears or a single ear depending on your preference or hearing needs.
- Explore additional settings: Depending on your hearing aid model and manufacturer, you may have access to additional settings and features. These can include fine-tuning audio settings, adjusting equalizer settings, or enabling noise reduction or feedback cancellation features. Explore the available options to optimize your listening experience.
It’s important to note that the availability and range of settings may vary depending on the specific hearing aid model and manufacturer. Some hearing aids also have companion apps that provide even more customization options. Refer to the user manual or contact the manufacturer for detailed information on accessing and adjusting settings specific to your hearing aids.
By adjusting the settings for your hearing aids on your iPhone, you can tailor the audio output to your individual hearing needs and preferences. Take the time to explore and experiment with different settings until you find the optimal configuration for your unique hearing requirements.
Using Accessibility Features with Your Hearing Aids
Your iPhone offers a range of accessibility features that can complement your hearing aids and improve your overall user experience. These features are designed to enhance accessibility for individuals with hearing loss and ensure that you can fully utilize your device. Here are some key accessibility features to explore:
- Live Listen: Live Listen is an excellent feature that turns your iPhone into a remote microphone. It allows you to place your iPhone closer to a particular sound source, such as a speaker or a television, and stream the audio directly to your hearing aids. To activate Live Listen, go to the Control Center or the Accessibility settings on your iPhone and enable the feature.
- Hearing Aid Mode: This mode optimizes audio output specifically for hearing aids. It ensures that the sound is appropriately amplified and tailored for your individual hearing needs. To enable Hearing Aid Mode, go to the Accessibility settings on your iPhone and select “Hearing Devices”. From there, you can enable the mode and adjust additional settings as needed.
- Visual Alerts and Vibrations: If you have difficulty hearing audio notifications, you can use visual alerts and vibrations to receive alerts and messages. This feature can be especially helpful when you are in noisy environments or when your hearing aids are not connected. Enable visual alerts and vibrations in the Accessibility settings under “Hearing Devices”.
- Subtitles and captions: Many apps and services offer the option to display subtitles or closed captions for videos and audio content. When watching media or using video calling apps, look for the option to enable subtitles or captions. This can help you follow along and enjoy content even if you miss some spoken words.
- Haptic Feedback: Haptic feedback provides tactile feedback through vibrations or taps, allowing you to receive non-auditory notifications and alerts. You can enable haptic feedback in the Accessibility settings under “Touch”. Customize the intensity and duration of the haptic feedback to your preference.
These are just a few examples of the accessibility features available on your iPhone. Take the time to explore the Accessibility settings and experiment with different features to find those that best meet your needs. You may also find it helpful to consult with an audiologist or hearing aid professional who can provide guidance on utilizing these features effectively with your specific hearing aids.
By utilizing the accessibility features on your iPhone, you can enhance your hearing aids’ functionality and ensure a more inclusive and accessible user experience. Enjoy the convenience and flexibility that these features provide for individuals with hearing loss.
Taking Care of Your Hearing Aids and iPhone Connection
Proper maintenance and care of your hearing aids and the connection with your iPhone are essential for optimal performance and longevity. Here are some tips to help you take care of your hearing aids and maintain a reliable connection:
- Clean your hearing aids regularly: Follow the manufacturer’s instructions for cleaning your hearing aids. Use a soft, dry cloth or a specialized cleaning tool to remove any earwax or debris that may accumulate in or around the hearing aid. Keeping your hearing aids clean will prevent blockages and ensure clear sound transmission.
- Protect your hearing aids from moisture: Moisture can damage the internal components of your hearing aids. Avoid exposing them to excessive humidity, moisture, or water. Remove your hearing aids before swimming, bathing, or participating in activities that may cause excessive sweating. Consider using a dehumidifier or a drying kit overnight to remove any moisture that may have accumulated during the day.
- Handle your hearing aids with care: Be gentle when handling your hearing aids. Avoid dropping them or exposing them to extreme temperatures. When not in use, store your hearing aids in a dry and secure place, preferably in a protective case provided by the manufacturer.
- Keep your iPhone up to date: Regularly update your iPhone’s software to ensure compatibility and optimal performance with your hearing aids. Software updates often include bug fixes and improvements that can enhance the Bluetooth connection and overall functionality of your iPhone.
- Avoid interference: Bluetooth signals can be susceptible to interference from other devices or obstacles. Try to keep your iPhone and hearing aids away from devices that emit electromagnetic signals, such as microwaves, cordless phones, or Wi-Fi routers. Additionally, avoid physical obstructions between your iPhone and hearing aids, as they can weaken the Bluetooth connection.
- Check battery levels regularly: Keep an eye on the battery levels of both your hearing aids and your iPhone. Low batteries can affect the performance and stability of the connection. Replace the batteries promptly when needed and charge your iPhone regularly to ensure a consistent connection.
By following these care tips, you can maintain the functionality and durability of your hearing aids while also ensuring a stable and reliable connection between your devices. Regular maintenance and care will help ensure that you continue to enjoy the benefits of the seamless connection between your hearing aids and your iPhone for years to come.
Final Thoughts
Pairing your hearing aids with your iPhone opens up a world of possibilities for enhanced communication and connectivity. With the ability to stream audio directly to your hearing aids and customize settings through your iPhone, you can enjoy a personalized and convenient listening experience. However, it’s important to remember a few key points as you navigate this process:
Firstly, always refer to the user manual or contact the manufacturer for detailed instructions specific to your hearing aids and iPhone model. The steps and compatibility may vary between different brands and models, so it’s crucial to follow the guidance provided by the manufacturer.
Secondly, don’t hesitate to reach out to customer support or schedule an appointment with an audiologist or hearing aid professional if you encounter any difficulties. They have the expertise and knowledge to assist you in troubleshooting issues and optimizing the connection between your hearing aids and iPhone.
Lastly, regular maintenance and care of your hearing aids and iPhone is vital for their longevity and performance. Clean your hearing aids regularly, protect them from moisture, and handle them with care. Keep your iPhone updated and be mindful of battery levels to ensure a stable and reliable connection.
By following these guidelines and exploring the features and settings available to you, you can make the most of your hearing aids and iPhone connection. Embrace the convenience, flexibility, and improved hearing experience that technology can provide, and enjoy the benefits of staying connected in a world that is continuously evolving to meet the needs of individuals with hearing loss.