
Step 1: Gather the Materials
Before you embark on making a digital TV antenna, it’s important to gather all the necessary materials. Here’s a list of items you’ll need:
- Coaxial cable: Look for a high-quality coaxial cable, preferably one with a thick inner copper conductor. The length of the cable will depend on your specific needs and how far your TV is from the nearest broadcast tower.
- Copper wire: You’ll need a piece of copper wire, preferably around 20 to 24-gauge, with a length of about 20 inches. This wire will act as the active element of the antenna.
- Wire cutters: Make sure you have a pair of wire cutters or a sharp utility knife to trim the cable and copper wire.
- Wire strippers: These tools are essential for removing the outer insulation of the coaxial cable and exposing the inner conductor.
- Balun transformer: A balun is a device that matches the impedance of the antenna to that of the coaxial cable. Look for a balun specifically designed for TV antennas.
- Wood or PVC material: You’ll need some wood or PVC pipes to construct the frame of the antenna. The size and dimensions will depend on the design you choose.
- Screws, nuts, and washers: These will be used to secure the components together and mount the antenna.
- Antenna mount: Depending on where you plan to place the antenna, you may need an antenna mount to secure it to a pole, rooftop, or inside your attic.
- A digital TV tuner: To receive and decode the digital TV signals, you’ll need a TV tuner, which can be built into your TV or purchased as an external device.
Once you have gathered all these materials, you’ll be ready to move on to the next steps in building your own digital TV antenna. Keep them handy as you proceed, and remember to double-check that you have everything before starting each step to ensure a smooth construction process.
Step 2: Measure and Cut the Wire Coax
Now that you have gathered all the necessary materials, it’s time to measure and cut the wire coax. Follow these steps to ensure proper sizing:
- Start by determining the desired length of the coaxial cable. Consider the distance between your TV and the nearest broadcast tower, as well as any obstructions that may interfere with the signal.
- Measure and mark the cable accordingly, using a ruler or measuring tape. It’s important to make precise measurements to avoid any signal loss.
- Using a pair of wire cutters or a sharp utility knife, carefully cut the coaxial cable at the marked spot. Ensure that the cut is clean and straight to prevent any damage to the inner conductor.
Remember, accuracy is crucial when measuring and cutting the wire coax. You want to ensure that the cable length is appropriate for your specific setup, as this will directly impact the quality of the TV signal you receive.
It’s important to note that if you’re unsure about the optimal cable length or encounter difficulties in cutting the coax, it’s recommended to consult a professional or refer to manufacturer guidelines for assistance.
With the wire coax properly measured and cut, you’re one step closer to assembling your digital TV antenna. Proceed to the next step to learn how to strip the coaxial cable and prepare it for connection.
Step 3: Strip the Coax Cable
After measuring and cutting the wire coax, the next step in building your digital TV antenna is to strip the coaxial cable. Stripping the cable involves removing the outer insulation to expose the inner conductor. Follow these steps to strip the coax cable properly:
- Take the wire stripper tool, specifically designed for coaxial cables, and adjust it to the appropriate setting based on the size of your cable.
- Hold the cable firmly and position the wire stripper tool around the end of the cable, making sure it fits snugly.
- Apply slight pressure and rotate the stripper tool around the cable a few times. Be careful not to apply excessive force, as it may damage the inner conductor.
- Once you have completed the rotation, carefully remove the tool from the cable, taking care not to accidentally pull out any wires.
- Gently pull off the stripped portion of the outer insulation. It should come off easily, revealing the inner conductor.
- Inspect the stripped end to ensure that all the outer insulation has been removed, leaving only the copper inner conductor exposed.
It’s important to note that precision and caution are key when stripping the coax cable. Damaging the inner conductor or leaving remnants of the outer insulation can negatively impact the performance and signal quality of your antenna.
If you’re unsure about the stripping process or encounter any difficulties, consider seeking guidance from a professional or consulting the manufacturer’s guidelines for your specific coaxial cable.
With the coax cable properly stripped, you’re now ready to move on to the next step, which involves preparing the copper wire for connection.
Step 4: Prepare the Copper Wire
Now that you have stripped the coax cable, the next step in building your digital TV antenna is to prepare the copper wire. Follow these steps to ensure it is ready for connection:
- Take the 20 to 24-gauge copper wire and measure it to a length of about 20 inches.
- Using wire cutters or a sharp utility knife, carefully trim the copper wire to the measured length. Ensure the cut is clean and straight.
- Twist one end of the copper wire to form a loop. This loop will be used to connect the wire to the coax cable.
- Hold the twisted end firmly and use a pair of pliers to flatten it slightly. This will make it easier to connect the wire to the coax cable in the next step.
It’s important to handle the copper wire with care to avoid any sharp edges or cuts. Take your time when preparing the wire to ensure it is done correctly and safely.
Once the copper wire is properly prepared, you’re ready to move on to the next step, which involves connecting the wire to the coax cable. This connection is crucial in ensuring the effective reception of digital TV signals.
Step 5: Connect the Copper Wire to the Coax Cable
Now that you have prepared the copper wire, it’s time to connect it to the coaxial cable. Follow these steps to make a secure connection:
- Take the end of the coaxial cable that you previously stripped and exposed the inner conductor.
- Insert the exposed inner conductor of the coax cable into the loop of the prepared copper wire.
- Ensure that the loop of the copper wire wraps around the exposed inner conductor tightly, creating a secure connection.
- Hold the connection firmly and use electrical tape or heat shrink tubing to secure and insulate the joint. This will provide protection and help maintain a reliable connection.
It’s important to make a solid and secure connection between the copper wire and the coaxial cable to ensure optimal performance of your digital TV antenna. A loose or weak connection can result in signal loss or poor reception.
Take your time to ensure that the connection is properly made and securely sealed. Double-check for any signs of loose wiring or exposed conductors before proceeding to the next step.
With the copper wire successfully connected to the coaxial cable, you’re one step closer to completing your digital TV antenna. Continue on to the next step to learn how to attach the coax cable to the balun transformer.
Step 6: Attach the Coax Cable to the Balun
Once you have connected the copper wire to the coaxial cable, the next step is to attach the coax cable to the balun transformer. Follow these steps to ensure a secure connection:
- Take the end of the coaxial cable, where the connection to the copper wire is made.
- Locate the input port on the balun transformer.
- Insert the exposed end of the coaxial cable into the input port of the balun.
- Ensure that the cable is inserted firmly, making sure it is fully seated and secured within the input port.
- If necessary, you can use screws or clips provided with the balun transformer to secure the coaxial cable in place.
It’s important to make a solid and secure connection between the coaxial cable and the balun transformer to ensure proper signal transmission and reception. A loose or improper connection can result in signal loss or poor TV reception.
Take your time to ensure that the connection is made correctly and securely. Double-check for any signs of loose cables or improper seating before proceeding to the next step.
With the coax cable successfully attached to the balun transformer, you’re making progress towards completing your digital TV antenna. Continue on to the next step to learn how to build the frame for your antenna.
Step 7: Build the Frame for the Antenna
Now that you have made the necessary connections, it’s time to build the frame for your digital TV antenna. Follow these steps to construct a sturdy and functional frame:
- Determine the size and shape of the frame based on your chosen antenna design. You can use wood or PVC material for the frame construction.
- Measure and cut the wood or PVC material according to your desired frame dimensions. If using wood, ensure that it is sturdy and weather-resistant.
- Assemble the frame by connecting the cut pieces of wood or PVC using screws, nuts, or connectors. Follow your chosen design or refer to online resources for guides on frame construction.
- Ensure that the frame is securely built and stable. Double-check for any loose connections or weak points in the frame structure.
When constructing the frame for your digital TV antenna, make sure to consider factors such as the antenna’s size, weight, and weather conditions in your area. A sturdy frame will provide stability and longevity for your antenna.
Take your time to build the frame accurately and securely. It’s important to ensure that the frame is rigid and capable of supporting the antenna’s weight without any wobbling or imbalance.
With the frame successfully built, you’re making progress in constructing your digital TV antenna. Proceed to the next step to learn how to attach the coax cable to the frame.
Step 8: Attach the Coax Cable to the Frame
Once you have built the frame for your digital TV antenna, the next step is to attach the coaxial cable to the frame. Follow these steps to ensure a secure connection:
- Identify a suitable location on the frame where you want to attach the coax cable.
- Secure the coaxial cable to the frame using clips, cable ties, or other fasteners. Make sure the cable is held tightly against the frame to prevent it from dangling or being exposed to the elements.
- Ensure that the coax cable is positioned in a way that does not impede the movement or functionality of the antenna.
- Inspect the attachment points to ensure that the cable is secured properly and will not come loose over time or in adverse weather conditions.
Attaching the coax cable to the frame is an important step in ensuring the stability and functionality of your digital TV antenna. A secure attachment will prevent the cable from getting damaged and protect it from external factors.
Take your time to carefully position and secure the coax cable to the frame. Pay attention to any sharp edges or potential hazards that could pose a risk to the cable’s integrity.
With the coax cable successfully attached to the frame, you’re making significant progress in building your digital TV antenna. Continue on to the next step to learn how to mount the antenna for optimal reception.
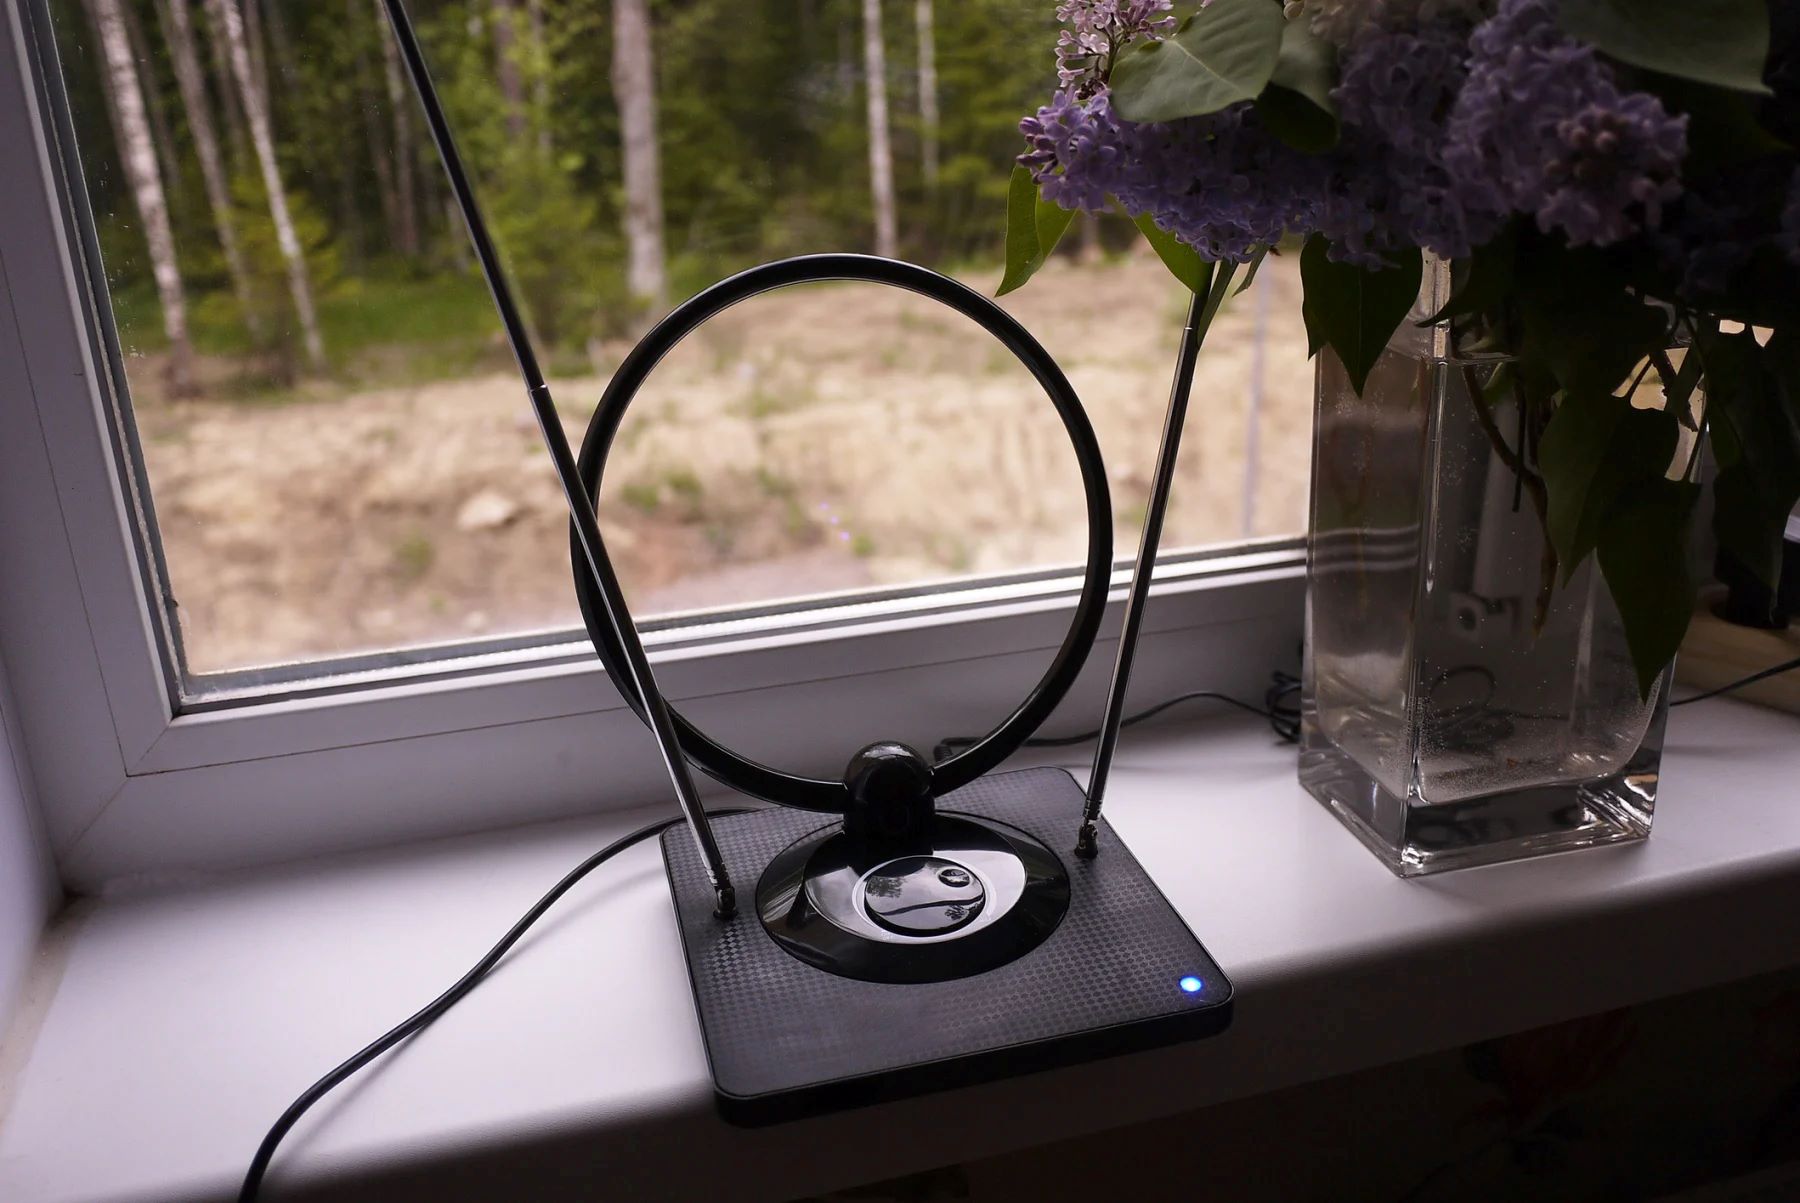
Step 9: Mount the Antenna
Now that your digital TV antenna is taking shape, it’s time to mount it in an optimal location for reception. Follow these steps to ensure a secure and effective mounting:
- Determine the ideal location for mounting your antenna. This can be on a rooftop, in an attic, or on a pole, depending on the specific requirements of your antenna and the signal strength in your area.
- Secure the antenna mount to the chosen location using screws, brackets, or other appropriate mounting hardware. Ensure that the mount is stable and securely fastened.
- Attach the frame of the antenna to the mount, making sure it is leveled and aligned properly. Use screws, bolts, or clamps to secure the frame to the mount.
- Double-check that the antenna is securely mounted and not at risk of falling or moving. It should be positioned in a way that allows for optimal reception and minimal interference.
Mounting your antenna at the correct location is crucial for maximizing signal reception and minimizing obstructions. Consider factors such as line-of-sight, nearby structures, and potential interference sources when choosing the mounting position.
Take your time to ensure that the antenna is mounted securely and levelled properly. A secure mounting will help maintain stability, optimize signal reception, and provide long-lasting performance.
With the antenna successfully mounted, you’re one step closer to enjoying free and clear TV reception. Continue on to the next step to learn how to scan for channels and set up your digital TV.
Step 10: Scan for Channels
After mounting your digital TV antenna, the next step is to scan for channels on your television. Follow these steps to discover the available channels in your area:
- Ensure that your TV is connected to the digital TV antenna using the coaxial cable.
- Turn on the TV and access the menu or settings options. Look for the channel scan or auto-tune feature.
- Select the option to scan for channels. Your TV will start searching for available digital channels.
- Depending on your TV model, you may have the option to perform a full scan or a quick scan. A full scan may take longer, but it will search for more channels.
- Allow the TV to complete the scanning process. Do not interrupt the scan, as this may prevent all available channels from being detected.
- Once the scan is complete, your TV will display a list of found channels. This list may include over-the-air broadcast channels as well as sub-channels.
- Save the channels to your TV’s memory or create a favorites list for easy access.
It’s important to note that the number and quality of channels you receive will depend on various factors such as your location, distance to broadcast towers, and the capabilities of your digital TV antenna.
Experiment with the antenna’s positioning, orientation, and height to optimize signal reception and discover additional channels. You may need to perform multiple scans or make slight adjustments to improve reception.
With the channel scan complete, you’re ready to enjoy the free and clear TV reception that your digital TV antenna provides. Proceed to the next step to learn how to adjust the antenna for even better reception if necessary.
Step 11: Adjust the Antenna for Better Reception
After scanning for channels, you may find that the reception quality of certain channels is not optimal. In this step, you will learn how to adjust your digital TV antenna to improve reception. Follow these steps to achieve better signal quality:
- Start by checking the signal strength and quality of the channels you are receiving. Most modern TVs have a signal strength meter or a signal quality indicator in the settings menu.
- With the TV turned on, slightly adjust the position of the antenna in small increments. It’s best to have someone assist you by monitoring the signal strength or quality indicator on the TV while you make these adjustments.
- Try rotating the antenna horizontally or vertically to find the position that provides the best reception. Minor adjustments like tilting or rotating can make a significant difference in signal quality.
- Pay attention to the signal strength and quality as you make adjustments. Find the position where the signal strength is highest and the quality is most stable.
- For best results, avoid obstacles such as buildings, trees, or other tall structures that may interfere with the signal. Experiment by moving the antenna to different locations or heights to find the optimal position for reception.
It’s important to note that finding the ideal position for your digital TV antenna may require some trial and error. Take your time to make small adjustments and test the reception quality after each change.
Remember that the signal reception can be affected by various factors, including weather conditions. It may be necessary to reposition the antenna seasonally to maintain the best reception.
By adjusting your digital TV antenna, you’ll be able to optimize signal reception and enjoy a clearer and more reliable viewing experience. Once you’ve achieved satisfactory reception, you’re all set to enjoy your favorite shows and channels!
Step 12: Enjoy Your Free, Clear TV Reception!
Congratulations! You have successfully built and set up your digital TV antenna. Now it’s time to sit back, relax, and enjoy free, clear TV reception. Here are a few things to keep in mind as you enjoy your new antenna:
- Explore the channels: Take the time to explore the various channels you have scanned and discovered. You may find new local channels, sub-channels, or even niche content that you didn’t have access to before.
- Fine-tune your antenna: If you notice any issues with specific channels or reception quality, don’t hesitate to make minor adjustments to your antenna’s position. Remember, small changes can sometimes make a big difference in signal reception.
- Regular maintenance: Occasionally, check your antenna to ensure it remains securely mounted and that there are no obstructions or damages. Perform any necessary maintenance to keep it in optimal working condition.
- Experiment with positioning: If you’re in an area with multiple broadcast towers or signal sources, try experimenting with the antenna’s positioning to fine-tune the reception. You may find that slight adjustments yield better results.
- Share the joy: If you’re thrilled with your new antenna and the quality of reception you’re experiencing, spread the word! Let your friends and family know about the benefits of having a digital TV antenna and how it provides access to free, high-quality TV content.
Remember, with your digital TV antenna, you have access to free, over-the-air channels that offer a wide range of entertainment, news, and sports programming. Say goodbye to expensive cable or satellite subscriptions and enjoy the freedom of clear TV reception without monthly fees.
Now grab some popcorn, sit back, and immerse yourself in the world of quality TV entertainment that your digital TV antenna brings right to your living room.