
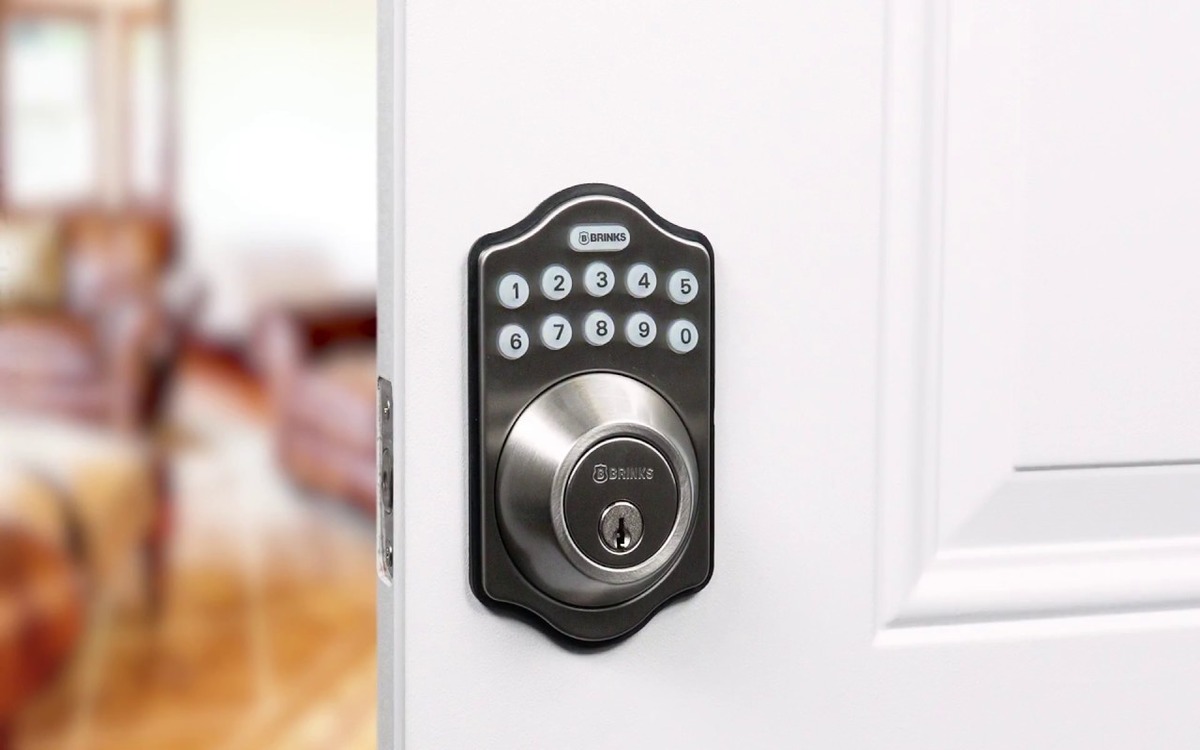
Tools Needed
Before you begin the installation process, it’s essential to gather all the necessary tools. Having these tools on hand will ensure a smooth and efficient installation of your Brinks electronic deadbolt. Here is a list of the tools you will need:
- Screwdriver Set – Both Phillips and Flathead screwdrivers will be required.
- Drill – Make sure you have a drill with the appropriate drill bits.
- Hammer – A basic hammer for any minor adjustments that may be needed.
- Tape Measure – Precise measurements are crucial for a proper installation.
- Level – To ensure that your deadbolt is straight and aligned correctly.
- Pencil – For marking holes and measurements on the door.
- Masking Tape – Helpful for preventing any scratching during the installation process.
- Wire Strippers – If your Brinks deadbolt requires any wiring connections.
Having these tools readily available will save you time and frustration during the installation process. Make sure you have them all before you begin, so you can complete the installation smoothly and efficiently. Once you have gathered the necessary tools, you are ready to move on to the next steps of the installation process.
Step 1: Remove Existing Deadbolt
The first step in installing your Brinks electronic deadbolt is to remove the existing deadbolt from your door. Follow these steps to successfully remove the old deadbolt:
- Inspect the current deadbolt: Examine the existing deadbolt to understand its mechanism and identify any screws or fasteners that are holding it in place.
- Remove the exterior assembly: Unscrew and remove the exterior assembly of the deadbolt. This usually involves removing a few screws from the faceplate or cover.
- Take out the interior assembly: Once the exterior assembly is removed, proceed to remove the interior assembly of the deadbolt. Again, use a screwdriver to unscrew and detach it from the door.
- Pull out the latch: Locate the latch mechanism on the edge of the door and remove it by unscrewing any retaining screws or fasteners. Slide the latch out of the door.
- Inspect the door and clean the area: Take a moment to inspect the door and the area where the deadbolt was installed. Clean any dirt or debris and ensure a smooth surface for the installation of your new Brinks electronic deadbolt.
Removing the existing deadbolt is a crucial step in the installation process. By following these steps carefully, you will create a clean canvas for installing your new Brinks electronic deadbolt. Once you have completed this step, you are ready to move on to preparing the door for the installation of the new deadbolt.
Step 2: Prepare the Door
After removing the existing deadbolt, the next step in installing your Brinks electronic deadbolt is to prepare the door for the new installation. Follow these steps to ensure that the door is ready:
- Measure and mark: Using a tape measure, determine the appropriate height for your new electronic deadbolt. Mark the location on the door with a pencil. Measure the backset, which is the distance from the edge of the door to the center of the hole, and mark it as well.
- Drill pilot holes: Using a drill and the appropriate drill bit, drill pilot holes at the marked locations for the deadbolt and the latch. Be mindful of the depth of the holes to ensure a proper fit.
- Create mortise for latch: If your new Brinks deadbolt requires a mortise for the latch, carefully carve out the necessary recess using a chisel or mortising tool. Follow the manufacturer’s instructions for the correct dimensions.
- Test fit the latch: Insert the latch into the mortise or the drilled hole and test its fit. Ensure that it sits flush and operates smoothly. Make any necessary adjustments if the fit is too tight or loose.
- Check door alignment: Use a level to ensure that the door is properly aligned. Adjust the hinges if necessary to achieve a straight and even door.
Preparing the door is crucial for a successful installation of your Brinks electronic deadbolt. By following these steps and taking the time to measure, mark, and drill accurately, you are setting the foundation for a secure and functional deadbolt. Once you have completed this step, you are ready to move on to the next stage of installing the latch and strike components of your Brinks electronic deadbolt.
Step 3: Install the Latch and Strike
With the door prepared, the next step in installing your Brinks electronic deadbolt is to install the latch and strike components. Follow these steps to successfully install them:
- Attach the latch: Insert the latch mechanism into the previously drilled hole or mortise on the edge of the door. Ensure that it aligns correctly and sits flush against the door. Secure it in place using the provided screws.
- Position the strike plate: Place the strike plate on the door frame where the latch will strike when the door is closed. Ensure that it aligns with the latch and mark the outline with a pencil.
- Create recess for strike plate: Use a chisel or a router to carve out a recess for the strike plate within the marked outline. Take your time to create a clean and precise recess that matches the dimensions of the strike plate.
- Align and install the strike plate: Place the strike plate over the recess and ensure that it aligns with the latch. Secure it to the door frame using the provided screws.
- Test the latch and strike: Close the door and test the latch and strike. Ensure that the latch smoothly enters the strike plate when the door is closed and retracts when the door is opened.
Installing the latch and strike components correctly is crucial for the proper functioning of your Brinks electronic deadbolt. Take your time to align and secure these components accurately to ensure a secure and reliable lock. Once you have completed this step, you are ready to move on to installing the exterior assembly of your Brinks electronic deadbolt.
Step 4: Install the Exterior Assembly
Now that the latch and strike components are in place, it’s time to install the exterior assembly of your Brinks electronic deadbolt. Follow these steps to successfully install it:
- Position the exterior assembly: Hold the exterior assembly against the outside of the door, aligning it with the drilled holes or markings from the previous steps. Ensure that the keyhole is facing the correct direction.
- Insert the mounting screws: With the exterior assembly in position, insert the mounting screws through the screw holes and into the corresponding holes on the interior assembly. Tighten the screws to secure the exterior assembly in place.
- Test the operation: Test the operation of the deadbolt by turning the thumbturn or using the key to lock and unlock the deadbolt. Ensure that it moves smoothly and engages properly with the latch and strike.
- Check the alignment: Use a level to confirm that the deadbolt is straight and aligned correctly on the door. Make any necessary adjustments to ensure proper alignment.
- Tighten any loose screws: Give the entire deadbolt assembly a thorough inspection and tighten any screws that may have become loose during the installation process.
Installing the exterior assembly is a crucial step in completing the installation of your Brinks electronic deadbolt. By following these steps, you will have the exterior operation of the deadbolt securely in place and ready for the next stages of the installation. Once you have completed this step, you are ready to move on to connecting the wires (if applicable) and installing the interior assembly of your Brinks electronic deadbolt.
Step 5: Connect the Wires
If your Brinks electronic deadbolt model requires wiring for additional features or smart connectivity, follow these steps to connect the wires:
- Read the instructions: Carefully read and familiarize yourself with the manufacturer’s instructions for wiring your specific Brinks electronic deadbolt model. Pay close attention to the wiring diagram and any specific requirements.
- Prepare the wires: If necessary, strip the ends of the wires using wire strippers. Ensure that there is enough exposed wire to create a secure connection without any frayed ends.
- Identify the wiring terminals: Locate the wiring terminals on the interior assembly of the deadbolt. These terminals are typically labeled or color-coded to indicate their function.
- Make the connections: Follow the wiring diagram and connect the wires to the corresponding terminals. Ensure that each wire is securely fastened and that there are no loose connections.
- Tuck and secure the wires: After making the connections, carefully tuck and secure the wires within the deadbolt assembly. Use cable clips or tape to keep them neat and prevent them from interfering with the deadbolt’s operation.
Connecting the wires correctly is crucial for the desired functionality of your Brinks electronic deadbolt. It is essential to follow the manufacturer’s instructions carefully to ensure proper wiring and prevent any electrical issues. Once you have completed this step, you are ready to move on to installing the interior assembly of your Brinks electronic deadbolt.
Step 6: Install the Interior Assembly
With the exterior assembly and wiring in place, it’s time to install the interior assembly of your Brinks electronic deadbolt. Follow these steps to successfully install it:
- Hold the interior assembly: Hold the interior assembly against the inside of the door, aligning it with the mounting holes from the exterior assembly. Ensure that the thumbturn or keypad is facing the correct direction.
- Insert the mounting screws: Insert the mounting screws provided with your Brinks electronic deadbolt through the screw holes on the interior assembly and into the corresponding holes on the exterior assembly. Tighten the screws to secure the interior assembly in place.
- Test the operation: Test the operation of the deadbolt by using the thumbturn or keypad to lock and unlock the deadbolt. Ensure that it moves smoothly and engages properly with the latch and strike.
- Check for proper alignment: Use a level to confirm that the deadbolt is straight and aligned correctly on the door. Adjust the placement if necessary to ensure proper alignment.
- Secure any loose screws: Give the entire deadbolt assembly a thorough inspection and tighten any screws that may have become loose during the installation process.
Installing the interior assembly is the final step in the installation process of your Brinks electronic deadbolt. By following these steps, you will have successfully installed the complete deadbolt system on your door. Once you have completed this step, you are ready to move on to testing the deadbolt and programming the electronic codes to secure your home.
Step 7: Test the Electronic Deadbolt
Once you have installed the Brinks electronic deadbolt, it is crucial to thoroughly test its functionality to ensure proper operation. Follow these steps to test the electronic deadbolt:
- Close the door: Close the door and ensure that it is fully engaged with the strike plate.
- Lock and unlock the deadbolt: Test the electronic deadbolt by using the provided methods to lock and unlock it. This can be done through a keypad, key fob, or a smartphone app, depending on the specific features of your Brinks electronic deadbolt.
- Check for smooth operation: Pay attention to the deadbolt’s movement as you lock and unlock it. It should move smoothly without any resistance or dragging.
- Test different locking methods: If your Brinks electronic deadbolt offers multiple locking methods, such as entering a PIN code, using a key fob, or utilizing a smartphone app, test each method to ensure they all work as expected.
- Verify proper engagement: When the deadbolt is in the locked position, check that it is fully engaged with the strike plate and provides a secure lock.
Testing the electronic deadbolt is crucial to ensure that it functions correctly and provides the desired level of security. By following these steps and thoroughly checking its performance, you can have peace of mind knowing that your Brinks electronic deadbolt is installed and operating properly. Once you have completed this step, you can proceed to the next step of programming the electronic codes.
Step 8: Program the Electronic Codes
Programming the electronic codes for your Brinks electronic deadbolt is essential to ensure secure access to your home. Follow these steps to program the electronic codes:
- Access the programming mode: Refer to the manufacturer’s instructions to access the programming mode of your Brinks electronic deadbolt. This step usually involves a combination of button presses, entering a master code, or using a programming tool.
- Set the master code: Once in the programming mode, set your desired master code. This code serves as the primary access code and allows you to manage and change other user codes.
- Program additional user codes: Depending on the capabilities of your Brinks electronic deadbolt, you can program additional user codes for family members, house guests, or trusted individuals. Follow the instructions to add and assign these codes.
- Test the codes: Test each programmed code to ensure that they lock and unlock the deadbolt successfully. Verify that each code provides the appropriate level of access and operates as intended.
- Keep a record of the codes: It is crucial to keep a record of the programmed codes in a secure location. This will help you manage the access to your home and ensure that you can change or update the codes when needed.
Programming the electronic codes for your Brinks electronic deadbolt allows you to personalize and control access to your home. By following these steps and referring to the manufacturer’s instructions, you can successfully program the desired codes and manage the security of your property. Once you have completed this step, you can proceed to set up any additional features that your Brinks electronic deadbolt may offer.
Step 9: Set Up Additional Features
Brinks electronic deadbolts often come with additional features that enhance security and convenience. Follow these steps to set up any additional features that your deadbolt may offer:
- Read the instructions: Carefully read the manufacturer’s instructions to understand the additional features available with your Brinks electronic deadbolt. This will help you make the most of its capabilities.
- Enable remote access: If your deadbolt offers remote access through a smartphone app or a home automation system, follow the instructions to enable and set up this feature. This allows you to control and monitor your deadbolt remotely.
- Set up notifications: Some Brinks electronic deadbolts provide the option to receive notifications when the door is locked or unlocked. If this feature is available, configure the notifications through the manufacturer’s designated app or system.
- Explore compatibility with smart home devices: If you have a smart home system, check if your deadbolt is compatible with it. Follow the instructions to integrate it with your existing smart home devices, such as voice assistants or security systems.
- Customize preferences: Take advantage of any customization options available with your Brinks electronic deadbolt. This may include adjusting the auto-lock feature, setting up temporary access codes, or configuring other preferences to suit your needs.
Setting up the additional features of your Brinks electronic deadbolt adds convenience and maximizes its functionality. By following these steps and referring to the manufacturer’s instructions, you can make the most of the features available with your deadbolt. Once you have completed this step, you can proceed with confidence, knowing that your Brinks electronic deadbolt is fully set up and ready to secure your home.
Step 10: Troubleshooting Tips
Even with proper installation and setup, you may encounter some issues or challenges with your Brinks electronic deadbolt. Here are some troubleshooting tips to help you resolve common problems:
- Check the power source: If your electronic deadbolt is not functioning properly, ensure that it has a reliable power source, whether it’s batteries or a wired connection. Replace the batteries or check the wiring if necessary.
- Confirm proper installation: Double-check that all components, including the latch, strike plate, exterior assembly, and interior assembly, are correctly installed and aligned. Make any necessary adjustments to ensure proper operation.
- Reset the system: If the deadbolt is not responding or acting strangely, try resetting the system by removing the batteries or unplugging the power source for a few minutes before reinitializing the setup.
- Clean and lubricate: Over time, dirt and debris can accumulate within the deadbolt mechanism, hindering its performance. Clean the components and use a recommended lubricant to maintain smooth operation.
- Double-check codes and programming: If you’re experiencing issues with user codes or remote access, verify that the codes are correctly programmed and check the accuracy of any app or system settings associated with the deadbolt.
- Consult the manufacturer’s support: If all else fails, consult the manufacturer’s support resources, such as their website, customer support hotline, or user manual. They can provide specific troubleshooting guidance for your model and address any product-related concerns.
By following these troubleshooting tips, you can efficiently address common issues and ensure the optimal performance of your Brinks electronic deadbolt. Remember to reach out to the manufacturer’s support channels if needed, as they are the best resource for resolving any lingering questions or technical challenges you may encounter.