
Why should you encrypt your iPad?
Encrypting your iPad is a crucial step in keeping your personal information and data safe from unauthorized access. With the increasing prevalence of cybercrime, encryption provides an additional layer of security, ensuring that even if your device falls into the wrong hands, your sensitive information remains protected. Here are a few reasons why you should consider encrypting your iPad:
- Data Protection: Encryption scrambles your data in a way that can only be unscrambled with the correct decryption key. This means that even if someone gains physical access to your iPad or tries to access your files remotely, they won’t be able to read or use the encrypted data without the encryption key.
- Privacy Assurance: Your iPad likely contains a vast amount of personal information, including contacts, emails, messages, documents, and photos. Encrypting your device ensures that your private information remains private, safeguarding it from prying eyes.
- Prevent Identity Theft: By encrypting your iPad, you significantly reduce the risk of identity theft. Encrypted data is much harder to retrieve and decipher, making it less likely for hackers and identity thieves to gain access to your sensitive information.
- Compliance with Regulations: Depending on your industry or profession, you may be required to adhere to specific data protection regulations, such as the General Data Protection Regulation (GDPR) or the Health Insurance Portability and Accountability Act (HIPAA). Encrypting your iPad ensures compliance with these regulations and helps maintain the confidentiality and integrity of the data you handle.
- Peace of Mind: Encrypting your iPad gives you peace of mind, knowing that your personal information and sensitive data are safe from unauthorized access. Whether you use your iPad for personal or business purposes, encryption offers an added layer of security that helps you rest easy.
Given the many benefits of encrypting your iPad, it’s clear that taking this simple step can go a long way in protecting your privacy and safeguarding your valuable data. The process of encrypting your iPad is relatively straightforward and can provide significant peace of mind in an increasingly digital world.
How to check if your iPad is already encrypted?
Before diving into the encryption process, it’s essential to determine whether your iPad is already encrypted. Fortunately, checking the encryption status on your device is a straightforward process. Here’s how you can check if your iPad is already encrypted:
- Step 1: Go to the Settings app on your iPad. You can find the Settings app icon on your home screen.
- Step 2: Scroll down and tap on the “Touch ID & Passcode” or “Face ID & Passcode” option, depending on the model of your iPad.
- Step 3: You will be prompted to enter your device passcode or use your fingerprint/Face ID to authenticate access to the settings. Provide the necessary authentication method.
- Step 4: Once you have successfully authenticated, scroll down to the bottom of the settings page. If your iPad is already encrypted, you will see a section labeled “Data Protection” or “File Data Protection.”
- Step 5: Within the “Data Protection” or “File Data Protection” section, it should indicate that your iPad is encrypted. If you see the message “Data Protection is enabled” or “Data is protected by strong encryption,” it means that your iPad is already encrypted.
If you do not see the “Data Protection” or “File Data Protection” section, or the message does not indicate that encryption is enabled, it means that your iPad is not currently encrypted.
It’s important to note that all modern iPads support hardware encryption, meaning that the device’s storage is encrypted by default once you set a passcode or enable biometric authentication. However, confirming the encryption status provides peace of mind and ensures that your data is properly protected.
If your iPad is not encrypted, it’s strongly recommended to proceed with the encryption process to enhance your device’s security and protect your sensitive information.
Back up your iPad before encrypting it
Before you proceed with encrypting your iPad, it’s crucial to create a backup of your device. Backing up your iPad ensures that you won’t lose any data during the encryption process. Here are the steps to back up your iPad:
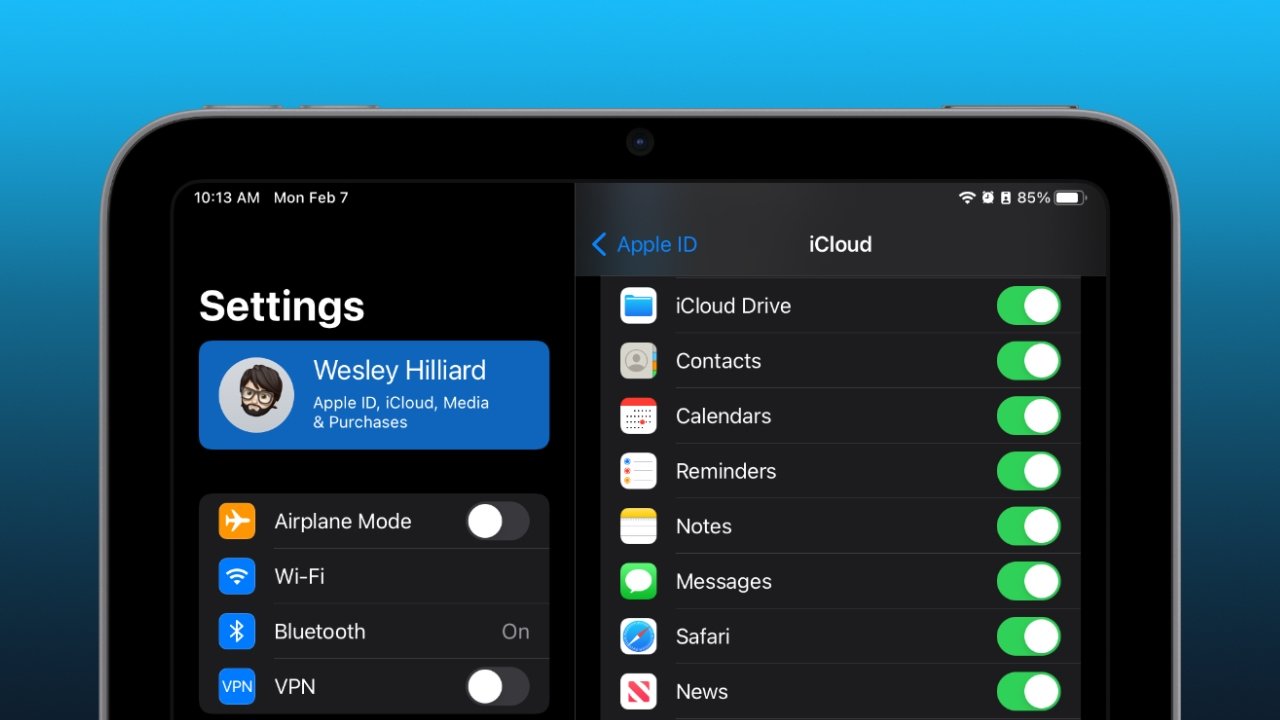
- iCloud Backup: The easiest way to back up your iPad is by using iCloud. Ensure that your iPad is connected to a Wi-Fi network, then go to the Settings app, tap your Apple ID at the top, select “iCloud,” and click on “iCloud Backup.” Enable the “iCloud Backup” toggle and tap on “Back Up Now.” Your iPad will start backing up to iCloud.
- iTunes Backup: If you prefer to back up your iPad using your computer, you can use iTunes. Connect your iPad to your computer using a Lightning cable, open iTunes, and select your device. In the Summary tab, click on “Back Up Now” under the “Manually Back Up and Restore” section. iTunes will create a backup of your iPad on your computer.
Whichever method you choose, it’s important to ensure that the backup process is completed successfully before proceeding with the encryption. Double-check that the backup includes all your important data, including contacts, photos, videos, apps, and settings.
Creating a backup is an essential precautionary step to protect your data in case anything goes wrong during the encryption process. It allows you to easily restore your iPad to its previous state if needed.
Remember to keep your backup safe and secure, either by storing it on iCloud or on an external hard drive. Regularly updating your backups ensures that you have the most recent version of your data available.
Once you have successfully backed up your iPad, you are ready to proceed with encrypting your device, knowing that your important data is protected.
Encrypt your iPad using a passcode
One of the simplest and most effective ways to encrypt your iPad is by setting up a passcode. When you enable a passcode, your device’s data is automatically encrypted, providing an added layer of security. Here’s how you can encrypt your iPad using a passcode:
- Step 1: Open the Settings app on your iPad and tap on “Touch ID & Passcode” or “Face ID & Passcode,” depending on the model of your iPad.
- Step 2: If prompted, enter your current passcode or authenticate using Touch ID/Face ID.
- Step 3: Scroll down and tap on “Turn Passcode On” or “Change Passcode” if you already have a passcode set.
- Step 4: Choose a 6-digit passcode for enhanced security. Alternatively, you can select “Passcode Options” to choose a custom alphanumeric passcode or a 4-digit numeric passcode.
- Step 5: Enter your chosen passcode and confirm it when prompted.
- Step 6: Once the passcode is set, your iPad will be encrypted, and your data will be protected.
It’s important to choose a strong and secure passcode to maximize the effectiveness of the encryption. Avoid simple passcodes like “123456” or “password” and opt for a unique combination of numbers, letters, and symbols.
Enabling a passcode not only encrypts your device’s data but also adds an extra level of protection against unauthorized access. Each time you unlock your iPad, you’ll need to enter the passcode, ensuring that only you can access your information.
Remember to keep your passcode secure and not share it with anyone. Additionally, avoid using easily guessable passcodes or using the same passcode across multiple devices.
By encrypting your iPad using a passcode, you significantly enhance the security of your device, protecting your data from potential threats.
How to choose a strong passcode for your iPad
When it comes to securing your iPad, choosing a strong passcode is essential. A strong passcode is one that is both difficult for others to guess and easy for you to remember. Here are some tips on how to choose a strong passcode for your iPad:
- Length: Opt for a passcode that is at least 6 digits long. Longer passcodes provide better security against brute force attacks.
- Complexity: Instead of using simple sequences like “123456” or “654321,” create a passcode that combines uppercase and lowercase letters, numbers, and symbols.
- Avoid personal information: Don’t use easily guessable information like your birthdate, phone number, or part of your name as part of your passcode.
- Pattern avoidance: Avoid using simple patterns on the keypad, such as “1234” or “4321,” as they can be easily guessed by others.
- No common phrases: Avoid using common phrases or commonly used passwords like “password” or “qwerty.”
- Non-dictionary words: Create a passcode that does not consist of common words found in dictionaries. Instead, consider using a combination of unrelated words or a passphrase.
- Frequent updates: Change your passcode regularly to enhance security. Recommendations vary, but consider changing your passcode every few months.
Remember, while it’s essential to choose a strong passcode, it’s equally important to select one that you can easily remember. Avoid using overly complex passcodes that may cause you to forget or mistype them frequently.
Consider memorizing your passcode rather than writing it down, as physical records can potentially be lost or accessed by unauthorized individuals. If you struggle with memorization, consider using a secure password manager application to store your passcodes.
By following these tips and selecting a strong passcode for your iPad, you substantially increase the security of your device, ensuring that your personal information remains protected from unauthorized access.
Enable encryption for data backups
Encrypting your iPad itself is vital for safeguarding your data, but it’s equally important to encrypt your data backups. When you enable encryption for your backups, whether you use iCloud or iTunes, you add an extra layer of security to your sensitive information. Here’s how you can enable encryption for data backups:
- iCloud Backup: To enable encryption for your iCloud backups, go to the Settings app on your iPad, tap your Apple ID at the top, select “iCloud,” then “iCloud Backup.” Make sure the “iCloud Backup” toggle is enabled. When you tap “Back Up Now,” you will be prompted to set a password for your backup. This password will be used to encrypt and decrypt your backup data.
- iTunes Backup: If you prefer to back up your iPad using iTunes, connect your iPad to your computer and launch iTunes. Select your device and navigate to the Summary tab. Under the “Backups” section, tick the box labeled “Encrypt iPad backup.” You will be prompted to set a password for your backup. Enter a strong and unique password, as this will be used to encrypt and decrypt your backup data.
By enabling encryption for your data backups, you ensure that even if someone gains access to your backup files, they won’t be able to view or extract your data without the encryption password.
It’s crucial to keep your backup password safe and secure. Choose a strong password that is not easily guessable and avoid using passwords that you use for other accounts.
Remember that if you forget your backup password, it cannot be recovered. Losing the encryption password may result in permanently losing access to your encrypted backup.
Regularly backing up your iPad, especially when you have enabled encryption for your backups, ensures that your data is protected and easily restorable in the event of accidental deletion, device damage, or loss.
Take the extra step to enable encryption for your data backups, providing an added layer of security for your valuable information.
Encrypt your iPad using a fingerprint or Face ID
In addition to using a passcode, you can further enhance the security of your iPad by encrypting it using biometric authentication methods like Touch ID (fingerprint) or Face ID (facial recognition). These features use unique physical characteristics to authenticate your identity and unlock your device. Here’s how you can encrypt your iPad using a fingerprint or Face ID:
- Touch ID (Fingerprint):
- If your iPad supports Touch ID, open the Settings app and navigate to “Touch ID & Passcode.”
- Enter your passcode when prompted.
- Place your finger on the home button, following the instructions on the screen, to set up your fingerprint.
- Once your fingerprint is enrolled, enable the “iTunes & App Store” toggle if desired.
- Your fingerprint will now be used to unlock your iPad and authenticate certain actions, such as app purchases.
- Face ID (Facial Recognition):
- If your iPad supports Face ID, open the Settings app and navigate to “Face ID & Passcode.”
- Enter your passcode when prompted.
- Follow the on-screen instructions to set up your face recognition. Position your face within the frame and rotate your head in a circular motion.
- Once your face is enrolled, enable the “iTunes & App Store” toggle if desired.
- Your face will now be used to unlock your iPad and authenticate certain actions, such as app purchases.
Using biometric authentication provides a convenient and secure way to encrypt your iPad. With Touch ID or Face ID, only your unique fingerprint or facial features can unlock the device, adding an additional layer of protection against unauthorized access.
When encrypting your iPad with Touch ID or Face ID, it’s still recommended to set a passcode as a backup option. This enables you to unlock your device if your fingerprint or face is not recognized or in situations where biometric authentication is not available.
Take advantage of the advanced security features provided by Touch ID or Face ID to encrypt your iPad and protect your personal information from potential threats.
Encrypt your iPad using Touch ID
If your iPad supports Touch ID, you can utilize this convenient and secure feature to encrypt your device. Touch ID enables you to use your fingerprint as a means of authentication, adding an extra layer of security to your iPad. Here’s how you can encrypt your iPad using Touch ID:
- Step 1: Open the Settings app on your iPad and tap on “Touch ID & Passcode.”
- Step 2: Enter your current passcode when prompted.
- Step 3: Under the “Fingerprints” section, tap on “Add a Fingerprint.”
- Step 4: Follow the on-screen instructions to place your finger on the Home button. Lift and reposition your finger repeatedly until your fingerprint is fully captured.
- Step 5: Once your fingerprint is successfully enrolled, tap on “Continue” or “Add Another Fingerprint” if you wish to add additional fingerprints.
- Step 6: With your fingerprint(s) enrolled, you can now use Touch ID to unlock your iPad and authorize various actions like installing apps or making purchases.
By encrypting your iPad using Touch ID, only your registered fingerprint(s) can unlock the device and access your information. This provides a convenient and secure alternative to using a passcode.
If you have already set up a passcode on your iPad, it is advised to keep it active as a backup authentication method. This ensures that you can still access your device if Touch ID fails, or in situations where fingerprint authentication is not feasible.
Remember to keep your registered fingerprints up to date by periodically re-adding them or adding new ones as needed. This ensures that Touch ID continues to function reliably.
By utilizing the Touch ID feature to encrypt your iPad, you can enjoy the benefits of quick and secure access to your device, knowing that your personal information is protected from unauthorized access.
Encrypt specific files or folders on your iPad
While encrypting your entire iPad provides overall security, there may be instances where you only want to encrypt specific files or folders containing sensitive information. Fortunately, there are third-party apps available that offer encryption capabilities for individual files or folders. Here’s how you can encrypt specific files or folders on your iPad:
- Step 1: Choose a third-party encryption app from the App Store that suits your needs. Some popular options include “Secure File Storage PRO” and “Documents by Readdle.”
- Step 2: Install and open the encryption app on your iPad.
- Step 3: Follow the on-screen instructions to set up a secure passcode or password for the app.
- Step 4: Using the encryption app, navigate to the specific file or folder you want to encrypt.
- Step 5: Select the file or folder and look for options related to encryption or locking.
- Step 6: Apply the encryption or locking feature, which will encrypt the selected files or folders using the passcode or password you set up for the app.
Keep in mind that the method for encrypting specific files or folders may vary depending on the app you choose. Some apps may offer additional security features, such as biometric authentication or cloud storage integration.
It’s important to choose a reputable and trustworthy encryption app from the App Store to ensure the security of your files and data. Read reviews, check the app’s privacy policy, and consider the app’s overall reputation before making your selection.
Remember to keep your encryption app and its password or passcode secure. Avoid sharing the passcode or password with others and regularly update it to maintain optimal security.
By encrypting specific files or folders on your iPad, you can selectively protect sensitive information, adding an extra layer of security to your device.
Encrypt emails and messages on your iPad
When it comes to communication, ensuring the privacy and security of your emails and messages is crucial. Encrypting your emails and messages adds an extra layer of protection, preventing unauthorized access to your sensitive information. Here’s how you can encrypt emails and messages on your iPad:
- Email Encryption:
- Use a secure email client: Consider using a secure email client that supports end-to-end encryption, such as ProtonMail or Tutanota. These platforms encrypt your emails before they leave your device and decrypt them only for the intended recipient.
- Use S/MIME or PGP: If you use the native Mail app on your iPad, you can configure it to use S/MIME (Secure/Multipurpose Internet Mail Extensions) or PGP (Pretty Good Privacy) encryption. These encryption methods require both parties to have compatible encryption certificates or keys.
- Enable Mail Data Protection: Your iPad’s built-in Mail app also offers a data protection feature that encrypts your email data when your device is locked. To enable this feature, go to the Settings app, tap on “Mail,” then ensure that “Data Protection” is enabled.
- Message Encryption:
- Use Apple’s iMessage: When sending messages to other Apple users via iMessage, they are automatically encrypted between devices. Look for the blue bubble indicating that you’re using iMessage instead of regular SMS.
- Use third-party encrypted chat apps: If you need additional security for messaging, consider using encrypted chat apps like Signal or WhatsApp. These apps use end-to-end encryption to protect your messages from interception.
It’s important to note that both parties involved in email or message communication need to have the necessary encryption features enabled for effective encryption. Encrypted communication provides peace of mind, knowing that your conversations remain private and secure.
Keep in mind that even with encryption, it’s still essential to practice good online security habits. Avoid sharing sensitive information through electronic means whenever possible, and be cautious about clicking on suspicious links or downloading attachments from unknown sources.
By taking steps to encrypt your emails and messages, you can ensure that your communication remains confidential and protected from unauthorized access.
Remote wiping: a useful feature to protect your data
In the event that your iPad is lost or stolen, remote wiping is a valuable feature that can help protect your data from falling into the wrong hands. Remote wiping allows you to erase all the data on your device from a remote location, ensuring that sensitive information remains secure. Here’s why remote wiping is a useful feature to protect your data:
- Data Protection: Remote wiping provides an effective means of safeguarding your personal and sensitive information. By initiating a remote wipe, you can erase all data on your iPad and prevent unauthorized access to your emails, photos, documents, and other personal information.
- Preventing Identity Theft: If your iPad is lost or stolen, your data can potentially be accessed by unauthorized individuals. Remote wiping ensures that your personal information remains confidential, reducing the risk of identity theft or misuse of your data.
- Lost Device Recovery: While the primary purpose of remote wiping is to protect your data, it can also aid in locating a lost device. Some remote wiping features can track the device’s location or display a custom message on the screen, providing information to anyone who may find the iPad.
- Peace of Mind: Knowing that you have the ability to remotely wipe your data can bring peace of mind, as you have a solution to protect your information even when your iPad is out of your possession. This feature enables you to take proactive steps to mitigate potential risks.
- Simplicity and Accessibility: Many remote wiping features are built into the operating system or accessible through remote device management platforms. This makes it easy to initiate a remote wipe from any internet-connected device, allowing you to take swift action to protect your data.
To enable remote wiping on your iPad, ensure that you have “Find My” feature enabled. This feature is typically associated with your Apple ID and can be accessed through the Find My app or iCloud website. In the case of a lost or stolen iPad, you can sign in to your Find My account and choose the option to remotely wipe the device.
It’s important to note that remote wiping permanently erases all data on your iPad, so it’s crucial to have a recent backup of your device’s data. Regularly backing up your iPad ensures that you can restore your data to a new device if needed.
Remote wiping provides a powerful solution to protect your data in the event of loss or theft. By utilizing this useful feature, you can take control of your data security and reduce the potential risks associated with a lost or stolen iPad.
What to do if you forget your iPad’s passcode
Forgetting your iPad’s passcode can be a frustrating experience, but there are several steps you can take to regain access to your device. Here’s what you can do if you forget your iPad’s passcode:
- Step 1: Remain Calm: It’s essential to stay calm and not panic. Forgetting your passcode is a common occurrence and can be resolved with the right approach.
- Step 2: Try Different Combinations: Before taking any drastic measures, try different combinations that you think might be your passcode. Sometimes, a momentary lapse can result in forgetting the correct sequence.
- Step 3: Check for iCloud Backup: If you have an iCloud backup of your iPad, you can restore your device using the backup. Connect your iPad to a computer, launch iTunes, and select the option to restore your device from the iCloud backup.
- Step 4: Use Recovery Mode: If you don’t have an iCloud backup, you can put your iPad into recovery mode and restore it using iTunes. Connect your iPad to a computer, launch iTunes, and follow the instructions to put your device into recovery mode. Once in recovery mode, you can restore your iPad to its factory settings, erasing all data and settings, including the forgotten passcode.
- Step 5: Contact Apple Support: If you’re unable to restore your iPad using the above methods, it’s recommended to contact Apple Support for further assistance. They may be able to guide you through additional troubleshooting steps or provide alternative solutions to regain access to your device.
It’s important to note that restoring your iPad to factory settings will erase all data on the device, including photos, messages, and apps. If you have a backup, you can restore your data after setting up your iPad again.
To prevent this situation in the future, ensure that you regularly back up your iPad and keep a secure record of your passcode or consider using features like Touch ID or Face ID for more convenient and secure authentication.
Remember to always keep your passcode or password in a safe and secure location to avoid the risk of unauthorized access to your device and personal information.
By taking these steps, you can recover access to your iPad and ensure that you can continue using your device without the inconvenience of a forgotten passcode.
Encrypting your iPad with third-party apps: pros and cons
While the built-in encryption features on your iPad offer robust data protection, some users may opt for additional encryption using third-party apps. These apps provide extra security measures and allow for more granular control over the encryption process. Here are the pros and cons of encrypting your iPad with third-party apps:
- Pros:
- Enhanced Security: Third-party encryption apps often offer advanced encryption algorithms and methods, providing an additional layer of security for your data.
- Granular Control: With third-party encryption apps, you have more control over which files and folders you encrypt. This can be particularly useful if you only want to encrypt specific sensitive data rather than encrypting your entire device.
- Additional Features: Many third-party encryption apps offer additional features such as secure cloud storage, secure messaging, and the ability to store encrypted files in multiple formats.
- Compatibility: Third-party encryption apps are often compatible across different platforms, allowing you to access and encrypt your data across multiple devices.
- Cons:
- Trustworthiness: It’s crucial to choose a reputable and trustworthy encryption app from a reliable source. Some third-party apps may not provide the level of security they claim, so be cautious and do thorough research before selecting an app.
- Usability: Third-party encryption apps may have a steeper learning curve compared to built-in encryption features. It’s important to familiarize yourself with the app’s functions and settings to ensure proper use and avoid any accidental data loss.
- Compatibility: While many third-party encryption apps are compatible with various platforms, there may be limitations or compatibility issues with certain file formats or operating systems. Ensure the app you choose supports the file types and devices you plan to encrypt.
- Reliance on Third-Party Apps: Relying solely on third-party encryption apps means your data’s security is dependent on the app’s developers and their ability to maintain the app’s security standards. Ensure the app receives regular updates and has positive user reviews to mitigate potential risks.
When considering third-party encryption apps, weigh the pros and cons carefully and choose an app that aligns with your specific needs and requirements. It’s also essential to regularly update your encryption apps, as outdated versions may have vulnerabilities.
Remember that built-in encryption features on your iPad already provide robust protection for your data. Third-party encryption apps may be more suitable for individuals with specialized security needs or those seeking additional control over their data encryption.
Ultimately, the decision to use third-party encryption apps boils down to personal preference and the level of security you deem necessary for your specific use case.
Additional security measures to protect your iPad
While encrypting your iPad is an essential step in securing your device and data, there are additional security measures you can take to further enhance its protection. Implementing these measures adds layers of security, making it more difficult for unauthorized individuals to access your information. Here are some additional security measures to consider:
- Enable Two-Factor Authentication (2FA): Two-factor authentication adds an extra layer of security by requiring a secondary form of verification, such as a verification code sent to your trusted device, in addition to your password or passcode.
- Regularly Update Your Software: Keep your iPad’s software up to date by installing the latest iOS updates. These updates often include security patches and bug fixes, addressing vulnerabilities that could be exploited by malicious individuals.
- Use a Virtual Private Network (VPN): When connecting to public Wi-Fi networks, use a reputable VPN service to encrypt your internet connection. This prevents potential eavesdropping and protects your data from being intercepted.
- Manage App Permissions: Review and manage the permissions granted to each app on your iPad. Restrict access to sensitive features like location services, camera, microphone, and contacts for apps that don’t genuinely require them.
- Beware of Phishing Attempts: Be cautious of suspicious emails, messages, or links that request personal information or prompt you to download unknown files. Avoid sharing sensitive information or clicking on suspicious links to prevent falling victim to phishing attacks.
- Enable Find My: Enable the Find My feature on your iPad. This feature allows you to locate and remotely wipe your device if it’s lost or stolen. It also enables Activation Lock, preventing others from using your device without your Apple ID credentials.
- Secure Network Connections: When connecting to Wi-Fi networks, prioritize secure and trusted networks. Avoid connecting to public or unsecured networks that could potentially expose your data to interception.
- Practice Safe Internet Browsing: Be mindful of the websites you visit and avoid accessing unknown or suspicious websites that may contain malware or malicious content. Consider using reputable web browsers with built-in security features.
- Enable Auto-Lock: Set a short auto-lock timer for your iPad to ensure that it locks automatically when not in use. This prevents unauthorized access if your device is left unattended.
Implementing these additional security measures alongside device encryption will significantly enhance the protection of your iPad and your sensitive information. It’s important to remain vigilant and proactive in maintaining the security of your device, as the digital landscape continues to evolve.
By following these best practices and staying informed about the latest security trends, you can safeguard your iPad and reduce the risk of unauthorized access or data breaches.