
Why Download Google Play Store on a Laptop?
Google Play Store is the ultimate hub for all Android applications, offering millions of apps, games, and digital content. While it is primarily designed for mobile devices, there are several reasons why you might want to download Google Play Store on your laptop.
1. Expanded App Availability: Some applications are exclusively available on smartphones and tablets, limiting your access and functionality. Downloading Google Play Store on your laptop allows you to access and enjoy these mobile-only apps on a larger screen.
2. Productivity and Convenience: With Google Play Store on your laptop, you can effortlessly multitask and switch between applications while working. This can boost your productivity levels and make your daily tasks more efficient, as you can easily access your favorite apps without the need for a separate mobile device.
3. Gaming Experience: Many popular mobile games are not available on desktop platforms. By installing Google Play Store on your laptop, you can enjoy these addictive games on a bigger screen, enhancing your gaming experience and immersing yourself in a whole new level of entertainment.
4. Testing and Development: For app developers and testers, having Google Play Store on a laptop is invaluable. It allows them to test their applications in different environments, ensure compatibility, and easily debug any issues that may arise during development.
5. Accessibility: If you don’t own a smartphone or tablet, installing Google Play Store on your laptop provides a convenient way to access a wide range of apps and digital content without the need for additional devices. This is particularly beneficial for users who rely heavily on web-based apps and services.
6. Updates and Security: By downloading Google Play Store on your laptop, you ensure that your installed apps are always up to date. You can also take advantage of Google’s security measures, such as automatic app scanning, to protect your device from potentially harmful applications.
7. Synchronization and Cloud Backup: Installing Google Play Store on your laptop allows for seamless synchronization between your mobile devices and your laptop. You can easily access your downloaded apps, games, and content across multiple devices and benefit from automatic cloud backup of your data.
Checking System Requirements
Before you proceed with downloading Google Play Store on your laptop, it’s important to ensure that your system meets the necessary requirements. Here are the key factors to consider:
1. Operating System: The most common Android emulators are compatible with Windows, macOS, and Linux operating systems. Make sure that your laptop runs one of these operating systems.
2. Processor and RAM: Android emulators require a decent processor and sufficient RAM to run smoothly. Check the minimum system requirements for the emulator you plan to use and ensure that your laptop meets or exceeds these specifications.
3. Storage Space: Android emulators consume disk space for installation and app storage. Verify that you have adequate free storage space on your laptop to accommodate the emulator and the apps you intend to download from the Play Store.
4. Graphics Card: Emulators benefit from a dedicated graphics card, as it enhances the performance and visual quality of the apps and games. While not mandatory, having a good graphics card can greatly improve your overall experience.
5. Internet Connection: A stable and reliable internet connection is crucial for downloading the required emulator software, as well as for accessing and downloading apps from the Google Play Store. Ensure that your laptop is connected to a strong and fast internet connection.
6. Security Software: Disable or temporarily pause any security software, such as antivirus or firewall programs, as they may interfere with the installation process or prevent the emulator from functioning properly. Remember to re-enable them once the installation is complete.
7. Compatibility with Virtualization Technology: Some emulators require virtualization technology, such as Intel Virtualization Technology (VT-x) or AMD Virtualization (AMD-V), to be enabled in your laptop’s BIOS settings. Check if your laptop supports virtualization and enable it if necessary.
It’s important to note that the system requirements may vary depending on the Android emulator you choose. It’s always recommended to check the official documentation or website of the specific emulator to get the most accurate and up-to-date information on system compatibility.
By ensuring that your laptop meets the necessary system requirements, you can proceed with confidence to the next steps of downloading and installing an Android emulator to enjoy Google Play Store on your laptop.
Step 1: Downloading an Android Emulator
The first step to downloading Google Play Store on your laptop is to install an Android emulator. An Android emulator is a software application that enables your laptop to mimic the functionality of an Android device, allowing you to run Android apps and games on your computer. Here’s how you can download an Android emulator:
1. Research and Select an Android Emulator: There are several Android emulators available, such as BlueStacks, NoxPlayer, and Genymotion. Research each emulator to identify the one that best suits your needs in terms of performance, features, and user experience.
2. Visit the Official Website: Once you have chosen an Android emulator, visit the official website of the emulator. This can usually be done by searching for the emulator’s name in your preferred search engine.
3. Download the Emulator Installer: On the official website, look for the download link or button for the emulator. Click on it to start downloading the emulator installation file. Choose the version of the emulator that is compatible with your laptop’s operating system.
4. Check File Integrity: Before proceeding with the installation, it is advisable to check the integrity of the downloaded file. This can be done by comparing the file’s checksum or using a file verification tool to ensure that the downloaded file has not been corrupted.
5. Run the Installer: Once you have confirmed the integrity of the downloaded file, locate the installer file on your laptop and run it. Follow the on-screen instructions to begin the installation process.
6. Customize Installation Options: During the installation, you may be presented with some customization options. These options can include choosing the installation directory, enabling or disabling certain features, or selecting the default language. Customize these options according to your preferences.
7. Wait for Installation to Complete: The installation process may take a few minutes to complete, depending on the speed of your laptop and the size of the emulator installer. Be patient and avoid interrupting the installation process.
8. Launch the Emulator: Once the installation is finished, you can launch the Android emulator from your desktop or Start menu. The emulator will open in a new window, resembling the interface of an Android device.
By following these steps, you will successfully download an Android emulator onto your laptop, paving the way for the next steps in downloading and installing Google Play Store. Stay tuned for the next part of the guide, where we will cover the process of installing the Android emulator on your laptop.
Step 2: Installing the Android Emulator
Now that you have downloaded the Android emulator onto your laptop, the next step is to install it. Installing the emulator will enable you to start running Android apps and games on your computer. Follow these steps to install the Android emulator:
1. Locate the Emulator Setup File: After downloading the emulator, locate the setup file on your laptop. It is usually saved in your Downloads folder or the location you chose during the download process. Double-click on the setup file to begin the installation.
2. Review and Accept the License Agreement: During the installation process, you will be presented with a license agreement. Read through the terms and conditions carefully, and if you agree, check the box or click the “Accept” button to proceed with the installation.
3. Choose the Installation Directory: The installer will prompt you to choose the directory where you want the Android emulator to be installed. You can either keep the default location or select a different directory. Once you have made your choice, click “Next” to continue.
4. Select Additional Components: Some emulators may offer additional components or features that can enhance your user experience. Review the list of optional components and select the ones you want to include in the installation. Click “Next” to proceed.
5. Customize Installation Settings: Depending on the emulator, you may be provided with additional installation settings. These can include options to create shortcuts, create a start menu folder, or set up a desktop icon. Customize these settings according to your preferences, and click “Install” to initiate the installation process.
6. Wait for the Installation to Complete: The installation process may take some time, depending on your laptop’s performance and the size of the emulator. During this time, do not interrupt the installation or close any windows. Wait patiently until the installation progress bar reaches 100%.
7. Launch the Emulator: Once the installation is complete, you will be notified that the emulator has been successfully installed. You can now find and launch the emulator from your desktop or Start menu. The emulator window will open, displaying a virtual Android device interface.
Congratulations! You have successfully installed the Android emulator on your laptop. You are one step closer to accessing Google Play Store and enjoying the vast array of Android apps and games on your computer. In the next part of our guide, we will walk you through the process of setting up the Android emulator to prepare it for Google Play Store installation.
Step 3: Setting up the Android Emulator
After successfully installing the Android emulator on your laptop, the next step is to set it up. Setting up the emulator involves configuring certain settings and preferences to optimize your user experience. Follow these steps to set up the Android emulator:
1. Accept Terms and Conditions: When you launch the Android emulator, you may be prompted to accept the terms and conditions. Read through them carefully and click the “Accept” button to proceed.
2. Choose Device Configuration: The emulator may give you options to choose the device configuration, such as screen size, resolution, and Android version. Select the configuration that best suits your needs or mimic the device you are familiar with. Click “Next” to continue.
3. Customize Additional Settings: Depending on the emulator, you may have access to additional settings and preferences. These can include language selection, location services, keyboard shortcuts, and more. Customize these settings according to your preferences and requirements.
4. Enable Virtualization Technology (if necessary): Some emulators require virtualization technology, such as Intel Virtualization Technology (VT-x) or AMD Virtualization (AMD-V), to be enabled in your laptop’s BIOS settings. If prompted, follow the instructions provided to enable virtualization in your BIOS.
5. Configure Screen Orientation: You can choose the desired screen orientation for the virtual device, such as portrait or landscape mode. This can be helpful for testing and using apps that are optimized for a specific screen orientation. Select your preferred screen orientation and continue with the setup.
6. Set Up Google Account: To access Google Play Store and download apps, you’ll need to sign in with your Google account. Follow the on-screen instructions to enter your Google account credentials or create a new account if you don’t have one. This step is essential for accessing the full functionality of Google Play Store.
7. Complete Setup: Once you have finished configuring the necessary settings, the emulator will finalize the setup process. It may take a few moments for the changes to take effect, so be patient during this process.
Now that you have successfully set up the Android emulator, you are ready for the next step: downloading and installing Google Play Store APK. By completing the setup process, you have created an environment in which you can easily access and use Android apps on your laptop without the need for a physical Android device. Stay tuned for the next part of our guide to proceed with the installation of Google Play Store.
Step 4: Downloading and Installing Google Play Store APK
With the Android emulator set up on your laptop, you can now proceed to download and install the Google Play Store APK. The APK file is the package file format used by Android to distribute and install applications. Follow these steps to download and install Google Play Store APK:
1. Open a Web Browser: Launch your preferred web browser on your laptop and navigate to a reliable APK download website. It is recommended to use trusted sources to ensure the authenticity and safety of the APK files.
2. Search for Google Play Store APK: On the APK download website, use the search function or browse through the categories to locate the Google Play Store APK file. Look for the latest version of the APK to ensure that you have the most up-to-date version.
3. Download the APK: Once you have found the Google Play Store APK, click on the download button or link associated with it. The APK file will start downloading to your laptop. Be patient as the download may take a few moments, depending on your internet speed.
4. Enable APK Installation: By default, Android does not allow the installation of APK files from sources other than the Google Play Store. To install the downloaded APK, you need to enable the “Unknown Sources” option in the security settings of your Android emulator. Open the settings of the emulator and navigate to the “Security” or “Privacy” section to find this option.
5. Locate the Downloaded APK: Once the APK download is complete, open the file explorer on your laptop and navigate to the folder where the Google Play Store APK was downloaded. Typically, the APK files are saved in the “Downloads” folder.
6. Install the APK: Double-click on the downloaded APK file to begin the installation process. Follow the on-screen prompts to install Google Play Store on your Android emulator. Be patient during the installation as it may take a few moments.
7. Complete the Installation: Once the installation is finished, you can close the file explorer and return to the Android emulator interface. The Google Play Store app will now be available in the list of installed apps on your emulator.
Congratulations! You have successfully downloaded and installed Google Play Store APK on your laptop using the Android emulator. In the next step, we will guide you through how to launch Google Play Store and sign in with your Google account. Stay tuned for the upcoming section.
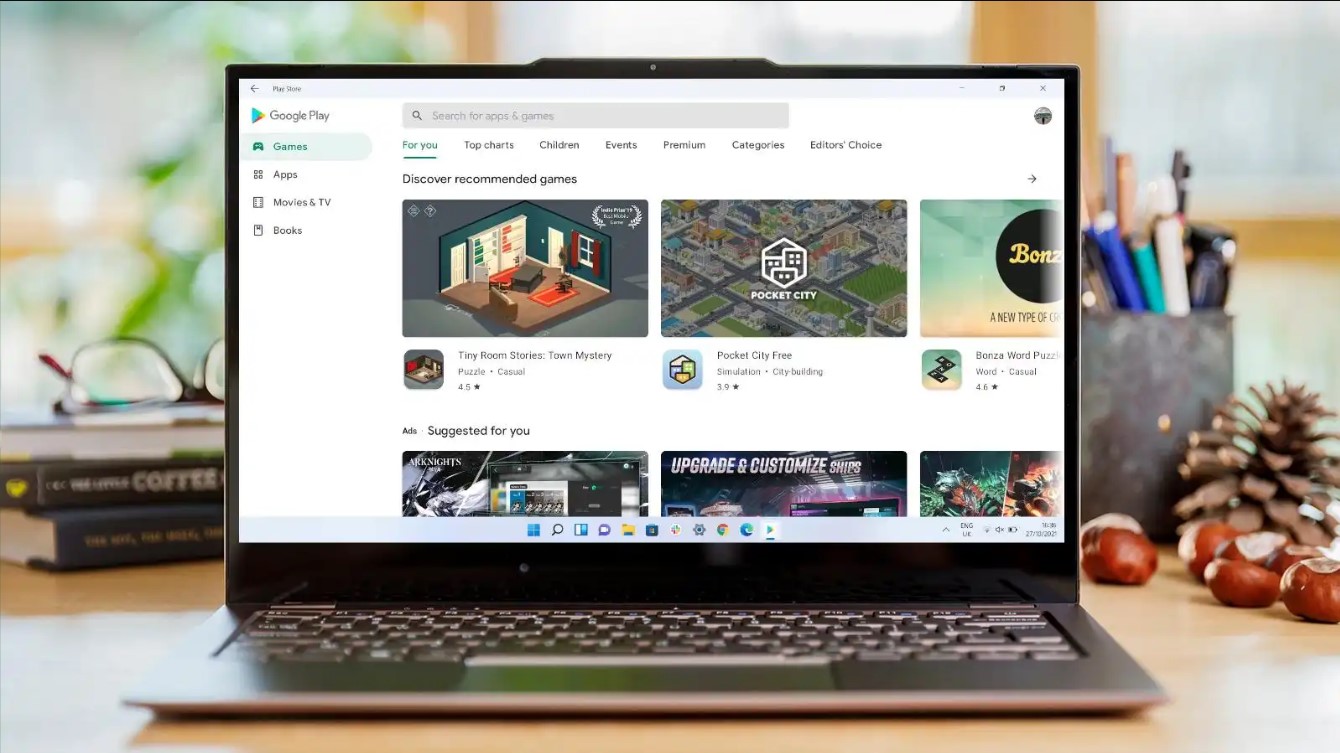
Step 5: Launching Google Play Store on the Laptop
Now that you have installed Google Play Store on your laptop using the Android emulator, it’s time to launch the app and start exploring the vast collection of apps and digital content. Follow these steps to launch Google Play Store:
1. Open the Android Emulator: Start by opening the Android emulator on your laptop. You can typically find the emulator icon on your desktop or in the Start menu. Double-click on the icon to launch the emulator if it’s not already running.
2. Locate the Google Play Store App: Once the emulator is launched, you will see a virtual Android device interface on your laptop screen. Look for the Google Play Store app icon among the installed apps. It usually resembles a multicolored triangle icon with the word “Play” written on it.
3. Click on the Google Play Store Icon: Click on the Google Play Store app icon to open it. The app will launch, presenting you with the main interface of Google Play Store, where you can browse and search for various apps, games, movies, books, and more.
4. Explore Google Play Store: Now that you have successfully launched Google Play Store, take some time to explore the different categories, featured apps, top charts, and recommendations. Use the search bar to find specific apps or browse through the different sections to discover new and popular applications.
5. Navigate through the Store: Use the navigation bar at the top of the app to switch between different sections, such as Apps, Games, Movies & TV, Books, and Music. You can also access your account settings, payment options, and other app-related features from the menu located at the top left corner of the app.
6. Customize Settings (Optional): If desired, you can customize various settings within Google Play Store. For example, you can manage app updates, enable or disable automatic app downloads, set parental controls, and more. Explore the settings menu to tailor your Google Play Store experience according to your preferences.
7. Start Installing Apps: Once you have found an app or game you want to install, click on its listing to view its details and user reviews. To install the app, click on the “Install” button. You may be prompted to grant certain permissions to the app during the installation process.
That’s it! You have successfully launched Google Play Store on your laptop using the Android emulator. Now you can freely browse, search, and install a wide range of apps, games, and digital content directly on your laptop. In the next step, we will guide you through signing in to Google Play Store with your Google account, allowing you to access your app library and enjoy a seamless experience across devices.
Step 6: Signing in to Google Play Store
In order to fully access the features and benefits of Google Play Store on your laptop, signing in with your Google account is essential. By signing in, you can access your app library, view your app subscriptions, manage your payment methods, and enjoy a seamless experience across devices. Follow these steps to sign in to Google Play Store:
1. Open Google Play Store: Launch the Android emulator on your laptop and locate the Google Play Store app. Click on the app icon to open it. The Play Store interface will appear on your screen.
2. Click on the Account Icon: In the top right corner of the Play Store app, you should see an account icon. It may be represented by your profile picture or the initial letter of your name. Click on this icon to proceed with signing in.
3. Select “Add Account”: A dropdown menu will appear, showing different account options. Click on the “Add Account” option to begin the account sign-in process.
4. Enter your Google Account Credentials: On the “Add an Account” screen, you will be prompted to enter your Google account credentials. This includes your email address and password. Type in the required information and click “Login” or “Next” to proceed.
5. Follow the On-Screen Prompts: Depending on your account setup and security settings, you may be asked to provide additional information or go through a verification process. Follow the on-screen prompts and provide any necessary information to complete the sign-in process.
6. Account Confirmation: After entering your credentials and going through any verification steps, Google Play Store will verify your account information. If successful, you will be signed in to Google Play Store with your Google account.
7. Access Your App Library: Once signed in, you can now access your app library, view your previously purchased or installed apps, and access your subscriptions. You can also explore new apps, games, and digital content that are tailored to your preferences and recommendations based on your account settings.
By signing in to Google Play Store with your Google account, you can enjoy a personalized and seamless experience across devices. It enables you to easily manage your app downloads, subscriptions, and preferences, ensuring that you get the most out of the Google Play Store on your laptop.
Step 7: Exploring and Installing Apps from Google Play Store
Now that you have signed in to Google Play Store on your laptop, it’s time to explore the wide variety of apps and digital content available and install those that catch your interest. Follow these steps to explore and install apps from Google Play Store:
1. Browse the Categories: On the Google Play Store homepage, you will find different categories such as Apps, Games, Movies & TV, Books, and Music. Click on a category to browse through the available selections and discover new content.
2. Search for Specific Apps: If you have a particular app in mind, you can use the search bar at the top of the Play Store interface to search for specific apps by name. Type in the app name or relevant keywords, and press Enter or click the search button.
3. Read App Details and Reviews: When you find an app you are interested in, click on the listing to view the app details. This page will provide information about the app’s features, screenshots, user reviews, and ratings. Take the time to read through the reviews to get an idea of other users’ experiences with the app.
4. Install the App: If you decide to install an app, click the “Install” button located on the app’s listing page. You may be prompted to grant certain permissions to the app during the installation process. Review the permissions and click “Accept” to proceed with the installation.
5. Wait for the Installation to Complete: Once you click “Install,” Google Play Store will start downloading and installing the app onto your laptop. The installation time will depend on the size of the app and your internet connection speed. Be patient and avoid interrupting the process.
6. Access Installed Apps: After the installation is complete, the app will appear in the list of installed apps on your Android emulator. You can access the installed app directly from the emulator’s home screen or app drawer. Click on the app icon to launch and use it.
7. Update Apps: It’s important to keep your apps up to date to ensure security and access new features. To update your installed apps, go to the “My Apps” section in Google Play Store. Here, you will see a list of all your installed apps that have available updates. Click the “Update” button next to each app to install the latest version.
8. Manage Subscriptions: If you have subscribed to any apps or services through Google Play Store, you can manage your subscriptions by going to the “Subscriptions” section. Here, you can view, cancel, or modify your subscriptions as needed.
By exploring and installing apps from Google Play Store, you can personalize your laptop experience and access a wide range of useful and entertaining applications. Whether you’re looking for productivity tools, games, or entertainment options, Google Play Store offers something for everyone. Enjoy discovering and using the apps that enhance your laptop usage.
Troubleshooting and FAQs
While downloading and using Google Play Store on your laptop, you may encounter some common issues or have questions along the way. Here are a few troubleshooting tips and frequently asked questions to help you navigate any challenges that may arise:
Q: I installed an Android emulator, but it’s running slow. What can I do?
A: Slow performance can be due to insufficient system resources allocated to the emulator. Try allocating more RAM and CPU cores to the emulator settings. Additionally, closing any unnecessary background applications on your laptop may improve performance.
Q: I can’t find Google Play Store in the installed apps. What should I do?
A: First, ensure that you have successfully installed Google Play Store using the APK file. If it’s installed, try restarting the emulator or checking if the app is located in a different folder or on another screen. You may also consider reinstalling the APK file.
Q: I’m unable to sign in to Google Play Store. What could be the problem?
A: Make sure you have a stable internet connection when signing in. Double-check your Google account credentials for accuracy. If you encounter issues with 2-step verification, generate and use an app-specific password. If the problem persists, try clearing the cache and data of the Google Play Store app in the emulator settings.
Q: Can I use my existing Google account to access Google Play Store on the emulator?
A: Yes, you can use your existing Google account to sign in to Google Play Store on the emulator. This allows you to access your existing app library, subscriptions, and other account-related features.
Q: How do I update apps downloaded from Google Play Store?
A: Google Play Store automatically checks for updates and notifies you when updates are available. To manually update apps, open Google Play Store, go to the “My Apps” section, and click the “Update” button next to each app with an available update.
Q: Can I use Google Play Store on multiple devices with the same Google account?
A: Yes, you can access Google Play Store on multiple devices using the same Google account. This allows you to sync your app library, purchases, and preferences across different devices.
Q: I encountered an error message during installation or usage. How can I troubleshoot it?
A: Error messages can vary depending on the situation. Try searching for the specific error message online to find troubleshooting steps or solutions. Alternatively, you can reach out to online communities or forums dedicated to Android emulators for further assistance.
If you are unable to resolve any issues or have additional questions, it’s recommended to consult the official documentation or support channels of the specific Android emulator you are using. They can provide specialized troubleshooting advice and assistance tailored to their emulator software.