
Checking System Requirements
Before you begin the process of connecting your Nintendo Switch Pro Controller to your PC, it’s crucial to ensure that your system meets the necessary requirements. This will help to guarantee a successful and seamless connection. Here are the key system requirements to consider:
- Operating System: Ensure that your PC is running on a compatible operating system. The Nintendo Switch Pro Controller is compatible with Windows 7 and above.
- USB Ports: Make sure that your PC has available USB ports. The Pro Controller can be connected using a USB cable for a wired connection.
- Bluetooth Capability: If you plan to connect the Pro Controller wirelessly, ensure that your PC has built-in Bluetooth functionality or an external Bluetooth adapter.
It’s worth noting that the Nintendo Switch Pro Controller is designed to work seamlessly with the Nintendo Switch console. While it can be connected to a PC, compatibility with specific games and software may vary. It’s always a good idea to check for any compatibility issues or updates for a smoother gaming experience.
By ensuring that your system meets the necessary requirements, you’ll have a solid foundation for successfully connecting your Nintendo Switch Pro Controller to your PC. Now, let’s move on to the different methods of connecting the controller to your PC.
Connecting the Pro Controller via USB
One of the simplest ways to connect your Nintendo Switch Pro Controller to your PC is through a USB connection. Follow these steps to establish a wired connection:
- Start by ensuring that your PC is powered on and running.
- Connect one end of the USB cable to your Pro Controller and the other end to an available USB port on your PC.
- Your PC should automatically recognize the Pro Controller and install any necessary drivers. If prompted, follow the on-screen instructions to complete the driver installation process.
- Once the Pro Controller is successfully connected, you can start using it to play games on your PC. Most games should automatically detect the controller, but if not, you may need to adjust the controller settings within the game.
Using the USB connection ensures a stable and reliable connection between your Pro Controller and PC. This method is ideal for those who prefer a wired setup or for situations where Bluetooth connectivity may not be available or optimal.
Remember to keep the USB cable connected while using the Pro Controller. If you prefer a wireless connection, you can also consider connecting the Pro Controller via Bluetooth, which we will cover in the next section.
Now that you’ve successfully connected your Pro Controller using a USB cable, let’s explore how to establish a wireless connection via Bluetooth.
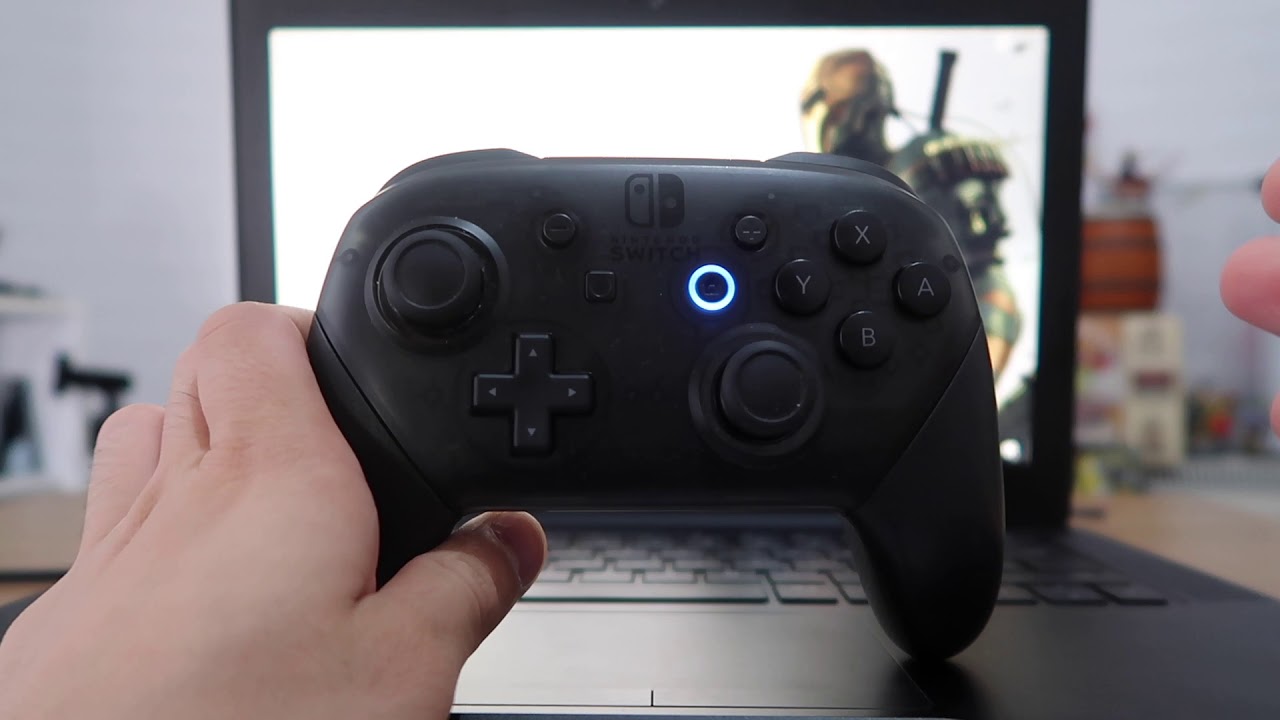
Connecting the Pro Controller via Bluetooth
If you prefer a wireless gaming experience, you can connect your Nintendo Switch Pro Controller to your PC via Bluetooth. Follow these steps to establish a wireless connection:
- Make sure that your PC has built-in Bluetooth functionality or an external Bluetooth adapter. If your PC doesn’t have Bluetooth capabilities, you’ll need to connect a Bluetooth adapter to an available USB port.
- On your PC, navigate to the settings menu and open the Bluetooth settings.
- Put your Pro Controller into pairing mode by pressing and holding the sync button on the back of the controller for a few seconds. The sync button is located near the USB-C port.
- Your PC should detect the Pro Controller and display it in the list of available devices. Click on the Pro Controller to initiate the pairing process.
- Once the pairing is successful, your PC will indicate that the Pro Controller is connected via Bluetooth. You can now use the controller to play games on your PC.
It’s important to note that the range of the Bluetooth connection may vary depending on your PC and the environment in which you’re using it. If you experience any connectivity issues or lag, try positioning your PC and Pro Controller closer together or removing any potential sources of interference.
Additionally, keep in mind that while most modern PC games support gamepad controllers, not all games may be compatible with the Pro Controller. It’s a good idea to check the game’s system requirements and controller compatibility before attempting to use the Pro Controller.
Now that you know how to connect your Pro Controller to your PC via Bluetooth, let’s explore how to prepare your PC for a successful Bluetooth connection.
Preparing Your PC for Bluetooth Connection
Before connecting your Nintendo Switch Pro Controller to your PC via Bluetooth, it’s essential to make sure that your PC is properly set up for a successful connection. Follow these steps to prepare your PC:
- Ensure that Bluetooth is enabled on your PC. Most PCs have a Bluetooth toggle in the system tray or the settings menu. If it’s disabled, turn it on.
- Check for and install any necessary Bluetooth drivers. You can usually find these drivers on the manufacturer’s website or through Windows Update. Installing the latest drivers can help improve the compatibility and performance of your Bluetooth connection.
- Keep your PC and Bluetooth adapter (if applicable) in close proximity during the pairing process. This will help ensure a strong and stable Bluetooth connection between your PC and the Pro Controller.
- Clear any potential sources of interference that may affect the Bluetooth signal. Move away from large metal objects, other electronic devices, or crowded wireless environments, as they can interfere with the Bluetooth connection.
- Restart your PC after making any changes or installations related to Bluetooth. This can help finalize the setup and ensure that all settings are properly applied.
By following these steps, you’ll be ready to establish a successful Bluetooth connection between your PC and the Nintendo Switch Pro Controller. Remember to have your Pro Controller in pairing mode before attempting to connect via Bluetooth.
Now that your PC is well-prepared, we can move on to the next section, which covers re-syncing the Pro Controller in case of any connection issues.
Re-Syncing the Pro Controller
If you’re experiencing connection issues between your Nintendo Switch Pro Controller and your PC, you may need to re-sync the controller to establish a stable connection. Here’s how you can re-sync the Pro Controller:
- Disconnect the Pro Controller from your PC, whether it’s through the USB cable or Bluetooth.
- Turn off the Pro Controller by pressing and holding the Sync button on the back of the controller for a few seconds until the lights on the controller turn off.
- If you were connecting via USB, unplug the USB cable from your PC.
- Wait for a few seconds before proceeding to the next step.
- Turn on the Pro Controller by pressing the Sync button once. The lights on the controller should start flashing.
- Depending on the type of connection you want to establish (USB or Bluetooth), follow the respective instructions mentioned earlier to re-connect the Pro Controller to your PC.
Re-syncing the Pro Controller can help resolve any temporary connection issues that may be impeding the seamless performance of your controller on PC. It essentially resets the controller’s connection and allows for a fresh connection attempt.
If you’re still encountering connection problems after re-syncing the Pro Controller, you may need to troubleshoot further or seek additional assistance. Let’s explore some troubleshooting tips in the next section to help resolve any lingering connection issues.
Adjusting Controller Settings on Your PC
After successfully connecting your Nintendo Switch Pro Controller to your PC, you may need to adjust specific controller settings to ensure optimal performance and compatibility with your games. Here are some important settings you can consider adjusting:
- Button Mapping: Some games allow you to customize the button mapping for your controller. You can remap buttons to suit your preferred layout or to match the game’s control scheme. Explore the game’s settings or options menu to access button mapping configurations.
- Gamepad Configuration: On Windows, you can access the Gamepad Configuration settings in the Control Panel. In this section, you can calibrate your Pro Controller, adjust sensitivity settings, and test the functionality of each button and joystick. Proper calibration and sensitivity adjustments can enhance your gaming experience.
- Software Compatibility: Certain games or software may require additional software or drivers to ensure full compatibility with the Pro Controller. Visit the game or software developer’s website to check for any necessary updates or add-ons.
- Steam Big Picture Mode: If you’re using Steam to play games, you can enable Steam’s Big Picture Mode. This mode provides a controller-friendly interface, making it easier to navigate and play games using your Pro Controller.
- Third-Party Controller Management Tools: There are several third-party controller management tools available that offer advanced customization options for your Pro Controller. These tools can allow you to create custom profiles, adjust dead zones, and fine-tune your controller settings. Research and explore these tools based on your specific needs.
By adjusting the controller settings on your PC, you can optimize your gaming experience and tailor the Pro Controller to your preferences. Experiment with different settings and configurations until you find the setup that suits you best.
If you encounter any issues or discrepancies while adjusting the controller settings, make sure to refer to the game’s documentation, online forums, or official support channels for additional assistance.
Now that you have a better understanding of adjusting controller settings on your PC, let’s move on to the next section, which covers troubleshooting common connection issues.
Troubleshooting Connection Issues
While connecting the Nintendo Switch Pro Controller to your PC is typically a straightforward process, you may encounter certain connection issues along the way. Here are some troubleshooting steps you can take to resolve common connection issues:
- Restart: Start by restarting your PC and the Pro Controller. Sometimes, a simple restart can help establish a stable connection.
- Update Drivers: Ensure that you have the latest drivers installed for both your Bluetooth adapter (if applicable) and the Pro Controller. Visit the manufacturer’s website or use Windows Update to check for any available driver updates.
- Check Compatibility: Verify that the game or software you’re trying to use with the Pro Controller is compatible. Check the system requirements and controller compatibility information provided by the game’s developer or manufacturer.
- Cables and Connections: If you’re connecting the Pro Controller via USB, check the USB cable and the ports on both the controller and your PC for any physical damage or loose connections. Try using a different USB cable or port to see if the issue is resolved.
- Interference: If you’re using Bluetooth to connect the Pro Controller, interference from other wireless devices or objects in the vicinity can disrupt the connection. Move away from potential sources of interference such as large metal objects, cordless phones, or other Bluetooth devices.
- Battery Level: If you’re using the Pro Controller wirelessly, ensure that the controller has sufficient battery charge. A low battery level can cause intermittent connection issues. Connect the controller to a power source or charge it before attempting to establish a Bluetooth connection.
If you’ve tried the above troubleshooting steps and are still unable to resolve the connection issues, it’s recommended to seek further assistance from official support channels or online forums dedicated to the Pro Controller or PC gaming.
Now that you’re equipped with troubleshooting techniques, let’s move on to the final section, which provides some tips for using the Pro Controller on your PC.
Tips for Using the Pro Controller on PC
Now that you’ve successfully connected your Nintendo Switch Pro Controller to your PC, here are some tips to enhance your gaming experience:
- Button Configuration: Customize the button configuration to your liking in games that support it. Optimize the layout to make it more comfortable and intuitive for your gameplay style.
- Explore Controller Settings: Take some time to explore the controller settings within games and software. You may find options for adjusting sensitivity, vibration, and other aspects to fine-tune your experience.
- Steam Integration: If you use the Steam platform, take advantage of its built-in controller support and configuration options. Steam’s Big Picture Mode and controller profiles can enhance compatibility and convenience.
- Keep Firmware Updated: Periodically check for firmware updates for your Pro Controller. Nintendo may release updates to improve compatibility, performance, and add new features.
- Controller Maintenance: Regularly clean and maintain your Pro Controller to ensure optimal performance. Keep buttons and joysticks free from debris and avoid exposing the controller to extreme temperatures or liquids.
- Explore Third-Party Software: Consider exploring third-party software and applications that offer additional customization and configuration options for your Pro Controller. These tools can further enhance your gaming experience and allow for advanced settings adjustments.
- Stay Informed: Keep an eye on forums, communities, and official websites for any updates, patches, or news related to Pro Controller compatibility and support on PC. This can help you stay up to date and make the most of your gaming sessions.
By following these tips, you can optimize your gaming experience with the Nintendo Switch Pro Controller on your PC. Experiment with different settings, customize your layout, and explore additional software options to tailor the controller to your preferences.
Remember, each game may have unique controller settings, so take the time to familiarize yourself with the options available in each game you play.
Now that you have these tips in mind, you’re ready to immerse yourself in the world of PC gaming with your Nintendo Switch Pro Controller.