
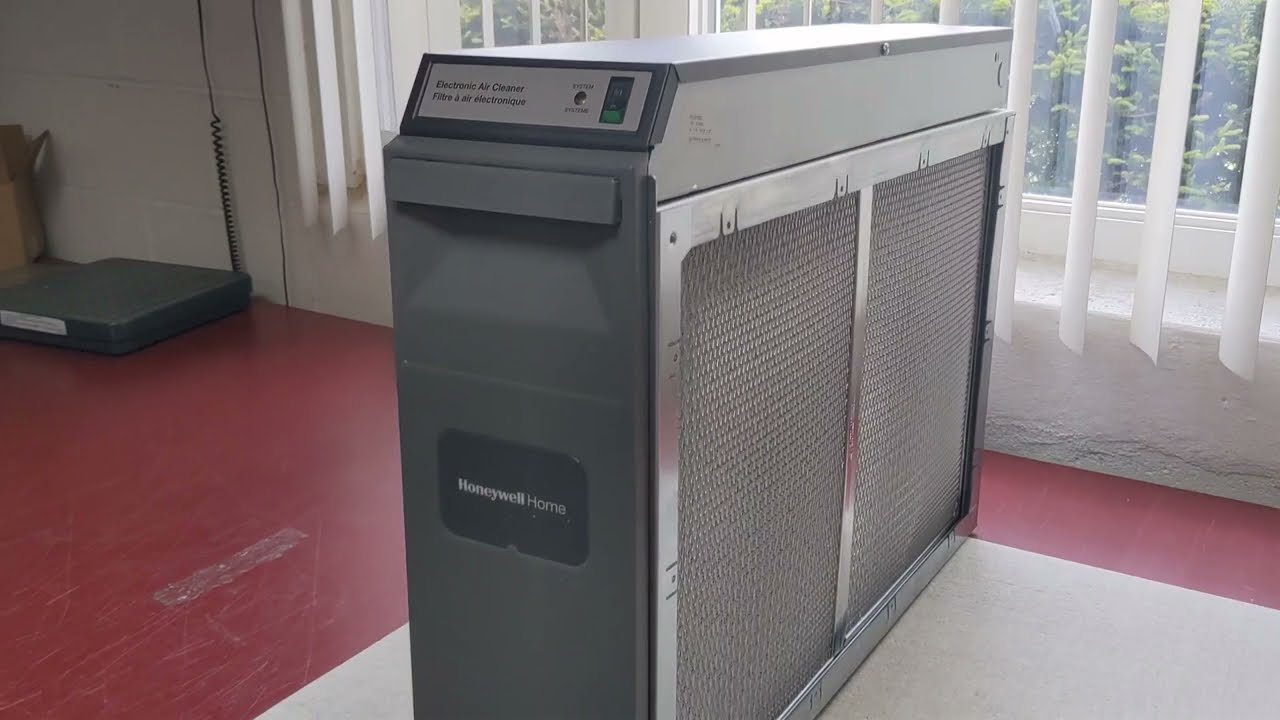
Overview of Honeywell Electronic Air Cleaner
The Honeywell Electronic Air Cleaner is a highly efficient filtration system designed to improve the air quality in your home. With its advanced technology and innovative features, it can effectively remove airborne pollutants, allergens, and particles as small as 0.3 microns. This air cleaner is ideal for individuals with allergies, asthma, or other respiratory conditions, as it helps to reduce indoor pollutants and promote a healthier living environment.
One of the key benefits of the Honeywell Electronic Air Cleaner is its electronic cell technology. The air cleaner uses an ionization process to charge particles in the air and collect them using oppositely charged plates. This unique filtration method ensures the capture of a wide range of contaminants, including dust, pollen, pet dander, mold spores, and bacteria. The air cleaner also features a pre-filter that captures larger particles before they reach the electronic cell, prolonging its lifespan and maintaining its efficiency.
Another advantage of the Honeywell Electronic Air Cleaner is its low maintenance requirements. Unlike traditional air purifiers that rely on disposable filters, this system only requires regular cleaning of its components. The electronic cell, pre-filter, and post-filter can all be easily removed and cleaned with a vacuum cleaner or water. This not only saves you money on purchasing replacement filters but also ensures that the air cleaner maintains optimal performance over time.
In terms of installation, the Honeywell Electronic Air Cleaner is designed to be compatible with most forced air heating and cooling systems. It can be installed in a central air conditioning unit or placed as a standalone unit. Its compact size and lightweight construction make it easy to integrate into existing ductwork or position in a suitable location in your home.
Overall, the Honeywell Electronic Air Cleaner provides a reliable and effective solution for improving indoor air quality. Its advanced filtration technology, low maintenance requirements, and compatibility with various HVAC systems make it a popular choice among homeowners. Whether you are concerned about allergies, respiratory health, or simply want to create a cleaner and more comfortable living space, this air cleaner offers a practical and efficient solution.
Tools and Materials Needed
Before you start cleaning your Honeywell Electronic Air Cleaner, gather the following tools and materials:
- Phillips head screwdriver
- Vacuum cleaner with brush attachment
- Mild detergent or cleaning solution
- Lukewarm water
- Clean cloth or sponge
- Gloves
The Phillips head screwdriver will be used to remove the access door of the air cleaner. The vacuum cleaner with a brush attachment will help in removing dust and debris from the filters and components. You will also need a mild detergent or cleaning solution to clean the filters and a clean cloth or sponge for wiping down the surfaces.
It is important to wear gloves while cleaning the air cleaner to protect your hands from any dirt or chemicals. Additionally, make sure to have access to lukewarm water for rinsing the filters.
Having these tools and materials handy will make the cleaning process easier and more efficient. It is recommended to gather everything before you begin to ensure a smooth and uninterrupted cleaning experience.
Step 1: Turn off the Power
Before you start cleaning your Honeywell Electronic Air Cleaner, it is crucial to turn off the power to ensure your safety. Here is how you can do it:
- Locate the circuit breaker or switch that controls the power supply to your air cleaner. It is typically located near your HVAC system or in the electrical panel of your home.
- Switch off the circuit breaker or flip the switch corresponding to the air cleaner. This will cut off the power supply and prevent any accidents or electrical shocks while you clean the unit.
- Double-check that the power is indeed turned off by trying to operate the air cleaner. If it doesn’t turn on, you have successfully disconnected the power.
Ensuring that the power is off is a crucial first step as it eliminates any risk of electrical hazards while working on the air cleaner. By taking this precaution, you can safely proceed with the cleaning process.
Keep in mind that electronic air cleaners are connected to the main power supply and handle high voltage. Therefore, it is essential to follow this step carefully to avoid any accidents or damage to the equipment.
Once the power is turned off, you can proceed to the next steps of dismantling the air cleaner and cleaning its various components.
Step 2: Remove the Access Door
After ensuring that the power to your Honeywell Electronic Air Cleaner is turned off, you can proceed to remove the access door. Follow these steps:
- Locate the access door on the front or side of the air cleaner. It is usually secured with screws or latches.
- Using a Phillips head screwdriver, carefully remove the screws securing the access door. Alternatively, release the latches to detach the door.
- Set the screws or latches aside in a safe place to avoid misplacing them.
- Gently pull the access door towards you to remove it from the air cleaner unit. Take note of any wires or connections attached to the door and be careful not to damage them.
Removing the access door provides you with access to the filters and other internal components of the air cleaner, allowing you to clean them thoroughly. Make sure to keep the removed door and any associated parts in a secure location to prevent loss or damage.
During this step, always handle the door and its components with care to avoid any accidental damage. Take extra precaution when working with delicate wires or connections that may be attached to the access door.
With the access door removed, you are now ready to proceed to the next steps of the cleaning process and ensure that your Honeywell Electronic Air Cleaner functions optimally for improved air quality in your home.
Step 3: Remove the Filters
Once you have removed the access door from your Honeywell Electronic Air Cleaner, it’s time to remove the filters. Follow these steps:
- Identify the filters inside the air cleaner. There are typically two types of filters: the pre-filters and the post-filters.
- Check for any clips, latches, or tabs that are securing the filters in place. Depending on the model, you may need to press, slide, or release these mechanisms to detach the filters.
- Begin by removing the pre-filters, which are usually the first line of defense against larger particles.
- Gently pull out the pre-filters from their housing. Take note of their position in the air cleaner to ensure proper reassembly later.
- Set the pre-filters aside for cleaning and proceed to remove the post-filters.
- Repeat the same process for the post-filters and carefully remove them from their designated slots or compartments.
Removing the filters allows you to effectively clean and maintain them, ensuring the optimal performance of your air cleaner. The pre-filters capture larger particles, while the post-filters provide additional filtration for finer particles. Both filters play crucial roles in improving the air quality in your home.
As you remove the filters, be gentle to avoid damaging them or their housing. It is also important to keep track of the position and orientation of the filters to ensure correct reinstallation later on.
With the filters removed, you can now move on to the next steps of cleaning each filter and the other components of your Honeywell Electronic Air Cleaner.
Step 4: Cleaning the Pre-Filters
Now that you have removed the pre-filters from your Honeywell Electronic Air Cleaner, it’s time to give them a thorough cleaning. Follow these steps to clean the pre-filters:
- Take the pre-filters to a sink or a bathtub where you can comfortably clean them.
- Using a vacuum cleaner with a brush attachment, gently vacuum both sides of the pre-filters to remove any loose dirt, dust, or debris.
- Fill the sink or bathtub with lukewarm water and add a mild detergent or cleaning solution. Mix well to create a soapy solution.
- Place the pre-filters in the soapy water and allow them to soak for about 10-15 minutes. This will help in loosening and removing any stubborn particles or stains.
- After soaking, use a soft brush or a clean cloth to scrub the pre-filters gently. Pay attention to areas with heavy dirt buildup.
- Rinse the pre-filters thoroughly under running water to remove any soap residue.
- Inspect the pre-filters for any remaining dirt or stains. If necessary, repeat the soaking and scrubbing process until they are clean.
- Gently squeeze out any excess water from the pre-filters and allow them to air dry completely before reinstalling.
Cleaning the pre-filters regularly is essential for maintaining the efficiency of your air cleaner. By removing dust and larger particles, the pre-filters help prolong the lifespan of the other filters and contribute to cleaner indoor air.
Remember to use a mild detergent or cleaning solution when cleaning the pre-filters. Avoid using harsh chemicals as they may damage the filters or leave behind residual odors.
Once the pre-filters are dry, you can move on to cleaning the post-filters and other components to complete the maintenance of your Honeywell Electronic Air Cleaner.
Step 5: Cleaning the Post-Filters
After cleaning the pre-filters, it’s time to focus on cleaning the post-filters of your Honeywell Electronic Air Cleaner. Follow these steps to effectively clean the post-filters:
- Inspect the post-filters for any visible dirt, dust, or debris. Use a vacuum cleaner with a brush attachment to remove any loose particles from both sides of the filters.
- If the post-filters are heavily soiled, fill a sink or bathtub with lukewarm water and add a small amount of mild detergent or cleaning solution.
- Place the post-filters into the soapy water and allow them to soak for about 10-15 minutes. This will help in loosening and removing stubborn dirt or stains.
- After soaking, use a soft brush or cloth to gently scrub the post-filters. Pay close attention to any areas with heavy dirt buildup.
- Rinse the post-filters under running water to remove any soap residue. Ensure that all the detergent is completely rinsed off.
- Inspect the post-filters to ensure that they are clean and free from any remaining dirt or stains. If necessary, repeat the soaking and scrubbing process.
- Gently squeeze out any excess water from the post-filters and allow them to air dry completely.
Cleaning the post-filters regularly is essential for maintaining the performance of your air cleaner. These filters provide additional filtration for finer particles, ensuring cleaner and healthier indoor air.
Remember to be gentle when cleaning the post-filters to avoid damaging them. Using a mild detergent or cleaning solution helps in effectively removing dirt without causing harm to the filters.
Once the post-filters are dry, you can proceed to clean the other components of your Honeywell Electronic Air Cleaner to ensure its optimal functioning and efficiency.
Step 6: Cleaning the Ionizing Wires
The ionizing wires of your Honeywell Electronic Air Cleaner play a crucial role in the filtration process by charging particles in the air. To ensure their proper functioning, regular cleaning is necessary. Follow these steps to clean the ionizing wires:
- Refer to the user manual of your air cleaner to locate the ionizing wires. They are typically located near the electronic cell.
- Before cleaning the ionizing wires, make sure the power to the air cleaner is turned off to avoid any potential risks.
- Using a soft brush or a clean cloth, gently brush or wipe off any visible dirt or dust from the ionizing wires. Take care not to bend or damage the wires.
- If there is stubborn dirt or residue on the wires, dampen the cloth slightly with water or use a mild cleaning solution and carefully wipe the wires to remove it.
- Be thorough in cleaning the entire length of the ionizing wires to ensure that they are free from any buildup that could hinder their effectiveness.
- Once cleaned, allow the ionizing wires to dry completely before reassembling the air cleaner.
Regular cleaning of the ionizing wires helps maintain their efficiency in charging particles and ensuring the effectiveness of the air cleaner. It is of utmost importance to handle the wires gently to avoid any damage or disruption in their operation.
Keep in mind that the ionizing wires are delicate components, so be cautious and avoid applying excessive force or bending them during the cleaning process. By properly cleaning and maintaining the ionizing wires, you can ensure that your Honeywell Electronic Air Cleaner continues to perform at its best, providing cleaner and healthier indoor air.
Step 7: Cleaning the Electronic Cell
The electronic cell is a vital component of your Honeywell Electronic Air Cleaner, responsible for collecting charged particles and contaminants from the air. Cleaning the electronic cell regularly ensures its optimal performance. Follow these steps to clean the electronic cell:
- Remove the electronic cell from the air cleaner unit. Refer to the user manual for specific instructions on how to safely remove it.
- Inspect the electronic cell for any visible dirt, dust, or debris. If needed, use a vacuum cleaner with a brush attachment to gently remove loose particles from both sides of the cell.
- Fill a sink or bathtub with lukewarm water and add a mild detergent or cleaning solution.
- Submerge the electronic cell in the soapy water and allow it to soak for about 10-15 minutes. This will help in loosening and removing any stubborn dirt or residue.
- After soaking, use a soft brush or cloth to gently scrub the electronic cell. Pay close attention to any areas with heavy dirt buildup.
- Rinse the electronic cell thoroughly under running water to remove any soap residue. Ensure that all the detergent is completely rinsed off.
- Inspect the electronic cell to ensure that it is clean and free from any remaining dirt or stains. If necessary, repeat the soaking and scrubbing process.
- Gently shake or allow the electronic cell to air dry completely before reinstalling it in the air cleaner unit.
Regularly cleaning the electronic cell is crucial for maintaining the efficiency of your Honeywell Electronic Air Cleaner. A clean electronic cell ensures effective capture and removal of airborne particles, contributing to cleaner and healthier indoor air quality.
Always handle the electronic cell carefully to avoid any damage to its delicate components. Using a mild detergent or cleaning solution and being gentle during the cleaning process will help maintain the effectiveness of the electronic cell and extend its lifespan.
Once the electronic cell is dry, you can proceed to reassemble the air cleaner and enjoy the benefits of improved air quality in your home.
Step 8: Reassembling the Air Cleaner
After cleaning all the components of your Honeywell Electronic Air Cleaner, it’s time to reassemble the unit. Follow these steps to ensure a proper reassembly:
- Begin by taking the dry pre-filters and post-filters that you cleaned earlier.
- Insert the pre-filters back into their designated slots or compartments. Ensure they are properly aligned and securely in place.
- Next, insert the dry post-filters into their respective compartments, aligning them correctly.
- Take the cleaned electronic cell and carefully insert it back into the air cleaner unit.
- Make sure the electronic cell is inserted in the correct orientation and properly secured according to the manufacturer’s instructions.
- Retrieve the access door that you removed earlier.
- Carefully align the access door with the openings on the air cleaner and gently slide or press it back into place.
- Secure the access door by using the screws or latches that you saved earlier. Tighten them securely, but be cautious not to overtighten.
Reassembling the air cleaner ensures that all the components fit properly and function effectively together. Following the correct order and alignment is essential to maintain optimal air flow and filtration performance.
Before turning on the power, double-check that all the components are properly installed and secured. This includes confirming that the access door is tightly closed without any gaps.
Once you have successfully reassembled your Honeywell Electronic Air Cleaner, you can proceed to the final step of turning the power back on and enjoying cleaner and healthier indoor air in your home.
Step 9: Turning the Power Back On
After completing the cleaning and reassembly process of your Honeywell Electronic Air Cleaner, it’s time to turn the power back on. Follow these steps to safely restore power to the unit:
- Locate the circuit breaker or switch that controls the power supply to your air cleaner.
- Switch on the circuit breaker or flip the switch associated with the air cleaner to restore the power supply.
- Give the air cleaner a few moments to initialize and start functioning.
- Check that the air cleaner is running smoothly and there are no unusual noises or vibrations.
- Verify that the access door is securely closed and that all components are properly installed.
- Observe the air cleaner for any error codes or indicators that may require attention. Consult the user manual if necessary.
By following these steps, you can safely reactivate your Honeywell Electronic Air Cleaner and resume its operation. Restoring power allows the air cleaner to effectively filter and purify the air in your home, providing you with cleaner and fresher indoor air quality.
Regularly check the air cleaner’s performance, such as airflow and filtration, to ensure that it is functioning optimally. If you notice any issues, such as reduced performance or strange odors, consult the user manual or contact a professional technician for further assistance.
With the power back on, you can now enjoy the benefits of a clean and efficient Honeywell Electronic Air Cleaner, helping you maintain a healthy and comfortable living space.
Maintenance Tips for Honeywell Electronic Air Cleaner
To keep your Honeywell Electronic Air Cleaner in top condition and ensure its long-term effectiveness, follow these maintenance tips:
- Regular cleaning: Clean the pre-filters, post-filters, and electronic cell at least once every three months or as recommended by the manufacturer. This helps maintain optimal performance and prevents the buildup of dirt and contaminants.
- Inspect the ionizing wires: Periodically check the ionizing wires for any damage or excessive dirt accumulation. If necessary, clean them using a soft brush or cloth. Properly functioning ionizing wires are essential for effective particle charging.
- Check the access door: Routinely examine the access door for any signs of wear, damage, or loose screws. Ensure it is securely closed after cleaning to maintain a tight seal and prevent air leakage.
- Monitor the airflow: Keep an eye on the airflow of the air cleaner. If you notice a significant decrease in airflow, it may indicate that the filters or electronic cell require cleaning or replacement.
- Replace filters as needed: Depending on your air quality and usage, the pre-filters and post-filters may need replacement periodically. Follow the manufacturer’s guidelines for filter replacement to maintain optimal filtration efficiency.
- Keep the surrounding area clean: Regularly dust and vacuum the area around the air cleaner to minimize the buildup of dust and particles that can affect its performance.
- Professional maintenance: Consider scheduling professional maintenance for your Honeywell Electronic Air Cleaner on an annual basis. A qualified technician can inspect, clean, and perform any necessary repairs or adjustments to ensure the air cleaner operates at its best.
- Refer to the user manual: Always refer to the user manual provided by Honeywell for specific maintenance instructions and guidelines particular to your air cleaner model. Familiarize yourself with the manufacturer’s recommendations to optimize the maintenance process.
By following these maintenance tips, you can prolong the lifespan of your Honeywell Electronic Air Cleaner and ensure it continues to effectively improve the indoor air quality of your home. Regular care and attention will help you enjoy cleaner and healthier air for years to come.