
Checking the Battery Level
Before changing the battery of your Ouya controller, it’s essential to check the current battery level. By doing so, you can determine if the battery needs to be replaced or if it still has enough power to last.
To check the battery level, you can use the Ouya console’s interface. Follow these steps:
- Power on your Ouya console and ensure it is connected to a TV or monitor.
- Navigate to the main menu and select “Settings.”
- In the settings menu, choose “System” and then select “Controller.”
- You will see a list of connected controllers. Select the one you want to check.
- On the controller settings page, look for the battery level indicator. It typically appears as a small battery icon with a percentage next to it.
The battery level indicator provides an estimate of how much charge is left in the controller’s battery. If it’s low, such as below 20%, it’s a good indication that a battery replacement is needed.
Keep in mind that the battery level indicator on the controller settings page may not always be 100% accurate. If you notice your controller’s performance degrading or it frequently disconnects, it’s another sign that the battery needs to be replaced, regardless of the reported battery level.
With just a few simple steps, you can quickly check the battery level of your Ouya controller and determine whether it’s time for a battery change or not. This way, you can ensure uninterrupted gaming sessions and a smooth overall experience.
Removing the Battery Cover
When it’s time to replace the battery of your Ouya controller, the first step is to remove the battery cover. The battery cover is located at the back of the controller and provides access to the battery compartment. Here’s how you can remove the battery cover:
- Hold the controller firmly in your hand with the front facing away from you.
- Locate the battery cover at the back of the controller.
- Most Ouya controllers have a small tab or groove near the bottom of the battery cover. Place your thumb or finger on this tab or groove.
- Apply a gentle amount of pressure and slide the battery cover in the direction indicated by the arrow or notch.
- Continue sliding until the battery cover is completely detached from the controller.
If you encounter any resistance while trying to slide off the battery cover, double-check to make sure that you are pressing on the correct tab or groove. Applying excessive force can damage the cover or the controller itself.
Once the battery cover is removed, you will have full access to the battery compartment and can proceed with the battery replacement process. Remember to handle the battery cover with care and keep it in a safe place, as you will need it to close the battery compartment after replacing the battery.
By following these simple steps, you can easily remove the battery cover of your Ouya controller and prepare it for the battery replacement process. Taking your time and being gentle will ensure that you don’t accidentally damage any part of the controller in the process.
Removing the Old Battery
Now that you have successfully removed the battery cover of your Ouya controller, the next step is to remove the old battery from the battery compartment. Follow these steps to safely remove the old battery:
- Locate the battery inside the battery compartment. It is usually positioned towards the top half of the compartment.
- Identify the connection points of the battery. There will typically be two metal contacts, one on each side of the battery.
- Gently press on the edge of the battery near the metal contact points.
- Using your fingers or a small, non-metallic tool like a plastic spudger, carefully lift the battery out of the compartment. Make sure to grip the battery firmly but not too forcefully to avoid any damage.
- Once the battery is lifted, continue to slowly and steadily remove it from the compartment, ensuring that it doesn’t snag on any edges or components.
- Set the old battery aside in a safe place. It’s always a good idea to recycle old batteries responsibly.
Be cautious when handling the old battery, as it may still hold some charge and can potentially cause harm if mishandled or punctured. It’s recommended to handle it by the edges and avoid touching the metal contacts.
Now that the old battery has been removed from the Ouya controller, you are one step closer to installing a new battery and restoring the functionality of your controller. Properly disposing of the old battery and maintaining a safe handling process is essential for both your safety and the environment.
Choosing a Replacement Battery
When it comes to choosing a replacement battery for your Ouya controller, it’s crucial to select the right one that is compatible and of high quality. Here are a few factors to consider when choosing a replacement battery:
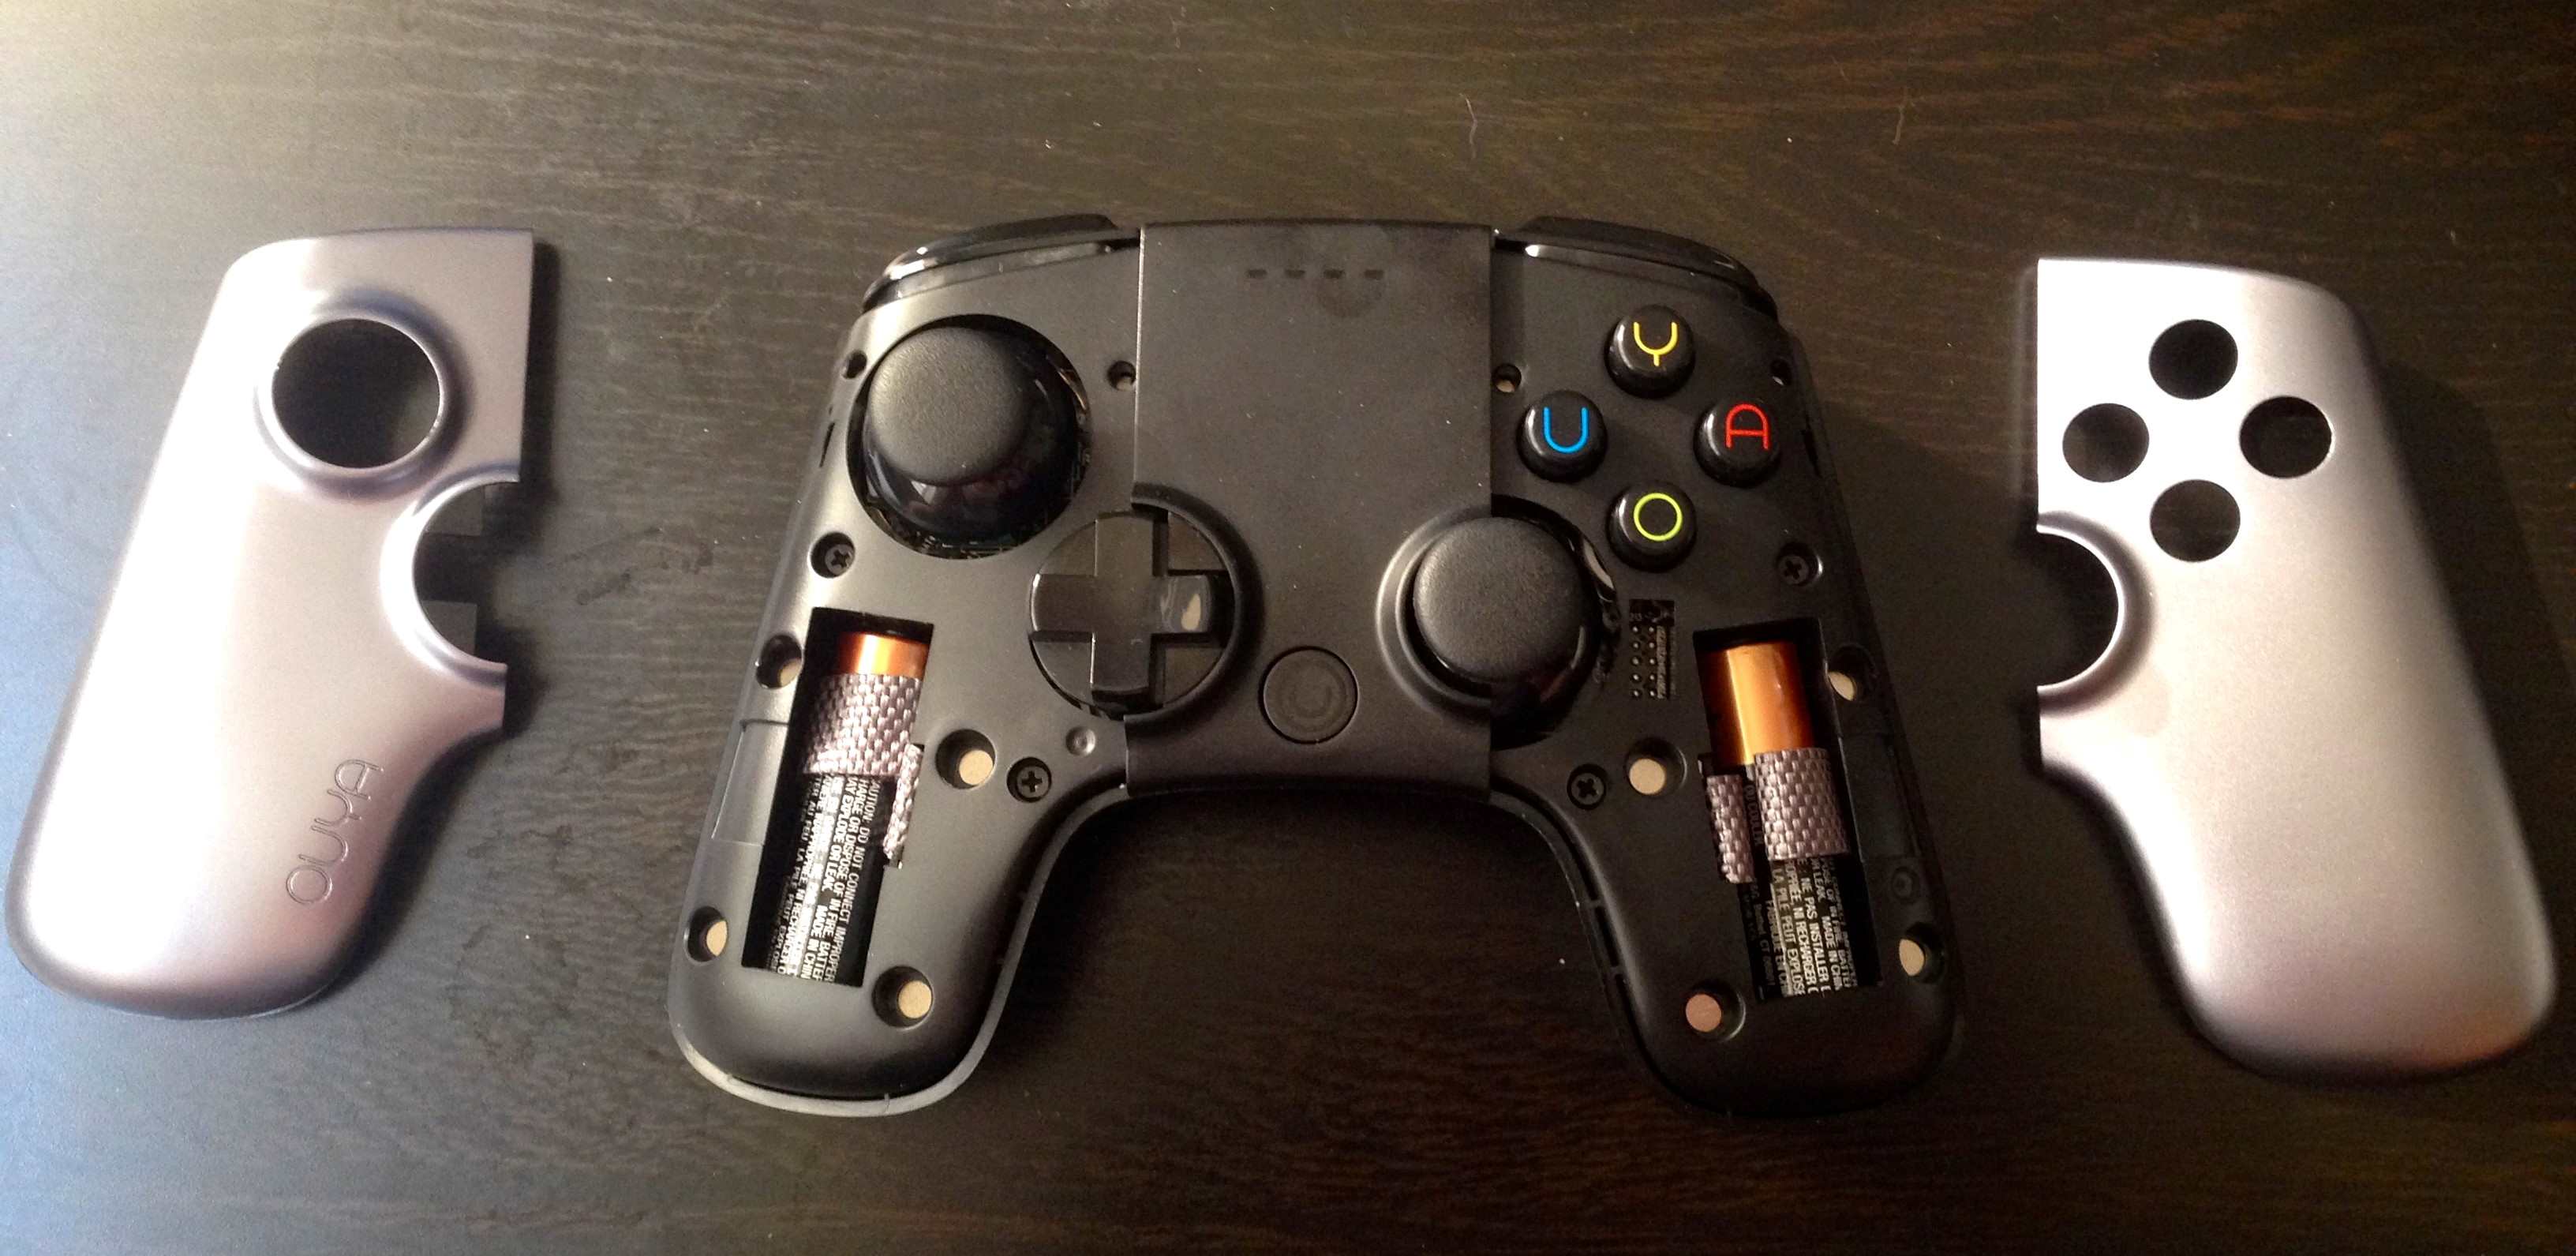
- Type of Battery: The Ouya controller typically uses AA batteries. Ensure that you choose a replacement battery that is the same type and size.
- Battery Life: Look for a replacement battery that offers a long battery life. Check the manufacturer’s specifications or user reviews to get an idea of how long the battery can last on a single charge.
- Rechargeable or Disposable: Decide whether you prefer a rechargeable battery or disposable batteries. Rechargeable batteries are more cost-effective and environmentally friendly in the long run, but disposable batteries may be more convenient if you don’t have access to charging options.
- Brand and Quality: Opt for reputable brands that have a track record of producing reliable batteries. Look for batteries that are known for their longevity and performance.
- User Reviews: Take the time to read reviews from other users who have purchased and used the replacement battery. Their experiences can provide valuable insights into the battery’s performance and reliability.
It’s worth mentioning that some replacement batteries come with additional features, such as low-power indicators or built-in charging circuits. These features can enhance the overall usability and convenience of the battery but may come at a higher price point.
Additionally, be aware of counterfeit or low-quality batteries. These may not provide the expected performance and could potentially damage your controller. Stick to reputable sellers and manufacturers when purchasing your replacement battery.
By considering these factors and doing thorough research, you can find a suitable replacement battery that meets your needs and ensures optimal performance for your Ouya controller.
Inserting the New Battery
Now that you have chosen a suitable replacement battery for your Ouya controller, it’s time to insert the new battery into the battery compartment. Here’s a step-by-step guide on how to properly insert the new battery:
- Hold the new battery in your hand, making sure it is positioned correctly. Align the positive (+) and negative (-) ends of the battery with the corresponding markings or symbols inside the battery compartment. Typically, the positive end is indicated by a plus sign (+) or a raised bump.
- Gently lower the new battery into the compartment, ensuring that it fits securely and snugly. Avoid applying excessive force that could damage the battery or the compartment.
- Double-check the alignment of the battery to ensure that the positive and negative ends are correctly positioned. This is crucial for the battery to function properly.
- Once the battery is properly aligned and seated, gently press it down to ensure a secure connection. Make sure the battery does not move or rattle when the controller is shaken lightly.
- Close the battery cover by aligning it with the controller and sliding it back into place. Apply gentle pressure until you hear or feel a click, indicating that the cover is securely attached.
It’s worth noting that if you are using a rechargeable battery, you may need to follow specific instructions for charging it for the first time to optimize its performance and lifespan. Refer to the manufacturer’s guidelines or user manual for more information.
Now that you have successfully inserted the new battery into your Ouya controller, you can proceed to the final step of replacing the battery cover and testing the controller. Taking the time to ensure proper insertion of the battery will help provide reliable power to your controller for uninterrupted gaming sessions.
Replacing the Battery Cover
With the new battery securely inserted into your Ouya controller, it’s time to replace the battery cover to protect the battery and ensure the controller is fully functional. Follow these steps to properly replace the battery cover:
- Hold the battery cover in your hand, ensuring it is facing the correct way. Align any notches or grooves on the cover with the corresponding slots on the controller.
- Position the battery cover over the battery compartment, aligning it with the edges of the controller.
- Press down firmly but gently on the battery cover, applying even pressure on all sides. You should hear or feel a click when the cover is properly attached.
- Once the cover is securely in place, run your fingers along the edges to ensure there are no gaps or loose areas. The cover should fit snugly and seamlessly with the controller.
It’s important to note that if you encounter any resistance or difficulty while replacing the battery cover, double-check to ensure that it is aligned correctly and that you are applying the right amount of pressure. Excessive force can damage the cover or the controller.
Always handle the battery cover with care, as it is designed to protect the battery and maintain the overall integrity of the controller. Keep the battery cover in a safe place when it’s not being used, so you can easily access it in case you need to change the battery again in the future.
Now that the battery cover is securely attached, your Ouya controller is ready to be used again. Ensure that the cover is firmly in place before continuing to the next step, which is testing the controller to ensure that the new battery is working properly.
Testing the Controller
After replacing the battery and securing the battery cover, it’s essential to test the Ouya controller to ensure everything is functioning correctly. Follow these steps to perform a basic test:
- Ensure that your Ouya console is turned on and properly connected to a TV or monitor.
- Hold the controller and press the power button to turn it on.
- Check if the controller powers on and establishes a connection with the console. Look for a visible light or indicator on the controller that confirms it is active and synced with the console.
- Test the buttons and analog sticks to verify that they respond accurately and smoothly. Press each button and move the sticks in different directions to confirm their functionality.
- Navigate through menus or launch a game to further test the controller’s input and responsiveness. Ensure that the controller accurately translates your commands into on-screen actions.
- Pay attention to any irregularities or malfunctions during the testing process. For example, if buttons are unresponsive or if the controller frequently disconnects or lags, it may indicate an issue that needs to be addressed
If you encounter any issues during the testing phase, double-check that the battery is inserted correctly and the battery cover is securely attached. Additionally, make sure the controller is within range and unobstructed from the console.
If problems persist after confirming the battery and cover, consult the user manual or visit the Ouya support website for troubleshooting advice or contact their customer support for further assistance, if needed.
By performing a thorough test of the controller, you can ensure that the new battery and its connection are functioning properly. This will help guarantee an optimal gaming experience without any interruptions or technical difficulties.