
Assessing the Fitbit Band
Before diving into the process of changing your Fitbit band, it’s essential to assess the condition of your current band and determine if a replacement is necessary. Fitbit bands are designed to be durable, but over time, wear and tear can take a toll. Here are some key factors to consider when assessing your Fitbit band:
- Visible Damage: Examine the band for any visible signs of damage, such as cracks, tears, or fraying. These issues may affect the band’s overall functionality and warrant a replacement.
- Comfort: Pay attention to how the band feels on your wrist. If you experience discomfort, itching, or irritation, it might be an indication that the band needs to be changed.
- Flexibility: Check if the band retains its flexibility and elasticity. If it has become stiff or rigid, it may no longer provide a secure and comfortable fit.
- Fitbit Compatibility: Ensure that the replacement band you choose is compatible with your specific Fitbit model. Different models may have different band sizes and connection mechanisms.
Additionally, take this opportunity to consider if you’d like to change the appearance of your Fitbit by opting for a different band color or style. This can be a great way to refresh your wearable device and add a personal touch.
By carefully assessing the condition and compatibility of your Fitbit band, you can make an informed decision about whether it’s time for a replacement. In the next sections, we will guide you through the process of changing your Fitbit band step-by-step.
Gathering the Necessary Tools
Before embarking on the task of changing your Fitbit band, it is important to gather the necessary tools to ensure a smooth and hassle-free experience. By having the right tools on hand, you can complete the process quickly and efficiently. Here are the essential tools you’ll need:
- Replacement Fitbit Band: Choose a replacement band that is suitable for your Fitbit model. Take note of the band size and design to ensure compatibility.
- Microfiber Cloth: A soft microfiber cloth will come in handy for cleaning your Fitbit and removing any dirt or residue that may have accumulated on the band or tracker.
- Small Screwdriver or Pin Tool: Some Fitbit models require a screwdriver or pin tool to release the pins securing the band. Check the instructions or specifications for your specific Fitbit model to determine if you need this tool.
- Tweezers: Tweezers can be useful for handling small components or pins during the band replacement process.
- Cleaning Solution (optional): If your Fitbit band needs a deeper clean, you may consider using a mild cleaning solution specifically formulated for cleaning wearable devices. Make sure the solution is safe for use on the band material.
Having these tools readily available will save you time and frustration during the band replacement process. Make sure to double-check that you have everything you need before proceeding to the next steps. Once you have gathered the necessary tools, you are ready to move on to the next section and begin removing the old Fitbit band.
Removing the Old Fitbit Band
Now that you have assessed the condition of your Fitbit band and gathered the necessary tools, it’s time to remove the old band from your Fitbit device. Follow these steps to successfully remove the old Fitbit band:
- Power Off: Before beginning, ensure that your Fitbit device is powered off. This will prevent any accidental inputs or interference during the band removal process.
- Locate the Band Attachment Points: Look for the attachment points on your Fitbit device. These are small pins or screws that secure the band to the tracker. The number and location of the attachment points will vary depending on your Fitbit model.
- Release the Attachment Points: Depending on your Fitbit model, you may need to use a small screwdriver or pin tool to carefully release the attachment points. Gently insert the screwdriver or tool into the designated slots or holes and apply slight pressure to release the pins/screws. Be cautious not to apply excessive force or damage the device.
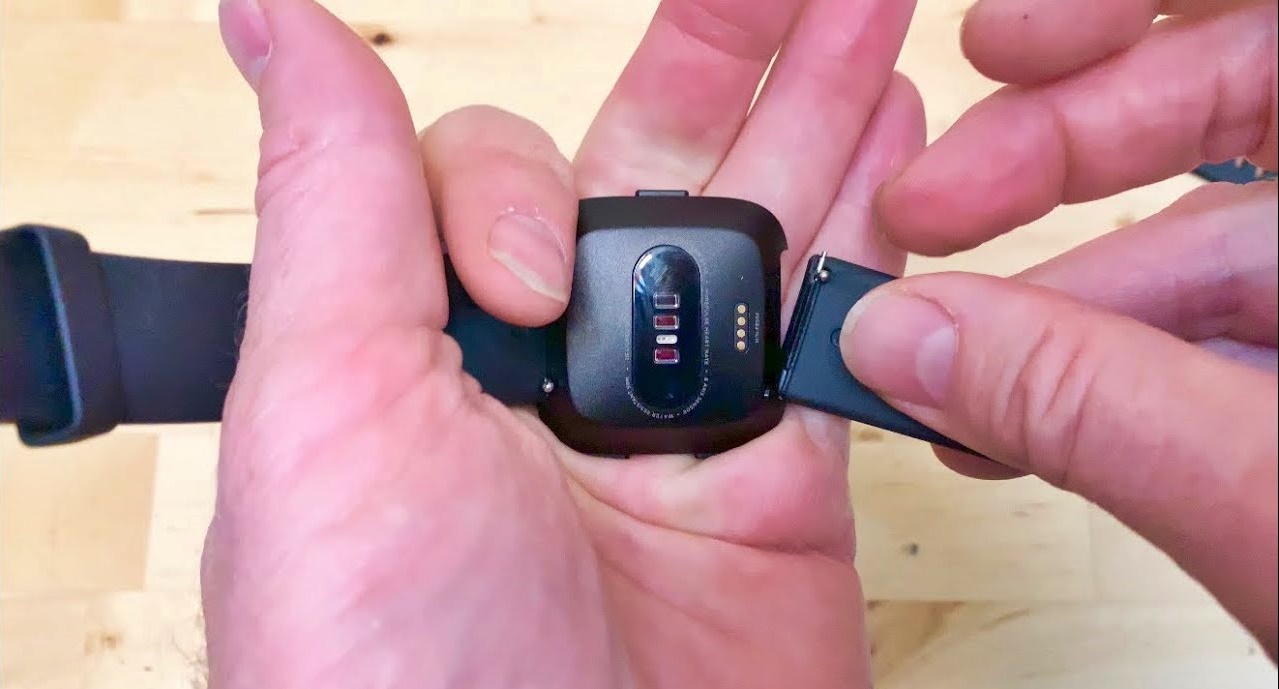
- Detach the Band: Once the attachment points are released, carefully detach the old Fitbit band from the tracker. You may need to gently pull or wiggle the band to loosen it from the device.
- Clean the Tracker: With the old band removed, take a moment to clean the tracker using a microfiber cloth. Wipe away any dust, dirt, or residue that may have accumulated on the device.
Once you have successfully removed the old Fitbit band and cleaned the tracker, you’re ready to move on to the next section. We will guide you through the process of attaching the new Fitbit band and ensuring a proper fit.
Attaching the New Fitbit Band
With the old Fitbit band removed and the tracker cleaned, it’s time to attach the new band to your Fitbit device. Follow these steps to securely attach the new Fitbit band:
- Align the Attachment Points: Take a close look at the attachment points on both the new Fitbit band and the tracker. Ensure that they are properly aligned.
- Insert the Pins/Screws: Carefully insert the pins or screws of the new Fitbit band into the corresponding attachment points on the tracker. Make sure they slide in smoothly and securely.
- Secure the Band: Depending on your Fitbit model, you may need to tighten the screws or engage the locking mechanism to secure the new band in place. Refer to the user manual or instructions specific to your Fitbit model for guidance.
- Double-Check the Fit: Once the band is attached and secure, double-check that it fits comfortably on your wrist. Make any necessary adjustments to ensure a proper fit.
Note: Some Fitbit bands may have additional features or mechanisms for adjustment, such as clasps or buckles. If your new band has any specific instructions for attaching or adjusting, be sure to follow them carefully.
After successfully attaching the new Fitbit band and ensuring a comfortable fit, proceed to the next section for adjusting the band to your desired size.
Adjusting the Fitbit Band
Now that the new Fitbit band is securely attached, it’s time to adjust it to the perfect size for your wrist. Follow these steps to properly adjust the Fitbit band:
- Determine the Desired Fit: Decide how snug or loose you want the Fitbit band to be on your wrist. Keep in mind that it should be comfortable enough to wear throughout the day, but not too loose that it slides around or falls off.
- Find the Adjustable Strap: Some Fitbit bands come with an adjustable strap that allows you to customize the size. Identify the adjustable part of the band, which is usually located near the clasp or buckle.
- Resize the Band: To resize the band, either slide the adjustable strap through the buckle or clasp to tighten it or pull it out to loosen it. Repeat the process until you achieve the desired fit.
- Trial and Error: It may take a few tries to find the perfect fit for your wrist. Put the Fitbit on your wrist and test its comfort and firmness. Make further adjustments until you’re satisfied with the fit.
Remember, the Fitbit band should be snug enough to stay securely in place during physical activity, but not so tight that it digs into your skin or causes discomfort. Take your time to find the right fit that works best for you.
Once you have adjusted the Fitbit band to your liking, proceed to the next section to ensure that the band is properly secured and ready for use.
Securing the Fitbit Band
After adjusting the Fitbit band to the desired size, it’s crucial to ensure that it is securely fastened and won’t come loose during your daily activities. Here are the steps to properly secure the Fitbit band:
- Double-Check the Buckle or Clasp: If your Fitbit band has a buckle or clasp, make sure it is securely fastened. Ensure that the buckle is inserted into the appropriate notch, and it clicks or snaps into place.
- Test the Band’s Tightness: While wearing the Fitbit, gently tug on the band to check its tightness. The band should be snug but not overly tight. It should stay comfortably in place on your wrist during regular movement.
- Inspect for Proper Alignment: Look for any misalignment or unevenness in the band attachment points. Ensure that the band is straight and properly aligned with the tracker.
- Give it a Shake: Give your wrist a few shakes to test the band’s stability. It should stay securely in place without sliding or slipping off your wrist.
- Perform a Comfort Test: Wear the Fitbit band for some time and assess its comfort. If it starts to feel too tight or uncomfortable, readjust the sizing or consider trying a different band option.
By following these steps, you can ensure that your Fitbit band is properly secured and provides a comfortable fit throughout your daily activities. It’s essential to periodically check the band’s security and readjust if necessary.
In the next and final section, we will guide you through testing the Fitbit band to confirm that it is fitting correctly and functioning as expected.
Testing the Fitbit Band for Proper Fit
After securing the Fitbit band, it’s important to test its fit and functionality to ensure a proper and comfortable experience. Follow these steps to perform a test of the Fitbit band:
- Move Freely: Engage in various movements such as walking, jogging, or performing basic exercises. The Fitbit band should stay in place comfortably without causing any discomfort or restrictions.
- Check Heart Rate Monitoring: If your Fitbit model includes heart rate monitoring, verify that it is functioning correctly. Make sure the sensors on the back of the tracker are in contact with your skin and accurately detecting your heart rate.
- Monitor Step Count: Take a few steps and verify that the Fitbit tracker accurately counts your steps. Ensure that each step is registered and displayed on the screen or in the Fitbit app.
- Test Sleep Tracking: If you wear your Fitbit during sleep, check if the band’s fit affects the sleep tracking feature. Monitor if it accurately records your sleep patterns and provides insightful data.
- Assess Comfort: Pay attention to how the Fitbit band feels throughout the day. Ensure that it doesn’t cause any discomfort, irritation, or skin reactions, especially if you have any known sensitivities.
During testing, if you notice any issues or inconsistencies with the Fitbit band’s fit or functionality, double-check the band’s security, adjust the sizing if needed, or consult the Fitbit support resources for troubleshooting assistance.
By performing these tests, you can confirm that your Fitbit band fits properly, functions correctly, and provides a comfortable experience as you track your activity and monitor your health. Enjoy the benefits of your Fitbit band and make the most out of your fitness journey!