
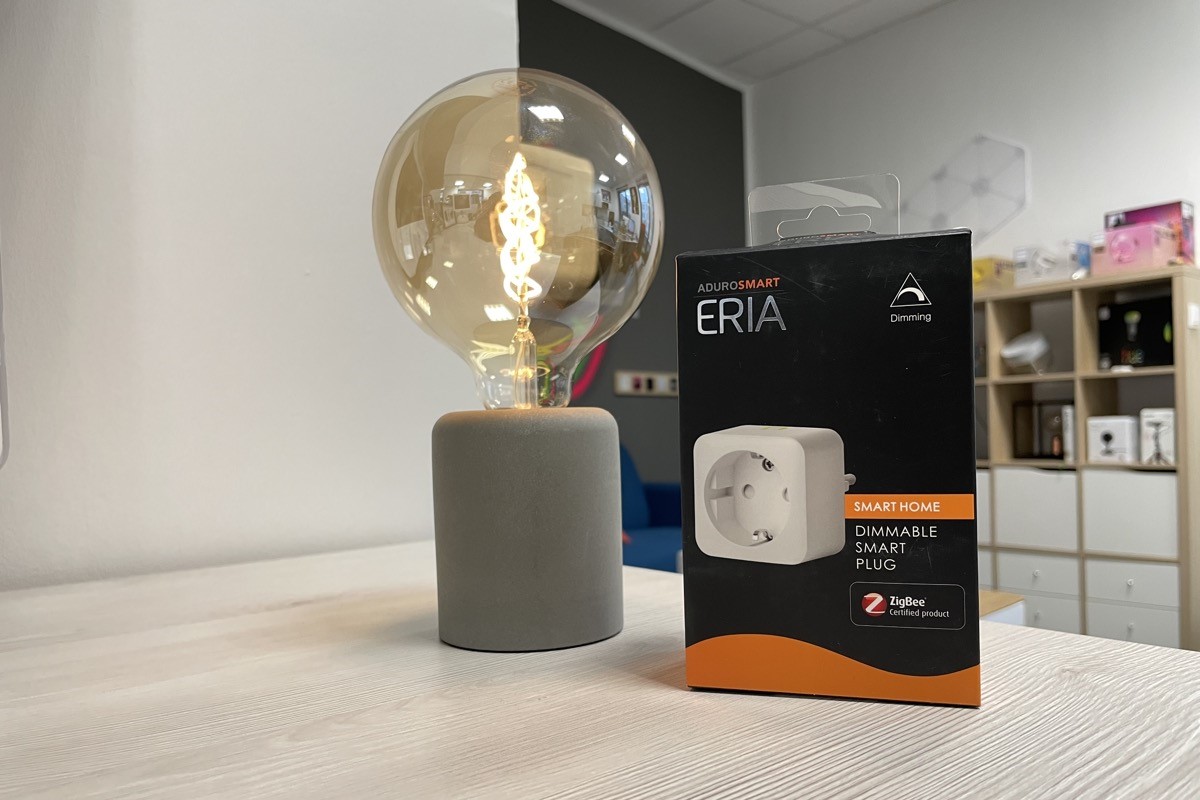
What is an Eria bulb?
An Eria bulb is a smart home lighting device that offers a wide range of features and functionalities. It is designed to be compatible with various smart home systems, including Philips Hue. The Eria bulb utilizes LED technology, which ensures energy efficiency and long-lasting performance.
With an Eria bulb, you can control your lighting settings remotely using a smartphone or voice commands through a virtual assistant. This allows you to adjust brightness levels, change colors, and even schedule lighting scenes according to your preferences.
One of the main advantages of the Eria bulb is its compatibility with different smart home ecosystems. This means that you can integrate it seamlessly into your existing smart home devices and create a unified and synchronized lighting experience throughout your home.
Moreover, the Eria bulb comes in different variations, including white and color options, allowing you to choose the perfect lighting ambiance for any occasion. Whether you want to create a warm and cozy atmosphere for a movie night or have vibrant and colorful lighting for a party, the Eria bulb can deliver.
Setting up the Eria bulb is also a breeze. With its simple and user-friendly installation process, even those with minimal technical experience can quickly get their smart lighting system up and running.
What is Philips Hue?
Philips Hue is a popular and highly regarded smart lighting system that allows users to control and customize their home lighting through smart devices. Developed by Signify, formerly known as Philips Lighting, the Philips Hue ecosystem offers a wide range of smart bulbs, lamps, fixtures, and accessories.
Philips Hue operates on a wireless communication protocol called Zigbee, which enables seamless connectivity between the Hue bridge and the smart lighting devices. This bridge acts as the central hub for controlling and managing the entire Hue system.
One of the key features of Philips Hue is its ability to create personalized lighting experiences. Users can choose from a vast selection of colors and shades to suit their moods and preferences. The Hue app allows for easy customization, enabling users to set timers, schedules, and special effects to create dynamic and immersive lighting scenes.
Another notable feature of Philips Hue is its compatibility with various smart home platforms and voice assistants, such as Amazon Alexa, Google Assistant, and Apple HomeKit. This allows users to control their lighting using voice commands, making it even more convenient and hands-free.
Philips Hue offers a range of smart bulbs, including white ambiance bulbs, white and color ambiance bulbs, and outdoor lighting solutions. This versatility allows users to illuminate their homes both inside and out with ease.
Whether you want to set the perfect ambiance for a cozy night in, increase productivity during working hours, or enhance home security by creating the appearance of occupancy, Philips Hue offers endless possibilities to customize and transform your lighting experience.
In addition, Philips Hue continues to improve and innovate, introducing new product lines and features to enhance the overall smart lighting experience. With regular firmware updates and a thriving community, Philips Hue provides ongoing support and ensures compatibility with the latest advancements in smart home technology.
Why would you want to add an Eria bulb to Philips Hue?
Adding an Eria bulb to your Philips Hue system can offer several benefits and enhance your smart home lighting experience. Here are some compelling reasons why you may want to consider incorporating an Eria bulb into your existing Philips Hue setup:
1. Expanded lighting options: By adding an Eria bulb to Philips Hue, you gain access to a wider range of lighting options. The Eria bulb comes in various options, including color bulbs and tunable white bulbs. This allows you to create more diverse lighting scenes and add a touch of personalization to different areas of your home.
2. Seamless integration: Eria bulbs are designed to be compatible with Philips Hue, meaning they can seamlessly integrate into your existing smart lighting system. This compatibility ensures that all your devices work harmoniously, and you can control them using a single interface or voice commands.
3. Cost-effective alternative: Eria bulbs can be a cost-effective alternative to official Philips Hue bulbs. While they offer similar functionalities and performance, they typically come at a more affordable price point. This makes adding more smart bulbs to your setup more budget-friendly without compromising on quality.
4. Compatible with existing smart home devices: If you have other smart home devices that are compatible with Eria bulbs, adding them to your Philips Hue system allows for seamless integration. This means that you can control your Eria bulbs alongside other smart devices, creating a unified and synchronized smart home experience.
5. Enhanced automation possibilities: Philips Hue is known for its extensive automation capabilities, allowing you to create schedules, set timers, and trigger lighting based on various events. By adding Eria bulbs to your setup, you can expand your automation possibilities and create more dynamic lighting routines based on your preferences and needs.
6. Easy setup and installation: Integrating Eria bulbs into your Philips Hue system is a straightforward process. Once you have the Eria bulbs, simply follow the provided instructions to add them to your existing Hue bridge. With just a few simple steps, you can expand your lighting setup and enjoy the benefits of Eria bulbs.
Overall, adding an Eria bulb to your Philips Hue system offers enhanced lighting options, cost savings, compatibility with other smart devices, and increased automation possibilities. Whether you’re looking for more color options, a budget-friendly alternative, or expanded customization, the combination of Eria bulbs and Philips Hue can elevate your smart home lighting experience.
What you will need
Before you can add an Eria bulb to your Philips Hue system, it’s important to gather the necessary materials and ensure that you have everything ready. Here’s a list of what you will need:
- Eria bulbs: Purchase the desired number of Eria bulbs based on your lighting needs. Choose between color bulbs or tunable white bulbs, depending on your preferences.
- Philips Hue bridge: Ensure that you have a Philips Hue bridge already set up in your home. The bridge serves as the central hub that connects and controls all the smart lighting devices in your Hue system.
- Smart device: You will need a smartphone or tablet with the Philips Hue app installed. The app allows you to control and customize your Philips Hue lighting setup.
- Stable Wi-Fi network: Make sure you have a stable and reliable Wi-Fi network in your home. This is necessary for seamless communication between your smart devices and the Philips Hue system.
- Power source: Ensure that you have a power source available for each Eria bulb. Depending on the bulb type, this might involve screwing the bulbs into existing fixtures or using standalone lamps.
It’s also worth noting that Philips Hue offers various starter kits that include both the bridge and several Hue bulbs. If you don’t have an existing Philips Hue system, you might consider purchasing one of these starter kits to get everything you need in one package.
Before proceeding with the installation, it’s recommended to read the instructions provided by both Philips Hue and Eria to ensure a smooth setup process. It’s important to follow the manufacturer’s guidelines to avoid any potential issues and to ensure that the integration between the Eria bulbs and the Philips Hue system is successful.
Once you have gathered all the necessary materials and acquainted yourself with the instructions, you are ready to proceed with the steps to add an Eria bulb to your Philips Hue system.
Step 1: Prepare your Eria bulb
Before you can add an Eria bulb to your Philips Hue system, it’s essential to properly prepare the bulb for installation. Follow these steps to ensure a smooth setup process:
- Unpack the Eria bulb: Carefully remove the Eria bulb from its packaging, taking caution not to damage it. Inspect the bulb for any visible signs of damage or defects.
- Screw in the Eria bulb: Depending on the type of Eria bulb, either screw it into an existing socket or attach it to a compatible lamp or fixture. Ensure that the bulb is secured tightly and firmly in place.
- Power on the bulb: If the Eria bulb is not already powered on, switch on the power source or flip the switch to activate the bulb. Wait a few moments for the bulb to fully illuminate.
- Connect to the Eria hub (if applicable): If you are using an Eria hub to control your Eria bulbs, follow the manufacturer’s instructions to connect the hub to your Wi-Fi network and pair it with the bulbs. This step may vary depending on the specific Eria bulb and hub model you are using.
- Ensure proper connectivity: Test the connectivity and functionality of the Eria bulb by using the respective Eria app or any compatible control method provided by Eria. This step ensures that the bulb is functioning correctly before integrating it into your Philips Hue system.
It’s important to note that Eria bulbs are typically designed to be compatible with multiple smart home systems, including Philips Hue. However, for seamless integration, it’s essential to prepare the bulb according to the manufacturer’s instructions and ensure that it is properly functioning before proceeding with the next steps.
By properly preparing your Eria bulb, you can ensure a hassle-free installation process and optimize the performance of your smart lighting system. Once you have completed this step, you can move on to setting up your Philips Hue system and adding the Eria bulb to your existing network.
Step 2: Set up your Philips Hue system
Before you can add an Eria bulb to your Philips Hue system, you need to ensure that your Hue system is properly set up. Follow these steps to get your Philips Hue system ready for integration:
- Connect the Hue bridge: Plug in the Philips Hue bridge to a power source and connect it to your home router using an Ethernet cable. Wait for the bridge’s status lights to indicate that it is properly connected.
- Download and open the Philips Hue app: Using your smartphone or tablet, download the official Philips Hue app from your device’s app store. Once installed, open the app and sign in or create an account if prompted.
- Ensure proper Wi-Fi connectivity: Make sure that your mobile device is connected to the same Wi-Fi network that the Philips Hue bridge is connected to. This is crucial for the app to communicate with the bridge and control the Hue system.
- Follow the on-screen instructions: The Philips Hue app will guide you through the setup process, which may involve registering your bridge, searching for available devices, and creating a new lighting setup.
- Test the connection: Once the app establishes a connection with the Hue bridge, you can test the connection by controlling the pre-installed Hue bulbs or fixtures. This ensures that your Hue system is properly set up and functioning correctly.
It’s important to note that the specific setup process may vary depending on the version of the Philips Hue app and bridge that you are using. Consult the manufacturer’s instructions or the in-app guidance for precise information for your specific setup.
By following these steps, you can set up your Philips Hue system and ensure that it is ready to connect with your Eria bulb. Once you have completed the setup process and confirmed that your Hue system is working correctly, you can proceed to the next step of adding the Eria bulb to your Philips Hue network.
Step 3: Connect the Eria bulb to Philips Hue
Now that you have your Eria bulb prepared and your Philips Hue system set up, it’s time to connect the Eria bulb to your Hue network. Follow these steps to successfully integrate the Eria bulb with your Philips Hue system:
- Open the Philips Hue app: Launch the Philips Hue app on your smartphone or tablet. Make sure that your device is connected to the same Wi-Fi network as your Philips Hue bridge.
- Navigate to the bulb setup section: In the app’s main menu or dashboard, locate the option to add or configure new bulbs. This section may be labeled differently depending on the version of the app you are using.
- Put the Eria bulb into pairing mode: Refer to the specific instructions provided by Eria for placing your bulb into pairing mode. This typically involves power cycling the bulb or using a specific combination of switches to initiate the pairing process.
- Start the bulb discovery process: Within the Philips Hue app, initiate the process for discovering new bulbs. This usually involves pressing a “search” or “discover” button within the app.
- Wait for the app to find the Eria bulb: The app will search for available bulbs in its vicinity. Wait for the app to detect and identify the Eria bulb you are attempting to connect to your Hue system. This may take a few moments.
- Confirm and assign the Eria bulb: Once the app has found the Eria bulb, it will prompt you to confirm the connection. Follow the on-screen instructions to assign the bulb to a specific room or group within your Hue system.
- Repeat the process for additional Eria bulbs: If you have multiple Eria bulbs to connect, repeat the previous steps for each bulb, ensuring that you put each bulb into pairing mode individually.
Once you have successfully connected the Eria bulb to your Philips Hue system, you will be able to control and customize it alongside your other Hue bulbs using the app. You can adjust the brightness, color, and other settings according to your preferences and create dynamic lighting scenes to suit various occasions and moods.
If you encounter any connectivity issues or are unable to connect the Eria bulb to your Hue system, refer to the troubleshooting tips provided by both Philips Hue and Eria, or consult their respective support channels for assistance.
Once you have completed the connection process for all your Eria bulbs, you can proceed to the next step of customizing your lighting settings within your Philips Hue system to fully enjoy the enhanced lighting experience.
Step 4: Customize your lighting settings
After successfully connecting your Eria bulb to your Philips Hue system, you can now take advantage of the customization options available to create personalized lighting settings. Follow these steps to customize your lighting settings:
- Open the Philips Hue app: Launch the Philips Hue app on your smartphone or tablet. Ensure that your device is connected to the same Wi-Fi network as your Philips Hue bridge.
- Navigate to the bulb settings: In the app’s main menu or dashboard, locate the settings section for individual bulbs. This section may be labeled as “bulb settings,” “light settings,” or something similar.
- Adjust brightness and color: Within the bulb settings, you can adjust the brightness level of the Eria bulb, making it brighter or dimmer according to your preference. If you have a color bulb, you can also choose from a spectrum of colors and shades to create a specific ambiance.
- Create lighting scenes: One of the advantages of the Philips Hue system is the ability to create customized lighting scenes. Experiment with different combinations of colors, brightness levels, and effects to create scenes that suit different activities or moods, such as “Relax,” “Focus,” or “Party.”
- Set up schedules and timers: Take advantage of the scheduling feature in the Philips Hue app to automate your lighting. Set timers for your Eria bulb to turn on and off at specific times, allowing you to wake up to gentle lighting or come home to a well-lit environment.
- Explore additional features: Philips Hue offers various advanced features and integrations that can enhance your lighting experience. You can explore options like syncing your lighting with music, enabling geolocation-based triggers, or integrating with other smart home systems to unlock even more possibilities.
- Experiment and refine: Don’t be afraid to experiment and adjust your lighting settings based on your preferences and changing needs. Take the time to fine-tune your scenes, brightness levels, and color choices until you achieve the desired ambiance and atmosphere in your space. Remember that customization is key for creating the perfect lighting experience for your home.
By customizing your lighting settings, you can create a personalized and immersive environment in your home. Whether you want a bright and energetic ambiance for a morning workout or a warm and cozy atmosphere for a relaxing evening, the customization options provided by Philips Hue and your connected Eria bulb can help you achieve the desired effect.
Continue to explore the features and capabilities of your Philips Hue system to fully maximize the potential of your smart lighting setup. With the ability to control and customize your lighting settings at your fingertips, you can transform your living spaces to suit any occasion or mood.
Troubleshooting tips
While adding an Eria bulb to your Philips Hue system is typically a straightforward process, you may encounter some potential issues or challenges along the way. Here are some troubleshooting tips to help you resolve common problems:
- Ensure proper connectivity: Check that both your smartphone or tablet and the Philips Hue bridge are connected to the same Wi-Fi network. Inconsistent connectivity can prevent proper communication between the devices.
- Verify bulb compatibility: Ensure that the Eria bulb you are trying to connect is compatible with the Philips Hue system. Check the bulb’s specifications and compatibility information provided by both Eria and Philips Hue.
- Restart the Hue system: If you’re experiencing connectivity issues or the Eria bulb is not being detected, try restarting your Philips Hue system. Power off the Hue bridge, wait a few seconds, and then power it back on.
- Reset the Eria bulb: If the Eria bulb is not connecting or responding, try resetting it to its factory settings. Follow the instructions provided by Eria to perform a reset, and then attempt to connect it to the Hue system once again.
- Ensure proper bulb placement: Make sure that the Eria bulb is properly installed in the socket or fixture, and that it has a stable power source. Loose connections or malfunctioning sockets can result in connectivity issues.
- Check signal strength: If you have multiple Philips Hue bulbs and are experiencing connection problems with one particular bulb, check if it is located far away from the Hue bridge. Weak signal strength may require adding a Hue bulb closer to act as a signal booster.
- Update firmware and apps: Ensure that you have the latest firmware updates for your Philips Hue bridge and the most up-to-date version of the Philips Hue app. New updates often include bug fixes and improved compatibility.
- Consult manufacturer support: If you have followed all troubleshooting steps and are still encountering issues, reach out to the respective support teams of Eria and Philips Hue for further assistance. They can provide specific troubleshooting tips and guidance based on your setup and situation.
Remember, troubleshooting is a process of elimination, and it may take multiple attempts or steps to resolve the issue. Be patient and methodical in your approach, and don’t hesitate to seek support when needed.
By following these troubleshooting tips, you can overcome common obstacles and ensure a smooth experience while integrating the Eria bulb into your Philips Hue system.