
Types of Scanners
Scanners are versatile devices that play a crucial role in our digital world. They are used to convert physical documents and images into digital format, allowing us to store, share, and manipulate them with ease. There are different types of scanners available, each catering to specific needs and requirements. Let’s explore some of the most common types:
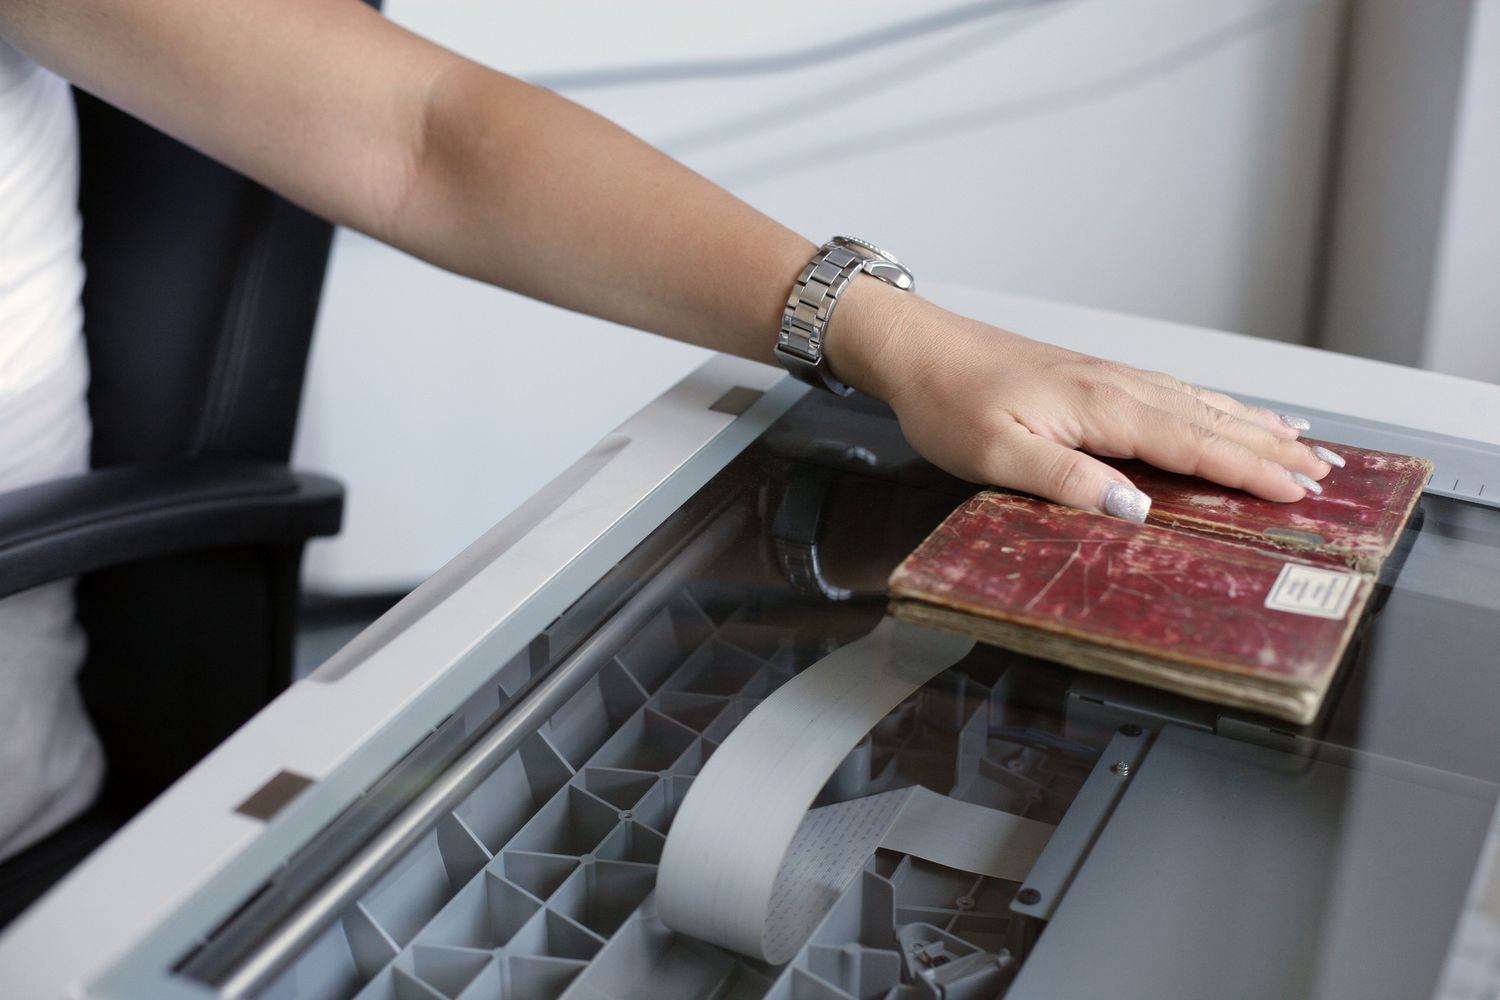
- Flatbed Scanners: These are the most common type of scanners, designed with a flat glass bed and a movable scanning head. They are ideal for scanning documents, photos, and even small objects. Flatbed scanners provide high-resolution scans and allow for easy scanning of thick materials like books.
- Sheet-fed Scanners: As the name suggests, sheet-fed scanners are designed to scan individual sheets of paper. They are compact in size and often used in offices for quickly scanning large volumes of documents. Sheet-fed scanners can be simplex (scanning one side of the page) or duplex (scanning both sides).
- Photo Scanners: These scanners are specifically designed for scanning photos and slides. They offer high-resolution scanning and produce excellent image quality. Photo scanners often come with specialized software for restoring old photos and enhancing color accuracy.
- Handheld Scanners: Handheld scanners are portable devices that allow for on-the-go scanning. They are compact, lightweight, and easy to use. Handheld scanners are particularly useful for scanning documents in tight spaces or while traveling.
- Drum Scanners: Drum scanners are high-end professional scanners used for capturing extraordinary levels of detail and color accuracy. They utilize a photoelectric cell and a rotating cylindrical drum to capture the image.
It’s important to consider your specific scanning needs when choosing a scanner. Factors to consider include the types of documents you will frequently scan, desired scan quality, and portability requirements. Now that you have an understanding of the different types of scanners available, you can make an informed decision that best suits your scanning needs.
Image Capture in Scanners
When it comes to scanning, the process of image capture is at the core of the scanner’s functionality. Understanding how image capture works in scanners can help you appreciate the technology behind these devices. Let’s dive into the details:
Scanners utilize a combination of hardware and software to capture images. The hardware consists of various components, including a light source, a sensor array, and scanning mechanisms. The software is responsible for controlling these hardware components and processing the captured images.
The image capture process starts with the light source illuminating the document or object being scanned. The light reflects off the surface and passes through a series of lenses and filters to ensure optimal image clarity and color accuracy. These lenses and filters help remove any imperfections or distortions in the captured image.
The reflected light then hits the sensor array, which is composed of tiny light-sensitive elements called pixels. Each pixel measures the intensity of light it receives and converts it into an electrical signal. The sensor array is typically a Charge-Coupled Device (CCD) or a Contact Image Sensor (CIS).
The electrical signals generated by the pixels are then amplified and converted into digital data by an Analog-to-Digital Converter (ADC). This digital data represents the image. The scanner software processes this data, applying algorithms to enhance the image quality, remove noise, adjust colors, and correct any distortions that may have occurred during the capture process.
Modern scanners often have advanced features for capturing images, such as Optical Character Recognition (OCR) for converting scanned text into editable digital text, and Automatic Document Feeders (ADFs) for quickly scanning multiple-page documents.
It’s worth noting that the image capture process varies slightly depending on the type of scanner. For example, flatbed scanners use a moving scanning head to capture the image, while sheet-fed scanners have a mechanism that moves the document over a stationary scanning head.
Now that you have a better understanding of how image capture works in scanners, you can appreciate the technology behind these devices. The combination of hardware and software ensures accurate and high-quality image reproduction, making scanners an essential tool for various industries and personal use.
Scanning Techniques and Sensors
Scanners employ different scanning techniques and sensors to capture and reproduce digital images. This section will explore some of the common scanning techniques and sensors used in scanners:
Contact Image Sensor (CIS): Contact Image Sensors are widely used in modern scanners, especially in portable and compact models. CIS technology uses an array of light-sensitive sensors placed close to the document being scanned. As the document moves past the sensors, they capture the image by measuring the amount of light reflected. CIS scanners are known for their energy efficiency, compact size, and affordable cost.
Charge-Coupled Device (CCD): CCD sensors were commonly used in scanners in the past, and they are still utilized in high-end professional scanners. CCD technology uses an array of tiny light-sensitive elements called photodiodes to capture the image. The photodiodes transfer charge between each other, hence the name “charge-coupled.” CCD scanners produce high-quality scans with accurate color reproduction and excellent dynamic range.
CMOS Sensor: Complementary Metal-Oxide-Semiconductor (CMOS) sensors are widely used in digital cameras and are increasingly being incorporated into scanners. CMOS sensors are similar to CCD sensors in terms of capturing light, but they have additional circuitry built onto each pixel. This allows for faster image capture and lower power consumption. CMOS sensors make scanners more affordable while still providing good image quality.
Single-Pass and Multi-Pass Scanning: Scanners employ either single-pass or multi-pass scanning techniques. In single-pass scanning, the document is scanned in one continuous pass. This technique is faster and less prone to misalignment errors. In contrast, multi-pass scanning involves scanning the document multiple times, typically from different angles. Multi-pass scanning can improve image quality by reducing artifacts and capturing more details, especially with darker or textured documents.
Line Sensor and Area Sensor: Scanners utilize different types of sensors to capture the image. Line sensors, as the name suggests, capture one line of the document at a time. These sensors are commonly used in high-speed document scanners. Area sensors, on the other hand, capture the entire image simultaneously. They are used in flatbed scanners and other scanners that require accurate reproduction of larger objects.
Understanding the scanning techniques and sensors used in scanners can help you make an informed choice when selecting a scanner based on your specific needs. Consider factors such as scanning speed, image quality, and portability to determine the most suitable scanner for your requirements.
Optical Resolution
Optical resolution is a crucial specification to consider when choosing a scanner as it determines the level of detail and clarity in the scanned image. It refers to the number of pixels or dots per inch (dpi) that a scanner can capture optically. Let’s delve into the details of optical resolution and its significance:
The higher the optical resolution, the more precise and detailed the scanned image will be. Scanners with higher resolution can capture finer details, sharp edges, and intricate textures, making them suitable for tasks that require high image fidelity, such as scanning photographs, artwork, and documents with small text.
Scanners typically have two resolution measurements: optical resolution and interpolated resolution. Optical resolution is the true optical capability of the scanner, while interpolated resolution is achieved through software manipulation and is not as accurate or reliable.
Optical resolution is determined by the scanner’s hardware components, particularly the sensor array. The sensor array is composed of light-sensitive pixels. The more pixels there are, the higher the optical resolution of the scanner. For example, a scanner with an optical resolution of 1200 dpi means that it can capture 1200 pixels per inch both horizontally and vertically.
When considering optical resolution, it’s important to assess your specific scanning needs. If you primarily scan text-based documents, a lower optical resolution, such as 300 dpi, may be sufficient. However, for more demanding tasks like scanning detailed graphics or high-quality images, a higher optical resolution, such as 4800 dpi or above, would be recommended.
It’s worth noting that higher optical resolutions result in larger file sizes and slower scanning speeds. Therefore, it’s important to strike a balance between resolution and practicality based on your intended usage.
Additionally, it’s essential to understand that optical resolution alone does not guarantee superior image quality. Other factors, such as the quality of the optics, the color depth of the scanner, and the image processing algorithms, also play a significant role in the overall image quality.
By considering the optical resolution alongside other important factors, such as scanning speed and document compatibility, you can make an informed decision when selecting a scanner that suits your specific needs. Whether it’s for personal or professional use, choosing a scanner with optimal optical resolution will ensure high-quality and visually appealing scanned images.
Color Depth
Color depth, also known as bit depth, is an important specification to consider when choosing a scanner as it determines the range of colors that can be captured and reproduced in a scanned image. Let’s explore the concept of color depth and its significance in scanners:
Color depth refers to the number of bits used to represent each pixel in an image. Each bit can represent a specific color or shade, and the more bits per pixel, the greater the number of colors that can be accurately reproduced. Common color depths in scanners are 24-bit, 48-bit, and 96-bit.
A 24-bit color depth is the standard for most consumer-grade scanners. It provides a total of 16.7 million colors, resulting in vibrant and true-to-life scanned images. The 24-bit color depth is suitable for most everyday scanning tasks, such as documents, photos, and other types of graphics.
For more demanding scanning tasks that require higher color accuracy and a wider color gamut, professional scanners offer higher color depths, such as 48-bit or 96-bit. These scanners can capture billions of colors and provide more precise color representation for tasks like professional photography, graphic design, and digital art.
It’s important to note that the capabilities of a scanner’s color depth are dependent on the software and hardware used for scanning. The scanner hardware must have the capability to capture the desired color depth, and the scanning software plays a critical role in accurately representing and displaying the colors in the scanned image.
When considering color depth, it’s essential to remember that the human eye can perceive only a limited range of colors. This means that while higher color depths may offer a wider range of colors, the difference may not be perceptible to the average viewer. The need for higher color depths depends on the specific requirements of your scanning tasks and the intended use of the scanned images.
It’s worth mentioning that the color depth of a scanner can also have an impact on the file size of scanned images. Images captured at higher color depths tend to have larger file sizes as they contain more color information. This can affect storage requirements and processing speeds.
By considering your specific scanning needs and the intended use of the scanned images, you can determine the appropriate color depth for your scanner. Whether you need accurate color representation for professional purposes or vibrant and lifelike images for personal use, choosing a scanner with the right color depth will ensure that your scanned images meet your expectations.
Bit Depth
Bit depth, also known as color depth, is a key technical specification to consider when choosing a scanner. It refers to the number of bits used to represent each pixel of an image, and it plays a crucial role in determining the level of detail, color accuracy, and dynamic range that can be captured and reproduced in the scanned image. Let’s explore the concept of bit depth and its significance:
Bit depth represents the number of shades or colors that can be assigned to each pixel in an image. It is typically expressed as either 8-bit, 16-bit, or 32-bit. A higher bit depth allows for a greater range of colors or shades, resulting in more accurate and realistic representations.
At an 8-bit depth, there are 256 shades available for each color channel (red, green, and blue) in an image. This results in a total of over 16 million possible colors. An 8-bit depth is commonly found in consumer-grade scanners and is suitable for most everyday scanning needs like documents and photographs.
For more professional or specialized applications that require a higher level of color accuracy and detail, such as graphic design, photo editing, or microscopy, a 16-bit or 32-bit bit depth is preferred. A 16-bit depth offers over 65 thousand shades per color channel, while a 32-bit depth provides over 4 billion shades, allowing for precise color gradations and smoother tonal transitions.
In addition to capturing a wider range of colors, a higher bit depth also enables the scanner to capture more shadow and highlight details, enhancing the dynamic range of the image. This is particularly useful for capturing and retaining details in dark or bright areas of a scanned document or image.
It is important to keep in mind that bit depth alone does not guarantee superior image quality. Other factors, such as the quality of the scanner’s sensors and optics, as well as the software algorithms used for image processing, also contribute to the overall image quality.
It’s worth noting that higher bit depths result in larger file sizes as they contain more color information for each pixel. This can impact storage requirements and processing speeds, particularly when working with large or high-resolution scanned images.
When considering the bit depth of a scanner, it’s essential to assess your specific scanning needs and the intended use of the scanned images. While higher bit depths offer more color fidelity and detail, they may not be necessary for all applications. It’s advisable to select a scanner with a bit depth that matches your requirements, ensuring that the resulting scanned images meet your expectations for color accuracy and detail.
The Scanning Process
The scanning process is the series of steps involved in capturing a physical document or image and converting it into a digital format. Understanding the scanning process will help you utilize your scanner effectively and achieve optimal results. Let’s explore the key steps involved in the scanning process:
1. Preparation: Before starting the scanning process, ensure that the document or image you want to scan is properly prepared. Remove any staples, clips, or folds that might hinder the scanning process. Clean the scanning surface and the document to avoid any dust or debris that could affect the scan quality.
2. Placement: Place the document or image to be scanned on the scanner bed or in the document feeder, depending on the type of scanner you are using. Align the document carefully, ensuring that it is straight and in the desired orientation (portrait or landscape).
3. Settings Configuration: Open the scanning software on your computer or the scanner’s control panel and adjust the settings according to your requirements. These settings may include scan format (e.g., TIFF, JPEG, PDF), resolution, color depth, file name, and destination folder.
4. Preview: Some scanning software or scanners offer a preview option. This allows you to see a preview of the scanned image before the actual scan. Use this feature to make any necessary adjustments, such as cropping or rotating the image, to achieve the desired result.
5. Scanning: Once you are satisfied with the preview, initiate the scanning process. The scanner will start capturing the image according to the specified settings. The scanning mechanism moves across the document, capturing the image line by line or in one pass, depending on the type of scanner.
6. Image Enhancement: After the scan is complete, the scanning software may provide options for image enhancement. These features can automatically adjust brightness, contrast, and color levels, remove red-eye, and perform other adjustments to enhance the quality of the scanned image. You can also make manual adjustments if needed.
7. Saving and Organizing: Once you are satisfied with the scanned image and any enhancement adjustments, save it to your preferred file format (e.g., JPEG, PDF) and choose a location to store the file. Consider organizing your scanned files into folders or using file naming conventions for easy retrieval in the future.
8. Post-Scanning Maintenance: After scanning, ensure that the scanner is clean and properly maintained. Regularly clean the glass bed, remove any paper debris, and calibrate the scanner if necessary. This will help maintain the scanner’s performance and ensure high-quality scans in the future.
The scanning process may vary slightly depending on the type of scanner and scanning software you are using. Familiarize yourself with the specific instructions provided by the manufacturer to get the best results from your scanner. With practice and attention to detail, you will become proficient in the scanning process and be able to quickly and efficiently convert physical documents and images into digital format.
Pre-scan and Preview
Pre-scanning and previewing are essential steps in the scanning process that allow you to assess and adjust the settings before performing the actual scan. These steps help you ensure optimal scanning results and save time and resources. Let’s explore the importance and functionality of pre-scan and preview:
Pre-scan: Pre-scanning is the initial scan that captures a low-resolution preview of the document or image. It allows you to assess the positioning and overall appearance of the scanned item without generating a full-resolution image. Pre-scanning helps you make adjustments to achieve the desired scan composition and clarity.
During the pre-scanning stage, you can review the scanned image on your computer screen or the scanner’s display panel. This gives you the opportunity to detect any potential issues, such as misalignment, skewing, or unwanted artifacts. It also provides an opportunity to evaluate the overall quality of the scan, including factors like brightness, contrast, and color accuracy.
Preview: Previewing is an advanced feature offered by many scanning software. It allows you to see a higher-resolution and more detailed representation of the scanned image before proceeding with the final scan. The preview feature usually provides additional tools for cropping, rotating, or adjusting the image parameters to achieve the desired result.
Previewing offers a valuable opportunity to make fine-tuned adjustments to the scan settings. You can modify image parameters like brightness, contrast, saturation, and sharpness to ensure the best representation of the original document or image. Additionally, cropping allows you to select and isolate specific areas of interest within the scanned item.
By utilizing the pre-scan and preview features, you can avoid unnecessary re-scans and potential waste of time and resources. These features let you assess the scan quality in advance and make adjustments to optimize the final scan result.
While pre-scanning and previewing are beneficial, it’s important to note that the displayed preview might differ slightly from the actual scanned image due to factors like color calibration and screen calibration. However, by making relative adjustments during the preview stage, you can still achieve accurate and visually pleasing scans.
Take advantage of the pre-scan and preview capabilities provided by your scanning software or scanner’s control panel. Familiarize yourself with these features to streamline your scanning workflow, minimize errors, and produce high-quality scanned documents and images.
Auto-cropping and Image Enhancement
Auto-cropping and image enhancement are valuable features offered by scanning software that help optimize the appearance and quality of scanned documents and images. These features automate certain adjustments, saving time and improving the overall scanning experience. Let’s delve into the functionalities and benefits of auto-cropping and image enhancement:
Auto-cropping: Auto-cropping is a feature that automatically detects the boundaries of a document or image and removes any unnecessary background. This helps eliminate unwanted areas and focuses on the main content, ensuring a clean and professional-looking scan. Auto-cropping is particularly useful when dealing with multiple documents or images in a single scan, as it streamlines the process and saves manual cropping time.
The auto-cropping feature utilizes advanced algorithms to identify the edges of the document or image and perfectly trim the scanned image to the desired size. This not only helps improve the aesthetics of the scan but also reduces file size by removing unnecessary white space.
Image Enhancement: Image enhancement features help improve the visual quality and readability of scanned documents and images. These features automatically adjust various image parameters to optimize brightness, contrast, sharpness, and color accuracy. The goal is to enhance the overall appearance and legibility of the scanned content while preserving its integrity.
Image enhancement algorithms analyze the scanned image and make adjustments to achieve the best possible result. They can compensate for underexposed or overexposed areas, remove noise or artifacts, correct color imbalances, and improve text clarity. In some cases, the software may provide manual adjustment options for more precise control over the enhancement settings.
By utilizing auto-cropping and image enhancement features, you can significantly enhance the quality and appearance of your scanned documents and images. These automated adjustments save time and effort, especially when dealing with large volumes of scanned material. Moreover, they help create professional-looking scans suitable for various purposes, including archiving, presentations, and online sharing.
It’s important to note that while auto-cropping and image enhancement features offer convenience and improvements, they are not infallible. The results may vary depending on the complexity of the document or image and the specific algorithms used by the scanning software. It’s always recommended to review and make manual adjustments if necessary to ensure the desired outcome.
Be sure to explore these features in your scanning software to harness their benefits. Familiarize yourself with their functionalities and experiment with different settings to find the optimal balance between automated adjustments and manual control. Ultimately, auto-cropping and image enhancement can greatly enhance the visual appeal and readability of your scanned documents and images.
Scanning Speeds and Duplex Scanning
Scanning speed is an important consideration when selecting a scanner, especially if you have high-volume scanning needs. Additionally, the availability of duplex scanning can further enhance productivity and streamline the scanning process. Let’s explore the significance of scanning speeds and the benefits of duplex scanning:
Scanning Speeds: Scanning speed refers to the rate at which a scanner can capture and process scanned images. It is typically measured in pages per minute (ppm) or images per minute (ipm) for duplex scanning. The scanning speed can vary significantly depending on the type of scanner and the scanning settings selected.
The scanning speed can impact workflow efficiency, particularly when dealing with large batches of documents or images. A higher scanning speed allows for quicker processing and reduces the overall time required for scanning tasks. However, it’s important to note that higher scanning speeds often come with higher price points and may require more powerful hardware.
When choosing a scanner, consider your specific scanning needs and the volume of documents or images you will typically handle. If you regularly scan large quantities of materials, investing in a scanner with a higher scanning speed can significantly improve productivity. On the other hand, if you have modest scanning requirements, a scanner with a lower scanning speed may suffice.
Duplex Scanning: Duplex scanning is the capability to scan both sides of a document in a single pass. This feature eliminates the need to manually reinsert or flip documents to scan the reverse side, saving time and effort. Duplex scanning is particularly beneficial for tasks involving double-sided documents, such as contracts, invoices, and brochures.
With duplex scanning, you can achieve faster scanning rates and a streamlined workflow. It also helps maintain the original order and orientation of pages within a document, enhancing the overall efficiency and accuracy of document processing.
Duplex scanning is available in different configurations. Some scanners have built-in dual scanning elements that capture images from both sides simultaneously. Others utilize a scanning mechanism that flips the document automatically to scan the reverse side. Additionally, scanning software often includes options for duplex scanning and automatically arranges the scanned images in the correct sequence.
When considering duplex scanning, evaluate the frequency and volume of double-sided documents you encounter. If your scanning needs frequently involve two-sided material, investing in a scanner with duplex scanning capabilities can significantly expedite the process and improve productivity.
Overall, scanning speeds and duplex scanning capabilities are valuable features to consider when selecting a scanner. Assess your scanning requirements and determine the optimal balance between scanning speed, duplex scanning functionality, and budget constraints. By doing so, you can choose a scanner that optimizes efficiency and streamlines your scanning workflow.
Scanner Interfaces
The interface of a scanner is the means through which it connects and communicates with a computer or other devices. The scanner interface plays a crucial role in the speed, convenience, and compatibility of scanning operations. Let’s explore some common scanner interfaces and their advantages and considerations:
USB (Universal Serial Bus): USB is the most commonly used interface for scanners today. USB offers high-speed data transfer rates and is widely supported by computers and other devices. USB connections are typically plug-and-play, meaning they are easy to set up and require no special drivers or software. USB interfaces come in different versions, including USB 2.0, USB 3.0, and the newer USB-C, with each version offering faster data transfer speeds.
Ethernet: Ethernet interfaces are commonly found in network scanners that can be shared among multiple users. Ethernet connectivity allows for scanning over a local area network (LAN), enabling users to remotely access and control the scanner. This is particularly useful in office settings where multiple users need simultaneous access to the scanning functionality.
Wireless (Wi-Fi or Bluetooth): Some scanners feature built-in wireless capabilities, either through Wi-Fi or Bluetooth technology. Wireless scanners offer the flexibility of scanning without the need for a physical connection to the computer. These scanners can be accessed and controlled from different devices within the wireless network range. Wireless scanning is particularly convenient for mobile devices like laptops, tablets, and smartphones.
FireWire (IEEE 1394): FireWire is an interface that provides fast data transfer rates and is commonly used in professional-grade and high-performance scanners. While FireWire was popular in the past, its use has declined with the emergence of USB and other interfaces. However, if you have a scanner or computer that supports FireWire, it can still be a viable option for high-speed scanning operations.
SCSI (Small Computer System Interface): SCSI is an older interface that was commonly used for high-performance scanners. SCSI interfaces offer fast data transfer rates and reliable connectivity, making them suitable for professional and high-volume scanning applications. However, SCSI requires specialized hardware and drivers, and compatibility with newer computer systems can be limited.
When choosing a scanner interface, consider the compatibility and availability of the interface on your computer or other devices. USB is the most widespread and versatile interface, suitable for most scanning needs. If you require network sharing capabilities, an Ethernet interface may be preferable. Wireless interfaces are advantageous for flexibility and mobility, while FireWire and SCSI interfaces are more suitable for specific professional requirements.
Additionally, it’s important to ensure that the scanner interface matches the capabilities of your computer or device. If your computer does not have a compatible interface, you may need to consider using an adapter or upgrading your hardware to support the desired interface.
By understanding the advantages and considerations of different scanner interfaces, you can select a scanner that seamlessly integrates with your existing setup and provides the connectivity and convenience required for your scanning needs.
Document Feeders and Flatbed Scanners
Document feeders and flatbed scanners are two common scanning mechanisms used in scanners. Each offers different advantages and features, catering to specific scanning requirements. Let’s explore the functionality and benefits of document feeders and flatbed scanners:
Document Feeders: Document feeders, also known as Automatic Document Feeders (ADFs), are commonly found in scanners designed for high-volume document scanning. A document feeder is a tray or mechanism that automatically feeds a stack of documents into the scanner for consecutive scanning. It eliminates the need for manually placing individual pages, saving time and effort.
Document feeders can handle a large volume of documents, typically ranging from 20 to 100 or more pages at a time. They are ideal for businesses and offices where there is a constant need to process large numbers of documents, such as contracts, invoices, and reports. Document feeders can be either simplex, scanning one side of the page, or duplex, scanning both sides.
The speed at which documents are fed through the document feeder depends on the scanner model and the settings chosen. Document feeders often come with features like automatic double-feed detection and paper size detection, ensuring efficient and accurate scanning even with varying document sizes and types.
Flatbed Scanners: Flatbed scanners are the most common type of scanner and are widely used for various scanning tasks. They consist of a flat glass bed and a movable scanning head. Flatbed scanners allow you to position the document or object directly on the glass surface, providing versatility and the ability to scan various materials, including documents, photos, books, and even 3D objects.
Flatbed scanners offer high-resolution scanning capabilities and produce detailed and accurate scans. The flatbed design allows for precise alignment and the ability to capture fine details, ensuring the best possible image quality. Flatbed scanners are well-suited for scanning delicate or valuable documents, as they do not require automatic feeding and provide more control over the scanning process.
With flatbed scanners, you have the flexibility to manually adjust the positioning, size, and orientation of the items being scanned. The scanning process can be paused or resumed as needed, making it convenient for scanning irregularly shaped or delicate materials.
While flatbed scanners are generally slower than document feeders, they offer the advantage of versatility. They are suitable for a wide range of scanning tasks, from single-page documents to bulky objects. Flatbed scanners are commonly used in home offices, creative environments, and for personal scanning needs.
When choosing between a document feeder and a flatbed scanner, consider your specific scanning requirements. If you regularly scan large volumes of documents, a scanner with a document feeder will greatly improve productivity. For versatility and the ability to scan various materials, a flatbed scanner is the ideal choice.
Some scanners offer both document feeder and flatbed scanning capabilities, providing the best of both worlds. This allows you to scan large volumes of documents efficiently while having the flexibility of a flatbed scanner when needed.
Understanding the functionality and benefits of document feeders and flatbed scanners will help you select the most suitable scanner for your scanning needs, whether it’s for home, office, or creative use.
Portable Scanners
Portable scanners are compact and lightweight devices that offer convenient scanning on the go. These scanners are designed for users who need the flexibility to scan documents, receipts, photos, and other materials outside of a traditional office setting. Let’s explore the features and advantages of portable scanners:
Portability: The key advantage of portable scanners is their portability. They are compact in size and often lightweight, allowing users to easily carry them in a bag or briefcase. Whether you’re working remotely, traveling, or attending meetings, portable scanners give you the ability to digitize documents and images wherever you are. They are particularly useful for professionals like sales representatives, researchers, and students who frequently need to scan documents on the go.
Scanning Technology: Portable scanners utilize different scanning technologies, including Contact Image Sensor (CIS) or manual scanning with a built-in scanner wand. CIS technology enables high-quality scans while keeping the device compact and energy-efficient. With a scanner wand, the user manually moves the scanner over the document, capturing the image. This provides versatility in scanning larger or irregularly shaped items.
Battery-powered: Portable scanners are often battery-powered or offer the option to run on rechargeable batteries. This enables uninterrupted scanning without the need for a power outlet, making them ideal for situations where access to electricity may be limited or unavailable. Battery power enhances portability and allows for scanning sessions in remote locations or during travel.
Connectivity: Portable scanners typically offer various connectivity options to transfer scanned images to a computer or mobile device, such as USB, Wi-Fi, or Bluetooth. Some portable scanners have built-in memory or memory card slots to store the scanned images directly. These connectivity options offer flexibility in transferring and managing scanned files based on your specific needs and workflow.
Scanning Capabilities: Despite their compact size, portable scanners can offer impressive scanning capabilities. They often provide features like color scanning, adjustable resolution, and the ability to scan both single-sided and double-sided documents with duplex scanning. While portable scanners may not match the speed and advanced features of larger desktop scanners, they still offer convenience and functionality for various scanning tasks.
User-friendly Operation: Portable scanners are designed for ease of use and typically come with user-friendly interfaces and intuitive controls. They often offer pre-configured scanning settings, auto-cropping, and image enhancement options to streamline the scanning process. The scanning software provided with portable scanners is usually straightforward and accessible, making it easy for users of all levels of experience.
Portable scanners are a convenient solution for those who require scanning flexibility and mobility. They offer the ability to digitize documents, receipts, and other materials while on the move, without the need for a dedicated office setup. Consider the features, scanning capabilities, and connectivity options available in portable scanners to find the one that best suits your portable scanning needs.
Scanner Software and Drivers
Scanner software and drivers play a crucial role in the functionality and performance of a scanner. They serve as the interface between the scanner and the computer, enabling users to control scanning settings, process scanned images, and manage scanning tasks. Let’s explore the importance of scanner software and drivers:
Scanner Software: Scanner software is the application or suite of programs provided by the scanner manufacturer to control and manage the scanning process. Scanner software offers a range of features and settings, allowing users to optimize scanning parameters, such as resolution, color depth, file format, and image enhancement options.
The software often includes additional functionalities, such as OCR (Optical Character Recognition) for converting scanned text into editable digital text, batch scanning for processing multiple documents at once, and direct integration with email or cloud storage services for easy file sharing and storage. Some scanner software also provides advanced features like barcode recognition and automatic document sorting.
Additionally, scanner software allows users to preview scanned images, make manual adjustments, and apply post-processing enhancements to improve image quality and readability. It’s essential to regularly update scanner software to take advantage of the latest improvements and features provided by the manufacturer.
Scanner Drivers: Scanner drivers are software programs that enable the communication between the scanner hardware and the computer’s operating system. They act as a bridge, translating the commands and data between the scanner and the computer. Scanner drivers allow the operating system to recognize the scanner and utilize its features and functionality.
Scanner drivers are crucial for the proper and efficient operation of the scanner. They ensure compatibility, enable various scanning modes (such as flatbed or automatic document feeder), and provide access to the scanner’s advanced features. It’s important to install the correct scanner drivers specific to the scanner model and the operating system of the computer.
Scanner drivers are typically provided by the scanner manufacturer and can be downloaded from their website. It’s recommended to regularly check for driver updates to ensure compatibility with new operating systems and to benefit from any bug fixes or performance enhancements provided by the manufacturer.
Both scanner software and drivers work together to optimize the scanning process and ensure seamless integration between the scanner and the computer. They enhance user experience, improve scan quality, enable advanced functionality, and provide efficient control over the scanning workflow.
When selecting a scanner, it is important to consider the availability and functionality of the accompanying software and drivers. Ensure that the software and drivers are compatible with your computer’s operating system and offer the features and capabilities necessary for your scanning needs. By doing so, you can make the most of your scanner and achieve optimal scanning results.
Scanning Tips and Best Practices
Scanning documents and images can be a straightforward process, but following some scanning tips and best practices can greatly enhance the quality and efficiency of the scanned results. Whether you’re a beginner or an experienced scanner user, consider these tips to achieve optimal scanning outcomes:
1. Clean your scanner: Keep the scanner glass clean and free from dust, fingerprints, or smudges. Use a microfiber cloth or an appropriate cleaning solution to ensure clear and distortion-free scans.
2. Adjust resolution and color depth: Consider the desired quality and file size of the scanned images. Higher resolution and color depth may result in better image quality but can increase file sizes. Choose settings that balance your requirements for clarity and storage space.
3. Properly align the document: Ensure that the document is aligned properly on the scanner bed or within the document feeder. Straighten the document to prevent skewed scans.
4. Remove staples and clips: Remove any staples, paper clips, or other obstructions that might damage the scanner or interfere with the scanning process. Ensure that the documents are free from folds or wrinkles.
5. Configure scanning settings: Familiarize yourself with the scanning software or scanner control panel settings. Adjust settings like file format, resolution, color mode, and image enhancement options to suit the specific requirements of your scanning task.
6. Utilize auto-cropping and image enhancement: Take advantage of auto-cropping and image enhancement features offered by the scanner software to optimize the appearance and legibility of scanned documents and images.
7. Preview before final scan: Always preview the scanned image before performing the final scan. Ensure that the document is positioned correctly and the scan quality meets your expectations. Adjust as needed before proceeding.
8. Organize and name scanned files: Develop a consistent file naming convention and organize your scanned files into folders for easy retrieval. This will help you keep track of your scanned documents and maintain an organized digital filing system.
9. Regularly update scanner drivers and software: Keep your scanner drivers and software up to date. Regularly check the manufacturer’s website for updates and enhancements that can improve the stability, compatibility, and performance of your scanner.
10. Practice good document management: Consider implementing a reliable document management system to store, categorize, and retrieve your scanned documents efficiently. This can include using keywords, tags, or metadata to facilitate quick and accurate searching.
By following these scanning tips and best practices, you can ensure high-quality scans and streamline your scanning workflow. Take the time to familiarize yourself with your scanner’s capabilities, utilize the available features, and maintain proper scanning practices. With attention to detail and good scanning habits, you can maximize the benefits of your scanner and create digital copies that meet your needs.