
Choosing the Right Scanner
When it comes to choosing a scanner, there are several factors to consider to ensure you get the right one for your needs. Here are some key points to keep in mind:
1. Scanner Type: There are two main types of scanners: Flatbed scanners and sheet-fed scanners. Flatbed scanners are the most common and are ideal for scanning documents, photos, and other flat objects. Sheet-fed scanners, on the other hand, are designed for quickly scanning multiple pages at once.
2. Resolution: The resolution determines the level of detail and clarity in the scanned image. Higher resolution scanners are ideal for tasks that require precise details, such as scanning photos or documents with small text.
3. Connectivity: Consider how the scanner will connect to your computer. USB is the most common and reliable option, but some scanners also offer wireless or network connectivity for added convenience.
4. Scanner Size: Think about how much space you have available for the scanner. If you have limited desk space, a compact or portable scanner might be a better choice.
5. Scanning Speed: If you have a large volume of documents to scan regularly, look for a scanner with a higher scanning speed to save you time and improve productivity.
6. Compatibility: Ensure that the scanner you choose is compatible with your operating system. Most scanners are compatible with both Windows and Mac, but it’s always best to double-check.
7. Budget: Set a budget for your scanner purchase and look for a model that fits within your price range. Compare features and reviews to get the best value for your money.
By considering these factors, you can make an informed decision and choose a scanner that is perfect for your specific needs. Whether you need to scan documents for work, digitize photos, or streamline your paperwork, finding the right scanner will make the process quick and hassle-free.
Installing the Scanner Software
After acquiring your scanner, the next step is to install the necessary software on your computer for it to function properly. Follow these steps to ensure a smooth installation process:
1. Check System Requirements: Verify that your computer meets the minimum system requirements for the scanner software. This typically includes the operating system version, available storage space, and RAM requirements. Refer to the scanner’s user manual or the manufacturer’s website for specific details.
2. Download or Insert Software CD: Depending on the scanner, you may need to download the software from the manufacturer’s website or use the included installation CD. If downloading, ensure you download the correct software version for your specific scanner model and operating system.
3. Run the Software Installation: Locate the downloaded software file or insert the installation CD into your computer’s CD drive. Follow the on-screen prompts to initiate the installation process. Pay close attention to any options or settings that may need to be configured during the installation.
4. Connect the Scanner: Once the software installation is complete, connect the scanner to your computer using the provided USB cable or the recommended connection method. Ensure the scanner is properly connected and powered on.
5. Software Setup: Launch the scanner software and complete any initial setup steps. This may include selecting your preferred language, configuring scanning settings, and setting up shortcuts or scan destinations. Take the time to customize these settings according to your preferences.
6. Test the Scanner: To ensure the software installation was successful, perform a test scan. Place a document or photo on the scanner bed, and use the software interface to initiate the scanning process. Check if the scanned image appears on your computer screen and verify that all features and functions are working as expected.
7. Update Software: It’s essential to keep your scanner software up to date. Check the manufacturer’s website regularly for software updates or enable automatic updates if available. Updated software often includes bug fixes, performance improvements, and compatibility enhancements.
By following these steps, you can easily install the scanner software on your computer and be ready to start scanning documents, photos, or other materials. If you encounter any issues during the installation, refer to the user manual or contact the manufacturer’s customer support for assistance.
Connecting the Scanner to Your Computer
Once you have installed the scanner software, the next step is to connect your scanner to your computer. Here are the steps to follow to ensure a successful connection:
1. Choose a Port: Determine which port you will use to connect your scanner to your computer. Most scanners use a USB connection, so ensure that you have an available USB port on your computer. If your scanner has alternative connection options like Ethernet or Wi-Fi, make sure your computer supports those as well.
2. Power on the Scanner: Before connecting the scanner, make sure it is powered on. Some scanners have a power button on the front or side, while others are powered directly through the USB connection.
3. Connect the USB Cable: Take the USB cable that came with the scanner and connect one end to the USB port on the scanner and the other end to an available USB port on your computer. Ensure the connection is secure on both ends.
4. Install Device Drivers: In most cases, your computer will automatically recognize the scanner and install the necessary device drivers. If prompted, follow the on-screen instructions to complete the installation. If your scanner requires specific drivers, refer to the manufacturer’s instructions for proper installation.
5. Check Connection: Once the device drivers are installed, check the connection between the scanner and your computer. Look for any alerts or notifications indicating that the scanner has been recognized. You can also go to the device manager on your computer to ensure the scanner is listed under the appropriate category.
6. Test the Connection: To ensure the scanner is properly connected, launch the scanner software and perform a test scan. Place a document or photo on the scanner bed and follow the software’s instructions to initiate the scanning process. If the scanned image appears on your computer and all features are working correctly, it means the connection is successful.
7. Consider Additional Steps: Depending on your scanner and computer, you may need to perform additional steps for optimal performance. This can include adjusting power settings, configuring network connections, or enabling specific scanner features. Refer to the user manual or manufacturer’s website for detailed instructions.
By following these steps, you can easily connect your scanner to your computer and begin scanning your documents, photos, and other materials. If you encounter any issues during the connection process, consult the user manual or contact the manufacturer’s customer support for assistance.
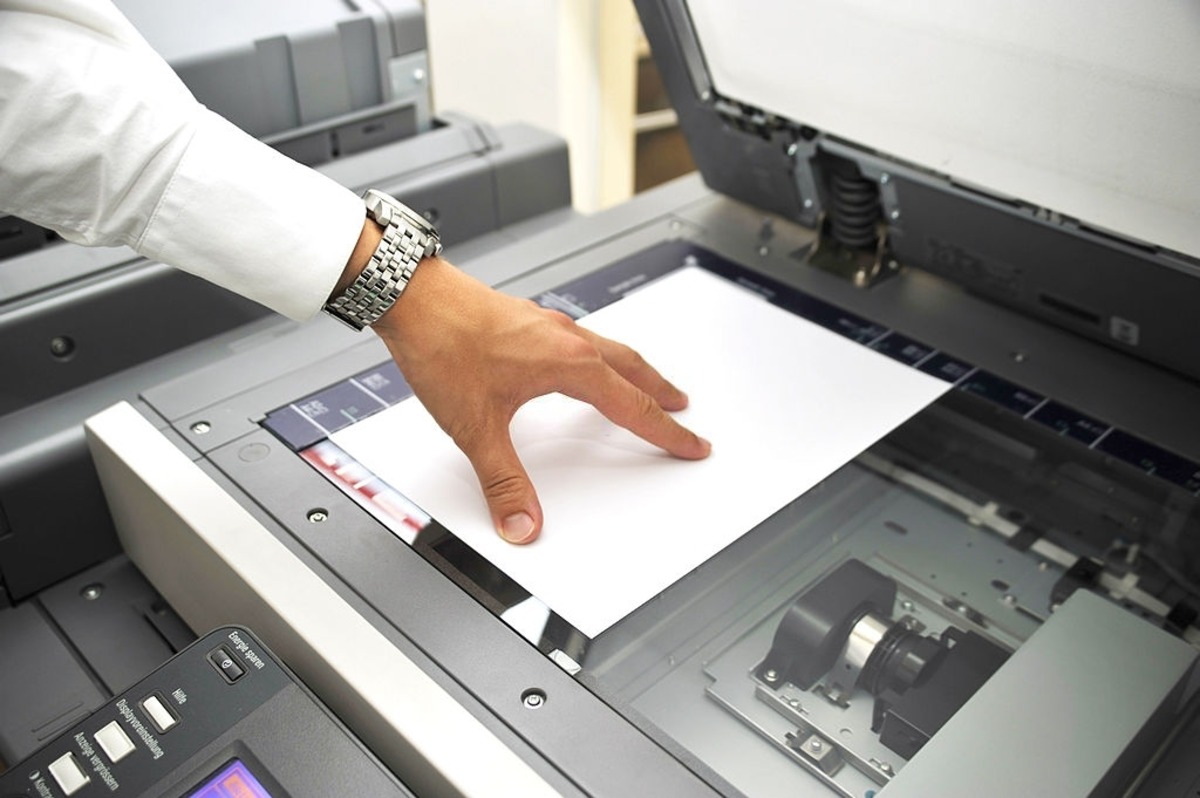
Preparing Your Documents for Scanning
Before you start scanning your documents, it’s important to prepare them properly to ensure accurate and high-quality scans. Follow these steps to ensure optimal results:
1. Remove Staples, Paper Clips, and Bindings: Before placing your documents on the scanner bed, remove any staples, paper clips, or bindings. These can cause damage to the scanner or create shadows or distortions in the scanned images.
2. Straighten and Align: Ensure that your documents are properly aligned and straightened before scanning them. Crooked or skewed documents can result in misaligned scans. Straighten any folded or crumpled pages to ensure they lay flat on the scanner bed.
3. Remove Dust and Debris: Clean your documents to remove any dust or debris that may be present. Use a soft, lint-free cloth or a document cleaning pad to gently wipe the surfaces of your documents. This helps to prevent dust particles from affecting the scan quality.
4. Organize and Group: If you have multiple documents to scan, organize them in the desired order before starting the scanning process. Group related documents together to make it easier to locate and organize the scans later on.
5. Consider Sheet Feeding: If your scanner has a sheet-fed option, you can save time by scanning multiple pages at once. Ensure that the documents are properly stacked and aligned within the sheet feeder to avoid jams or misfeeds.
6. Check for Confidential Information: Before scanning sensitive or confidential documents, review them to ensure that no private or confidential information is visible. If necessary, use a document black-out tool or cover sensitive information with a removable sticky note.
7. Consider Document Size: Different scanners have different scanning areas and document size limitations. Pay attention to the maximum scanning size and adjust the document accordingly. For larger documents, you may need to scan them in multiple parts and stitch them together later using appropriate software.
By following these steps, you can ensure that your documents are properly prepared for scanning. Taking the time to prepare your documents correctly will result in high-quality scans, making it easier to archive, share, or digitize your important paperwork.
Basic Scanning Settings
When it comes to scanning documents, understanding and adjusting the basic scanning settings can help you achieve the desired results. Here are some important settings to consider:
1. Resolution: The resolution, measured in dots per inch (dpi), determines the level of detail and clarity in the scanned image. Higher resolutions are ideal for tasks that require precise details, such as scanning photos or documents with small text. Lower resolutions are suitable for basic document scanning. Choose a resolution based on your specific needs and the intended use of the scanned documents.
2. Color Mode: Depending on the type of document being scanned, you can select the appropriate color mode. Common color modes include color, grayscale, and black and white. Color mode is ideal for photos and documents with colored elements, grayscale mode is suitable for black and white images or documents with varying shades, and black and white mode is ideal for text-based documents for improved clarity and reduced file size.
3. File Format: The choice of file format determines how the scanned document is saved. Popular file formats include JPEG, TIFF, and PDF. JPEG is widely used for photos and images, TIFF is suitable for high-quality scans that require lossless compression, and PDF is ideal for documents that need to be easily shared or printed. Choose the file format based on your requirements for image quality, file size, and compatibility.
4. Scan Area: Most scanners allow you to adjust the scan area to capture only a specific portion of the document. This feature is useful when you have multiple documents on a single page or want to crop out unnecessary parts of the image. Use the scanner software’s cropping or selection tool to define the desired scan area accurately.
5. Brightness and Contrast: Adjusting the brightness and contrast settings can help enhance the visibility and legibility of scanned documents. If a document appears too dark or washed out, adjusting the brightness can improve the clarity. Similarly, adjusting the contrast can help make text or images stand out. Experiment with these settings to find the optimal balance for your specific documents.
6. Preview Scans: Before scanning the entire document, take advantage of the preview feature in your scanner software. It allows you to see a preview of the scanned image and make any necessary adjustments to settings or scan area before finalizing the scan. This can help you avoid unnecessary rescans and ensure the best output quality.
7. Scan Naming and Saving: Determine a consistent naming convention and file-saving location for your scanned documents. This will make it easier to locate and manage your files in the future. Consider including relevant information, such as date or document type, in the file name to facilitate organization and retrieval.
By understanding and adjusting these basic scanning settings, you can ensure that your scanned documents meet your specific requirements. Take the time to experiment with different settings and review the scanned output to achieve the best results.
Advanced Scanning Settings
For more control and customization over your scanned documents, exploring the advanced scanning settings can greatly enhance your scanning experience. Here are some key advanced settings to consider:
1. OCR (Optical Character Recognition): OCR is a powerful feature that allows your scanner to convert scanned text documents into editable and searchable digital text. By enabling OCR, you can extract text from scanned documents and make it easier to modify or search for specific information within the document.
2. Descreening: If you frequently scan materials like magazines or printed documents, descreening is a useful feature. It helps to minimize the moiré pattern artifacts that can occur when scanning printed materials. Enable the descreening option in your scanning software to achieve clearer and more professional-looking scans.
3. Auto Color Detection: Some advanced scanners offer an auto color detection feature that automatically analyzes the scanned document and determines the appropriate color mode. This feature is particularly useful when scanning mixed documents with both black and white and color elements. The scanner will automatically switch between color, grayscale, and black and white modes to optimize the output quality.
4. Double-Sided Scanning: If your scanner has a duplex or automatic document feeder (ADF), you can enable double-sided scanning. This allows you to scan both sides of a document in a single pass, saving time and effort. Check your scanner’s user manual or software settings to enable the double-sided scanning feature.
5. Custom Scan Profiles: Many scanning software applications allow you to create and save custom scan profiles. These profiles store your preferred settings, such as resolution, color mode, file format, and more. By creating and using custom scan profiles, you can streamline your scanning process and quickly apply your preferred settings to different types of documents.
6. Image Correction: Advanced scanners often come with built-in image correction features. These include options to adjust and improve image quality, such as removing dust and scratches, reducing noise, sharpening blurry images, and enhancing color balance. Experiment with these features to enhance the overall appearance of your scanned documents.
7. Batch Scanning: If you have a large number of documents to scan, batch scanning is a convenient feature. It allows you to load multiple documents into the scanner’s document feeder or tray, and the scanner will automatically scan each document sequentially. This can save significant time and effort, especially when dealing with multiple-page documents or large scanning projects.
By exploring and utilizing these advanced scanning settings, you can personalize and optimize your scanning workflow. Take advantage of these features to achieve the best possible scan quality and streamline your document digitization process.
Scanning Images
When scanning images, whether it’s old family photos or artwork, certain considerations can help preserve the quality and essence of the original. Here are some essential steps to keep in mind when scanning images:
1. Clean the Image: Before scanning, ensure that the image is clean and free from dirt, dust, or fingerprints. Use a lint-free cloth or compressed air to gently remove any debris or particles that may be present. Cleaning the image beforehand helps in achieving a clearer and more accurate scan.
2. Set the Resolution: The resolution plays a crucial role in scanning images. For high-quality scans, opt for a resolution of at least 300 dpi (dots per inch), which preserves finer details and allows for better enlargements. However, if the image is intended for online display or smaller prints, a lower resolution may be sufficient.
3. Choose the Color Mode: Select the appropriate color mode based on the image type and desired outcome. For color photos or artwork, use the RGB color mode. For black and white images or line drawings, switch to grayscale mode. Adjusting the color mode helps to maintain the integrity and accuracy of the original image.
4. Adjust Brightness and Contrast: Use the brightness and contrast settings to enhance the appearance of the scanned image. Experiment with different levels to achieve a balance that accurately represents the original image. Adjusting brightness can increase visibility, while tweaking contrast can add depth and clarity to the scanned image.
5. Consider Image Formats: Select the appropriate image file format for saving the scanned image. JPEG is commonly used for photographs due to its compressed file size and good image quality. If you require lossless quality or plan on post-processing the image, consider using TIFF format. PNG is suitable for digital artwork or images with transparency. Choose the format that best suits your purpose and intended use of the image.
6. Use Preview and Editing Tools: Utilize the preview feature provided by the scanning software to check the image quality and make any necessary adjustments before finalizing the scan. Many scanning software applications also provide basic editing tools like cropping, rotating, or straightening the image. Take advantage of these tools to fine-tune the scanned image as needed.
7. Handle Fragile or Delicate Images with Care: If scanning delicate or fragile images such as old photographs or valuable artwork, extra caution is required. Ensure the scanner’s surface is clean and free from debris. Place a protective cover or glassine paper over the image to avoid direct contact with the scanner glass. Gentle handling is crucial to prevent any damage or smudging during the scanning process.
By following these steps, you can capture high-quality scans of your images, preserving their beauty and ensuring their longevity. Experiment with different settings and adjustments to achieve the best possible outcome when scanning your cherished photographs or artwork.
Scanning Text Documents
Scanning text documents is a common practice for digitizing paperwork, archiving important documents, or creating digital copies for easy retrieval. To ensure accurate and legible scans, follow these steps when scanning text documents:
1. Clean the Document: Before scanning, ensure that the document is clean and free from any dirt, smudges, or creases. Use a soft, lint-free cloth or a document cleaning pad to gently wipe the surface and remove any debris that may interfere with the scanning process.
2. Set the Scan Resolution: For text documents, a resolution of 300 dpi (dots per inch) is generally sufficient to capture clear and readable scans. However, if the document contains small text or intricate details, consider using a slightly higher resolution to preserve the fine details.
3. Choose the Black and White Mode: Set the scan mode to black and white or grayscale, depending on the document’s content. Black and white mode is ideal for text-based documents as it provides sharp and clear results while minimizing file size. Grayscale mode is suitable for documents with images or shaded elements.
4. Adjust Brightness and Contrast: Use the brightness and contrast settings to optimize how the scanned text appears. Adjusting the brightness can help enhance the visibility of lighter text, while tweaking the contrast can improve the distinction between text and the background. Experiment with the settings to find the ideal balance for optimal legibility.
5. Check Orientation and Alignment: Ensure that the document is correctly aligned on the scanner bed to avoid crooked or skewed scans. Pay attention to the document’s orientation, keeping it in the proper landscape or portrait position as needed. Align the edges of the document with the guides or markers on the scanner to ensure a straight scan.
6. Enable OCR (Optical Character Recognition): If you intend to edit or search the text within the scanned document, enable OCR in your scanning software if available. OCR technology recognizes and converts scanned text into editable and searchable digital text, saving you time and allowing for easy document manipulation.
7. Save as PDF or Searchable PDF: Consider saving the scanned document as a PDF file format. PDF files preserve the formatting and layout of the original document, ensuring seamless viewing on different devices. If OCR is enabled, saving the document as a searchable PDF allows you to quickly search for specific keywords within the scanned text.
8. Review and Correct: After scanning, take a moment to review the scanned document on your computer screen. Check for any missed pages, smudged text, or scanning errors. If necessary, rescan any problematic pages or make manual corrections using editing tools in your scanning software.
By following these steps, you can efficiently scan text documents, ensuring the preservation of important information and making future document retrieval and management a breeze. Take the time to experiment with different settings and adjustments to achieve the best possible scans for your specific text documents.
Scanning Multiple Pages
Scanning multiple pages is a common task when dealing with multi-page documents, contracts, or reports. Follow these steps to efficiently scan multiple pages:
1. Automatic Document Feeder (ADF): If your scanner is equipped with an Automatic Document Feeder (ADF), utilize this feature for scanning multiple pages. Load the pages into the ADF tray, ensuring they are aligned and not exceeding the maximum page limit indicated. The ADF will automatically feed each page for scanning.
2. Document Alignment: Ensure that the pages are properly aligned before placing them in the scanner. Align the edges of the documents to ensure they are straight and have uniform margins. This helps to maintain consistency and readability in the scanned output.
3. Page Order: Arrange the pages in the desired order before scanning. This helps in maintaining the document’s sequential layout and makes it easier to navigate through the scanned document later on. Consider numbering the pages lightly with a pencil on the bottom corner for reference, if needed.
4. Enable Duplex Scanning: If your scanner supports duplex scanning, take advantage of this feature to scan both sides of each page in a single pass. Duplex scanning saves time and effort, especially when working with double-sided documents. Enable this setting in your scanner’s software or on the scanner itself if available.
5. Verify Scanned Pages: After scanning each page, visually check the scanned output on your computer screen or in the scanner’s preview mode. Ensure that each page is legible, aligned correctly, and free from any scanning errors. Rescan any problematic pages if necessary to ensure the highest quality.
6. Save as a Single Document: Once all the pages are scanned, save them as a single document. Most scanning software allows you to save multiple scanned pages as a single PDF file. This consolidates the entire document into one file, making it easier to manage and share.
7. Review and Adjust: After saving the scanned document, take a final moment to review the entire document on your computer screen. Check for any missed or misaligned pages, as well as any scanning errors that may have occurred. Make any necessary adjustments or edits using the software’s editing tools.
8. Naming and Organizing: Give the scanned document a descriptive and meaningful name to make it easier to locate later on. Consider using a consistent naming convention, such as including the document title, date, or a unique identifier. Organize your scanned documents into appropriate folders or categories for better management and easy retrieval.
By following these steps, you can smoothly scan multiple pages and create digital copies of your important documents or reports. Utilize the features provided by your scanner’s software to enhance efficiency and maintain the quality of the scanned document stack.
Scanning in Color, Grayscale, or Black and White
When scanning documents, it’s important to consider the appropriate color mode to use based on the content and desired outcome. Here are the key factors to consider when scanning in color, grayscale, or black and white:
Color Scanning: Color scanning is ideal for preserving the original colors and details of photographs, images, or documents with color elements. When scanning in color mode, ensure that your scanner’s settings are adjusted to capture the full range of colors. Color scans result in larger file sizes compared to grayscale or black and white scans, as they retain a full spectrum of colors.
Grayscale Scanning: Grayscale scanning captures images or documents in shades of gray, producing a black and white image with a range of gray tones. It is suitable for documents with images or shading that require more depth and detail than a pure black and white scan. Grayscale scans are often used for text documents with images, pencil drawings, or photographs that do not require full color preservation.
Black and White Scanning: Scanning in black and white mode reduces the image to pure black and white tones, without any gray or color information. This mode is commonly used for text documents or line art, as it provides optimal clarity and legibility. Black and white scans result in smaller file sizes compared to color or grayscale scans, making them ideal for archiving or sharing text-based documents.
Choosing the Right Mode: The choice of color mode depends on factors such as the document type, content, and intended use. For visually rich materials like photographs or magazines, color scanning is typically preferred to preserve the original hues and details. Grayscale scanning strikes a balance between detail and file size and is suitable for documents with images or shading that require depth. Black and white scanning, with its clear and concise output, is often preferred for text-based documents with no color or intricate details.
Overscan Considerations: When scanning in color or grayscale, it is recommended to apply a slight “overscan” to ensure that the edges of the document are fully captured. This accounts for any slight misalignment or page curl that may occur during the scanning process. Overscan helps to prevent important content from being cut off or distorted at the edges of the scanned image.
Software Settings: Utilize your scanner’s software settings to choose the appropriate color mode. Most scanning software provides options to select color, grayscale, or black and white mode. Take advantage of additional settings such as adjusting brightness, contrast, or saturation to further enhance the scanned output.
By considering these factors and adjusting your scanning settings accordingly, you can accurately capture the colors, details, and nuances of your documents while optimizing file size and readability. Carefully select the color mode that suits the specific content and purpose of your scanned materials.
Adjusting Brightness and Contrast
When scanning documents or images, adjusting the brightness and contrast settings can significantly improve the visual quality and legibility of the scanned output. Here are some key considerations when adjusting brightness and contrast:
Brightness: The brightness setting controls the overall lightness or darkness of the scanned image. Increasing the brightness can make the image appear lighter, while decreasing it can make the image darker. Adjusting the brightness is particularly useful when dealing with documents that may be too faint or images that appear washed out.
Contrast: Contrast refers to the difference between the light and dark areas of an image. Increasing contrast enhances the distinction between the lighter and darker elements, making the image appear more vibrant and well-defined. Conversely, reducing contrast can soften harsh contrasts and make the image appear more muted or subtle.
Techniques for Adjusting Brightness and Contrast: Different scanning software applications offer various tools and options for adjusting brightness and contrast. Here are some common techniques:
- Automatic Adjustment: Many scanning software programs offer an automatic adjustment feature that analyzes the image and adjusts the brightness and contrast settings based on predefined algorithms. This can be a convenient starting point for getting a balanced scan.
- Manual Adjustment: Manual adjustment allows you to have more control over the brightness and contrast settings. Typically, sliders or numerical values are provided to fine-tune the levels. Experiment with small adjustments, viewing the changes in real-time, and aim for an optimal balance that enhances the image without overexposing or losing details.
- Histogram Adjustment: Some advanced scanning software applications provide a histogram, which displays the distribution of brightness levels in the image. This can be a helpful visual reference when adjusting brightness and contrast. Ensure that the histogram is balanced and covers a sufficient range of brightness levels to achieve an optimal scan.
Considerations for Different Content Types: The ideal brightness and contrast settings may vary depending on the content being scanned. For example:
- Text Documents: Increase the brightness to ensure that the text is clear and legible. Adjust the contrast to make the text stand out without losing any finer details.
- Photographs: Enhance the brightness and contrast to bring out the details and enhance the overall vibrancy of the image. However, be careful not to overdo it, as this can result in washed-out or overly dark areas.
- Artwork or Graphics: Adjust the brightness and contrast to accurately preserve the original colors, shading, and texture of the artwork. Aim for a balance that maintains the integrity of the original while ensuring good visibility.
Test and Refine: It’s important to test and refine the brightness and contrast settings to achieve the desired results. Scan a test document or image with different settings and compare the outputs to determine the most suitable adjustments for your specific materials.
By understanding the impact of brightness and contrast adjustments, as well as leveraging the tools provided by your scanning software, you can optimize the visual quality and readability of your scanned documents and images.
Cropping and Resizing Scanned Documents
After scanning a document, you may need to crop or resize it to remove unwanted portions, adjust the composition, or fit the document into a specific size or aspect ratio. The following steps will guide you in cropping and resizing your scanned documents:
Cropping:
1. Open the Scanned Document: Open the scanned document in an image editing software or the scanning software itself, which may have cropping capabilities.
2. Select the Crop Tool: Look for the crop tool, usually represented by an icon resembling a square or rectangle. Click on the tool to activate it.
3. Define the Crop Area: Click and drag the cursor on the document to select the specific area you want to keep. Adjust the selection by clicking and dragging the edges or corners of the selection box.
4. Finalize the Crop: After selecting the desired area, look for a “Crop” or “Apply” button to confirm the crop. The software will crop the document, discarding the areas outside the selection.
Resizing:
1. Open the Scanned Document: Open the scanned document in an image editing software capable of resizing, such as Adobe Photoshop or GIMP.
2. Select the Resize Tool or Option: Look for the resize tool or option in the software. It may be under the “Image” menu or represented by an icon resembling two arrows pointing towards or away from each other.
3. Specify the New Dimensions: Enter the desired dimensions for the document. You can input values in pixels, inches, centimeters, or select a percentage of the original size. Alternatively, you can manually resize the document by dragging the corners or edges of the image.
4. Ensure Proportional Resizing: To maintain the original aspect ratio of the document and prevent distortion, ensure that the proportions are constrained or the “Maintain Aspect Ratio” option is selected.
5. Finalize the Resize: Click the “OK” or “Apply” button to apply the resizing. The software will adjust the document to the specified dimensions.
Tips:
- Preserve the Original: If desired, create a duplicate of the scanned document before making any edits. This allows you to preserve the original scan in case you need it again.
- Zoom In for Precision: When cropping, zoom in on the document to accurately select the desired area and ensure a clean crop.
- Consider Aspect Ratio: When resizing, be mindful of the aspect ratio. If you want to change the dimensions while maintaining the original ratio, you may need to add white space or apply additional editing to the document.
- Save as a New File: After cropping or resizing, save the modified document as a new file to differentiate it from the original scan. This ensures that you keep both versions intact.
Cropping and resizing scanned documents allow you to fine-tune the composition and size to suit your needs. Follow these steps to achieve the desired result and create a more focused and visually appealing document.
Saving Scanned Documents
After scanning your documents, it’s crucial to save them properly to ensure their accessibility, organization, and long-term preservation. Here are some key considerations when saving scanned documents:
Choosing the Right File Format:
1. PDF (Portable Document Format): PDF is a widely used file format for scanned documents. It retains the original formatting and layout of the document, making it suitable for sharing, printing, and archiving. PDFs also support OCR (Optical Character Recognition), allowing you to search for specific text within the document.
2. JPEG (Joint Photographic Experts Group): JPEG is a common file format for scanned images and photographs. It offers good image quality with a relatively small file size. However, note that JPEGs are lossy compressed formats, which means image quality can degrade slightly with each save.
3. TIFF (Tagged Image File Format): TIFF is a widely used format for high-quality scans that require lossless compression. It preserves all the details and does not degrade image quality. However, TIFF files tend to have larger file sizes compared to other formats.
Naming and Organizing:
1. Choose Descriptive Names: When saving scanned documents, use descriptive names that clearly indicate the content, date, or any relevant identifiers. This makes it easier to locate and identify specific documents later on.
2. Create Folders or Directories: Create a logical folder structure to organize your scanned documents. Establish categories or subfolders based on topics, dates, or other criteria that make sense for your specific needs. This helps streamline document retrieval and management.
3. Consider Metadata: If your scanning software allows, add relevant metadata to your scanned documents. This can include information like author, keywords, or a brief description. Metadata improves searchability and provides additional context for your documents.
Backup and Storage:
1. Backup Regularly: As with any digital files, it is essential to regularly back up your scanned documents. This can be done through external hard drives, cloud storage services, or network drives. Regular backups minimize the risk of data loss due to hardware failure or other unforeseen events.
2. Consider Duplication: For critical or sensitive documents, consider creating multiple copies and storing them in different locations. This provides an extra layer of protection and ensures that your documents are accessible even if one backup fails.
3. Long-Term Storage: If you have documents that require long-term preservation, consider using archival-grade storage solutions. These provide protection against environmental factors like moisture, light, and temperature fluctuations, increasing the longevity of your documents.
By choosing the right file format, naming and organizing documents effectively, and implementing proper backup and storage strategies, you can ensure the accessibility, organization, and preservation of your scanned documents. These practices help to streamline your workflow and provide peace of mind knowing that your important documents are securely stored.
Choosing the Right File Format
When saving scanned documents, selecting the appropriate file format is crucial for compatibility, efficiency, and preservation. Here are the key considerations when choosing the right file format:
PDF (Portable Document Format):
Advantages:
- Retains the original formatting, layout, and fonts of the document.
- Works well for documents with multiple pages or complex formatting.
- Supports OCR (Optical Character Recognition) for text searchability.
- Universally supported on various devices and platforms.
Best Use: PDF is ideal for sharing, archiving, and printing documents while preserving the integrity of the original layout and formatting, or when OCR functionality is required.
JPEG (Joint Photographic Experts Group):
Advantages:
- Offers good image quality with relatively small file sizes.
- Works well for scanned photographs or images that require visual representation.
- Commonly supported on various devices and platforms.
Best Use: JPEG is suitable for documents primarily consisting of images or photographs where high-quality visual representation is essential. However, note that JPEG is a lossy compression format, and multiple saves may lead to slight degradation in image quality.
TIFF (Tagged Image File Format):
Advantages:
- Preserves image quality and details without any lossy compression.
- Works well for high-quality scans or documents requiring lossless compression.
- Supports multiple color modes, including grayscale and color.
- Compatible with various image-editing software.
Best Use: TIFF is a preferred format for professional applications, high-quality scans, or archiving documents where preservation of image quality and details is critical. However, TIFF files tend to have larger file sizes compared to other formats.
PNG (Portable Network Graphics):
Advantages:
- Provides lossless compression while preserving image quality.
- Supports transparency, making it suitable for digital artwork or documents with transparent elements.
- Works well for web-based or online document sharing.
Best Use: PNG is ideal for documents with transparency or when high-quality images are required without sacrificing file size. It works well for web-based or online document sharing.
Considerations:
- File Size: Consider the impact of file size on storage requirements, transfer speed, and compatibility with web-based platforms.
- Collaboration and Compatibility: Choose a format that is widely supported and easily accessible across different devices and software applications.
- Document Type: Tailor the format choice to the specific type of document—text-based, image-driven, or a combination of both— to ensure the optimal balance between quality and functionality.
By considering the advantages and best uses of each file format, you can make an informed decision when saving scanned documents, ensuring compatibility, efficiency, and the preservation of document integrity.
Naming and Organizing Scanned Files
Effectively naming and organizing your scanned files is essential for efficient document management, retrieval, and overall organization. Here are key considerations when naming and organizing scanned files:
Descriptive File Names:
- Be Specific: Give your scanned files descriptive and meaningful names that accurately reflect the content of the document. Include relevant information such as document title, date, project name, or any other identifying details.
- Consistency: Establish a consistent naming convention for your files to ensure uniformity and make it easier to organize and search for specific documents. This can include using prefixes, suffixes, or specific keywords related to the content.
- Avoid Special Characters: Keep file names simple and avoid using special characters, as they can create compatibility issues on different operating systems or platforms.
Create Folders or Directories:
- Logical Structure: Design a logical folder structure that aligns with your needs and the content of the scanned documents. Consider creating main categories or folders and further subdivide them based on relevant criteria such as document type, project name, date, or any other logical grouping.
- Subfolders: Use subfolders to further categorize and organize specific types of scanned documents within the main folders. For example, within an “Invoices” folder, you may have subfolders for different years or clients.
- Avoid Overcomplication: Strike a balance between creating a well-organized folder structure and avoiding excessive levels of subfolders. Keep it intuitive and consider how you and others will navigate and locate documents within the structure.
Consider Metadata:
- Add Metadata: If your scanning software allows, consider adding relevant metadata to your scanned documents. Include information such as author, keywords, project name, or a brief description. This improves searchability and provides additional context for your documents.
- Document Tags or Labels: Some operating systems or document management systems allow you to tag or label your scanned files. Utilize this feature to further organize and categorize your documents based on specific criteria or tags.
Regular Review and Clean-up:
- Periodically Review: Set aside time to review and assess your scanned files and folder structure. This can help identify any outdated or redundant documents that can be deleted or archived. Ensure that your organization system remains current and aligned with your needs.
- Archive or Backup Old Documents: For documents that are no longer actively used but still require preservation, consider archiving them separately or creating backup copies. This helps declutter active folders while maintaining access to important historical documents.
By implementing effective naming and organizing strategies for your scanned files, you can enhance document management and retrieval, improve productivity, and ensure a well-structured and streamlined digital archive of your scanned documents.
Troubleshooting Common Scanner Issues
While scanners are generally reliable devices, they may encounter occasional issues that can disrupt your scanning workflow. Here are some common scanner issues and troubleshooting steps to resolve them:
1. Scanner Not Detected:
- Check Connections: Ensure that all cables connecting the scanner to the computer are securely plugged in. Consider disconnecting and reconnecting the cables to establish a proper connection.
- Restart and Update: Restart your computer and check for any pending software or driver updates for your scanner. Sometimes, outdated drivers can cause connectivity issues.
- Try a Different Port or Computer: If available, try connecting the scanner to a different USB port on your computer or test it on another computer to determine if the issue is with the scanner or the current system.
2. Paper Jams or Feeding Issues:
- Check for Obstructions: Open the scanner lid and inspect for any stuck paper or debris that may be blocking the paper path. Carefully remove any obstructions, following the manufacturer’s instructions.
- Improve Paper Quality: Use high-quality, undamaged paper to avoid jams. Ensure that the paper stack is properly aligned and not exceeding the recommended capacity specified by the scanner.
- Clean Rollers and Feeding Mechanisms: Over time, dirt and debris can accumulate on the rollers and feed mechanisms, leading to feeding issues. Gently clean these parts with a lint-free cloth or a recommended cleaning solution as per the manufacturer’s guidelines.
3. Poor Image Quality:
- Check Scanner Settings: Ensure that the resolution and color settings are appropriate for the type of document being scanned. Adjust settings such as brightness, contrast, or image correction options to optimize image quality.
- Clean the Scanner Glass: Dust or smudges on the scanner glass can affect image quality. Clean the glass surface with a soft, lint-free cloth and a recommended cleaning solution, following the manufacturer’s instructions.
- Inspect Scanner Components: Check for any damaged or misaligned scanner components that could impact image quality. If necessary, refer to the user manual or contact the manufacturer’s support for assistance.
4. Software or Compatibility Issues:
- Update Software and Drivers: Ensure that the scanner software and drivers are up to date. Check the manufacturer’s website for any available updates or patches that could address compatibility issues.
- Check Operating System Compatibility: Ensure that your scanner is compatible with your computer’s operating system. Verify with the manufacturer, and if needed, seek assistance to install any required software updates or patches.
- Reinstall Scanner Software: If the scanner software is experiencing issues, try uninstalling and reinstalling the software. Follow the manufacturer’s instructions or refer to their support resources for guidance.
By following these troubleshooting steps, you can resolve common scanner issues and resume your scanning tasks. If the problem persists or is more complex, consult the scanner manual, contact the manufacturer’s support, or seek assistance from a certified technician.