
What is TRON?
TRON is a blockchain-based platform that aims to create a decentralized digital entertainment ecosystem. Founded by Justin Sun in 2017, TRON’s goal is to revolutionize the way content is produced, shared, and consumed. It envisions a future where individuals have direct control over their data and can monetize their creations without intermediaries.
At its core, TRON focuses on building a blockchain infrastructure that facilitates the creation and delivery of digital content. By eliminating intermediaries, such as streaming platforms and payment processors, TRON aims to empower content creators by allowing them to connect directly with their audiences and retain a larger share of their earnings.
One of the key features of TRON is its native cryptocurrency, called TRX. TRX is used within the TRON ecosystem for various purposes, including incentivizing content creation, content sharing, and engaging with decentralized applications (DApps) built on the TRON network. TRX can be obtained through exchanges or by participating in TRON’s network through activities like staking or participating in governance mechanisms.
TRON’s infrastructure is built on a delegated proof-of-stake (DPoS) consensus mechanism, which ensures faster transaction confirmation and greater scalability compared to traditional proof-of-work (PoW) blockchains like Bitcoin. This enables TRON to handle a high volume of transactions, making it suitable for applications that require real-time interactions, such as gaming and streaming.
Moreover, TRON provides developers with a comprehensive set of tools and resources to build DApps on its blockchain. This enables the creation of decentralized applications that can offer unique features and functionalities, such as peer-to-peer content sharing, tokenized rewards, and decentralized governance.
Overall, TRON aims to disrupt the digital entertainment industry by leveraging blockchain technology to empower content creators, eliminate intermediaries, and create a more inclusive and transparent ecosystem. By giving individuals more control over their data and revenue streams, TRON paves the way for a new era of digital content consumption and monetization.
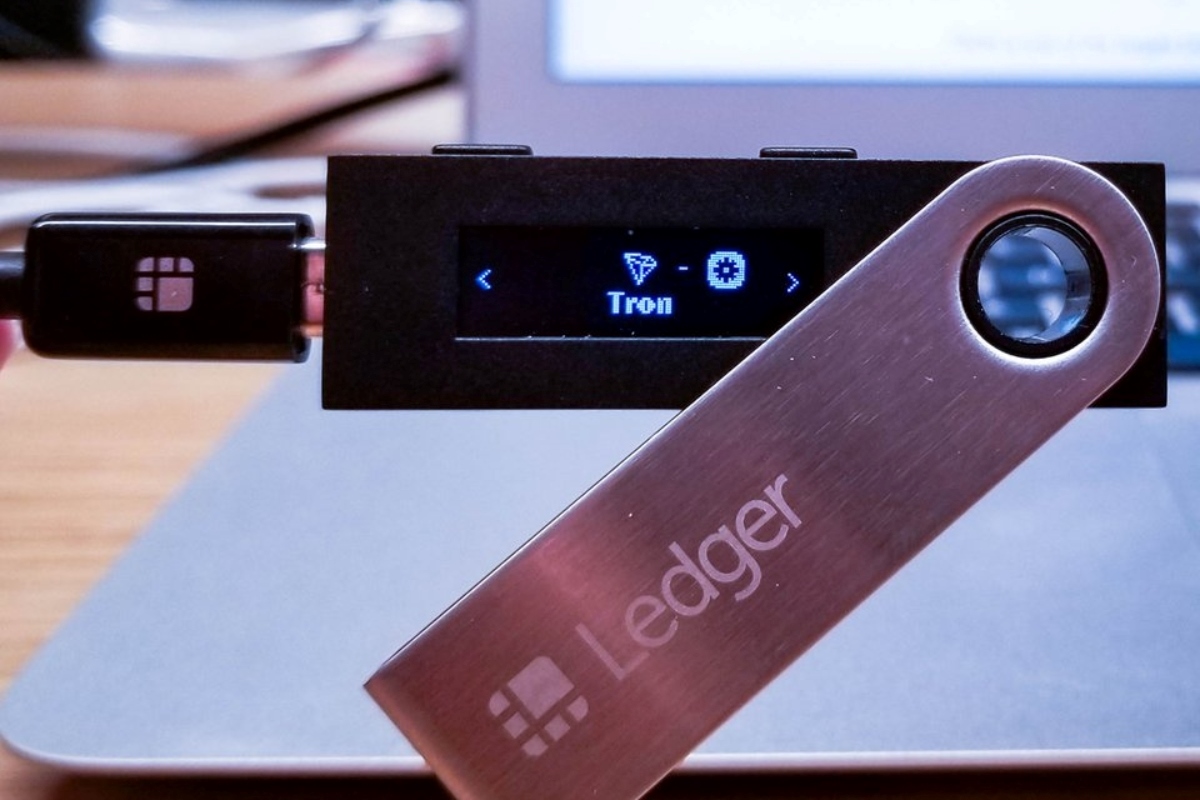
Overview of Ledger Nano S
The Ledger Nano S is a hardware wallet that provides a secure and convenient way to store and manage cryptocurrencies, including TRON (TRX). It is a compact device that resembles a USB drive and offers robust security features to protect your digital assets.
One of the key advantages of using a hardware wallet, like the Ledger Nano S, is that it keeps your private keys offline. This means that your private keys are never exposed to the internet, reducing the risk of them being compromised by hackers or malware. With the Ledger Nano S, your private keys are stored securely on the device itself, adding an additional layer of protection.
In addition to its security features, the Ledger Nano S is also known for its user-friendly interface. It features a small OLED screen that allows you to conveniently navigate and verify transactions, ensuring that you have full control over your cryptocurrency transactions. The device also has physical buttons that are used to confirm or reject actions, providing an extra layer of verification.
Setting up the Ledger Nano S is a straightforward process. Once you receive the device, you’ll need to connect it to your computer using a USB cable and follow the instructions on the Ledger Live application, which is Ledger’s official software for managing your cryptocurrencies. During the setup, you’ll be prompted to create a unique PIN code and a recovery seed phrase, which you should keep in a safe place as it can be used to restore your wallet in case your device is lost or damaged.
Once your Ledger Nano S is set up, you can install the TRON app through the Ledger Live application. The TRON app allows you to manage your TRX holdings directly from your Ledger device. With your TRON app installed, you can securely send, receive, and view your TRON balance without exposing your private keys.
Overall, the Ledger Nano S provides a secure and user-friendly solution for managing your TRON and other cryptocurrencies. Its offline storage, intuitive interface, and robust security features make it an excellent choice for individuals looking to safeguard their digital assets.
Setting up your Ledger Nano S
Setting up your Ledger Nano S is a simple process that involves a few steps to ensure the security and functionality of your device. Follow the instructions below to get started:
- Unbox your Ledger Nano S: Open the package and take out your Ledger Nano S device along with the USB cable and recovery sheet that comes with it.
- Download the Ledger Live software: Visit the official Ledger website and download the Ledger Live software compatible with your operating system. Install the software on your computer.
- Connect and initialize your Ledger Nano S: Use the provided USB cable to connect your Ledger Nano S to your computer. Follow the on-screen instructions on the Ledger Live software to initialize your device.
- Create a PIN code: During the setup process, you will be prompted to create a PIN code. Use the device’s buttons to enter a 4 to 8-digit PIN code. Make sure to choose a PIN code that is unique and easy for you to remember.
- Write down your recovery phrase: After setting your PIN code, your device will ask you to write down a recovery phrase. This phrase consists of 24 words and serves as a backup in case your device is lost, stolen, or damaged. Write down the recovery phrase and store it in a safe place. Make sure not to share it with anyone and keep it offline.
- Confirm your recovery phrase: Once you’ve written down your recovery phrase, the Ledger Nano S will ask you to confirm the order of the words to ensure you have written them correctly. This step is crucial for the security of your funds, so take your time to verify each word.
- Install TRON app: After completing the initial setup, open the Ledger Live software and navigate to the Manager section. Find the TRON app and click “Install” to add the TRON app to your Ledger Nano S.
- Verify the installation: Once the TRON app is installed on your Ledger Nano S, you can verify its presence by checking the app list on the device’s screen.
With your Ledger Nano S set up, you are now ready to securely manage your TRON and other cryptocurrencies. Remember to always connect your Ledger device to trusted devices, keep your PIN code and recovery phrase offline, and regularly update your Ledger Live software to benefit from the latest security updates.
Installing the TRON App on Ledger Nano S
To manage your TRON (TRX) holdings on your Ledger Nano S, you’ll need to install the TRON app onto your device. The installation process is straightforward and can be completed using the Ledger Live software on your computer. Here are the step-by-step instructions:
- Connect your Ledger Nano S: Use the USB cable provided with your Ledger Nano S to connect it to your computer.
- Open Ledger Live: Launch the Ledger Live software on your computer. If you don’t have it installed, you can download it from the official Ledger website and install it.
- Enter your PIN code: On your Ledger Nano S, enter your PIN code using the device’s buttons to unlock it.
- Navigate to the Manager section: In the Ledger Live software, click on the “Manager” tab located at the top of the screen.
- Search for the TRON app: In the Manager section, search for “TRON” in the app catalog. Once you find it, click on it to access the TRON app installation page.
- Install the TRON app: Click on the “Install” button to start the installation process. Follow the on-screen instructions and confirm any actions requested by the Ledger Live software.
- Wait for the installation to complete: The TRON app installation process may take a few moments. Ensure that your Ledger Nano S remains connected until the installation is confirmed.
- Verify the app installation: Once the installation is complete, you will see a “Installed” message next to the TRON app in the Manager section of Ledger Live. The TRON app will also appear on your Ledger Nano S screen.
With the TRON app successfully installed on your Ledger Nano S, you are now ready to manage your TRX holdings securely. You can use the TRON app to send, receive, and view your TRX balance directly from your Ledger device, ensuring that your private keys remain safe and protected offline.
Remember to always verify the authenticity of the app on your Ledger Nano S screen before using it. Additionally, periodically check for app updates on the Ledger Live software to ensure you have the latest features and security enhancements.
Accessing your TRON Wallet on Ledger Nano S
Once you have installed the TRON app on your Ledger Nano S, you can easily access and manage your TRON (TRX) wallet using the device. Here’s a step-by-step guide on how to access your TRON wallet:
- Connect your Ledger Nano S: Use the USB cable provided with your Ledger Nano S to connect it to your computer.
- Open Ledger Live: Launch the Ledger Live software on your computer and enter your PIN code on your Ledger Nano S to unlock the device.
- Navigate to the Portfolio section: In the Ledger Live software, click on the “Portfolio” tab at the top of the screen. This will display an overview of your cryptocurrency holdings.
- Select TRON from the list: Scroll through the list of supported cryptocurrencies in the Portfolio section and click on “TRON” to access your TRX wallet.
- Choose the account: If you have multiple TRON accounts, you will see a list of accounts associated with your Ledger Nano S. Select the account you want to access.
- View your TRX balance: After selecting the account, Ledger Live will display your TRON wallet balance, along with transaction history and other relevant information.
With your TRON wallet accessed through Ledger Live, you can now perform various actions, such as sending and receiving TRX, checking transaction details, and accessing additional features provided by the TRON ecosystem.
It’s worth noting that every time you want to access your TRON wallet on your Ledger Nano S, you need to connect the device to your computer and unlock it using your PIN code. This adds an extra layer of security, as your private keys remain safely stored on the Ledger Nano S, protecting them from potential online threats.
Remember to double-check the addresses when sending or receiving TRX, as any errors in inputting the addresses may result in the loss of your funds.
By using your Ledger Nano S to access your TRON wallet, you can have peace of mind knowing that your TRX holdings are securely stored and under your control.
Transferring TRON to your Ledger Nano S
If you want to store your TRON (TRX) securely, transferring your TRX tokens to your Ledger Nano S is a wise choice. Follow these steps to transfer TRON to your Ledger Nano S:
- Make sure your Ledger Nano S is connected: Connect your Ledger Nano S to your computer using the provided USB cable and ensure it is properly connected.
- Unlock your Ledger Nano S: Enter your PIN code on the Ledger Nano S device to unlock it.
- Open the TRON app: Navigate to the TRON app on your Ledger Nano S by scrolling through the apps using the device’s buttons and selecting TRON.
- Launch Ledger Live: Open the Ledger Live software on your computer, and if needed, enter your Ledger Live PIN code to access your accounts.
- Select the TRX account: In the Ledger Live software, click on the “Portfolio” tab at the top of the screen to view your cryptocurrency accounts. Find your TRX account and click on it.
- Click on “Receive”: In the TRX account overview, find the “Receive” button and click on it. Ledger Live will generate a TRX address for you to receive tokens.
- Copy the TRX address: Click on the copy icon next to the generated TRX address to copy it to your clipboard. Ensure you have copied the correct address.
- Initiate the TRX transfer: Access your current TRX wallet or the exchange where your TRX is stored. Initiate a withdrawal or transfer by pasting the TRX address you copied into the recipient address field.
- Enter the transfer details: Specify the amount of TRX you want to transfer and confirm any other necessary details, such as gas fees. Review the transaction details carefully.
- Confirm the transfer: Follow the final steps required by your wallet or exchange to confirm the TRX transfer. Ensure that the recipient address matches the address you previously copied from the Ledger Live software.
- Wait for confirmation: The TRX transfer may take some time to be confirmed on the TRON network. You can track the progress of the transfer through the TRON blockchain explorer or in the Ledger Live software.
After the transfer is confirmed, you will be able to see your TRX balance in the Ledger Live software and your Ledger Nano S device. Remember to always verify the recipient address and double-check the transaction details before confirming the transfer to ensure the security of your funds.
By transferring your TRON tokens to your Ledger Nano S, you can have peace of mind knowing that your TRX is stored in a secure hardware wallet, protected by the device’s built-in security features.
Sending TRON from your Ledger Nano S
If you want to send your TRON (TRX) from your Ledger Nano S to another TRON address, you can easily do so by following these steps:
- Connect your Ledger Nano S: Use the provided USB cable to connect your Ledger Nano S to your computer.
- Unlock your Ledger Nano S: Enter your PIN code on the Ledger Nano S device to unlock it.
- Open the TRON app: Navigate to the TRON app on your Ledger Nano S by scrolling through the apps using the device’s buttons and selecting TRON.
- Launch Ledger Live: Open the Ledger Live software on your computer, and enter your Ledger Live PIN code to access your accounts.
- Select the TRX account: In the Ledger Live software, go to the “Portfolio” tab at the top of the screen. Find your TRX account and click on it.
- Click on “Send”: In the TRX account overview, find the “Send” button and click on it.
- Enter the recipient’s TRON address: Enter the TRON address of the recipient to whom you want to send TRX. Make sure you have the correct address and review it carefully.
- Specify the TRX amount: Enter the amount of TRX you want to send to the recipient. Double-check the amount to ensure accuracy.
- Review the transaction details: Carefully review the transaction details, including the recipient’s address and the TRON amount, to ensure everything is correct.
- Confirm the transaction: Confirm and authorize the transaction on your Ledger Nano S device by checking the details displayed on the screen and pressing the appropriate button to confirm.
- Wait for confirmation: After confirming the transaction on your Ledger Nano S, wait for the transaction to be processed and confirmed on the TRON network. The recipient will receive the TRX once the transaction is confirmed.
It’s important to double-check and verify the recipient’s TRON address before confirming the transaction. Sending TRX to the wrong address may result in permanent loss of funds.
By using your Ledger Nano S to send TRON, you can have confidence in the security and convenience of your transaction. The device securely stores your private keys, ensuring that your TRX remains safe throughout the process.
Remember to keep your Ledger Nano S and recovery phrase in a safe place to protect your funds and prevent unauthorized access to your TRON holdings.
Managing your TRON Wallet on Ledger Live
Ledger Live is the official software provided by Ledger that allows you to manage your TRON (TRX) wallet and other cryptocurrency holdings. With Ledger Live, you can easily view and manage your TRX balance, track transactions, and access additional features. Here’s how you can manage your TRON wallet on Ledger Live:
- Open Ledger Live: Launch the Ledger Live software on your computer and ensure your Ledger Nano S is connected via USB.
- Unlock your Ledger Nano S: Enter your PIN code on the Ledger Nano S device to unlock it.
- Select your TRX account: In the Ledger Live software, click on the “Portfolio” tab at the top of the screen to view your cryptocurrency accounts. Locate and click on your TRX account.
- View your TRX balance: Ledger Live will display an overview of your TRX balance, including the current value of your holdings and the transaction history.
- Send TRX: To send TRX from your Ledger Nano S, click on the “Send” button in the TRX account overview. Enter the recipient’s TRX address, specify the amount, review the transaction details, and confirm the transaction using your Ledger Nano S device.
- Receive TRX: To receive TRX into your Ledger Nano S, click on the “Receive” button in the TRX account overview. Ledger Live will display a TRX address specific to your Ledger Nano S. Share this address with the sender to receive TRX.
- View transaction history: In the TRX account overview, you can view your transaction history, including the date, time, and amount of each transaction.
- Access additional features: Ledger Live provides additional features, such as the ability to stake TRX or interact with decentralized applications (DApps) built on the TRON network. Explore the available features within the TRX account section.
- Update and manage settings: In the Ledger Live software, you can update your Ledger Nano S firmware, manage account settings, and adjust transaction preferences to suit your needs.
By using Ledger Live to manage your TRON wallet, you can conveniently track your TRX holdings, initiate transactions, and explore additional features offered by the TRON ecosystem. Always ensure you have the latest version of Ledger Live installed to access the most secure and up-to-date features for managing your TRON wallet.
Remember to keep your Ledger Nano S device and recovery phrase in a safe place to protect your TRX holdings from unauthorized access.
Additional Resources and Troubleshooting
When using your Ledger Nano S to manage your TRON (TRX) wallet, it is essential to have access to additional resources and troubleshooting guides that can help you navigate any issues or questions that may arise. Here are some valuable resources to assist you:
- Ledger Support: Visit the official Ledger Support website for comprehensive guides, articles, and troubleshooting tips specifically tailored to Ledger Nano S users. You can find step-by-step instructions on setting up your device, installing apps, managing accounts, and resolving common issues. The support site also provides access to the Ledger community, where you can seek assistance from fellow Ledger users.
- TRON Official Documentation: Explore the TRON official documentation to gain a more in-depth understanding of the TRON blockchain, its features, and the overall TRON ecosystem. This resource provides detailed information on interacting with TRON and its associated technologies, including wallets, DApps, and smart contracts.
- Community Forums: Engage with the TRON and Ledger communities by participating in forums and discussion boards. There, you can ask questions, share experiences, and learn from others who are also using Ledger Nano S to manage their TRX wallets. Community members often provide helpful insights and solutions to common issues.
- Official TRON Wallets: If you are looking for alternative wallet options to manage your TRON holdings, consider exploring official TRON wallets that offer compatibility with Ledger Nano S. Many wallets, such as TRONScan and TronLink, provide integration with Ledger devices, allowing you to securely manage your TRX tokens.
If you encounter any issues while using your Ledger Nano S with TRON, here are a few common troubleshooting steps you can try:
- Ensure firmware and software are up to date: Check for any available firmware or software updates for both your Ledger Nano S and the Ledger Live software. Keeping them up to date can resolve compatibility issues and ensure optimal performance.
- Restart your Ledger Nano S and computer: Sometimes, a simple restart can resolve minor connection or communication issues between your Ledger Nano S and computer.
- Check USB cable and connection: Ensure that you are using the original USB cable provided with your Ledger Nano S and that it is securely connected to both the device and your computer.
- Try a different USB port or computer: If the issue persists, try connecting your Ledger Nano S to a different USB port or try using a different computer to rule out any port or computer-specific issues.
- Contact Ledger Support: If none of the above steps resolve the issue, reach out to Ledger Support directly for assistance. They can provide personalized guidance and troubleshooting steps based on your specific situation.
By utilizing these additional resources and troubleshooting steps, you can effectively manage your TRON wallet on your Ledger Nano S and overcome any challenges that may arise along the way.