
Choosing the Right Connector
When it comes to connecting a fiber optic cable to a connector, selecting the right connector is crucial for ensuring a reliable and efficient connection. With a variety of connector types available, it’s essential to consider factors such as compatibility, performance, and ease of installation. Here’s a guide to help you choose the right connector for your fiber optic cable:
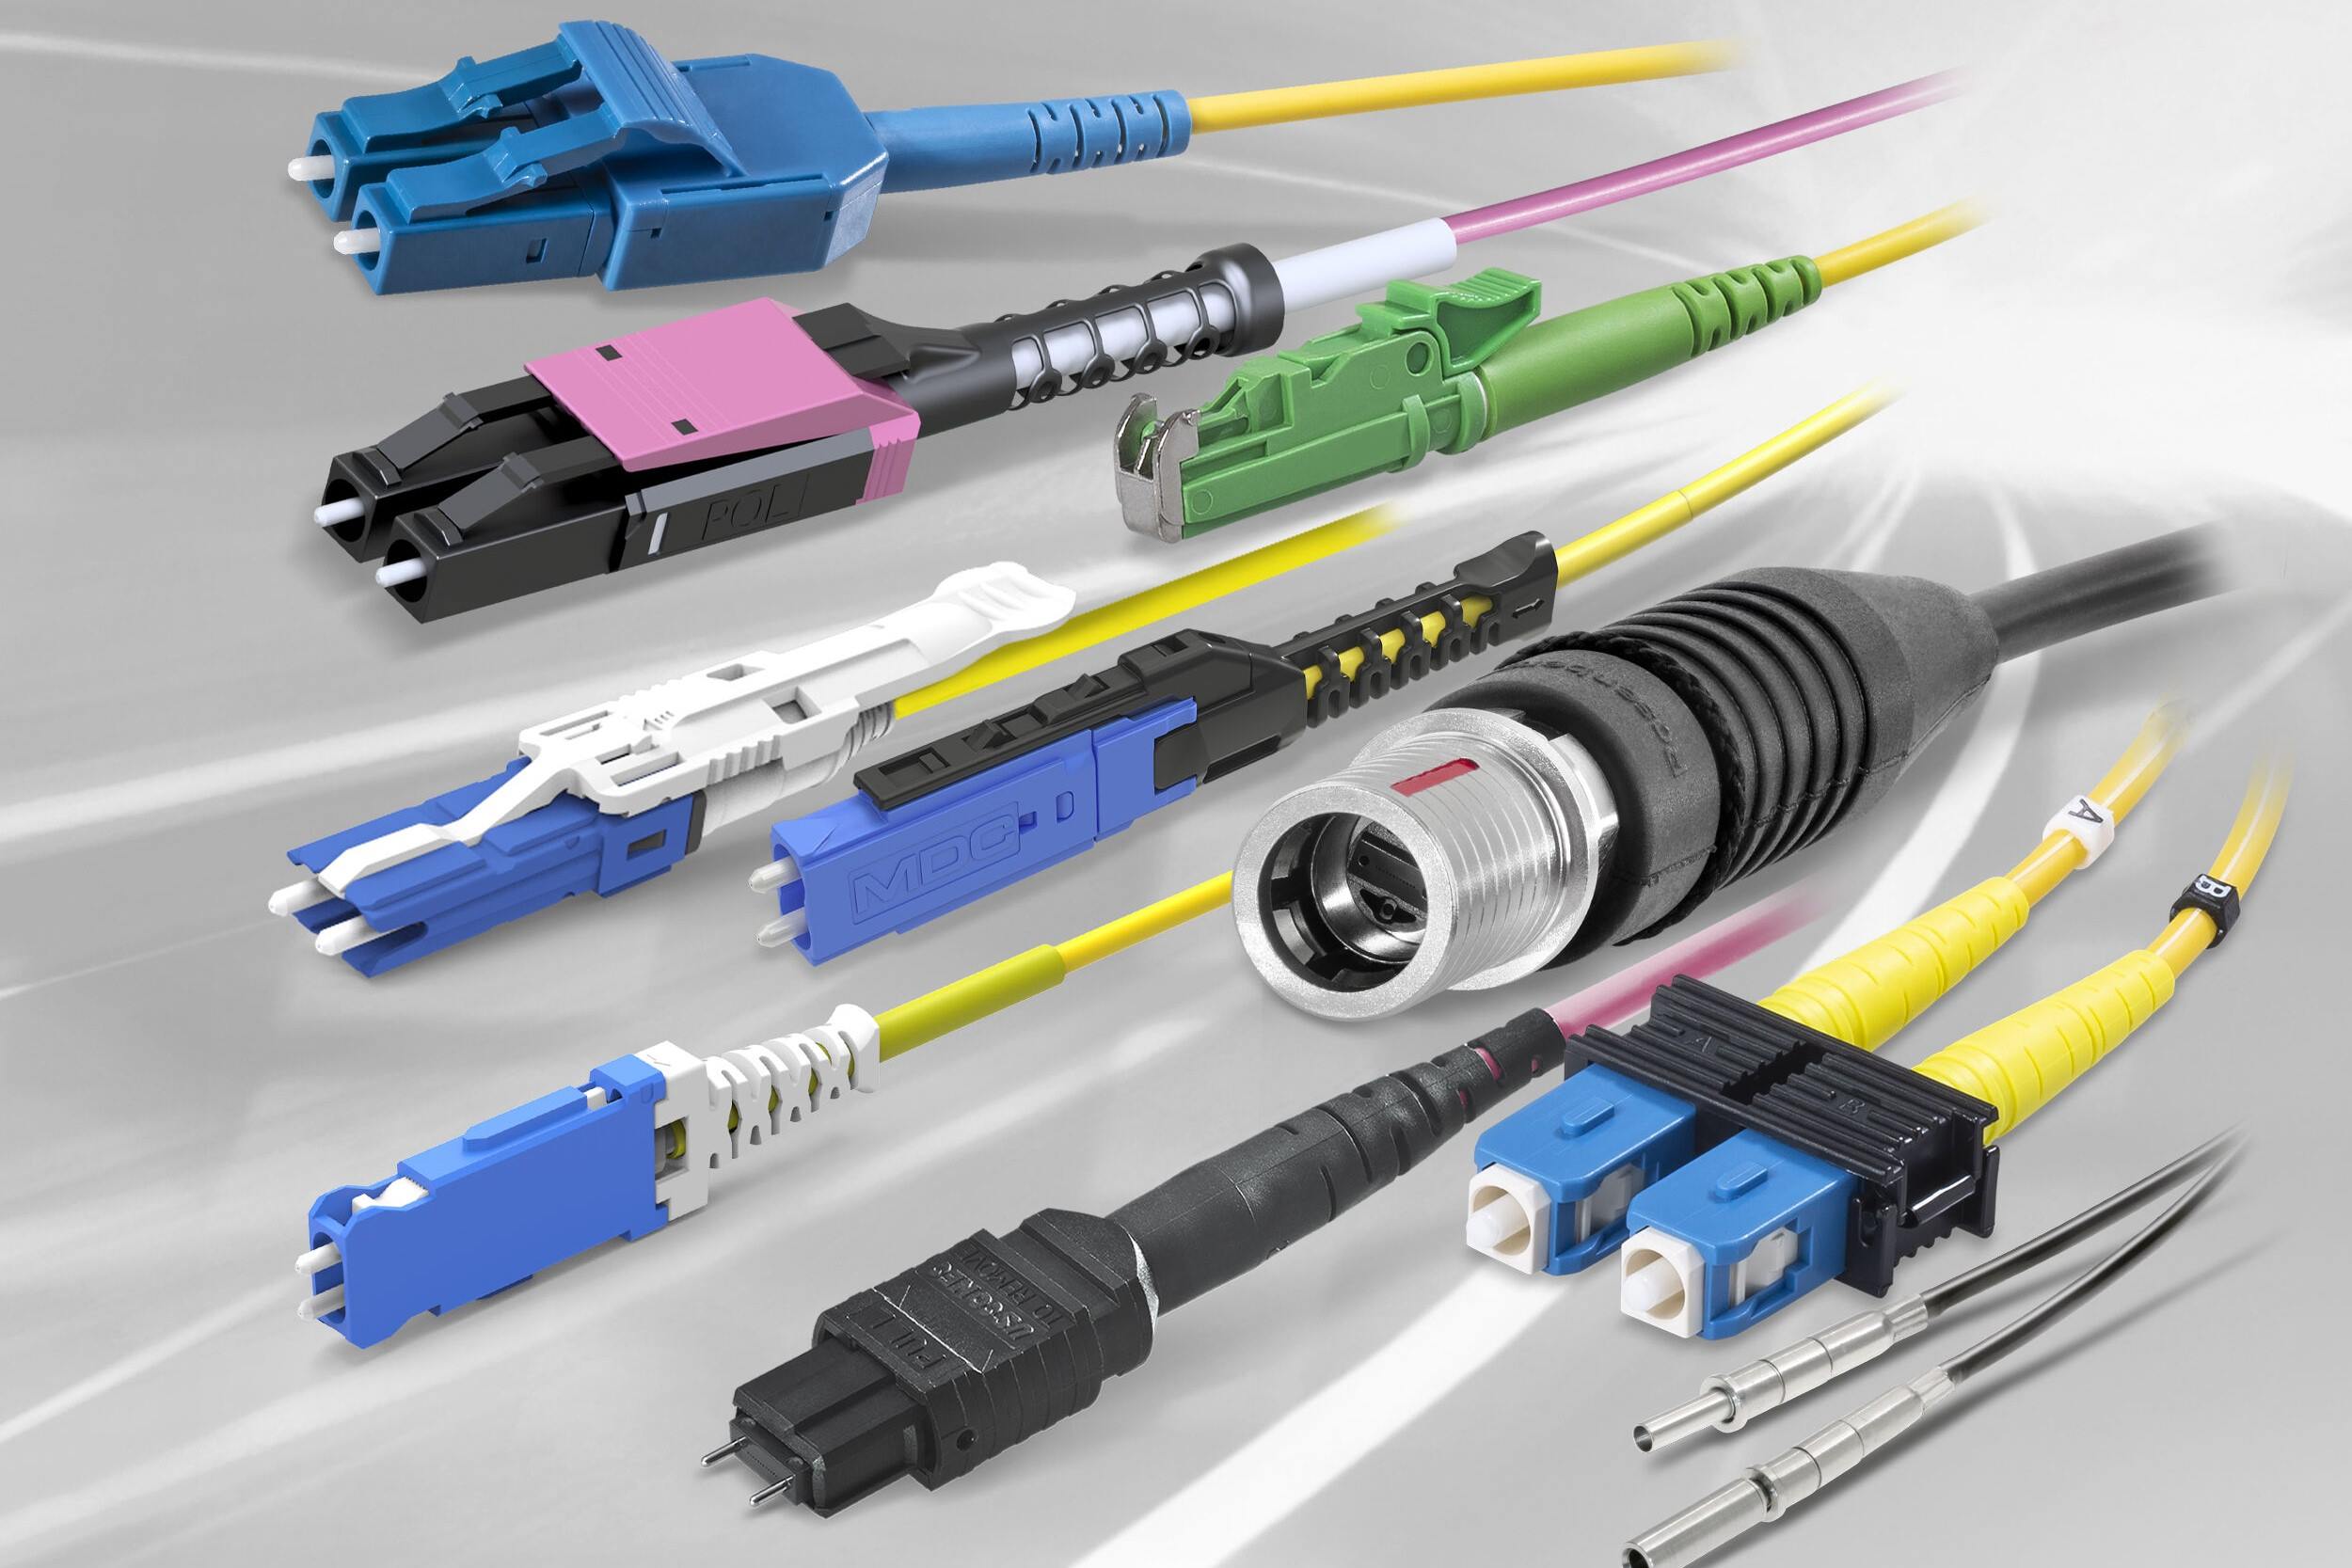
- Connector Types: There are several types of fiber optic connectors, including LC, SC, ST, and MTP/MPO connectors. Each type has its unique features and applications. For instance, LC connectors are ideal for high-density installations, while SC connectors are known for their simple push-pull latching mechanism. Understanding the specific requirements of your application will help in determining the most suitable connector type.
- Compatibility: It’s essential to ensure that the chosen connector type is compatible with the equipment or devices at both ends of the fiber optic link. Whether it’s connecting to a transceiver module, patch panel, or another cable, compatibility is key to establishing a seamless connection without any signal loss or performance issues.
- Performance Considerations: Different connectors offer varying performance characteristics, such as insertion loss, return loss, and bandwidth capabilities. Assessing the performance requirements of the network or system is crucial for selecting a connector that meets the desired performance criteria.
- Installation and Maintenance: Consider the ease of installation and maintenance when choosing a connector. Connectors that facilitate quick and straightforward installation can contribute to time and cost savings during deployment and maintenance activities.
- Environmental Considerations: Depending on the deployment environment, factors such as temperature range, moisture resistance, and ruggedness may influence the choice of connector. For outdoor or harsh environments, connectors with enhanced environmental sealing and durability may be preferred.
By carefully evaluating these factors, you can make an informed decision when selecting a connector for your fiber optic cable. The right connector not only ensures a secure and robust connection but also contributes to the overall performance and reliability of the fiber optic network or system.
Preparing the Fiber Optic Cable
Before connecting a fiber optic cable to a connector, proper preparation of the cable is essential to ensure a successful and durable connection. The following steps outline the process of preparing the fiber optic cable:
- Gather the Necessary Tools: To begin the preparation, gather the required tools, including a cable stripper, lint-free wipes, isopropyl alcohol, cleaver, and a marker for labeling the cable. Having the necessary tools ready will streamline the preparation process and help maintain cleanliness and precision.
- Inspect the Cable: Thoroughly inspect the fiber optic cable for any signs of damage, such as cuts, kinks, or excessive bending. Identifying and addressing any cable damage is crucial to ensuring the integrity of the connection and preventing signal loss or performance degradation.
- Measure and Mark the Cable: Measure and mark the precise point on the cable where the connector will be attached. Accurate measurements and markings are essential for achieving the correct cable length and ensuring that the connector is positioned accurately for optimal performance.
- Clean the Cable: Before proceeding with further preparation, clean the cable using lint-free wipes and isopropyl alcohol. Removing any dirt, dust, or contaminants from the cable’s surface is vital to maintaining a clean and reliable connection.
- Protect the Fiber Ends: After cleaning, protect the exposed fiber ends with dust caps or protective covers to prevent any contamination or damage before the connector is attached. This precautionary step helps maintain the cleanliness and integrity of the fiber ends.
By following these preparatory steps, you can ensure that the fiber optic cable is in optimal condition for the subsequent processes of stripping, cleaving, and connector attachment. Proper preparation sets the foundation for a successful and high-quality fiber optic connection.
Stripping the Fiber Optic Cable
Stripping the fiber optic cable is a critical step in the process of connecting it to a connector. Properly stripping the cable ensures that the fiber is exposed and ready for the subsequent stages of cleaving and connector attachment. Here’s a detailed guide on how to strip a fiber optic cable:
- Select the Appropriate Tool: Use a precision fiber optic cable stripper designed for the specific cable diameter to ensure precise and clean stripping without damaging the fiber.
- Measure and Mark: Measure the precise length from the cable end to the point where the stripping will begin. Marking the cable helps maintain accuracy and prevents over-stripping.
- Secure the Cable: Secure the cable in a stable position to prevent any movement or slippage during the stripping process, ensuring consistent and precise results.
- Strip the Outer Jacket: Using the cable stripper, carefully remove the outer jacket of the fiber optic cable, following the marked length. Exercise caution to avoid damaging the underlying components while stripping the outer jacket.
- Remove Strength Members: If the cable contains strength members, carefully remove them after stripping the outer jacket, taking care not to disturb the fiber elements within the cable.
- Strip the Buffer Tube: After removing the strength members, strip the buffer tube to expose the individual fiber or fibers. Maintain precision and avoid excessive force to prevent damage to the delicate fiber components.
- Clean the Stripped Area: Once the fiber is exposed, clean the stripped area using lint-free wipes and isopropyl alcohol to remove any residues or contaminants, ensuring a clean and debris-free surface for the subsequent steps.
By following these steps, the fiber optic cable can be accurately and safely stripped, preparing it for the next crucial stage of cleaving the fiber. Proper stripping is essential for maintaining the integrity and performance of the fiber and ensuring a reliable connection with the connector.
Cleaving the Fiber Optic Cable
After stripping the fiber optic cable, the next essential step in the connection process is cleaving the fiber. Cleaving involves the precise and controlled cutting of the fiber to create a smooth and perpendicular end face, which is crucial for achieving a low-loss and stable connection. Here’s a detailed guide on how to cleave a fiber optic cable:
- Use a Quality Cleaver: Select a high-quality fiber cleaver designed for the specific type of fiber being used. A precision cleaver ensures accurate and consistent cleaving results.
- Prepare the Cleaver: Set up and calibrate the cleaver according to the manufacturer’s instructions, ensuring that it is properly adjusted for the fiber type and cleave length requirements.
- Clean the Fiber End: Before cleaving, ensure that the stripped fiber end is clean and free from any contaminants or residues that could affect the cleaving process and the quality of the fiber end face.
- Secure the Fiber: Secure the fiber in the cleaver to prevent any movement or vibration during the cleaving process, which could result in an uneven or angled fiber end face.
- Cleave the Fiber: Following the cleaver’s instructions, carefully cleave the fiber to create a smooth and perpendicular end face. Apply gentle and consistent pressure to achieve a clean cleave without inducing stress or fractures in the fiber.
- Inspect the Cleaved End: After cleaving, inspect the fiber end face using a fiber inspection microscope to ensure that it is smooth, flat, and free from any defects or irregularities. A high-quality cleave is essential for a low-loss and reliable connection.
- Protect the Cleaved End: Once cleaved, protect the fiber end face from any potential damage or contamination by promptly covering it with a protective cap or dust cover.
By following these steps, the fiber optic cable can be accurately cleaved, resulting in a pristine end face that is ready for the subsequent process of connecting it to a connector. Proper cleaving is crucial for achieving optimal signal transmission and minimizing signal loss in the fiber optic connection.
Cleaning the Connector
Before connecting the fiber optic cable to the connector, it is essential to ensure that the connector end face is meticulously cleaned to guarantee a reliable and low-loss connection. Contaminants or residues on the connector end face can significantly impact the performance of the connection. Here’s a comprehensive guide on how to clean the connector:
- Inspect the Connector End Face: Prior to cleaning, inspect the connector end face using a fiber inspection microscope to identify any contaminants, scratches, or defects. A thorough inspection helps determine the cleaning requirements and the overall condition of the connector.
- Use Proper Cleaning Tools: Select lint-free cleaning wipes and an appropriate fiber optic connector cleaning solution recommended by the connector manufacturer. Avoid using materials that may leave lint or introduce additional contaminants to the connector.
- Apply Cleaning Solution: Apply a small amount of the cleaning solution to the cleaning wipe, ensuring it is not oversaturated. Gently wipe the connector end face in a single motion to remove any dirt, oil, or debris. Use a fresh section of the wipe for each cleaning pass to prevent recontamination.
- Inspect the Cleaned End Face: After cleaning, reinspect the connector end face to verify that it is free from contaminants and residues. Repeat the cleaning process if necessary until the end face is pristine and ready for the fiber optic cable connection.
- Use a Connector Inspection Tool: Utilize a connector inspection tool with built-in magnification and illumination to perform a detailed examination of the connector end face. This allows for a close-up view to ensure that the end face is thoroughly clean and free from any imperfections.
- Protect the Cleaned End Face: Once the connector end face is cleaned and inspected, promptly cover it with a protective cap or dust cover to prevent any recontamination before the fiber optic cable is inserted.
By following these cleaning procedures, the connector end face can be effectively cleaned and prepared for the subsequent step of inserting the fiber optic cable. A meticulously cleaned connector end face is vital for establishing a high-quality and reliable connection, minimizing signal loss and ensuring optimal performance in the fiber optic network or system.
Inserting the Fiber Optic Cable into the Connector
Once the fiber optic cable and the connector are appropriately prepared, the next crucial step is to insert the fiber optic cable into the connector. This process requires precision and care to ensure a secure and stable connection. Here’s a detailed guide on how to insert the fiber optic cable into the connector:
- Prepare the Connector: Ensure that the connector is clean and free from any debris or contaminants before proceeding with the insertion of the fiber optic cable. A pristine connector end face is essential for a reliable connection.
- Inspect the Fiber End: Verify that the cleaved end of the fiber optic cable is clean and free from any damage or irregularities. A smooth and undamaged fiber end is crucial for achieving a low-loss connection.
- Position the Cable: Carefully position the prepared fiber optic cable for insertion into the connector, aligning it with the connector’s keying mechanism or alignment features to ensure proper orientation and alignment.
- Apply Epoxy or Adhesive (If Required): In some cases, an epoxy or adhesive may be applied to secure the fiber optic cable within the connector. Follow the manufacturer’s guidelines for the appropriate application and curing process.
- Insert the Cable: With precision and gentle pressure, insert the fiber optic cable into the connector, ensuring that it is properly seated and aligned. Avoid excessive force that could damage the fiber or connector components.
- Verify the Connection: After insertion, visually inspect the connector to confirm that the fiber optic cable is securely and correctly positioned. A proper connection should exhibit a flush and uniform alignment between the cable and the connector.
- Perform a Pull Test (If Applicable): If specified by the installation guidelines, perform a pull test to verify the strength and integrity of the connection. The cable should remain securely attached to the connector without any signs of slippage or detachment.
By following these steps, the fiber optic cable can be effectively inserted into the connector, establishing a robust and reliable connection. Proper alignment, secure seating, and adherence to manufacturer guidelines are essential for ensuring the integrity and performance of the fiber optic connection.
Securing the Connector
After inserting the fiber optic cable into the connector, the next critical step is to secure the connector in place to ensure a stable and durable connection. Properly securing the connector not only safeguards the integrity of the connection but also contributes to the long-term performance and reliability of the fiber optic link. Here’s a detailed guide on how to secure the connector:
- Assess the Securing Method: Depending on the connector type and installation requirements, assess the appropriate method for securing the connector. This may involve utilizing crimping, heat shrinking, or mechanical latching mechanisms, among others.
- Follow Manufacturer Guidelines: Adhere to the connector manufacturer’s guidelines and recommendations for the specific securing method and any associated tools or equipment required for the process.
- Prepare the Securing Components: If crimping or heat shrinking is required, prepare the necessary components, such as crimp sleeves or heat shrink tubes, ensuring they are compatible with the connector and cable type.
- Apply the Securing Method: Carefully apply the chosen securing method, following the designated procedures and techniques to secure the connector in place. Exercise caution to avoid causing any damage to the fiber or connector during the securing process.
- Verify Secure Attachment: After securing the connector, visually inspect and verify that it is firmly and securely attached to the fiber optic cable. The attachment should be robust and capable of withstanding mechanical stress and environmental factors.
- Perform Tensile Strength Test (If Applicable): In some installations, a tensile strength test may be performed to validate the secure attachment of the connector. This test ensures that the connector remains firmly attached to the cable under specified tensile loads.
- Protect the Secured Connection: Once the connector is securely attached, protect the secured connection from potential damage or contamination by utilizing protective sleeves, boots, or strain reliefs as recommended for the specific installation environment.
By following these steps and guidelines, the connector can be effectively secured to the fiber optic cable, ensuring a stable and resilient connection. Proper securing methods and adherence to manufacturer recommendations are essential for maintaining the integrity and performance of the fiber optic link.
Testing the Connection
After completing the process of connecting the fiber optic cable to the connector and securing the assembly, it is crucial to perform comprehensive testing to validate the integrity and performance of the connection. Testing ensures that the connection meets the required standards and specifications, providing confidence in its reliability for data transmission. Here’s a detailed guide on how to test the fiber optic connection:
- Visual Inspection: Begin the testing process with a visual inspection of the connector and the connected fiber optic cable. Verify that the connector end faces are clean, undamaged, and properly aligned, ensuring that there are no visible defects that could affect the connection.
- Optical Power Measurement: Utilize an optical power meter to measure the optical power levels at both ends of the fiber optic link. This measurement helps assess the signal loss and overall performance of the connection, ensuring that it meets the specified power budget.
- Return Loss Measurement: Perform a return loss measurement using an optical time-domain reflectometer (OTDR) or a reflectometer to evaluate the amount of light reflected back from the connection point. A low return loss indicates minimal signal reflection and optimal connection quality.
- Insertion Loss Testing: Conduct insertion loss testing to measure the amount of signal loss occurring at the connection point. This test verifies that the connection meets the required insertion loss specifications, ensuring efficient signal transmission.
- End-Face Inspection: Use a fiber inspection microscope to inspect the end faces of the connector and the fiber optic cable for any microscopic defects or contamination that may impact the connection quality. A thorough end-face inspection is crucial for identifying potential issues that may not be visible to the naked eye.
- Environmental Testing (If Applicable): In environments with specific temperature, humidity, or mechanical stress requirements, conduct environmental testing to evaluate the connection’s performance under these conditions. This testing ensures that the connection remains reliable in diverse operating environments.
- Documentation and Record Keeping: Document the testing results, including optical power levels, return loss, insertion loss, and any visual inspection findings. Maintaining detailed records of the testing process provides valuable data for future reference and troubleshooting.
By meticulously conducting these testing procedures, the integrity and performance of the fiber optic connection can be thoroughly evaluated, ensuring that it meets the required standards for reliable data transmission. Comprehensive testing is essential for validating the quality and reliability of the fiber optic connection in diverse operational conditions.