
Choosing the Right Greeting Card Template
When it comes to creating a personalized greeting card, choosing the right template sets the foundation for a beautiful and impactful design. With a plethora of options available, it’s important to consider a few key factors before diving into the creative process. Here are some tips to help you choose the perfect greeting card template:
- Occasion: Consider the specific occasion or event for which you are creating the card. Whether it’s a birthday, wedding, holiday, or graduation, there are templates designed to suit each occasion. The template should align with the theme and tone of the event.
- Style: Think about the aesthetic and style you want to convey through your greeting card. Are you looking for something elegant and sophisticated, fun and playful, or minimalistic and modern? Browse through a variety of template styles and choose one that best matches your vision.
- Layout: Pay attention to the layout options within the template. Some templates offer multiple photo placement options, while others focus more on typography and text. Consider the number of photos you want to include and how you want them to be displayed.
- Customizability: Look for templates that offer a high degree of customization. You may want to add your own text, adjust colors, resize elements, or rearrange the design. Templates that allow for easy customization give you more creative flexibility.
- Printing Option: If you plan to print the greeting card yourself, make sure the template is compatible with your printer’s specifications. Some templates have specific dimensions or require special paper sizes. Alternatively, if you prefer to use a professional printing service, check if the template is compatible with their requirements.
By considering these factors, you can narrow down your choices and select a greeting card template that suits your needs. Remember to take your time and explore various options before making a final decision. Once you have the perfect template, you can begin personalizing it to create a heartfelt and visually appealing greeting card.
Gathering Materials and Resources
Before diving into the creative process of designing your greeting card, it’s important to gather all the necessary materials and resources. Having everything prepared and organized will make the design process smoother and more enjoyable. Here’s a checklist of materials and resources you may need:
- Computer: Ensure you have access to a computer with Adobe Photoshop installed. This powerful software will allow you to customize the greeting card template and unleash your creativity.
- Greeting Card Template: Make sure you have downloaded and saved the chosen greeting card template to your computer. You can find a wide selection of premade templates online or use a design software to create your own.
- Images and Graphics: Gather any images or graphics that you plan to incorporate into your greeting card design. These can be personal photos, stock images, or illustrations that complement the theme and message of your card.
- Fonts: Consider the fonts you want to use for the text elements of your greeting card. Collect any desired fonts and install them on your computer if necessary. Choose fonts that are legible and match the overall style of your card.
- Color Palette: Think about the color scheme you want to use in your greeting card design. Collect swatches or create a color palette that reflects the mood and theme of your card. This will help maintain consistency in your design.
- Inspiration: Search for inspiration online or gather physical examples of greeting cards that resonate with you. Take note of design elements, layouts, and creative ideas that you can incorporate into your own card.
- Printer and Paper: If you plan to print the greeting card yourself, make sure you have a reliable printer and suitable paper. Choose high-quality cardstock that is compatible with your printer’s specifications. Alternatively, you can explore professional printing services if you prefer.
- Scissors, Glue, and Decorative Elements (Optional): Depending on your design, you may want to add extra embellishments to your greeting card. Prepare scissors, glue, ribbons, stickers, or any other decorative elements you wish to use.
By gathering all these materials and resources before starting the design process, you’ll have everything at your fingertips and be well-prepared to create a stunning and personalized greeting card. Take your time to ensure you have everything you need, and don’t be afraid to get creative and experiment with different elements to make your card truly unique.
Opening the Template in Adobe Photoshop
Once you have chosen the perfect greeting card template and gathered all the necessary materials, it’s time to open the template in Adobe Photoshop. Follow these steps to get started:
- Launch Adobe Photoshop: Open Adobe Photoshop on your computer by clicking on the software icon. If you don’t have Photoshop installed, you can download a trial version from Adobe’s official website.
- Open the Template: In Photoshop, go to the “File” menu and select “Open.” Navigate to the location where you saved the greeting card template and select the file. Click “Open” to load the template into Photoshop.
- Inspect the Layers Panel: Once the template is open, you will likely see a Layers panel on the right-hand side of the Photoshop workspace. This panel displays all the different layers that make up the design. Take a moment to familiarize yourself with the layers and their names.
- Understanding the Structure: Examine how the design is structured within the layers. Typically, you will find separate layers for the background, text, images, and any other elements. This allows you to easily customize and modify each part of the greeting card.
- Organize Your Workspace: Arrange the Photoshop workspace to your liking. You can resize and reposition the panels, zoom in or out of the template, and adjust the view to make it more comfortable for you to work with.
- Familiarize Yourself with Photoshop Tools: Take a moment to familiarize yourself with the various tools in Photoshop. These tools enable you to edit, manipulate, and enhance different elements of the greeting card design. Experiment with their functions and explore Photoshop’s capabilities.
By following these steps, you can easily open the greeting card template in Adobe Photoshop and start customizing it to fit your vision. Remember to save your progress regularly to avoid any potential data loss. Now that the template is loaded, you can move on to the next steps of customizing the text, adding images, and bringing your greeting card design to life.
Understanding the Layers and Tools
When working with a greeting card template in Adobe Photoshop, it’s important to understand the concept of layers and familiarize yourself with the tools available. This knowledge will enable you to customize and personalize the design to your liking. Here’s a breakdown of layers and tools in Photoshop:
Layers:
Layers are an essential feature in Photoshop that allow you to work with individual elements of your greeting card design. Each layer represents a different component, such as the background, text, images, or other design elements. By organizing elements into separate layers, you can easily modify and manipulate specific parts of the template without affecting the rest of the design. Use the Layers panel to view and manage the layers of your greeting card template. You can hide or show layers, rearrange their order, adjust opacity, and apply various layer styles to achieve the desired look.
Tools:
Adobe Photoshop offers an extensive array of tools that allow you to edit, enhance, and manipulate different elements of your greeting card design. Here are a few key tools you’ll find useful:
- Move Tool: The Move Tool allows you to select and move layers or elements within your design. Click and drag on the desired element to reposition it.
- Text Tool: The Text Tool enables you to add and edit text in your greeting card. Click on the desired area, and a text box will appear, allowing you to type in your customized text. You can also adjust the font, size, color, and other text properties.
- Brush Tool: The Brush Tool allows you to paint, draw, or apply artistic strokes and effects to your design. Choose from different brush types, sizes, and settings to achieve the desired effect.
- Shape Tools: Photoshop provides various shape tools, such as the Rectangle Tool, Ellipse Tool, and Custom Shape Tool. These tools let you create shapes, borders, and frames for your greeting card.
- Selection Tools: Selection Tools, like the Marquee Tool and Lasso Tool, allow you to select specific areas or elements of your design for editing or manipulation. Use different selection techniques to precisely target the desired portions of your card.
- Transform Tools: Transform Tools, such as the Rotate Tool and Scale Tool, enable you to resize, rotate, skew, or distort elements within your design. These tools are useful for adjusting the size or orientation of images or text.
Familiarize yourself with these key layers and tools in Adobe Photoshop to gain more control and creativity over your greeting card design. Experiment with different layer styles, techniques, and tools to bring your vision to life. Don’t be afraid to explore and try out new features – that’s where the true magic happens.
Customizing the Text and Fonts
One of the most important aspects of personalizing a greeting card is customizing the text and choosing the right fonts. The text adds meaning and communicates the message of the card, while the fonts contribute to its visual appeal. Here are some tips for customizing the text and selecting appropriate fonts for your greeting card:
- Readability: Ensure that the text is easily readable by choosing fonts that are clear and legible. Avoid using overly decorative or complicated fonts that may be difficult to decipher.
- Consistency: Maintain consistency in your font choices throughout the greeting card. Use the same font or a complementary font for headings, subheadings, and body text to create a harmonious and cohesive look.
- Contrast: Create visual interest by using contrasting fonts for different text elements. For example, pair a bold and sans-serif font with a delicate and cursive font to add emphasis or highlight specific parts of the text.
- Font Sizes: Adjust the font sizes according to the importance of the text. Larger fonts can be used for headings or important messages, while smaller fonts work well for additional information or fine print.
- Font Colors: Choose font colors that complement the overall design and enhance readability. Dark text on a light background or light text on a dark background tends to work well. Ensure sufficient contrast between the font color and background to ensure readability.
- Font Alignment: Align your text appropriately within the greeting card. Experiment with left-aligned, centered, or right-aligned text to achieve the desired visual effect.
- Experimentation: Don’t be afraid to experiment with different fonts and styles. Play around with various font combinations and see how they look within the design. Try different font weights, italics, or uppercase/lowercase combinations to add variation and interest.
- Emotional Tone: Consider the emotional tone of your greeting card and choose fonts that complement that tone. Playful, whimsical fonts work well for light-hearted and fun occasions, while elegant and formal fonts are suitable for sophisticated events.
- Personalization: Add a personal touch to your greeting card by using handwritten or script fonts for names or personal messages. Many fonts mimic the look of handwriting and can add a heartfelt feel to your design.
By customizing the text and selecting appropriate fonts, you can effectively convey your message and enhance the visual appeal of your greeting card. Remember to strike a balance between creativity and readability, and don’t be afraid to experiment until you find the perfect combination.
Adding Images and Graphics
Images and graphics play a vital role in enhancing the visual impact of a greeting card. They can evoke emotions, convey messages, and add a personal touch to your design. Here are some tips for effectively adding images and graphics to your greeting card:
- Select High-Quality Images: Choose high-resolution images that are clear and of good quality. Avoid pixelated or blurry photos, as they can detrimentally affect the overall appearance of your greeting card.
- Consider Aspect Ratio: Ensure that the aspect ratio of the images you select matches the dimensions and layout of your greeting card template. Images that are too narrow or too wide may appear distorted when resized to fit within the template.
- Balance Visual Elements: Strive for a balanced composition by placing images and graphics strategically within your greeting card design. Consider the rule of thirds or experiment with different placement options to achieve visual harmony.
- Customize Image Size and Position: Resize and reposition the images within the template to best suit your design. Adobe Photoshop provides various tools and features that allow you to adjust the size, rotate, and crop images as needed.
- Add Personal Photos: If the greeting card is for a personal occasion, such as a birthday or anniversary, consider adding personal photos to make it more meaningful and special. Use photos that capture cherished memories or moments.
- Blend Images with the Background: Experiment with blending techniques to integrate the images seamlessly into the background of your greeting card. Use layer masks, opacity adjustments, or blending modes to create a cohesive and polished look.
- Add Graphics and Illustrations: Enhance the design by incorporating additional graphics or illustrations. These can be icons, borders, decorative elements, or any other graphical elements that complement the theme and overall aesthetic of your greeting card.
- Consider Copyright and Usage: Ensure that you have the necessary rights or permissions to use any images or graphics in your greeting card design. If you’re using stock images, make sure to comply with the licensing terms and attribute the source if required.
- Edit and Enhance Images: Make necessary adjustments to the images, such as adjusting brightness, contrast, or color balance, to enhance their visual appeal and fit better within the design of your greeting card.
- Experiment and Iterate: Don’t be afraid to experiment with different image placements, styles, and effects. Iterate on your design, trying new ideas and exploring creative possibilities until you achieve the desired look and feel for your greeting card.
By carefully selecting and adding images and graphics to your greeting card, you can create a visually striking and personalized design that captivates the recipient. Remember to balance the visual elements, maintain high image quality, and respect copyright guidelines while allowing your creativity to shine.
Adjusting Colors and Backgrounds
The colors and backgrounds of your greeting card have a significant impact on its overall look and feel. By adjusting the colors and backgrounds, you can set the right mood and create a cohesive design. Here are some tips for effectively adjusting colors and backgrounds in your greeting card:
- Consider the Theme: Reflect on the theme or occasion of your greeting card and choose colors that align with it. For example, vibrant and festive colors work well for birthday cards, while soft pastel hues are suitable for baby shower invitations.
- Create a Color Palette: Develop a color palette that harmonizes well and provides a visually pleasing combination. Choose a dominant color, along with complementary or contrasting shades, to add depth and interest to your design.
- Background Selection: Select a background that complements the overall aesthetic of your greeting card. It can be a solid color, a pattern, a gradient, or even a themed image. Ensure that the background doesn’t overpower the text or images, and that it provides sufficient contrast for readability.
- Adjust with Color Tools: Use Adobe Photoshop’s color adjustment tools to fine-tune the colors of your greeting card. Experiment with the Hue/Saturation, Levels, or Curves tools to modify the overall color balance, brightness, or contrast.
- Apply Color Filters: Consider applying color filters or overlays to the images or background of your greeting card. This can help enhance the mood or achieve a specific visual effect. Experiment with different filters to find the one that fits your desired look.
- Create a Cohesive Look: Ensure that the colors used in your greeting card are consistent throughout. This includes the background, text, and any additional graphical elements. Consistency in color scheme helps create a cohesive and visually pleasing design.
- Emphasize Key Elements: Use color strategically to draw attention to specific elements of your greeting card. For example, highlight important text or key images with a contrasting or bolder color to make them stand out.
- Consider Color Psychology: Keep in mind that different colors evoke different emotions or associations. Use this to your advantage by aligning the color choices with the intended message or mood of the greeting card. For instance, warm colors like red and yellow can signify energy and happiness, while cool colors like blue and green can evoke calmness and tranquility.
- Test and Iterate: After making color adjustments, take a step back and assess how they impact the overall design. Make adjustments as needed and iterate on your color choices until you achieve the desired visual impact for your greeting card.
By thoughtfully adjusting the colors and backgrounds of your greeting card, you can create a visually cohesive and impactful design that effectively conveys your message and captures the recipient’s attention. Remember to consider the theme, create a balanced color palette, and apply the adjustments strategically to enhance the overall aesthetic of your greeting card.
Applying Filters and Effects
Applying filters and effects to your greeting card can add depth, texture, and visual interest to your design. Filters and effects allow you to experiment with different styles and give your card a unique and personalized touch. Here are some tips for effectively applying filters and effects to your greeting card:
- Consider the Overall Style: Think about the desired style and aesthetic of your greeting card. Filters and effects can range from vintage and retro to contemporary and modern. Choose effects that align with the overall theme and mood of your design.
- Experiment with Photoshop Filters: Adobe Photoshop offers a wide variety of built-in filters that can transform the appearance of your greeting card. These filters can be found under the “Filter” menu. Try out different filters, such as blur, sharpen, distortion, or artistic effects, and see how they enhance your design.
- Control Filter Intensity: Adjust the intensity of the applied filters using opacity or blending modes. This allows you to find the perfect balance between the original design and the applied effect.
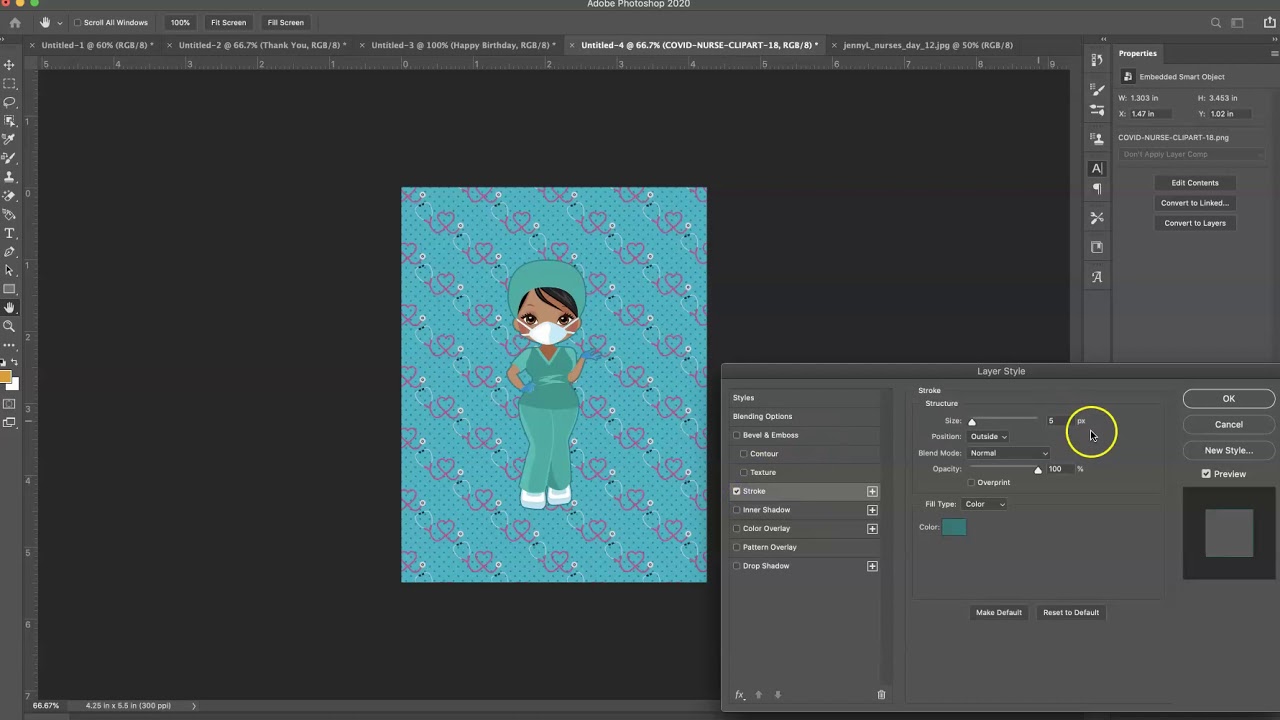
- Apply Layer Styles: Explore the layer styles functionality in Photoshop to add texture, bevels, gradients, or drop shadows to your greeting card design. These layer styles can be found in the “Layer Style” panel and provide a quick and easy way to enhance different elements of your design.
- Add Textures: Incorporate textures into your greeting card to add depth and visual interest. Textures could be patterns, grunge overlays, or even images. Experiment with blending modes and opacity levels to achieve the desired effect.
- Use Photo Editing Effects: If you’ve included photos in your greeting card, consider applying photo editing effects such as sepia tones, black and white conversions, or color enhancements. These effects can help achieve a specific mood or evoke nostalgic feelings.
- Exercise Restraint: While filters and effects can elevate your design, it’s important to exercise restraint and avoid overusing them. Apply effects selectively to specific elements or areas of your greeting card to maintain a balanced and visually pleasing composition.
- Experimentation is Key: Don’t be afraid to experiment and try out different filters and effects. Not every effect will work for every design, so take the time to explore various options and find the ones that best enhance your greeting card.
- Save a Copy: Before applying filters and effects, it’s a good practice to save a copy of your original design. This allows you to compare the modified version with the original and make adjustments as needed.
By applying filters and effects to your greeting card design, you can add depth, creativity, and a unique visual flair. Remember to experiment, exercise restraint, and carefully consider how each effect contributes to the overall aesthetic and message of your greeting card.
Previewing and Saving Your Greeting Card
Once you have customized the text, added images, adjusted colors, and applied filters and effects to your greeting card, it’s important to preview the final result before saving your design. Previewing helps you identify any potential issues and ensures that your greeting card looks exactly how you envisioned it. Here are some steps to help you preview and save your greeting card:
- Zoom-In and Zoom-Out: Adjust the zoom level of your design to get a closer look at the details and ensure that everything is visually appealing and in the right place. Zooming in allows you to check for any pixelation or blurriness, while zooming out gives you a better sense of the overall composition.
- Check for Spelling and Grammar Errors: Carefully review the text in your greeting card, checking for any spelling or grammar mistakes. These errors can distract from your design and undermine the intended message. Use spell check tools or consider getting a second pair of eyes to proofread your content.
- Test Print: If you plan to print your greeting card, consider doing a test print before finalizing. This allows you to check for any alignment issues, color accuracy, or other print-related concerns. Adjust your design if needed based on the test print results.
- Solicit Feedback: Share your greeting card with a trusted friend, family member, or colleague, and ask for their feedback. They may offer valuable insights or suggestions that can further enhance your design.
- Save Your Work: Before saving your greeting card, create a duplicate or save a separate copy of your final design. This ensures you have a backup in case you want to make further modifications in the future without losing the original version.
- Choose the Right File Format: Select the appropriate file format for saving your greeting card. If you plan to share it digitally or post it online, consider saving it as a JPEG or PNG file. If you intend to print it, save it in a high-quality PDF or TIFF format.
- Ensure Compatibility: If you are sharing the greeting card with others or sending it to a printing service, make sure to double-check the file format and any specific requirements they may have regarding file dimensions, resolution, or color profiles.
- Organize Your Files: Maintain a well-organized folder structure to store your greeting card design files. Create separate folders for different versions, drafts, and final copies to make it easier to locate and retrieve them in the future.
- Label and Store Master Template: If you have customized a template, save the modified version separately from the original template file. Label and store the master template in a safe place for future use or when you want to create similar greeting cards.
By previewing and saving your greeting card, you can ensure its quality, spot any last-minute adjustments, and save it in the appropriate file format. Taking these steps will enable you to share, print, or distribute your greeting card with confidence and celebrate your creativity.
Printing and Sharing Your Greeting Card
After designing and finalizing your greeting card, it’s time to bring it to life by printing and sharing it with your intended recipients. Here are some steps to help you successfully print and share your greeting card:
- Choose the Right Paper: Select a high-quality paper that is suitable for greeting card printing. Consider factors such as thickness, finish, and texture to achieve the desired look and feel for your card.
- Adjust Print Settings: Before printing, adjust the print settings on your printer to ensure optimal results. Select the appropriate paper size, orientation, and print quality settings according to your greeting card design.
- Print a Test Copy: Before printing a large batch of greeting cards, it’s advisable to print a test copy. This allows you to verify that the colors, alignment, and overall print quality meet your expectations.
- Consider Professional Printing: If you want a polished and professional finish, consider using a local print shop or online printing service. They can provide high-quality printing, various paper options, and additional finishing options like embossing or foil stamping.
- Trim to Size: If you printed multiple greeting cards on a single sheet, use a paper trimmer or scissors to carefully cut and separate them. Follow the trim lines or guidelines provided on the template to ensure accurate and clean cuts.
- Personalize and Sign: Add a personal touch to each greeting card by hand-signing them or including a handwritten note. This adds a more intimate and meaningful touch for the recipient.
- Envelope Selection: Choose suitable envelopes that fit the size of your greeting cards. Consider coordinating the color or style of the envelope with the design of your cards.
- Protective Packaging: When sending or delivering the greeting cards, consider using protective packaging to prevent any damage during transit. Use bubble mailers or clear sleeves to keep the cards safe and presentable.
- Distribute Digitally: For a quicker and more convenient option, you can distribute your greeting cards digitally. Share them via email, social media, or on a website. Convert your design to a digital-friendly format like a JPEG or PDF for easy viewing and sharing.
- Spread the Word: Inform your intended recipients about the arrival of their greeting cards. Send personalized messages or make announcements on social media to build anticipation and make them feel special.
- Create Online Galleries: Consider creating an online gallery or portfolio to showcase your greeting card designs. This allows others to view and appreciate your creativity, and may even lead to new opportunities or collaborations.
By following these steps, you can successfully print and share your beautifully designed greeting cards. Whether you choose to print them yourself or use professional printing services, or distribute them digitally, it’s a wonderful way to connect with your loved ones and spread joy and positivity.
Troubleshooting Tips and Common Mistakes
During the process of creating greeting cards, you may encounter certain challenges or make common mistakes. Here are some troubleshooting tips to help you overcome obstacles and avoid common pitfalls:
- Check Image Resolution: If your images appear blurry or pixelated when printed, ensure that they have a high enough resolution. Low-resolution images may look fine on screen but can result in poor print quality.
- Proofread Thoroughly: Double-check all text content for spelling errors, typos, or incorrect information. It’s easy for mistakes to go unnoticed, so take the time to proofread your greeting cards carefully.
- Verify Print Settings: Before printing, ensure that your print settings, such as paper size, orientation, and quality, are correctly configured. Mistakes in print settings may result in misaligned or distorted output.
- Adjust Colors for Print: Keep in mind that colors may look different on-screen compared to when printed. To avoid unpleasant surprises, calibrate your monitor and make adjustments to color settings specifically for print output.
- Double-Check Alignment: Pay attention to the alignment of elements within your greeting card design, such as text, images, and borders. Misaligned elements can make the card appear unprofessional.
- Test Different Paper Options: If you’re not satisfied with the print quality, try different paper options. Some designs may look better on glossy paper, while others may benefit from a matte finish. Experiment to find the right fit.
- Avoid Cluttered Designs: Overloading your greeting card with too many elements or excessive decoration may result in a cluttered and confusing look. Keep the design clean, uncluttered, and focused on the main message or theme.
- Test Cross-Browser Compatibility: If you’re sharing your greeting cards online, make sure to test them across different web browsers and devices. Elements of the design may appear differently depending on the platform, so ensure a consistent experience.
- Save Backups Frequently: To avoid data loss or accidental changes, save backup copies of your greeting card project at regular intervals. This ensures that even if something goes wrong, you’ll have a recent version to revert to.
- Ask for Feedback: Don’t hesitate to seek feedback from others before finalizing your greeting cards. Fresh eyes can spot potential issues or offer valuable suggestions for improvements that you may have overlooked.
By keeping these troubleshooting tips in mind and learning from common mistakes, you can overcome obstacles and create greeting cards that are visually appealing, error-free, and loved by the recipients. Remember to approach each challenge as an opportunity to learn and grow as a designer.