
Identifying Corroded Batteries
Identifying Corroded Batteries
When your trusty flashlight suddenly fails to illuminate, the culprit is often corroded batteries. Identifying corroded batteries is crucial in ensuring the proper functioning of your flashlight and preventing potential damage. Here’s how to spot the telltale signs of battery corrosion:
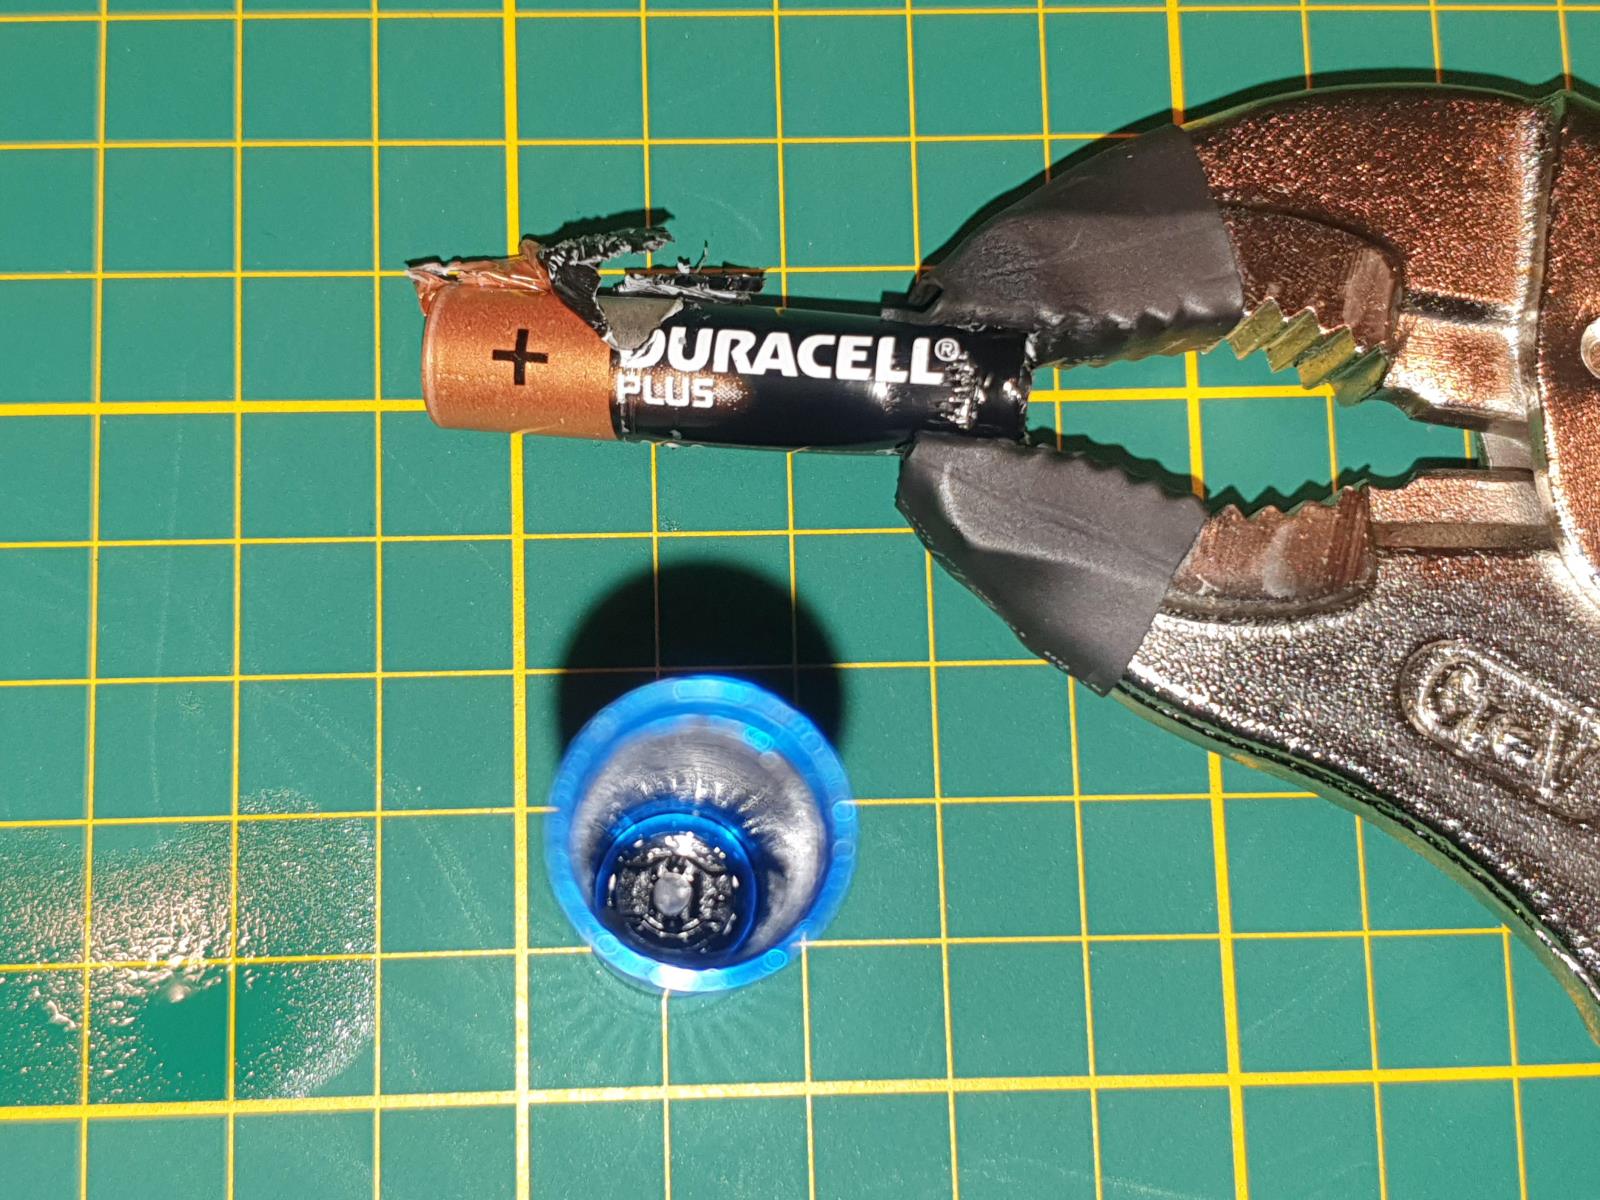
- Visual Inspection: Begin by visually inspecting the battery compartment. Look for any signs of rust-like residue or a white powdery substance on the batteries or the contacts within the flashlight. Corrosion often manifests as a fuzzy, powdery substance around the battery terminals, indicating a chemical reaction that has occurred.
- Diminished Performance: If your flashlight’s brightness has significantly decreased or it has stopped working altogether, it may be a result of corroded batteries. This diminished performance is a common indicator of battery corrosion and should prompt a thorough inspection.
- Strange Odor: A pungent or unusual odor emanating from the flashlight may also indicate battery corrosion. If you detect any unusual smells, exercise caution and investigate the source promptly.
Identifying corroded batteries early on can prevent further damage to your flashlight and ensure a swift resolution to the issue. Once you’ve confirmed the presence of corroded batteries, it’s essential to take appropriate safety precautions before attempting to remove them.
Safety Precautions
Before embarking on the task of removing corroded batteries from your flashlight, it’s imperative to prioritize safety. The corrosive substances present in the batteries can pose potential risks, and adhering to the following safety precautions is paramount:
- Protective Gear: Prior to handling the flashlight, equip yourself with protective gear such as gloves and safety goggles. These items will shield your skin and eyes from direct contact with the corrosive residue, minimizing the risk of skin irritation or injury.
- Ventilation: Ensure that the area where you are working is well-ventilated. Corrosive fumes may be released during the battery removal process, and adequate ventilation will help disperse any potentially harmful vapors.
- Isolation: If possible, work in a space isolated from food, drinks, and other personal items. This precaution prevents accidental contamination of consumables or belongings with the corrosive residue from the batteries.
- Secure Disposal: Prepare a designated container for the safe disposal of the corroded batteries. Sealable plastic bags or airtight containers are ideal for containing the batteries and preventing further leakage or contamination.
- Cautionary Approach: Exercise caution and avoid direct contact with the corroded batteries. Refrain from touching your face or eyes while handling the batteries, and wash your hands thoroughly after completing the removal process.
By adhering to these safety precautions, you can mitigate potential risks and ensure a secure environment for addressing the issue of corroded batteries in your flashlight. Once the necessary safety measures are in place, you can proceed with confidence to remove the corroded batteries effectively and safely.
Removing Corroded Batteries
Removing corroded batteries from a flashlight requires careful attention and a methodical approach to prevent further damage. Follow these steps to safely and effectively remove the corroded batteries:
- Prepare the Workspace: Begin by selecting a well-lit and adequately ventilated workspace. Lay down a clean cloth or paper towels to provide a clean surface for the flashlight and to absorb any potential spills or residue.
- Put on Protective Gear: Prior to handling the flashlight, don protective gloves and safety goggles to shield your skin and eyes from direct contact with the corrosive residue.
- Inspect the Battery Compartment: Carefully open the battery compartment of the flashlight and assess the extent of the corrosion. Take note of any visible damage or excessive residue.
- Remove the Batteries: Using a pair of non-conductive, insulated gloves or insulated tools, carefully extract the corroded batteries from the compartment. Avoid using bare hands to prevent direct contact with the corrosive material.
- Dispose of the Batteries Safely: Place the corroded batteries into a sealable plastic bag or an airtight container designated for hazardous waste. Ensure that the container is securely sealed to prevent any leakage or further contamination.
- Clean the Compartment: After removing the batteries, use a cotton swab or a small brush dipped in a mixture of water and baking soda to gently clean the battery contacts and the interior of the compartment. This solution helps neutralize any remaining acidic residue and corrosion.
- Dry and Inspect: Once the compartment is clean, use a dry cloth or paper towel to thoroughly dry the interior. Inspect the compartment to ensure that all traces of corrosion have been removed.
By following these steps, you can safely remove the corroded batteries from your flashlight, minimizing the risk of further damage and preparing the flashlight for the next essential step: cleaning the internal components to restore its functionality.
Cleaning the Flashlight
After successfully removing the corroded batteries, the next critical step is to clean the internal components of the flashlight to eliminate any residual corrosion and ensure optimal functionality. Follow these steps to effectively clean your flashlight:
- Disassemble the Flashlight: If possible, disassemble the flashlight according to the manufacturer’s instructions. This may involve removing the lens, reflector, and other accessible components to facilitate thorough cleaning.
- Inspect for Residue: Carefully examine each component for signs of corrosion residue or moisture. Wipe away any visible residue using a clean, dry cloth or a cotton swab.
- Clean with Mild Soap Solution: Prepare a solution of mild dish soap and warm water. Dampen a soft cloth or sponge with the solution and gently wipe the exterior of the flashlight to remove any dirt, grime, or remaining residue. Take care to avoid saturating the internal components with excess moisture.
- Focus on Contacts and Threads: Pay special attention to the battery contacts, threads, and other electrical connections within the flashlight. Use a cotton swab moistened with the soap solution to clean these areas thoroughly, ensuring the removal of any lingering corrosion or debris.
- Rinse and Dry: After cleaning, lightly dampen a fresh cloth with clean water and use it to wipe away any soap residue from the flashlight. Once rinsed, dry the components thoroughly with a dry cloth to prevent moisture-related issues.
- Reassemble the Flashlight: Once all components are clean and dry, reassemble the flashlight according to the manufacturer’s instructions. Take care to securely fasten all parts to ensure proper functionality.
By meticulously cleaning the internal and external components of your flashlight, you can effectively eliminate residual corrosion and debris, restoring the device to its optimal condition. With the cleaning process complete, the final step involves testing the flashlight to confirm its renewed functionality.
Testing the Flashlight
After addressing the issue of corroded batteries and thoroughly cleaning the internal components, it’s essential to test the flashlight to ensure that it functions reliably. Follow these steps to conduct a comprehensive test of your flashlight:
- Insert New Batteries: Begin by inserting fresh, high-quality batteries into the battery compartment of the flashlight. Ensure that the batteries are inserted in the correct orientation, following the polarity markings within the compartment.
- Power On the Flashlight: Turn on the flashlight to assess its brightness and functionality. Observe the beam intensity and any adjustable lighting modes or features to confirm that the flashlight is operating as expected.
- Check for Intermittent Operation: Move the flashlight gently to detect any flickering or intermittent operation. This step helps identify loose connections or residual issues that may impact the flashlight’s performance.
- Test Additional Features: If your flashlight includes additional features such as strobe modes, adjustable focus, or signaling capabilities, test each feature to ensure that they operate smoothly and reliably.
- Inspect for Water Resistance: If your flashlight is designed to be water-resistant or waterproof, consider conducting a brief water resistance test to verify the integrity of the seals and housing. This step is particularly important if the flashlight has been exposed to moisture during the corrosion removal process.
- Verify Longevity: Allow the flashlight to remain powered on for an extended period, observing its performance and assessing the longevity of the batteries. This step helps ensure that the flashlight maintains consistent illumination without unexpected dimming or power interruptions.
By meticulously testing the flashlight after addressing the corrosion issue and cleaning the internal components, you can confirm that the device is fully operational and ready for use. This thorough testing process provides peace of mind, ensuring that your flashlight is reliable and prepared for any future illumination needs.