
Gathering Materials
To successfully recess a USB hub into a table, you will need to gather a few key materials. Ensuring you have everything you need beforehand will make the process smoother and more efficient. Here is a list of the essential items:
- A USB hub: Choose a hub that meets your specific requirements, such as the number of ports you need and any additional features you desire.
- A power drill: This will be necessary for cutting the hole in the table to accommodate the USB hub.
- A hole saw drill bit: Use this specialized drill bit to create a clean, precise hole of the appropriate size for the USB hub.
- An extension cord: Depending on where the table is located, you may need an extension cord to ensure the USB hub has a power supply.
- Electrical tape: This will be used to secure and organize the wires for a professional and tidy look.
- A USB cable: Make sure you have a cable long enough to connect the USB hub to your computer or other devices.
- A screwdriver: You may need to remove and reattach screws during the installation process.
- Sandpaper or a file: This will help smooth any rough edges around the hole in the table, creating a clean and polished finish.
Once you have gathered these materials, you will be well-prepared to begin the process of recessing a USB hub into your table. By having everything at your disposal, you can proceed smoothly without any interruptions to search for missing items.
Measuring and Marking the Top of the Table
Before you begin cutting into the table, it is crucial to accurately measure and mark the location of the hole for the USB hub. Follow these steps to ensure precision:
- Choose the desired placement: Determine where you want the USB hub to be recessed into the table. Keep in mind practicality and accessibility for connecting devices and cables.
- Measure the USB hub dimensions: Take measurements of the USB hub, noting the width and depth. This will determine the size of the hole you will need to create in the table.
- Place the USB hub on the table: Position the USB hub on the table in your chosen location. Ensure it is centered and aligned as desired.
- Draw an outline: Using a pencil or marker, trace the outline of the USB hub onto the table. This will act as your guide when cutting out the hole.
- Double-check the measurements: Verify that the outline aligns with the dimensions of the USB hub. Make any necessary adjustments to ensure a precise fit.
Take your time during this step to avoid any mistakes or inaccuracies. It is important to have a well-measured and marked area to ensure a seamless installation of the USB hub.
Cutting Out the Hole
Now that you have accurately measured and marked the location for the USB hub, it’s time to cut out the hole in the table. Follow these steps to ensure a clean and precise cut:
- Prepare the work area: Clear the table surface of any objects or debris, ensuring you have a clean and unobstructed workspace.
- Secure the table: If your table is movable, make sure to secure it in place to prevent any accidental movement during the cutting process.
- Attach the hole saw drill bit: Place the appropriate-sized hole saw drill bit onto your power drill. Ensure it is securely attached.
- Align the drill bit: Position the center of the hole saw drill bit on the marked outline of the USB hub. This will ensure that the hole is cut in the correct position.
- Start drilling: With a firm grip on the drill, begin slowly drilling into the table along the marked outline. Apply gentle and consistent pressure to create a clean and even cut.
- Keep the drill level: Maintain a level position as you continue drilling. This will help prevent any unintended angled cuts that could affect the fit of the USB hub.
- Remove the cut-out piece: Once you have completed the initial cut, gently remove the cut-out piece of the table. Set it aside, as you may need it for future reference or for any necessary modifications.
- Check the fit: Carefully place the USB hub into the hole to check the fit. Ensure that it sits flush with the surface of the table and is aligned properly.
- Sand or file any rough edges: If there are any rough edges around the hole, use sandpaper or a file to smooth them out. This will provide a polished finish and avoid any potential damage when connecting devices.
By following these steps, you will successfully cut out a hole in your table that is perfectly suited for recessing the USB hub.
Preparing the USB Hub
Before installing the USB hub into the recessed hole of the table, it is important to properly prepare the hub for the installation. Here are the essential steps:
- Inspect the USB hub: Carefully examine the USB hub for any visible damage or defects. Check the ports, cables, and power supply to ensure they are in good condition.
- Organize the cables: If the USB hub comes with its own cables, untangle and organize them neatly. This will make the installation process easier and prevent any cable clutter.
- Consider cable length: Assess the length of the USB hub’s cables and measure the distance between the recessed hole and your computer or other devices. Ensure the cables are long enough to connect without strain or tension.
- Clean the USB hub: Using a soft, lint-free cloth, gently clean the USB hub to remove any dust or dirt. This will not only improve its appearance but also prevent any obstructions in the ports.
- Check power requirements: Review the power requirements of the USB hub and ensure that it can be adequately powered from the available power source. If necessary, connect the hub to an extension cord or power strip.
- Test the USB ports: Before installation, plug in a few devices to test the USB ports on the hub. Ensure that they are functioning correctly and able to transfer data or charge devices efficiently.
By taking the time to properly prepare the USB hub, you can avoid potential issues and ensure a smooth installation process. It is important to have a clean, organized, and functional hub before proceeding to the next steps.
Installing the USB Hub
With the USB hub prepared and the hole in the table cut out, it’s time to install the hub into its recessed position. Follow these steps for a successful installation:
- Position the USB hub: Carefully place the USB hub into the recessed hole, ensuring it fits securely and sits flush with the surface of the table.
- Align the USB ports: Position the USB ports in the direction that is most convenient for connecting devices. Make sure they are easily accessible and not obstructed by any other objects.
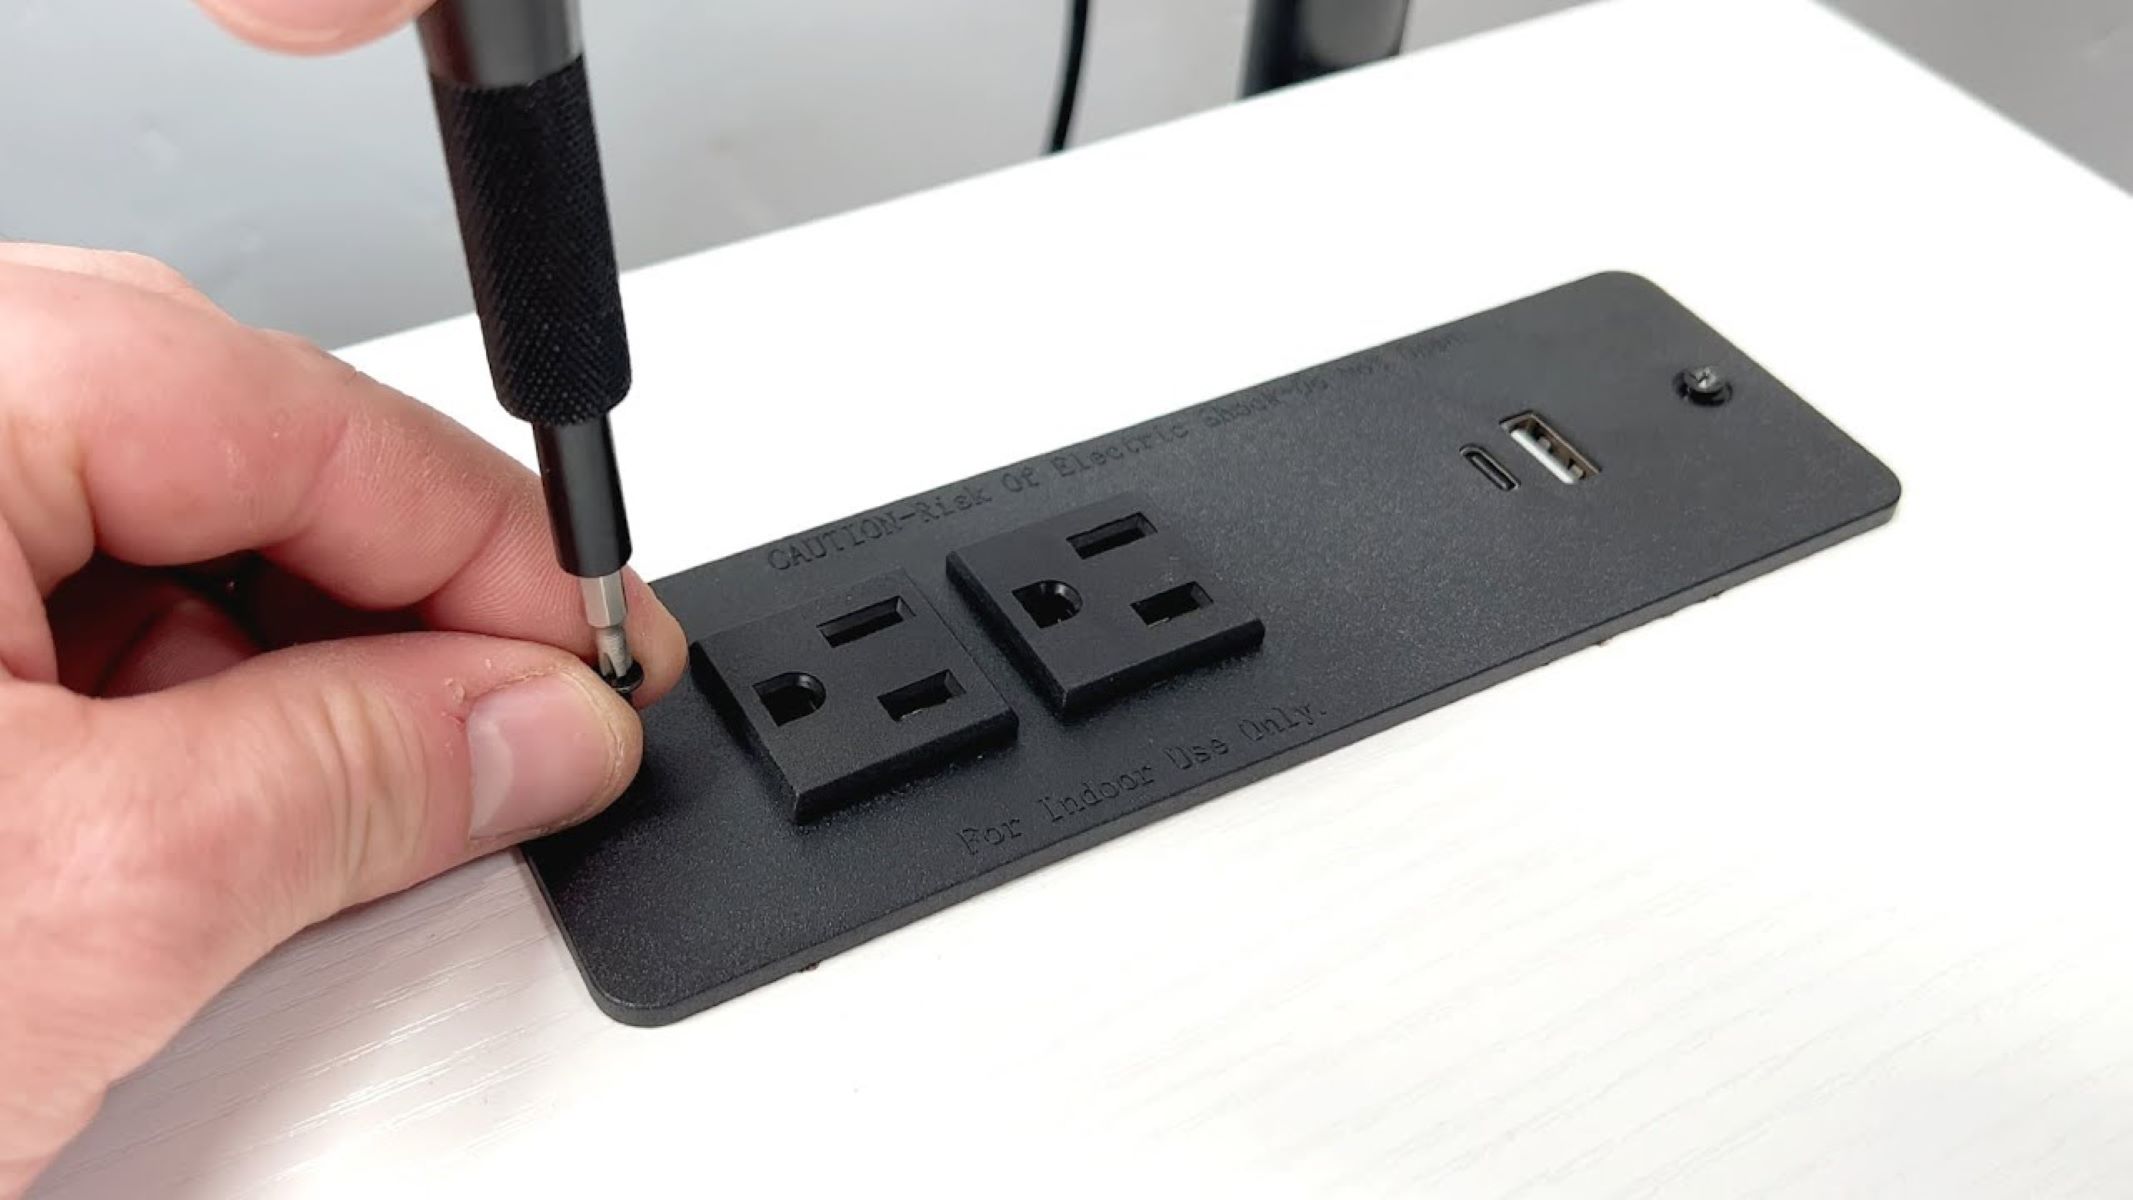
- Secure the hub: Depending on the design of the USB hub, there may be screws or clips that need to be used to secure it in place. Follow the manufacturer’s instructions to properly secure the hub within the recessed hole.
- Tighten screws or clips: If your USB hub requires screws or clips to hold it in place, use a screwdriver or appropriate tool to tighten them securely. Ensure that the USB hub remains stable and does not wobble or shift.
- Double-check alignment: Before proceeding, double-check the alignment of the USB hub and make any necessary adjustments. This will help ensure that the cords and devices will connect smoothly without any issues.
Take your time during this step to ensure that the USB hub is properly installed and securely positioned within the recessed hole. A precise and secure installation will result in a functional and visually pleasing setup.
Securing the Hub in Place
Once the USB hub is positioned within the recessed hole, it is important to secure it in place to ensure stability and prevent any accidental movement. Follow these steps to properly secure the USB hub:
- Assess the type of securing mechanism: Depending on the design of the USB hub and the recessed hole, there may be different methods of securing the hub in place. Determine if screws, clips, adhesive, or other securing methods are required.
- Use screws or clips: If the USB hub comes equipped with screw holes or clips, carefully align them with the corresponding holes or slots on the recessed hole. Insert the screws or attach the clips to firmly hold the hub in place.
- Tighten screws or clips: Use a screwdriver or an appropriate tool to tighten the screws or secure the clips. Ensure that they are tightened enough to hold the hub securely, but be cautious not to overtighten and damage the hub or the table.
- Apply adhesive (if necessary): If screws or clips are not available or suitable for your setup, you may opt to use adhesive to secure the hub. Apply an appropriate adhesive to the bottom of the hub and press it firmly into place within the recessed hole. Allow the adhesive to dry and cure according to the manufacturer’s instructions.
- Test for stability: Once the hub is secured, gently try to move it to check for any looseness or wobbling. If it feels unstable, tighten the screws or clips further or reapply the adhesive as needed.
By securing the USB hub in place, you ensure that it remains stable and properly positioned within the recessed hole. This will contribute to the longevity and functionality of the setup, providing a reliable connection for your devices.
Connecting the USB Ports to the Hub
Once the USB hub is securely in place within the recessed hole, it’s time to connect the USB ports to the hub. Follow these steps to ensure a proper and reliable connection:
- Prepare the USB cables: Plug one end of each USB cable into the corresponding USB ports on the USB hub. Ensure the cables are long enough to comfortably reach from the hub to your computer or other devices.
- Thread the cables: Carefully thread the USB cables through the hole or pathway designed for cable management. This will keep the cables organized and prevent them from tangling or becoming a visual distraction.
- Connect the other ends: Connect the other ends of the USB cables to the appropriate ports on your computer or other devices. Make sure the connections are secure and snugly fitted.
- Verify the connections: Double-check all the connections to ensure each USB cable is securely connected to both the hub and the respective device. This will prevent any data transfer or charging issues.
- Manage the cables: Use cable ties or clips to neatly secure and bundle the USB cables together. This will create a tidy and organized appearance and prevent any accidental disconnections.
By following these steps, you will successfully connect the USB ports to the hub, establishing a reliable connection between the hub and your devices. Take your time to ensure each connection is secure and properly managed for a clean and efficient setup.
Testing the Setup
After installing and connecting the USB hub, it’s important to thoroughly test the setup to ensure everything is functioning as expected. Follow these steps to perform a comprehensive test:
- Connect devices: Plug in various devices, such as USB flash drives, external hard drives, or smartphones, to the USB ports on the hub. Ensure that the devices are recognized and accessible on your computer.
- Data transfer: Copy files to and from the connected devices to test the data transfer speed and stability. Pay attention to any delays, interruptions, or errors during the transfer process.
- Device charging: If your USB hub supports charging capabilities, connect devices that require charging, such as smartphones or tablets. Verify that the devices are charging properly and at the expected rate.
- Device compatibility: Test the compatibility of various devices with the USB hub. Connect devices with different operating systems or hardware specifications to ensure seamless connectivity.
- Monitor power supply: Pay attention to the power supply of the USB hub and any connected devices. Ensure that the hub is receiving adequate power and that the devices are not overloading the hub or causing any power-related issues.
- Additional functions: If your USB hub has any additional features or functions, such as Ethernet ports or audio connections, test those functions to ensure proper operation.
- Verify stability: Throughout the testing process, pay attention to the stability of the USB hub and its connection to the table. Ensure that it remains securely in place without any wobbling or movement.
By conducting a comprehensive test, you can identify and address any potential issues or compatibility concerns with the USB hub setup. This will ensure a smooth and reliable experience when using the connected devices.
Finishing Touches
With the USB hub installed and tested, it’s time to add the finishing touches to create a polished and aesthetically pleasing setup. Consider the following steps to enhance the overall appearance and functionality:
- Cable management: Take the time to properly organize and manage the cables running from the USB hub to your devices. Use cable clips, ties, or a cable management system to keep the cables neat, tidy, and out of sight.
- Cover the recessed hole: If desired, you can use a cover or lid specifically designed to fit over the recessed hole. This will give the installation a more seamless and integrated look when the USB hub is not in use.
- Add decorative elements: Consider adding decorative elements around the USB hub to blend it harmoniously with the table or room decor. For example, you can place a small plant, a decorative tray, or a stylish desk organizer near the hub.
- Label the USB ports: To make it easier to identify which USB port connects to which device, consider adding labels or color-coded markers near each port. This will save you time and effort when plugging and unplugging devices.
- Regular maintenance: Keep the USB hub and the surrounding area clean and free from dust or debris. Wipe down the hub and the table surface regularly with a soft, lint-free cloth to maintain its appearance and functionality.
By paying attention to these finishing touches, you can elevate the overall look and usability of your recessed USB hub setup. These small details add a professional and organized touch to your workspace or tabletop, enhancing both functionality and aesthetics.