
Signs of a Dead Car Battery
Dealing with a dead car battery can be a major inconvenience, leaving you stranded and late for your plans. It’s important to be able to recognize the signs of a dying or dead car battery so that you can take the necessary steps to resolve the issue. Here are some common signs that indicate your car battery may be on its last legs:
- Engine Cranking Slowly: One of the most telltale signs of a weak car battery is when you notice the engine cranking slowly or struggling to start. If you hear a clicking sound when turning the key, it is likely that your battery is too weak to provide the necessary power to start the engine.
- Dimming Headlights: Another sign that may indicate a dying battery is dimming headlights. If you notice that your headlights are not as bright as they used to be, especially when idling or at low speeds, it could be a sign that your battery is not holding a charge effectively.
- Electrical Issues: A weak or dying battery can also cause various electrical issues in your car. You may experience problems with the power windows, radio, or other electrical components. If you notice that these systems are not functioning properly or are intermittent in their operation, it is worth checking your battery.
- Unresponsive Electronics: When you turn the key in the ignition, your car’s electronics should spring to life. If you find that your dashboard lights, AC, or other electronic systems are unresponsive or take longer to start up than usual, it may be a sign of a weak battery.
- Strange Smell: In rare cases, a dead or dying battery can emit a strange smell. If you detect a strong, sulfurous odor akin to rotten eggs, it is advisable to have your battery checked by a professional.
Overall, being able to identify these signs will help you diagnose a dead car battery early on, allowing you to take proactive measures to address the issue and avoid any unexpected breakdowns. In the next sections, we will discuss how to check the battery connections, test the battery voltage, use a battery tester, perform a load test, jump-start the battery, and schedule a battery replacement if necessary.
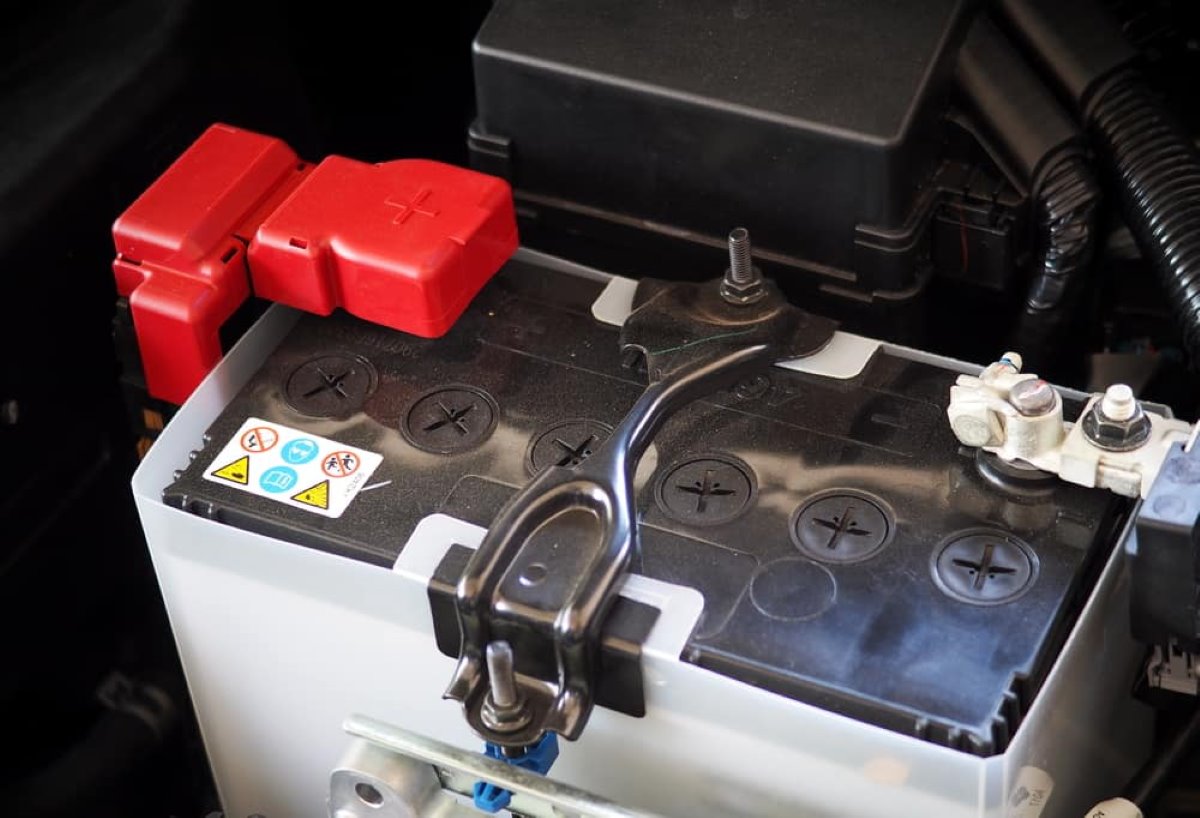
Checking the Battery Connections
When dealing with a car battery issue, it’s crucial to start by inspecting the battery connections. Over time, corrosion can build up on the battery terminals, hindering the flow of electrical current. Here’s how you can check the battery connections:
- Locate the battery: The car battery is usually located in the engine bay. It is a rectangular-shaped box with two terminals – positive (+) and negative (-).
- Ensure safety: Before proceeding, make sure the engine is off, and the keys are removed from the ignition. It’s also recommended to wear safety gloves and goggles for protection.
- Inspect the terminals: Take a close look at the battery terminals. Look for any signs of corrosion, which appears as a white or greenish powdery substance around the terminals.
- Clean the terminals: If you notice corrosion, it’s important to clean the terminals. Start by disconnecting the negative (-) terminal using a wrench or pliers. Then, do the same for the positive (+) terminal.
- Prepare a cleaning solution: Mix equal parts of baking soda and water to create a cleaning solution. Dip an old toothbrush or a wire brush into the solution.
- Scrub the terminals: Gently scrub the battery terminals with the toothbrush or wire brush to remove the corrosion. Make sure to clean both the terminal posts and the cable connectors.
- Rinse and dry: After scrubbing, rinse the terminals and connectors with clean water to remove any residue. Once done, dry them thoroughly with a clean cloth or rag.
- Reconnect the terminals: Once the terminals are clean and dry, reconnect the positive (+) terminal first, followed by the negative (-) terminal. Ensure they are securely tightened.
Checking and cleaning the battery connections can improve the electrical conductivity and help resolve minor issues caused by corrosion. However, if you notice significant damage or corrosion that cannot be easily cleaned, it may be necessary to seek professional assistance or consider replacing the battery. In the next section, we will discuss how to test the battery voltage to further diagnose its condition.
Testing the Battery Voltage
Testing the battery voltage is a crucial step in diagnosing a car battery issue. It helps determine the current charge level and whether the battery is holding a charge properly. Here’s how you can test the battery voltage:
Step 1: Gather the necessary tools
Before you begin, make sure you have a digital multimeter or a battery voltage tester. These tools can accurately measure the voltage of your car battery.
Step 2: Ensure safety
As always, ensure that the engine is off and the keys are removed from the ignition before attempting any tests. Safety goggles and gloves are recommended.
Step 3: Locate the battery terminals
Identify the positive (+) and negative (-) terminals on the battery. The positive terminal is usually marked with a plus sign (+) and is connected to the red cable. The negative terminal is marked with a minus sign (-) and connected to the black cable.
Step 4: Set up the multimeter
If using a multimeter, set it to the DC voltage range. The voltage setting should be higher than the expected battery voltage, typically 20 volts or higher.
Step 5: Connect the multimeter
Connect the multimeter’s positive (red) probe to the positive (+) terminal of the battery and the negative (black) probe to the negative (-) terminal.
Step 6: Read the voltage
Read the voltage displayed on the multimeter. A fully charged battery should read around 12.6 to 12.8 volts. If the reading is significantly lower, it indicates a weak or discharged battery.
Step 7: Interpret the results
If the battery voltage is below 12.4 volts, it may indicate a low charge. A voltage below 12 volts suggests a heavily discharged battery. In both cases, the battery may require charging or replacement.
Testing the battery voltage provides insight into its condition and helps determine if it holds a charge. If the voltage reading is low, it’s essential to investigate further or seek professional assistance to identify any underlying issues. In the next section, we will discuss how to use a battery tester for a more comprehensive battery assessment.
Using a Battery Tester
While testing the battery voltage gives you a good indication of its charge level, using a battery tester provides a more comprehensive assessment of the battery’s overall health. A battery tester measures the battery’s capacity to deliver sufficient current for starting the engine. Here’s how you can use a battery tester:
- Gather the necessary tools: You will need a battery tester, which can be an electronic battery load tester or a conductance tester. These testers accurately evaluate the battery’s condition.
- Prepare the battery: Ensure the engine is off, and the keys are removed from the ignition. It’s also important to clean the battery terminals to ensure the best possible connection during the test.
- Connect the tester: Connect the battery tester to the positive (+) and negative (-) terminals of the battery. Follow the instructions provided with the tester for proper connection.
- Run the test: Once the tester is connected, follow the manufacturer’s instructions to initiate the test. The tester will simulate a load on the battery and measure how well it maintains voltage under this load.
- Interpret the results: The battery tester will provide a result indicating the battery’s state. It may display a pass/fail status or provide a measurement of the battery’s capacity in percentage.
- Compare the results: Consult the battery tester’s user manual to understand what the results mean. Generally, a passing result or a high capacity percentage indicates a healthy battery, while a failing result or a low capacity percentage indicates the need for a new battery.
Using a battery tester gives you a more accurate assessment of the battery’s condition by evaluating its ability to provide current under load. This can help identify any underlying issues with the battery that may not be apparent by just measuring voltage. If the battery tester indicates a weak or failing battery, it is recommended to replace it to avoid unexpected breakdowns.
In the next section, we will discuss how to perform a load test on the battery, which provides an additional level of analysis to assess the battery’s capacity to deliver sufficient power.
Performing a Load Test
A load test is a more advanced battery test that determines the battery’s ability to maintain voltage under a simulated load. This test helps assess the battery’s capacity to deliver sufficient power, especially when starting the engine. Here’s how you can perform a load test on your car battery:
- Ensure safety: Start by turning off the engine and removing the keys from the ignition. Safety goggles and gloves are recommended for protection.
- Gather the necessary tools: You will need a battery load tester, also known as a carbon pile tester. This tester applies a significant load on the battery to assess its performance.
- Connect the load tester: Connect the load tester to the battery. The positive (+) clamp should be connected to the positive terminal of the battery, and the negative (-) clamp to the negative terminal.
- Adjust load settings: Follow the instructions provided with the load tester to adjust the load settings. It’s important to set the load to the appropriate level based on your vehicle’s battery specifications.
- Run the test: Once the load tester is connected and the settings are adjusted, activate the load test. The tester will apply a load to the battery and measure its voltage under this load.
- Observe the results: Look at the voltage reading on the load tester. It should stay above a certain threshold, usually around 9.6 volts or higher, during the test. If the voltage drops significantly below this threshold, it indicates a weak or failing battery.
- Interpret the results: Consult the load tester’s user manual to understand how to interpret the results. Typically, a consistent voltage above the threshold during the load test indicates a healthy battery, while a voltage drop below the threshold suggests the need for a battery replacement.
A load test helps determine if the battery can handle the voltage demands when starting the engine or operating other power-consuming systems in your vehicle. By performing this test, you can ensure that the battery is capable of delivering sufficient power to meet your car’s electrical needs. If the load test indicates that the battery is weak or failing, it’s advisable to replace it to avoid unexpected battery failures.
In the next section, we will discuss how to jump-start a dead battery, which can be a temporary solution to get your car running again.
Jump-Starting the Battery
When faced with a dead car battery, jump-starting is a common and effective method to get your vehicle running again. Jump-starting involves using the power from another car’s battery to provide the necessary charge to start your engine. Here’s how you can jump-start your dead battery:
- Find a functioning car: Locate a vehicle with a fully charged battery and park it close to your car. Ensure that the two vehicles are not touching each other.
- Identify the battery terminals: Locate the battery terminals in both vehicles. The positive (+) terminal is usually marked with a red cover or a plus sign, while the negative (-) terminal is marked with a black cover or a minus sign.
- Attach the jumper cables: Take the jumper cables and connect them in the following order:
- Connect one end of the red (positive) cable to the positive terminal of the dead battery.
- Connect the other end of the red cable to the positive terminal of the functioning battery.
- Connect one end of the black (negative) cable to the negative terminal of the functioning battery.
- Connect the other end of the black cable to an unpainted metal surface on your car’s engine block or chassis, away from the battery.
- Start the functioning vehicle: Start the functioning vehicle and let the engine run for a few minutes to allow the battery to charge the dead battery.
- Try starting your car: Attempt to start your car’s engine. If it doesn’t start, wait a few more minutes and try again. If it still doesn’t start, there may be other issues with your vehicle that require further inspection.
- Disconnect the cables: Once your car starts, carefully disconnect the jumper cables in the reverse order:
- Remove the black cable from the metal surface on your car’s engine block or chassis.
- Remove the black cable from the negative terminal of the functioning battery.
- Remove the red cable from the positive terminal of the functioning battery.
- Remove the red cable from the positive terminal of the previously dead battery.
Jump-starting can provide a temporary solution to get your car back on the road. However, it’s important to note that jump-starting alone does not address the underlying issue with your battery. It is advisable to have your battery tested and, if necessary, replaced to prevent future incidents.
In the next section, we will discuss when it’s time to schedule a battery replacement and what factors you should consider.
Scheduling a Battery Replacement
When dealing with a dead or failing car battery, it’s important to consider scheduling a battery replacement. A new battery ensures reliable starting power and provides confidence in your vehicle’s electrical system. Here are some factors to consider when scheduling a battery replacement:
- Age of the battery: The average lifespan of a car battery is typically around 3 to 5 years. If your battery is approaching or exceeding this timeframe, it’s a good idea to start considering a replacement.
- Previous battery issues: If you have experienced repeated battery problems or have needed jump-starts frequently, it may indicate a battery that is no longer holding a charge effectively. In such cases, it’s advisable to replace the battery to avoid further inconvenience or potential breakdowns.
- Environmental conditions: Extreme temperatures, both hot and cold, can impact the performance and longevity of a car battery. If you live in an area with harsh weather conditions, it may be necessary to replace the battery more frequently than the average lifespan.
- Battery maintenance: Proper battery maintenance, such as regular cleaning of terminals and ensuring secure connections, can extend the lifespan of a battery. However, if you have neglected maintenance and notice signs of battery failure, it may be time for a replacement.
- Vehicle usage: The way you use your vehicle can also affect the battery’s lifespan. Frequent short trips or long periods of inactivity can lead to a decrease in charge and a shortened battery life. If this is the case, it’s recommended to consider replacing the battery to ensure reliable starting power.
When scheduling a battery replacement, it’s advisable to consult your vehicle’s manual or seek the assistance of a professional. They can provide guidance on the appropriate battery size and specifications for your specific vehicle model. Additionally, professional installation ensures proper connection and minimizes the risk of damage to your vehicle’s electrical system.
By proactively scheduling a battery replacement based on these factors, you can avoid unexpected battery failures, improve the reliability of your vehicle, and ensure uninterrupted functionality of its electrical components.
In this article, we discussed the signs of a dead car battery, how to check the battery connections, test the battery voltage, use a battery tester, perform a load test, jump-start the battery, and schedule a battery replacement. By understanding these steps, you can effectively diagnose and address battery issues for a smooth and hassle-free driving experience.