
Materials Needed
To embark on the creative journey of crafting a box stitch lanyard, you will need a few essential materials. Gathering these supplies is the first step toward creating a unique and personalized lanyard that can serve as a practical accessory or a thoughtful handmade gift. Here's what you'll need:
-
Lanyard Lace: This is the primary material for crafting the box stitch lanyard. It comes in various colors, allowing you to choose a shade that resonates with your personal style or the recipient's preferences.
-
Lanyard Hooks or Key Rings: These will serve as the attachment point for the completed lanyard, enabling it to be easily secured to keys, ID badges, or other items.
-
Scissors: A reliable pair of scissors is essential for cutting the lanyard lace to the desired length and for trimming any excess material.
-
Optional Beads or Charms: If you wish to add decorative elements to your lanyard, beads or charms can be incorporated into the design. These embellishments can infuse your creation with individuality and flair.
-
Lanyard Loom or Clipboard (Optional): While not mandatory, a lanyard loom or clipboard can aid in maintaining tension and structure as you weave the box stitch.
-
Tape or Clipboard: This will be used to secure the lanyard lace during the weaving process, preventing it from tangling or becoming unruly.
-
Lighter (Optional): A lighter can be used to carefully seal the ends of the lanyard lace to prevent fraying, providing a polished and professional finish to your creation.
Gathering these materials will set the stage for an enjoyable and rewarding crafting experience, allowing you to explore your creativity and produce a lanyard that is both functional and visually appealing. With these essentials at hand, you are ready to delve into the process of setting up the loom and initiating the box stitch.
Setting Up the Loom
Before diving into the intricate art of weaving a box stitch lanyard, it is crucial to properly set up the loom. This foundational step establishes the framework for the weaving process, ensuring that the lanyard takes shape with precision and stability. Here’s how to set up the loom:
- Securing the Lanyard Lace: Begin by fastening one end of the lanyard lace to the top of the loom using a lanyard hook or by looping it around the top bar. This initial anchoring will provide the starting point for the weaving process.
- Tensioning the Lace: With the end secured, carefully extend the lanyard lace downward, ensuring that it remains taut but not overly stretched. Maintaining consistent tension is essential for achieving a uniform and well-structured box stitch.
- Securing the Bottom End: Once the lanyard lace is extended to the desired length, affix the opposite end to the bottom of the loom, ensuring that it remains parallel to the top attachment. This dual-point fixation sets the stage for weaving without compromising the stability of the lanyard.
- Optional Use of a Clipboard: If a lanyard loom is not available, a clipboard can serve as an alternative, providing a flat and secure surface for the weaving process. The lanyard lace can be affixed to the clipboard using tape, maintaining the necessary tension for weaving.
By meticulously setting up the loom, you establish the groundwork for a successful weaving endeavor. The careful attention to detail at this stage ensures that the subsequent weaving process unfolds smoothly, allowing you to focus on creating a visually captivating and durable box stitch lanyard. With the loom in place, you are ready to embark on the next phase: initiating the box stitch.
Starting the Box Stitch
With the loom properly set up, it’s time to initiate the box stitch, the fundamental weaving pattern that forms the basis of the lanyard. The box stitch, also known as the square stitch, is characterized by its interwoven pattern, resulting in a sturdy and visually appealing design. Here’s how to begin the box stitch:
- Positioning the Lanyard Lace: Take note of the two strands of lanyard lace, one extending from the top and the other from the bottom of the loom. Ensure that they are parallel and positioned neatly, ready to commence the weaving process.
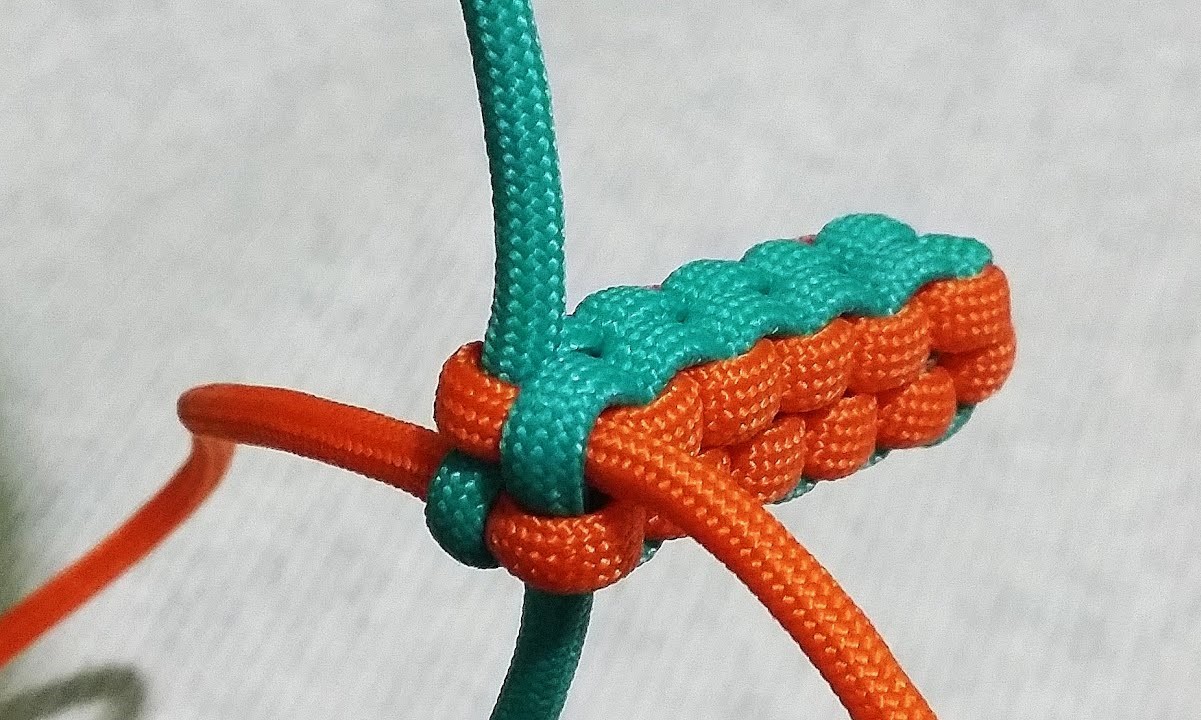
- Creating the First Cross: To initiate the box stitch, carefully cross the right strand over the left, forming an “X” at the center of the loom. This foundational crossover sets the stage for the subsequent weaving sequence.
- Weaving the Right Strand: After creating the initial cross, take the right strand and pass it under the left strand, pulling it through to the opposite side. This action results in the formation of the first half of the box stitch, establishing the framework for the subsequent interlacing.
- Weaving the Left Strand: Following the completion of the right strand’s weave, proceed by taking the left strand and passing it under the right strand, mirroring the previous action. This intertwining creates the second half of the box stitch, contributing to the lanyard’s structural integrity.
- Tightening the Weave: After each crossover and weave, gently tighten the lanyard lace to maintain a consistent tension throughout the box stitch. This practice ensures that the pattern emerges with uniformity and solidity, resulting in a professionally crafted lanyard.
By methodically following these steps, you lay the groundwork for a meticulously woven box stitch lanyard. The precision and care invested in initiating the box stitch set the stage for the subsequent stages of pattern creation and embellishment. As the box stitch takes form, the lanyard begins to manifest its unique and intricate design, setting the stage for the creative journey ahead.
Creating the Pattern
As the box stitch forms the foundational structure of the lanyard, the opportunity arises to infuse it with a captivating pattern. The creative process of pattern-making allows for personalization and artistic expression, transforming the lanyard into a unique and visually striking accessory. Here’s how to create a captivating pattern:
- Consistent Box Stitch Weaving: Maintain a consistent rhythm of box stitch weaving, ensuring that each crossover and interlacing sequence is executed with precision. This foundational continuity establishes the canvas upon which the pattern will come to life.
- Introducing Color Variations: Incorporate color variations by alternating between different lanyard lace hues as you weave. This interplay of colors can yield visually compelling patterns, adding depth and vibrancy to the lanyard’s design.
- Exploring Geometric Designs: Embrace geometric designs by strategically positioning the lanyard lace during the weaving process. By manipulating the placement of the strands, you can create patterns such as chevrons, diamonds, or zigzags, infusing the lanyard with a contemporary and dynamic aesthetic.
- Experimenting with Symmetry: Delve into symmetrical patterns by mirroring the weaving actions on both sides of the lanyard. Symmetry can imbue the lanyard with a sense of balance and harmony, resulting in a visually appealing and meticulously crafted design.
- Incorporating Repeating Motifs: Introduce repeating motifs, such as hearts, stars, or arrows, into the pattern to imbue the lanyard with thematic elements. These motifs can serve as focal points within the design, adding a touch of whimsy and individuality to the lanyard.
By embracing the creative potential of pattern-making, you elevate the lanyard from a simple accessory to a personalized work of art. The interplay of colors, shapes, and symmetrical arrangements culminates in a visually captivating pattern that reflects your artistic vision. As the pattern takes shape, the lanyard becomes a testament to the fusion of creativity and craftsmanship, ready to adorn and delight those who encounter it.
Adding Beads or Charms (Optional)
Infusing your box stitch lanyard with beads or charms presents an opportunity to introduce embellishments that enhance its visual appeal and personal significance. Whether crafting the lanyard for yourself or as a heartfelt gift, the addition of beads or charms can elevate its aesthetic and imbue it with individuality. Here’s how to incorporate beads or charms into your lanyard:
- Selecting Beads or Charms: Choose beads or charms that resonate with your personal style or hold sentimental value. Consider incorporating beads in varying sizes, colors, or materials to introduce visual interest and texture to the lanyard.
- Integrating Beads into the Weave: As you progress in the box stitch weaving process, periodically intersperse beads into the lanyard. This can be achieved by threading a bead onto one or both strands of the lanyard lace before executing a weaving sequence, allowing the bead to become integrated into the pattern.
- Securing Beads in Place: After incorporating a bead into the weave, ensure that it is snugly positioned to prevent excessive movement. This can be accomplished by gently tightening the weave around the bead, anchoring it securely within the pattern.
- Attaching Charms to the Lanyard: If opting for charms, attach them to the completed lanyard using jump rings or by threading them onto the lanyard hooks. Charms can serve as meaningful embellishments, reflecting hobbies, interests, or symbolic representations that hold personal significance.
- Exercising Creativity: Embrace creativity by experimenting with bead placement and charm selection, allowing your lanyard to reflect your unique style and narrative. The addition of beads or charms presents an opportunity for self-expression and customization, transforming the lanyard into a wearable embodiment of creativity.
By incorporating beads or charms into your box stitch lanyard, you infuse it with a touch of individuality and personal significance. Whether it’s a subtle shimmer from intricately placed beads or the meaningful symbolism of attached charms, these embellishments elevate the lanyard into a wearable expression of creativity and personal narrative.
Finishing Off the Lanyard
As the creative journey of crafting a box stitch lanyard nears its completion, attention to the finishing touches becomes paramount. The final steps not only ensure the lanyard’s durability but also contribute to its polished and professional appearance. Here’s how to finish off the lanyard:
- Trimming Excess Lace: Once the desired length of the lanyard is achieved, carefully trim any excess lanyard lace, ensuring that the ends are even and neatly cut. This step paves the way for the subsequent finishing techniques.
- Sealing the Ends: To prevent fraying and to give the lanyard a refined look, use a lighter to carefully melt the trimmed ends of the lanyard lace. Exercise caution and briefly pass the flame over the ends, allowing them to slightly melt and seal. Alternatively, a small amount of clear nail polish can be applied to the ends to secure them.
- Attaching the Lanyard Hook or Key Ring: Securely attach the lanyard hook or key ring to the top of the lanyard, ensuring that it is firmly affixed. This attachment point serves as the means to connect the lanyard to keys, identification badges, or other items, adding functionality to the finished piece.
- Quality Checking: Carefully inspect the entire lanyard, ensuring that the weave is consistent, the beads or charms (if included) are securely in place, and the finishing touches are executed with precision. This quality check guarantees that the lanyard is not only visually appealing but also durable and ready for practical use.
By meticulously completing these finishing steps, you bring the box stitch lanyard to its full potential, ready to adorn and serve its intended purpose. The attention to detail invested in the finishing process ensures that the lanyard is not only a testament to creativity and craftsmanship but also a practical and enduring accessory.