
Common Installation Problems with OS X Combo Updates
OS X Combo Updates are essential for keeping your Mac operating system up to date with the latest features, bug fixes, and security enhancements. However, just like any software update, problems can sometimes occur during the installation process. Understanding these common installation issues can help you troubleshoot and resolve them effectively. Here are some of the most frequent problems users encounter:
- Stuck or Frozen Installation: One of the most frustrating issues is when the installation process gets stuck or freezes, leaving you unable to progress further. This can happen due to various reasons, such as incompatible software, missing prerequisites, or even hardware issues.
- Unexpected Restart: Some users may experience their Mac unexpectedly restarting during the installation process. This can be caused by a conflict between the update and certain system configurations or third-party software.
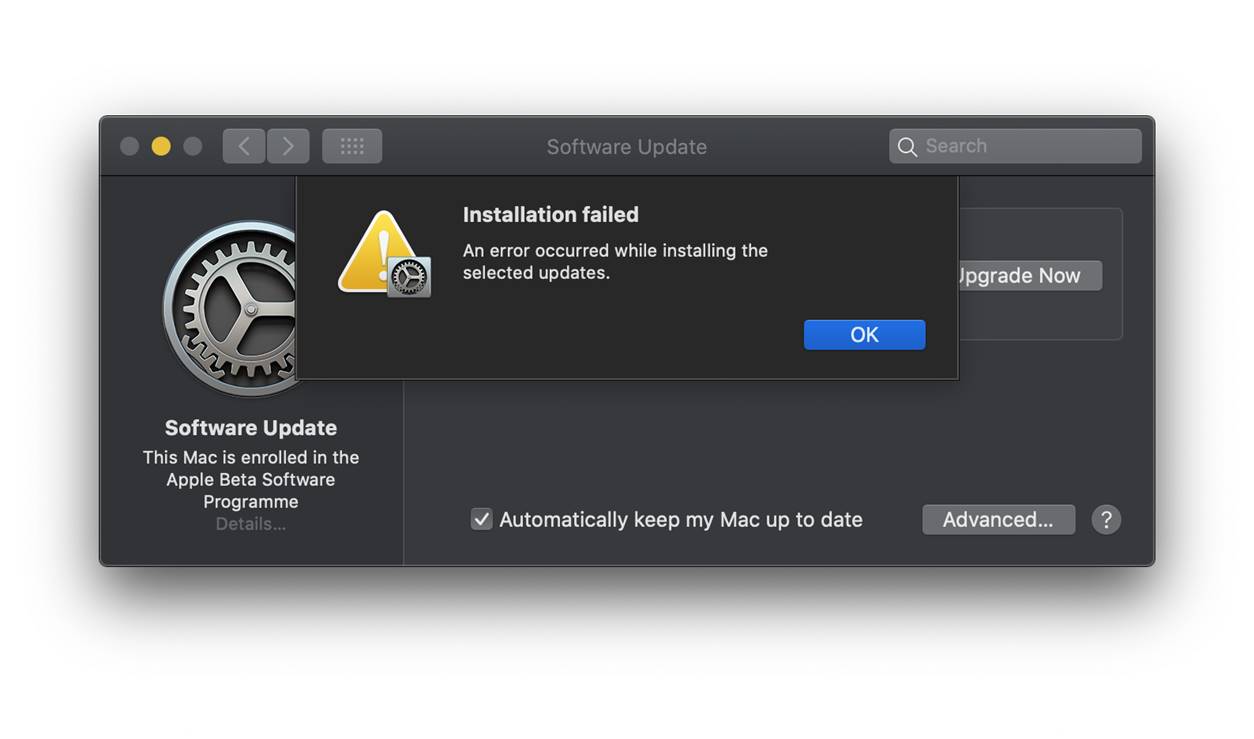
- Error Messages: Error messages can indicate specific issues during the installation. These messages might include phrases like “Installation Failed” or “An error occurred during the update.” Understanding the error code or description can provide valuable insight into the problem and help in finding a resolution.
- Slow Installation: Another common problem is a slow installation process that takes longer than expected. This can be attributed to various factors, such as a poor internet connection, insufficient available disk space, or a large number of files being processed during the update.
- Failed Verification: The installation process includes a verification step to ensure the integrity of the update package. If this verification fails, it can indicate a problem with the downloaded package, a corrupted file, or issues with the disk.
These are just a few examples of the common problems users may encounter when installing OS X Combo Updates. In the following sections, we will delve into each of these issues and provide troubleshooting steps to resolve them effectively.
Checking System Requirements
Before attempting to install an OS X Combo Update, it is important to ensure that your Mac meets the necessary system requirements. Failing to meet these requirements can lead to installation problems or compatibility issues. Here are the key steps to check your system requirements:
- Check the macOS Version: Make sure that your Mac is running a compatible version of macOS. Each Combo Update is designed for specific macOS versions, and attempting to install an update on an incompatible system can cause errors or even prevent installation altogether.
- Verify the Available Disk Space: Check the amount of available disk space on your Mac. Combo Updates require a certain amount of free space to download and install successfully. Insufficient disk space can cause the installation to fail or become corrupted. Ensure that you have enough free space on your primary disk.
- Review Hardware Requirements: Some macOS updates require specific hardware capabilities. For example, certain features or upgrades may not be compatible with older Mac models or require a minimum amount of RAM or processor power. Consult the official documentation or release notes for the Combo Update to ensure that your Mac meets the hardware requirements.
- Check Network Connectivity: Stable internet connectivity is crucial for downloading and installing Combo Updates. Ensure that your Mac is connected to a reliable network, preferably a high-speed internet connection. Unstable or slow internet connections can cause the update to fail or result in incomplete downloads.
By thoroughly checking the system requirements before installing an OS X Combo Update, you can minimize the chances of encountering installation problems. It is essential to carefully review the compatibility guidelines provided by Apple and ensure that your Mac meets all the necessary prerequisites. In the next section, we will explore troubleshooting steps for verifying your internet connection, which is vital for successful updates.
Verifying Internet Connection
A stable and reliable internet connection is crucial for downloading and installing OS X Combo Updates. If your internet connection is slow or unstable, it can lead to incomplete downloads, interrupted installations, or installation errors. To verify your internet connection, follow these steps:
- Check Network Connectivity: Ensure that your Mac is connected to a network, either through Wi-Fi or Ethernet. Check the network status icon in the menu bar to ensure you have a stable connection. If you are using Wi-Fi, try moving closer to the router to improve signal strength.
- Restart Your Router: If you experience slow or inconsistent internet speeds, try restarting your router. This can help resolve temporary connectivity issues or clear any network congestion that may be affecting the download speed.
- Use Speed Test Tools: Perform an internet speed test to assess your current download and upload speeds. There are various online speed test websites available that can provide accurate measurements. Compare your results with the recommended minimum internet speed specified by Apple for downloading Combo Updates.
- Disable Bandwidth-Intensive Applications: Close any applications or processes that consume a significant amount of bandwidth, such as video streaming, file downloads, or online gaming. These applications can compete for network resources and slow down the download speed for the Combo Update.
- Reset Your Network Settings: If you continue to experience connectivity issues, you can reset your network settings. Go to “System Preferences” > “Network” and click on the “Advanced” button. From there, you can choose to reset your Wi-Fi or Ethernet settings. Note that this will clear any saved network configurations and require you to reconnect to your Wi-Fi network.
By verifying your internet connection and ensuring it is stable and fast, you can optimize the download and installation process of OS X Combo Updates. A reliable network connection is essential for uninterrupted downloads and successful installations. In the upcoming sections, we will explore additional troubleshooting steps to overcome installation problems with OS X Combo Updates.
Using Safe Mode to Install the Combo Update
If you are encountering issues with the installation of an OS X Combo Update, restarting your Mac in Safe Mode can help resolve certain software conflicts and allow for a smoother installation process. Safe Mode disables non-essential system extensions and startup items, which can help isolate any problematic software or drivers that may be interfering with the update. Follow these steps to install the Combo Update in Safe Mode:
- Restart Your Mac: From the Apple menu, select “Restart.”
- Enter Safe Mode: Immediately after your Mac restarts, press and hold the Shift key. Continue holding until you see the Apple logo and a progress bar. This indicates that your Mac is starting up in Safe Mode.
- Install the Combo Update: Once your Mac has booted up in Safe Mode, navigate to the location where you have downloaded the Combo Update. Double-click on the update package to initiate the installation process.
- Follow the On-Screen Instructions: The installation process will guide you through the necessary steps. Follow the on-screen instructions to install the Combo Update on your Mac.
- Restart Your Mac: After the installation is complete, restart your Mac normally. This will exit Safe Mode and allow your Mac to boot up with all system extensions and startup items enabled.
Safe Mode provides a stripped-down version of macOS, allowing you to install the Combo Update without potential conflicts caused by third-party software or incompatible system extensions. It is important to note that not all installation issues can be resolved by using Safe Mode. If you continue to experience problems after installing the update in Safe Mode, proceed to the following troubleshooting steps. In the next section, we will explore how clearing temporary files and resetting caches can help resolve installation problems.
Clearing Temporary Files and Resetting Caches
Clearing temporary files and resetting caches can help resolve installation problems with OS X Combo Updates. Temporary files and cached data can accumulate over time, causing conflicts or corrupting the installation process. Here are steps to clear temporary files and reset caches on your Mac:
- Clean Up System Junk: Use a reputable cleanup tool or manually delete temporary files and system junk from your Mac. You can use applications like CleanMyMac, Onyx, or Disk Cleanup to safely remove temporary files, caches, and unnecessary system logs.
- Reset macOS Caches: Resetting caches can help resolve conflicts and improve system performance. To reset caches, restart your Mac and hold down the Command + Option + R + P keys before the Apple logo appears. Keep holding the keys until you hear the startup chime for the second time. This will clear the cache and reset the NVRAM/PRAM.
- Clear Application Caches: Some applications store temporary files and caches that can interfere with updates. You can manually clear the caches for specific applications by going to their respective preferences/settings and locating the cache options. Clearing the cache may require you to sign in again or reconfigure certain preferences.
- Empty the Downloads Folder: If you have downloaded the Combo Update multiple times, check your Downloads folder for any duplicate or incomplete downloads. Delete any redundant or incomplete update files to avoid confusion during the installation process.
- Restart Your Mac: After clearing temporary files and resetting caches, it is recommended to restart your Mac. This will ensure that the changes take effect before attempting to install the Combo Update again.
Clearing temporary files and resetting caches can help resolve conflicts and ensure a clean installation of the Combo Update. By removing unnecessary temporary files and caches, you create a more stable environment for the update to install without any hindrances. In the next section, we will explore how running Disk Utility to repair disk permissions can be beneficial in resolving installation problems.
Running Disk Utility to Repair Disk Permissions
Running Disk Utility to repair disk permissions can help resolve installation problems with OS X Combo Updates. Over time, disk permissions can become misaligned or corrupted, which can cause issues during the installation process. Here is how you can run Disk Utility:
- Open Disk Utility: Go to the “Applications” folder, then open the “Utilities” folder, and launch “Disk Utility.”
- Select your Disk: In the Disk Utility window, select the primary disk that contains your macOS installation. Typically, this is labeled with the manufacturer’s name (e.g., Macintosh HD).
- Click on “First Aid”: Once you have selected your disk, click on the “First Aid” tab at the top of the Disk Utility window.
- Click on “Verify Disk Permissions”: Click on the “Verify Disk Permissions” button to check for any misaligned or incorrect disk permissions. Disk Utility will scan your disk and display a report of any permissions that need to be repaired.
- Repair Disk Permissions: If Disk Utility identifies any permissions that need to be repaired, click on the “Repair Disk Permissions” button. Disk Utility will proceed with repairing the disk permissions. Note that this process may take some time to complete.
- Restart Your Mac: After Disk Utility has finished repairing disk permissions, restart your Mac to ensure that the changes take effect.
Running Disk Utility to repair disk permissions can help resolve installation issues by ensuring that the necessary permissions are correctly set for system files and folders. This process can prevent conflicts and allow the Combo Update to be installed without any hindrances. However, it is important to note that newer versions of macOS no longer require manual disk permission repairs, as the system handles permissions automatically. In the next section, we will explore the importance of uninstalling problematic applications before installing the Combo Update.
Uninstalling Problematic Applications Before Installing
Before installing an OS X Combo Update, it is crucial to identify and uninstall any problematic applications that may interfere with the installation process. Certain applications or utilities can have conflicts with system updates and cause installation errors or unexpected behavior. To ensure a smooth update, it is recommended to follow these steps:
- Identify Potential Problematic Applications: Review your installed applications and identify any software that is known to have compatibility issues with the particular macOS version or Combo Update you are installing. Check the developer’s website or refer to user forums for any reported issues.
- Uninstall the Problematic Applications: Use the uninstallation method specific to each problematic application. This process may involve dragging the application to the Trash, running an uninstaller provided by the developer, or using a third-party uninstaller tool. Ensure that you fully remove all related files and folders to avoid any remnants that could cause conflicts later on.
- Restart Your Mac: After uninstalling the problematic applications, it is essential to restart your Mac. This helps ensure that any remaining processes or background services associated with the uninstalled applications have been fully terminated.
- Install the OS X Combo Update: Once all problematic applications have been uninstalled and your Mac has been restarted, you can proceed with installing the Combo Update. Follow the installation instructions provided by Apple for a successful update process.
Uninstalling problematic applications before installing an OS X Combo Update can help avoid conflicts and errors during the installation process. By removing any applications known for compatibility issues, you reduce the risk of encountering unexpected behavior or encountering installation failures. It is also a good practice to stay updated with the latest versions of software to ensure compatibility with the latest macOS updates. In the next section, we will explore the importance of disconnecting external devices before installing the Combo Update.
Disconnecting External Devices
When installing an OS X Combo Update, it is essential to disconnect any external devices connected to your Mac. External devices, such as USB drives, printers, or peripherals, can sometimes interfere with the update process and cause installation issues. To ensure a smooth update, follow these steps:
- Eject USB Drives: Before proceeding with the Combo Update installation, eject any connected USB drives or external storage devices. Go to the Finder, locate the USB drive icon on the desktop or in the sidebar, and drag it to the Trash. This ensures that no data transfers or conflicting operations occur during the update process.
- Disconnect Peripherals: Unplug any peripherals that are not necessary for the update process, such as printers, scanners, or external monitors. Disconnecting these devices reduces the chances of the update being interrupted due to communication issues or conflicting drivers.
- Remove Non-Essential USB Devices: If you have any non-essential USB devices connected, such as gaming controllers or dongles, it is recommended to remove them temporarily. These devices can sometimes cause conflicts or interrupt the installation process.
- Restart Your Mac: After disconnecting all external devices, restart your Mac. This ensures that your system recognizes the device removal and starts the update process with only the essential components connected.
- Install the Combo Update: Once your Mac has restarted, you can proceed with installing the OS X Combo Update. Follow the installation instructions provided by Apple to ensure a successful update.
By disconnecting external devices before installing an OS X Combo Update, you minimize the likelihood of compatibility issues or potential conflicts that might hinder the installation process. This step ensures that the update focuses solely on updating your Mac’s operating system without any external interference. In the next section, we will explore the benefits of resetting the PRAM/NVRAM and SMC to resolve installation problems.
Resetting the PRAM/NVRAM and SMC
Resetting the PRAM/NVRAM and SMC (System Management Controller) can help resolve installation problems with OS X Combo Updates. The PRAM/NVRAM stores various configuration settings, while the SMC controls system functions, including power management and hardware controls. Resetting these components can often resolve issues related to installation errors or unexpected behavior. Follow these steps to reset the PRAM/NVRAM and SMC:
- Resetting the PRAM/NVRAM:
- Shut down your Mac.
- Turn on your Mac and immediately press and hold the Option + Command + P + R keys together.
- Continue holding the keys until you hear the startup sound for the second time or see the Apple logo and progress bar appear and disappear twice.
- Release the keys and let your Mac restart normally.
- Resetting the SMC:
- Mac desktops:
- Shut down your Mac.
- Unplug the power cord from the back of the Mac.
- Wait for 15 seconds.
- Reconnect the power cord.
- Wait for a few seconds, then turn on your Mac.
- Mac laptops with removable batteries:
- Shut down your Mac.
- Remove the battery from your laptop.
- Press and hold the power button for 5 seconds.
- Reinsert the battery.
- Turn on your Mac.
- Mac laptops without removable batteries:
- Shut down your Mac.
- Press and hold the Shift + Control + Option keys along with the power button for 10 seconds.
- Release all the keys.
- Press the power button to turn on your Mac.
- Mac desktops:
Resetting the PRAM/NVRAM and SMC can often resolve installation issues by resetting various system configurations and controls. By performing these resets, you can clear any underlying issues that may be impacting the installation process. In the next section, we will explore the benefits of installing from a new user account to overcome installation problems.
Installing from a New User Account
If you are experiencing installation problems with an OS X Combo Update, installing from a new user account can help resolve issues related to user-specific settings or permissions. Creating a new user account provides a fresh environment where the update can be installed without interference from any existing user-related conflicts. Follow these steps to install from a new user account:
- Create a New User Account: Open “System Preferences” and go to “Users & Groups.” Click on the “+” button to create a new user account. Provide the necessary information and set the account type as “Administrator.”
- Log in with the New User Account: Log out from your current user account and log in using the newly created account. This will ensure that you are working from a clean user environment.
- Download and Install the Combo Update: Once you are logged in with the new user account, proceed to download the OS X Combo Update. Follow the installation instructions provided by Apple to complete the update process.
- Restart Your Mac: After the update is installed successfully, restart your Mac and log in with your original user account.
Installing from a new user account provides a fresh start where the update can be installed without any conflicts arising from user-specific settings or permissions. This helps ensure that the Combo Update installation process is not hindered by any user-related issues. However, it is important to note that creating a new user account should only be considered as a troubleshooting step and not a permanent solution. In the next section, we will explore the benefits of seeking support from Apple and participating in community discussions to resolve installation problems.
Contacting Apple Support and Community Discussions
If you have exhausted troubleshooting options and still encounter issues with the installation of an OS X Combo Update, contacting Apple Support and engaging in community discussions can provide valuable assistance in resolving the problem. Here are the benefits of each approach:
- Contacting Apple Support: Apple Support provides direct assistance for technical issues and can guide you through troubleshooting steps tailored to your specific situation. You can reach out to Apple Support via phone, chat, or email, depending on your preference and availability. They have access to in-depth knowledge and resources to address your installation problems effectively.
- Participating in Community Discussions: Community discussions, such as Apple Support Communities or online forums, allow you to interact with fellow Mac users facing similar installation issues. Engaging with the community can provide insights, recommended solutions, and workarounds that have worked for others. Often, community members share their experiences, offer step-by-step guides, or troubleshoot together to find a resolution.
When reaching out for support or joining community discussions, ensure you provide detailed information about your Mac model, macOS version, and the exact issues you are encountering. This will help others understand your situation and provide targeted assistance or advice. Be respectful and considerate when asking for help or providing feedback in community discussions, as these platforms thrive on collaboration and mutual support.
By seeking support from Apple and participating in community discussions, you can tap into a wealth of knowledge and experience that can aid in resolving installation problems. Remember that these approaches can complement your own troubleshooting efforts and provide additional insights and solutions. In all instances, maintaining open communication channels and following the advice of experts can greatly contribute to a successful resolution.