
Understanding the Phone App on iPhone 10
The Phone app on iPhone 10 is a powerful tool that allows you to manage your contacts and make calls with ease. Understanding its features and functionalities can significantly enhance your overall user experience. Here's a comprehensive overview of the Phone app on iPhone 10:
-
Dialer Interface: Upon opening the Phone app, you are greeted with the dialer interface, where you can input phone numbers directly to make calls. This interface also displays your recent calls, making it convenient to redial or return missed calls.
-
Contacts Tab: The Contacts tab provides access to your contact list, allowing you to view, add, edit, and organize your contacts. This tab is essential for managing your personal and professional connections efficiently.
-
Favorites: The Favorites tab enables you to mark specific contacts as favorites for quick access. This feature is particularly useful for prioritizing and reaching out to frequently contacted individuals without the need to search through your entire contact list.
-
Recents: In the Recents tab, you can review your call history, including incoming, outgoing, and missed calls. This feature provides a convenient way to track your communication activities and quickly redial or return calls.
-
Voicemail: The Voicemail tab centralizes your voicemail messages, allowing you to listen to, delete, or manage voicemails efficiently. This feature ensures that you never miss important messages and provides a streamlined approach to voicemail management.
-
Integrated Search: The Phone app incorporates a robust search functionality, enabling you to quickly locate specific contacts by entering their names, phone numbers, or other relevant details. This search feature simplifies the process of finding and connecting with your contacts.
Understanding the Phone app on iPhone 10 empowers you to leverage its diverse features for seamless communication and contact management. Whether you need to add new contacts, organize existing ones, or make calls efficiently, familiarizing yourself with the Phone app's interface and capabilities is essential for maximizing its utility in your daily interactions.
Adding a New Contact
Adding a new contact to your iPhone 10 is a straightforward process that allows you to expand your network and stay connected with ease. Whether you've met someone new or need to save a colleague's number, the Phone app simplifies the task of creating and organizing contacts. Here's a step-by-step guide to adding a new contact on your iPhone 10:
-
Accessing the Contacts Tab: To begin adding a new contact, open the Phone app and navigate to the "Contacts" tab located at the bottom of the screen. This tab serves as the central hub for managing your contacts and initiating the process of adding a new entry.
-
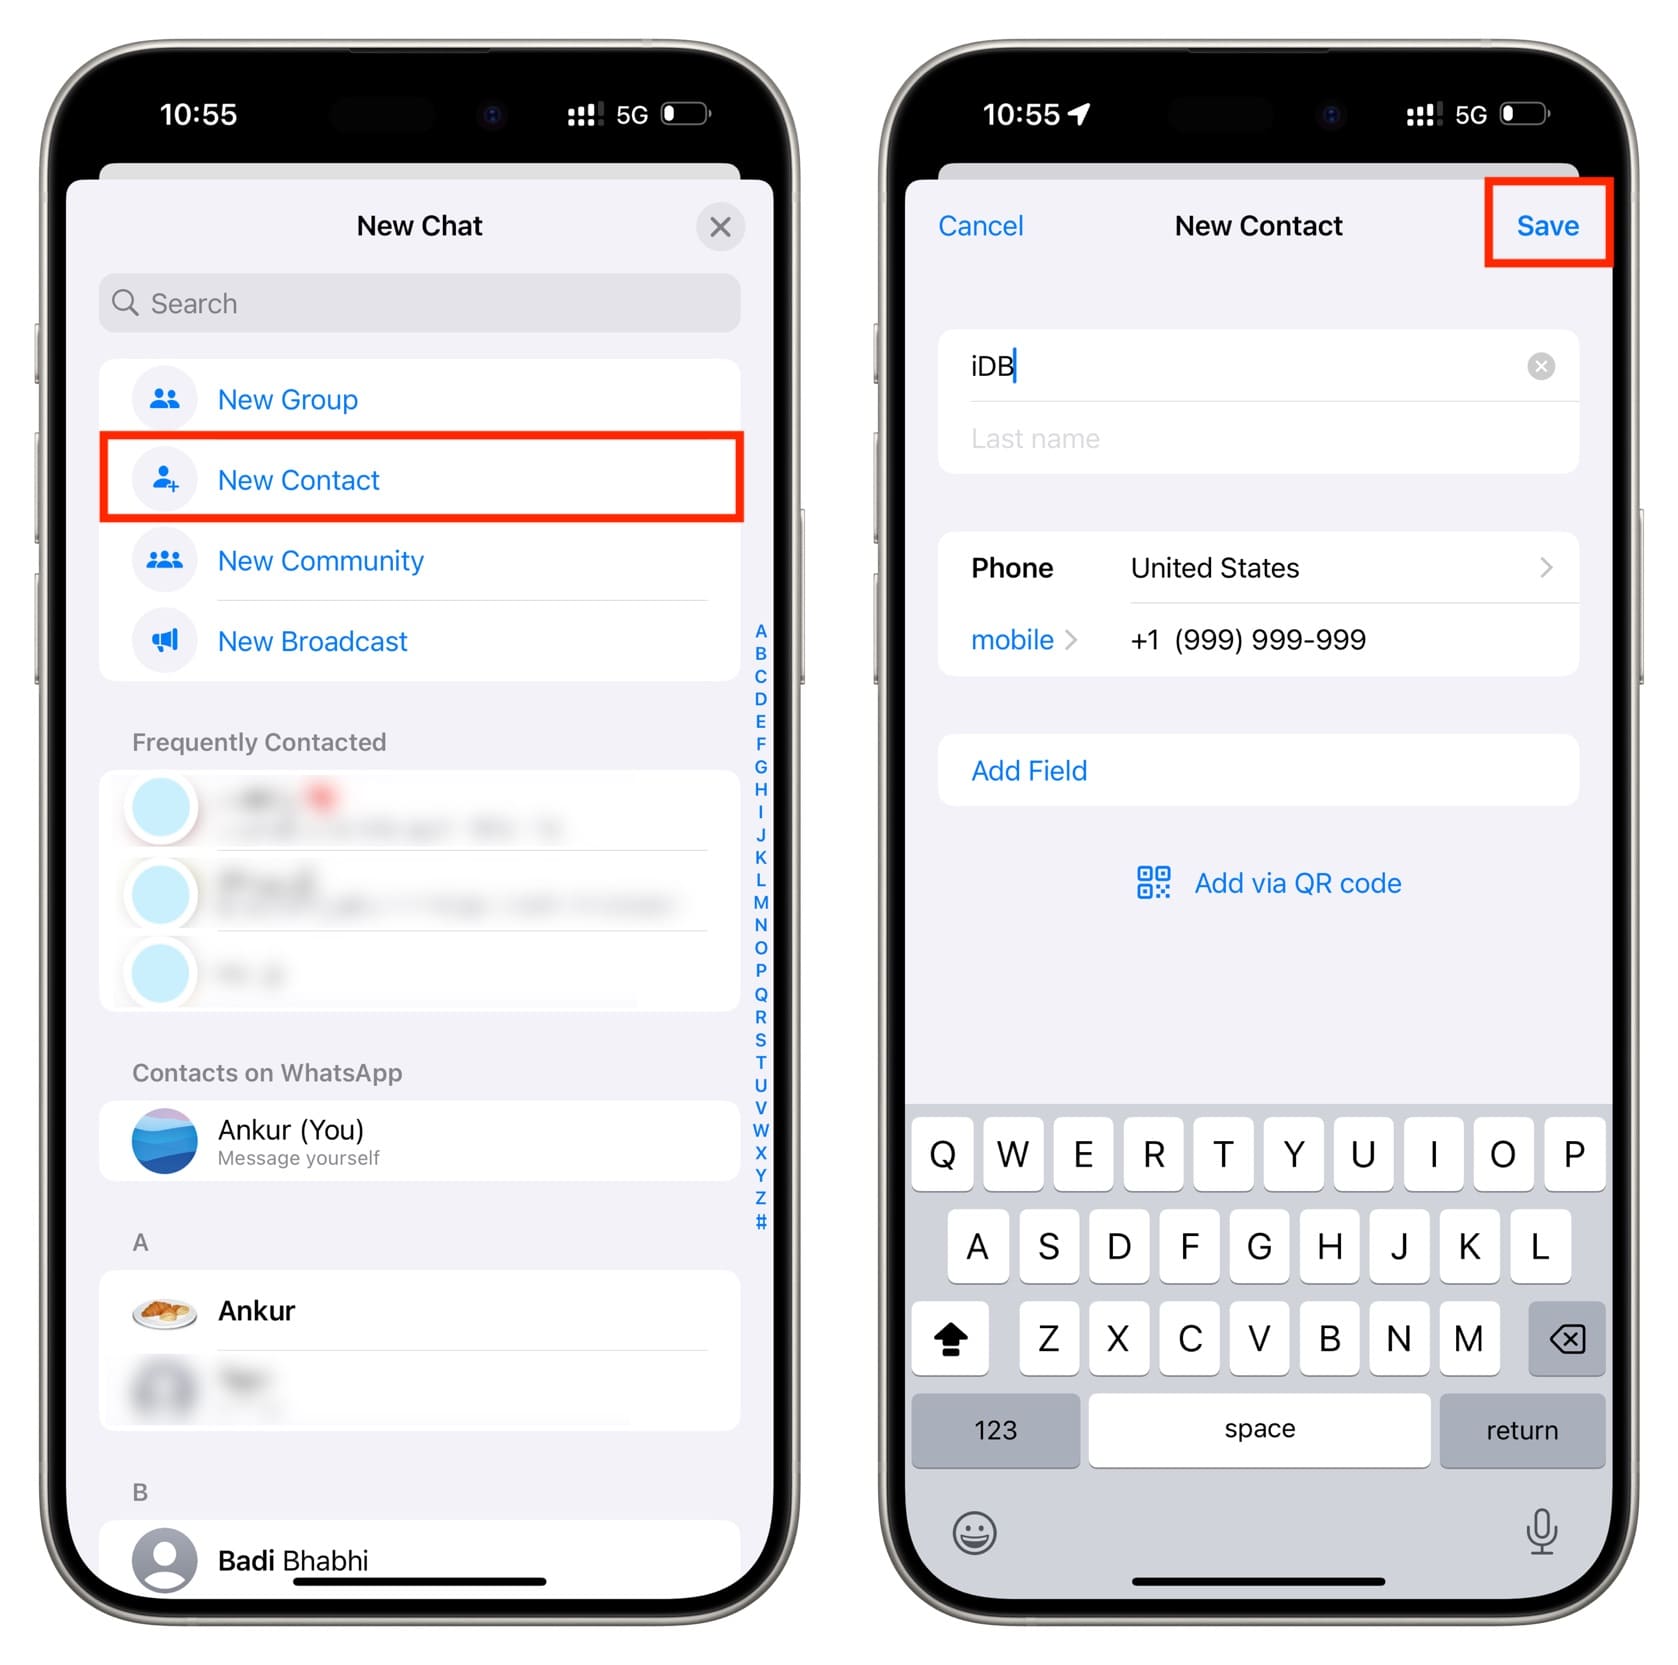
Initiating the Addition: Once in the Contacts tab, look for the "Add" button, typically represented by a plus sign (+) in the upper right corner of the screen. Tapping this button triggers the contact creation interface, allowing you to input the individual's details.
-
Entering Contact Information: Upon tapping the "Add" button, you will be prompted to input the contact's information, including their name, phone number, email address, and any additional details you wish to include, such as their job title or company affiliation. This step ensures that the new contact's information is accurately captured for future reference.
-
Saving the Contact: After entering the necessary details, you can save the new contact by tapping the "Done" or "Save" option, typically located in the upper right corner of the screen. This action finalizes the addition of the contact to your iPhone 10's address book, making their information readily accessible for calls, messages, and other forms of communication.
-
Customizing Contact Labels: For added convenience and organization, you can assign custom labels to specific contact details, such as differentiating between work and personal phone numbers or categorizing email addresses. This customization allows for clear identification and streamlined communication with the newly added contact.
By following these simple steps, you can seamlessly integrate new contacts into your iPhone 10, ensuring that your network remains up to date and easily accessible. Whether it's a new friend, business associate, or service provider, the ability to swiftly add contacts empowers you to expand your connections and maintain efficient communication channels directly from your device.
Adding Phone Numbers to an Existing Contact
Expanding an existing contact's information by adding additional phone numbers is a valuable capability offered by the iPhone 10's Phone app. Whether you need to include alternative contact numbers for a friend, family member, or colleague, the process of enriching an existing contact with supplementary phone numbers is seamless and intuitive. Here's a detailed guide on how to add phone numbers to an existing contact on your iPhone 10:
-
Accessing the Contact: Begin by opening the Phone app and navigating to the "Contacts" tab. Locate the existing contact to which you want to add a phone number and tap on their name to access their contact details.
-
Initiating the Addition: Once within the contact's details, look for the "Edit" option, typically represented by an "Edit" button or an "Edit Contact" link. Tapping this option will enable you to modify the contact's information, including adding new phone numbers.
-
Adding Phone Numbers: Within the contact editing interface, scroll down to the section where phone numbers are listed. Tap on "add phone" or the "+" symbol next to the phone number field to insert a new phone number for the contact.
-
Selecting Number Type: After tapping to add a new phone number, you will have the option to specify the type of number being added, such as "mobile," "work," "home," or other custom labels. This categorization ensures clarity and organization within the contact's details.
-
Saving the Changes: Once the new phone number and its corresponding label have been entered, proceed to save the changes by tapping "Done" or "Save" in the upper right corner of the screen. This action finalizes the addition of the new phone number to the existing contact.
-
Verification and Organization: After saving the changes, review the contact's details to ensure that the new phone number has been successfully added and categorized. This verification step helps maintain accurate and organized contact information within your iPhone 10.
By following these steps, you can effortlessly enhance the contact details of your existing connections by incorporating additional phone numbers. Whether it's capturing multiple phone numbers for a single individual or differentiating between personal and professional contact information, the ability to expand and categorize phone numbers within existing contacts empowers you to maintain comprehensive and well-organized communication resources directly from your iPhone 10.
Editing and Deleting Phone Numbers in Contacts
Editing and deleting phone numbers within contacts on your iPhone 10 is a fundamental aspect of contact management, allowing you to maintain accurate and relevant information for seamless communication. Whether you need to update a contact's phone number or remove outdated entries, the Phone app provides intuitive tools to facilitate these actions. Here's a comprehensive guide on how to edit and delete phone numbers within contacts on your iPhone 10:
Editing Phone Numbers
-
Accessing the Contact: Open the Phone app and navigate to the "Contacts" tab. Locate the contact whose phone number you wish to edit and tap on their name to access their details.
-
Initiating the Edit: Once within the contact's details, look for the "Edit" option, typically represented by an "Edit" button or an "Edit Contact" link. Tapping this option will enable you to modify the contact's information, including editing existing phone numbers.
-
Modifying Phone Numbers: Within the contact editing interface, locate the phone number you wish to edit and tap on it to make changes. You can update the existing number or replace it with a new one as needed.
-
Saving the Changes: After making the necessary edits, save the changes by tapping "Done" or "Save" in the upper right corner of the screen. This action finalizes the updated phone number within the contact's details.
-
Verification and Organization: Review the contact's details to ensure that the edited phone number has been updated accurately. This verification step helps maintain precision and relevance within the contact's information.
Deleting Phone Numbers
-
Accessing the Contact: Similarly, open the Phone app and navigate to the "Contacts" tab. Locate the contact from which you want to delete a phone number and tap on their name to access their details.
-
Initiating the Deletion: Once within the contact's details, locate the phone number you wish to delete and tap on the "Edit" option to enter the contact editing interface.
-
Removing the Phone Number: Within the editing interface, locate the phone number to be deleted and tap on the "Delete" or "Remove" option next to it. Confirm the deletion when prompted.
-
Saving the Changes: After removing the phone number, save the changes by tapping "Done" or "Save" in the upper right corner of the screen. This action finalizes the deletion of the phone number from the contact's details.
By following these steps, you can efficiently manage and update phone numbers within your contacts, ensuring that your communication resources remain accurate and up to date. Whether it's correcting a contact's phone number or streamlining your contact list by removing obsolete entries, the editing and deletion capabilities within the Phone app empower you to maintain a well-organized and reliable network of contacts on your iPhone 10.