
Choosing the Right DSLR for Video Shooting
When it comes to shooting high-definition (HD) video on a DSLR camera, choosing the right equipment is vital. While many DSLRs provide the capability to shoot video, not all of them offer the same level of video quality and control. Here are some important factors to consider when selecting a DSLR for video shooting:
- Image Sensor: Look for a DSLR with a large image sensor, as this will provide better low-light performance and depth of field control. APS-C or full-frame sensors are preferred for professional-quality video.
- Video Resolution and Frame Rate: Ensure that the DSLR supports at least 1080p Full HD video recording. Higher resolutions, such as 4K, are becoming increasingly popular, allowing for more flexibility in post-production.
- Manual Controls: A DSLR with manual controls for aperture, shutter speed, and ISO will give you greater control over the look and feel of your video. Check if the camera allows for manual focus during video recording as well.
- Audio Input: Look for a DSLR with an external microphone input. Built-in microphones may not provide the best audio quality, so having the option to connect an external microphone can significantly improve sound capture.
- Stabilization: In-camera stabilization, either optical or digital, can help reduce camera shake when recording handheld footage. Some DSLRs also offer compatibility with lens-based stabilization systems.
- Connectivity and Recording Formats: Check if the DSLR provides connectivity options like HDMI output for monitoring or external recording. It’s also worth considering the supported recording formats, such as MOV or MP4.
- Battery Life: Consider the DSLR’s battery life, as shooting video can consume more battery power compared to capturing still images. Invest in additional batteries or a battery grip for extended shooting sessions.
- Ergonomics: A comfortable grip and intuitive layout of buttons and controls are essential for prolonged shooting. Consider holding the camera in your hands to test its ergonomics before making a purchase decision.
By considering these factors and researching different DSLR models, you can choose a camera that meets your specific video shooting needs. Don’t forget to read reviews and user experiences to get a better idea of the DSLR’s video capabilities. Remember, the right DSLR will empower you to capture professional-quality HD videos and unleash your creativity behind the lens.
Understanding the Basics of HD Video Settings
When shooting HD video on a DSLR camera, understanding the basic video settings is crucial to achieving high-quality footage. Here are the key settings you need to know:
- Resolution: HD video typically refers to a resolution of 1920×1080 pixels (Full HD). However, some cameras now offer higher resolutions, such as 4K (3840×2160 pixels). The resolution determines the level of detail in your footage.
- Frame Rate: The frame rate determines how many individual frames, or pictures, are captured per second. The standard frame rate for video is 24 frames per second (fps). Higher frame rates, such as 30fps or 60fps, result in smoother motion but require more storage space.
- Shutter Speed: The shutter speed controls the amount of time the camera’s shutter is open, determining how long each frame is exposed. It is typically set to double the frame rate. For example, if shooting at 24fps, the shutter speed would be around 1/50th of a second.
- Aperture: Aperture controls the amount of light entering the camera through the lens. A lower aperture number (e.g., f/1.8) allows more light, resulting in a shallower depth of field. Adjusting the aperture affects the focus and the amount of background blur.
- ISO: ISO measures the camera’s sensitivity to light. A higher ISO value allows for shooting in low-light conditions but may introduce noise or graininess in the footage. Keep the ISO as low as possible but increase it when necessary for proper exposure.
- White Balance: White balance adjusts the camera’s settings to ensure accurate color representation in different lighting conditions. Use manual white balance settings for consistent results, or choose a preset based on the lighting environment.
By familiarizing yourself with these key settings, you’ll have greater control over the look and feel of your HD video footage. Experiment with different combinations of settings to achieve the desired effect for each shot. Remember, practice and understanding the impact of each setting on your video will help you create visually stunning and professional-looking footage.
Essential Camera Accessories for Shooting HD Video
When shooting HD video on a DSLR camera, having the right accessories can greatly enhance the quality and versatility of your footage. Here are some essential camera accessories to consider:
- External Microphone: Built-in camera microphones often pick up unwanted background noise. Investing in an external microphone can drastically improve audio quality and ensure clear and crisp sound during your video recordings.
- Stabilization Tools: Handheld video footage can suffer from unwanted camera shake. Utilize tripod stands, monopods, or camera stabilizers to keep your shots steady and eliminate distracting movement.
- ND Filters: Neutral Density (ND) filters help control the amount of light entering the lens. They are ideal for shooting in bright conditions or when you want to achieve a narrow depth of field in well-lit settings. ND filters allow you to have more control over exposure without compromising image quality.
- External Monitor: Using an external monitor allows you to have a larger and more accurate view of your composition and focus. It also provides better visibility when shooting in challenging lighting conditions. Look for monitors with high resolution and adjustable brightness levels.
- Camera Rig: Camera rigs provide additional stability and control for handheld shooting. They typically consist of a shoulder mount, handles, and mounting points for accessories like microphone and lights. Rigs distribute the weight of the camera and accessories more evenly, reducing fatigue during long shooting sessions.
- Additional Batteries and Memory Cards: HD video recording consumes more power and storage space compared to taking still photos. It’s essential to have spare batteries and memory cards to avoid running out of power or storage space in the middle of a shoot.
- Lighting Equipment: Good lighting is crucial for capturing high-quality video footage. Invest in a basic lighting setup, including LED panels, softboxes, or reflectors, to ensure proper illumination and minimize shadows or uneven lighting conditions.
- Remote Shutter Release: When shooting video, utilizing a remote shutter release can help with starting and stopping the recording without touching the camera. This minimizes the chances of accidental camera movement and ensures smoother transitions between shots.
- Lens Filters: Consider using lens filters for creative effects or to enhance the quality of your video. Filters like polarizers, UV filters, or graduated neutral density (GND) filters can improve color saturation, reduce glare, and balance exposure in challenging lighting situations.
These essential camera accessories will greatly enhance your video shooting capabilities and allow you to capture professional-looking HD footage. Invest in good quality accessories that suit your specific needs and shooting style to take your videos to the next level.
Mastering Exposure and White Balance for Video
Exposure and white balance are fundamental aspects of capturing high-quality video footage on a DSLR camera. Understanding how to master these settings will allow you to achieve accurate colors and well-exposed images. Here are some tips to help you master exposure and white balance for video:
- Exposure: Proper exposure is crucial for well-balanced video footage. Use the camera’s histogram as a guide to ensure you are capturing a wide range of tones without clipping highlights or losing details in the shadows. Adjust the aperture, shutter speed, and ISO to achieve the desired exposure level.
- Manual Mode: Shooting in manual mode gives you complete control over exposure. This allows you to adjust the aperture, shutter speed, and ISO individually, ensuring consistent exposure throughout your footage. Avoid relying on auto-exposure modes, which can result in unwanted exposure fluctuations.
- Exposure Compensation: Use exposure compensation to fine-tune the camera’s exposure settings. Increase the compensation to brighten the image or decrease it to darken the footage. This is especially useful in challenging lighting conditions or when capturing scenes with high contrast.
- White Balance: White balance ensures accurate color representation in different lighting situations. Set the white balance manually using a white card or a neutral gray reference to achieve consistent color temperatures. Alternatively, use the camera’s preset white balance settings based on the lighting environment.
- Custom White Balance: If shooting in mixed lighting conditions, consider creating a custom white balance by manually setting the color temperature. This ensures accurate color representation, especially when combining different light sources with varying color temperatures.
- White Balance Shift: Some DSLR cameras allow you to adjust the white balance shift values for fine-tuning the color temperature. This feature comes in handy when fine adjustments are needed to achieve the desired color tones in specific lighting situations.
- Use Gray Card or Color Chart: Utilize a gray card or color chart to accurately measure the white balance and color temperature in your scene. This provides a reference for post-processing and ensures consistent color reproduction throughout your video footage.
By mastering exposure and white balance, you will have greater control over the overall look and feel of your video footage. Practice using manual mode, experimenting with different exposure settings, and understanding the impact of white balance on the color rendition. With time and experience, you’ll be able to capture videos with accurate exposures and true-to-life colors.
Using the Correct Shutter Speed and Frame Rate
The choice of shutter speed and frame rate plays a crucial role in capturing smooth, cinematic-looking videos on a DSLR camera. By understanding how these settings work together, you can achieve the desired motion effect and avoid unwanted artifacts. Here are some tips for using the correct shutter speed and frame rate:
- Shutter Speed: The shutter speed determines how long the camera’s shutter remains open to expose each frame. It is measured in fractions of a second. The general rule of thumb is to set the shutter speed to double the frame rate for natural-looking motion. For example, when shooting at 24 frames per second (fps), choose a shutter speed of 1/48th of a second.
- Smooth Motion: To achieve smooth motion in your videos, it is essential to use a shutter speed that is synchronized with the frame rate. A balanced combination of shutter speed and frame rate helps create the illusion of motion without excessive blurring or choppiness.
- Slow Motion: If you intend to capture slow-motion footage, choose a higher frame rate. A higher frame rate allows for more frames per second, resulting in smoother slow-motion playback. For example, shooting at 60fps and then slowing it down to 24fps in post-production will give you a smooth slow-motion effect.
- Fast-Moving Subjects: When capturing fast-moving subjects, consider using a higher shutter speed to freeze the action and reduce motion blur. This ensures that each frame is sharp and detailed, even in high-speed scenes.
- Artistic Effect: Adjusting the shutter speed can also be used creatively to achieve specific effects. A slower shutter speed, such as 1/30th of a second, can create a slight motion blur, providing a dreamy or ethereal look. Experimentation with different shutter speeds can yield unique and artistic results.
- Flickering Lights: Be cautious when shooting under certain types of artificial lighting, such as fluorescent or LED lights. These lights flicker at a specific frequency, and using a mismatched shutter speed can result in undesirable banding or flickering in the footage. Adjust the shutter speed or consider using an anti-flicker setting if available on your camera.
- Post-Processing: Keep in mind that altering the speed of the footage in post-production can affect the final look and feel. Changing the frame rate can result in smoother or more stylized motion, but it may also introduce a slight loss in image quality or require additional processing time.
By understanding how shutter speed and frame rate work together, you can capture videos with the desired motion effect and smoothness. Experiment with different combinations to achieve the desired cinematic look for your footage. With practice and experience, you’ll be able to use shutter speed and frame rate effectively to bring your creative vision to life.
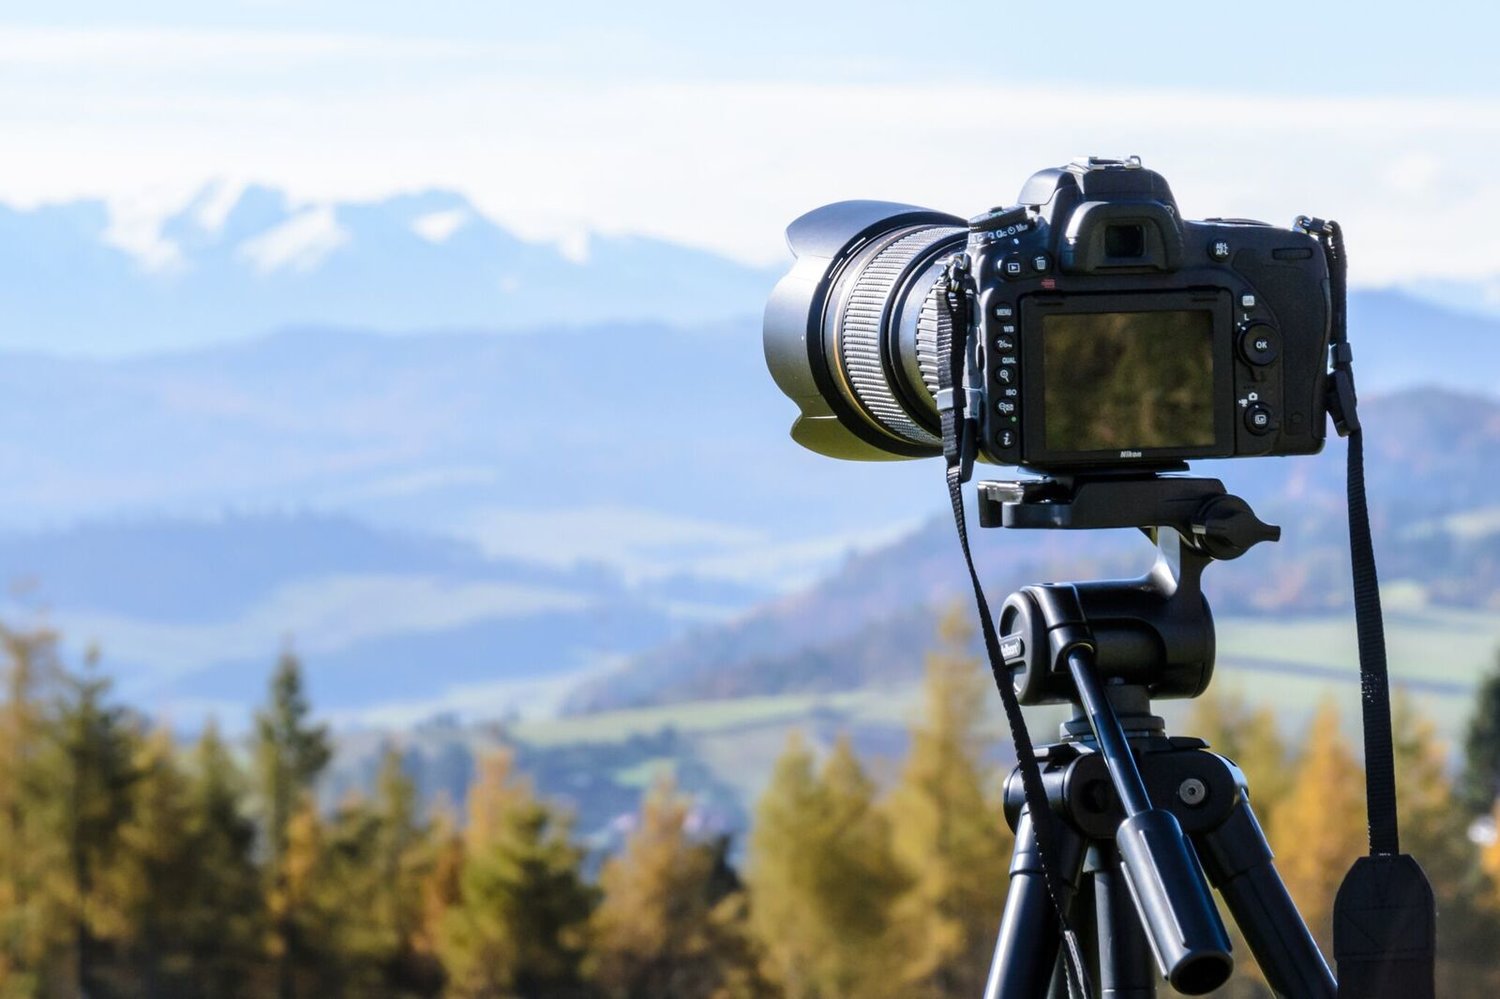
Achieving Smooth and Stable Footage with Tripods and Stabilizers
When it comes to shooting professional-looking video footage on a DSLR camera, achieving smooth and stable footage is essential. Handheld shooting can result in unwanted camera shake and jerky movements, compromising the overall quality of the footage. Here are some tips for achieving smooth and stable footage using tripods and stabilizers:
- Tripods: A tripod is a must-have accessory for stable video footage. Invest in a sturdy tripod that can support the weight of your camera and other accessories. Choose one with adjustable legs and a fluid head for smooth panning and tilting movements.
- Monopods: Monopods provide portability and stability while allowing for more mobility compared to tripods. They are particularly useful when shooting in crowded or tight spaces, where a tripod may not be practical. Monopods help reduce camera shake and provide additional support for smoother shots.
- Gimbals and Stabilizers: Gimbals and stabilizers are handheld devices that use various mechanisms to counteract camera shake and stabilize footage. They can provide smooth, almost cinematic-looking shots even when shooting while walking or running. Consider investing in a quality gimbal for more flexibility and creative possibilities.
- Shoulder Rigs: Shoulder rigs are worn over the shoulder and provide stability while allowing for more mobility compared to tripods or monopods. They distribute the weight of the camera and accessories across the body, reducing fatigue and minimizing unwanted camera movement.
- Stabilization Techniques: Regardless of the equipment used, proper stabilization techniques are crucial. Hold the camera with both hands, keeping your elbows close to your body. Use smooth and controlled movements when panning or tilting the camera. Avoid sudden jerks or erratic movements that can result in shaky footage.
- Image Stabilization: Utilize the image stabilization feature available on some DSLR lenses or in-camera stabilization systems. These features help reduce camera shake by compensating for small movements and vibrations. They can be particularly useful when shooting handheld or in situations where using external stabilizers is not possible.
- Practice and Experiment: Achieving smooth and stable footage requires practice and experimentation. Take the time to familiarize yourself with the equipment and different stabilization techniques. Try different settings and techniques to find what works best for your shooting style and the specific needs of your project.
By using tripods, stabilizers, and practicing proper stabilization techniques, you can significantly improve the overall quality of your video footage. Invest in reliable and high-quality equipment that suits your specific shooting requirements. With practice and experimentation, you’ll be able to capture smooth and stable footage that enhances the professionalism and impact of your videos.
Capturing High-Quality Audio with External Microphones
When it comes to video production, high-quality audio is just as important as clear visuals. The built-in microphones on DSLR cameras are often limited in their capabilities and can introduce unwanted background noise or poor audio quality. Investing in an external microphone is crucial for capturing excellent audio to accompany your video footage. Here are some tips for capturing high-quality audio with external microphones:
- Shotgun Microphones: Shotgun microphones are a popular choice for video production. They have a narrow pick-up pattern that focuses on the audio in front of the camera, minimizing background noise. Shotgun microphones are ideal for interviews, vlogging, or any situation where you want to capture specific audio sources.
- Lavalier Microphones: Lavalier, or lapel, microphones are small clip-on microphones that are commonly used in interviews or situations where the subject is moving. They provide clear audio and reduce environmental noise, making them a great choice for capturing dialogue or speeches.
- Wireless Microphone Systems: Wireless microphone systems allow you the freedom to move around without being tethered to the camera. They consist of a wireless transmitter that is attached to the microphone and a receiver connected to the camera. This setup is useful for recording audio from a distance or in situations where hiding wires is necessary.
- Windshields and Deadcats: When shooting outdoors, wind noise can be a significant problem. Using a windshield or deadcat, which is a furry cover that goes over the microphone, helps minimize wind noise and ensures cleaner audio recordings. These accessories are particularly useful when shooting in windy or outdoor environments.
- Audio Monitoring: It’s important to monitor the audio while recording to ensure optimal levels and quality. Use headphones to listen to the audio in real-time and adjust the microphone placement or settings as needed. This allows you to identify and address any issues before they affect the final video.
- Placement and Distance: Proper microphone placement is crucial for capturing clear audio. Position the microphone as close as possible to the audio source while keeping it out of the camera’s frame. Experiment with different placements to find the optimal position for the best sound quality.
- Check Audio Levels: Ensure that the audio levels are properly set on both the microphone and the camera. Avoid clipping, which occurs when the audio levels max out and distort the sound. Adjust the levels to achieve a balanced and consistent sound throughout the recording.
- Post-Processing: Even with high-quality external microphones, some post-processing may be necessary. Use audio editing software to enhance the clarity, remove background noise, or make other adjustments as needed. However, it’s important to capture the best possible audio during the recording process to minimize post-processing requirements.
Investing in an external microphone and following these tips will greatly improve the audio quality in your video productions. Remember to conduct tests and practice using the microphone in different scenarios to fully understand its capabilities and the best ways to capture high-quality audio. By combining excellent visuals with clear and crisp audio, you’ll create compelling videos that engage your audience on multiple levels.
Proper Lighting Techniques for HD Video Shooting
Proper lighting is essential for capturing high-quality video footage. It not only ensures proper exposure but also sets the mood, enhances the details, and creates a professional look. Whether you’re shooting indoors or outdoors, understanding and implementing proper lighting techniques can significantly improve the overall quality of your HD video. Here are some tips for achieving proper lighting:
- Utilize Natural Light: When shooting in natural light, take advantage of the available sunlight. Choose a location with ample natural light and position your subject accordingly. Consider the direction and intensity of the sunlight, as it can create different effects and shadows on your subject.
- Control the Light: If shooting indoors or in low-light situations, it’s crucial to have control over the lighting. Use artificial lighting sources such as studio lights, LED panels, or softboxes to create a consistent and desired lighting setup. Experiment with different lighting angles and intensities to achieve the desired look.
- Three-Point Lighting: The three-point lighting technique is a common method used in video production. It consists of three key lights: the key light, fill light, and backlight. The key light is the primary light source that provides the main illumination on the subject. The fill light helps reduce shadows and provides a more balanced look, while the backlight separates the subject from the background and adds depth.
- Diffuse and Soften Light: Soft lighting helps create a more flattering and natural look. To achieve soft lighting, use diffusers or softboxes to scatter the light and reduce harsh shadows. This technique is particularly useful when shooting close-ups or portraits, as it helps create a smoother and more even look.
- Color Temperature: Pay attention to the color temperature of your lighting. Different light sources have different color temperatures, ranging from warm (orange) to cool (blue). Ensure that all your lighting sources have matching color temperatures to maintain consistency in your footage. Consider adjusting the white balance settings on your camera to match the lighting conditions.
- Lighting Ratios: Lighting ratios refer to the difference in intensity between the key light and fill light. Experiment with different lighting ratios to create different moods and effects. A higher lighting ratio, with a more prominent key light, can create a dramatic look, while a lower ratio provides a more even and natural appearance.
- Highlight and Shadow Details: Pay attention to the details in both the highlights and shadows. Expose the highlights correctly to avoid blown-out areas, while ensuring that there is enough detail in the shadow areas. Use reflectors or bounce boards to fill in shadows or add additional light as needed.
- Practice and Experiment: Lighting is both an art and a science. It takes practice and experimentation to master different lighting techniques and achieve the desired results. Continuously learn and refine your skills by studying lighting setups in films, videos, and photography. Don’t be afraid to try new techniques and think creatively.
By understanding and applying these proper lighting techniques, you can elevate the quality and visual appeal of your HD video footage. Experiment with different lighting setups and adapt the techniques to suit the specific needs of your project. Remember, proper lighting not only enhances the overall quality of your videos but also helps convey your intended message and capture the attention of your viewers.
Composing Shots for a Cinematic Look
Composing shots with a cinematic look can greatly enhance the visual appeal of your video footage. Whether you’re shooting a narrative film, a documentary, or any other type of video, the way you frame and compose your shots can evoke emotions, convey messages, and immerse your viewers in the story. Here are some tips for achieving a cinematic look in your video compositions:
- Rule of Thirds: Use the rule of thirds to create a balanced and visually pleasing composition. Imagine breaking your frame into a grid of nine equal parts using two horizontal and two vertical lines. Place your subject or key elements along these lines or at the intersections, rather than in the center, to create a more dynamic and captivating composition.
- Leading Lines: Incorporate leading lines to draw the viewer’s eyes into the frame and guide their attention. Leading lines can be natural elements like roads, rivers, or architectural features that create a sense of depth and perspective. Use these lines to direct focus towards your subject or key points of interest.
- Depth of Field: Utilize depth of field to enhance the cinematic feel of your shots. Adjust the aperture to control the depth of field and create selective focus. By having a shallow depth of field, you can draw attention to the main subject while blurring the background, giving your shots a more visually captivating and dream-like quality.
- Perspectives and Angles: Experiment with different perspectives and angles to add visual interest and variety to your shots. Explore low-angle or high-angle shots to alter the viewer’s perception and add drama or uniqueness to your composition. Use unconventional angles to create a more dynamic and visually striking image.
- Movement and Tracking Shots: Consider incorporating movement into your shots to add energy and visual storytelling. Utilize tracking shots, dolly movements, or steadicam shots to follow your subject or capture dynamic action sequences. Smooth and controlled camera movements can create a more immersive and cinematic experience for the viewer.
- Foreground and Background Elements: Pay attention to the foreground and background elements to add depth and layers to your composition. Incorporate objects, people, or elements that provide visual interest and a sense of scale. This can make your shots more visually captivating and contribute to the overall cinematic look and feel.
- Color and Lighting: Use color schemes and lighting to enhance the mood and tone of your shots. Experiment with color grading and lighting setups to create a specific atmosphere or evoke certain emotions. Utilize contrasting colors or soft, diffused lighting to create a visually striking and cinematic effect.
- Visual Storytelling: Each shot should serve a purpose in telling your story or conveying your message. Consider how each shot relates to the overall narrative or theme. Use composition techniques to guide the viewer’s attention and highlight important details or elements that drive the story forward.
By implementing these tips and techniques in your video compositions, you can capture shots that have a cinematic quality and captivate your audience. Experiment with different approaches, study films and videos that you find visually inspiring, and practice your composition skills. Remember, the composition is an integral part of visual storytelling, allowing you to convey your message and immerse your viewers in the world you’ve created.
Editing and Post-Processing Tips for HD Video Footage
Once you’ve captured your HD video footage, the editing and post-processing stage is where you can truly bring your vision to life. Skilful editing enhances the storytelling, improves the flow, and polishes the overall look and feel of your video. Here are some tips for editing and post-processing HD video footage:
- Organization and Backup: Before diving into the editing process, make sure your footage is well organized and backed up. Create a structured folder system to easily locate and access your files. Also, back up your original footage to prevent any loss or corruption during the editing process.
- Import and Organization: Import your footage into a professional video editing software and organize your clips in a logical sequence or timeline. Use naming conventions or keywords to easily identify and locate specific shots or scenes.
- Storyboard and Editing Plan: Prior to editing, create a storyboard or rough editing plan to guide your editing process. This helps you visualize the structure and flow of your video, ensuring a more cohesive and engaging final result.
- Trimming and Cutting: Begin the editing process by trimming unnecessary footage and cutting out any mistakes or undesired parts. Focus on the pacing, ensuring that each scene is concise and serves its purpose in advancing the story or message.
- Transitions and Effects: Add appropriate transitions, such as cuts, fades, or dissolves, to seamlessly transition between shots. Utilize effects sparingly and purposefully to enhance specific moments or create a desired visual impact. Avoid excessive use of effects that can distract from the content.
- Color Grading: Enhance the overall look and mood of your footage through color grading. Adjust the colors, contrast, and saturation to create a consistent and visually appealing aesthetic. Experiment with different LUTs (Look-Up Tables) or create your own custom grading to achieve the desired look.
- Audio Mixing: Pay careful attention to audio during editing. Adjust the audio levels, balance, and EQ to ensure clear and balanced sound. Cut out any unwanted noise or background disturbances and add subtle sound effects or music to enhance the overall experience.
- Titles and Graphics: If necessary, add titles, lower thirds, or graphics to provide context, introduce key elements, or display information. Keep them visually appealing but legible, ensuring they enhance rather than distract from the main content of your video.
- Review and Feedback: After completing your initial edit, take the time to review your work critically. Seek feedback from others to gain different perspectives and make necessary adjustments to further improve the overall quality of your video.
- Export and Compression: When exporting your final video, choose the appropriate settings for your intended platform or delivery method. Consider the resolution, aspect ratio, and file format to ensure optimal playback quality while maintaining a reasonable file size.
- Final Quality Check: Before sharing or publishing your video, perform a final quality check. Watch the video from start to finish to ensure there are no glitches, audio-sync issues, or visual artifacts. Make any necessary adjustments or corrections to produce a polished and professional final product.
Skilful editing and post-processing can greatly enhance the final output of your HD video footage. Take the time to plan, organize, and apply appropriate techniques to achieve your desired vision. Remember, editing is a collaborative and iterative process, so embrace feedback and continuously refine your work. With practice and attention to detail, your edited video will effectively convey your message and captivate your audience.