
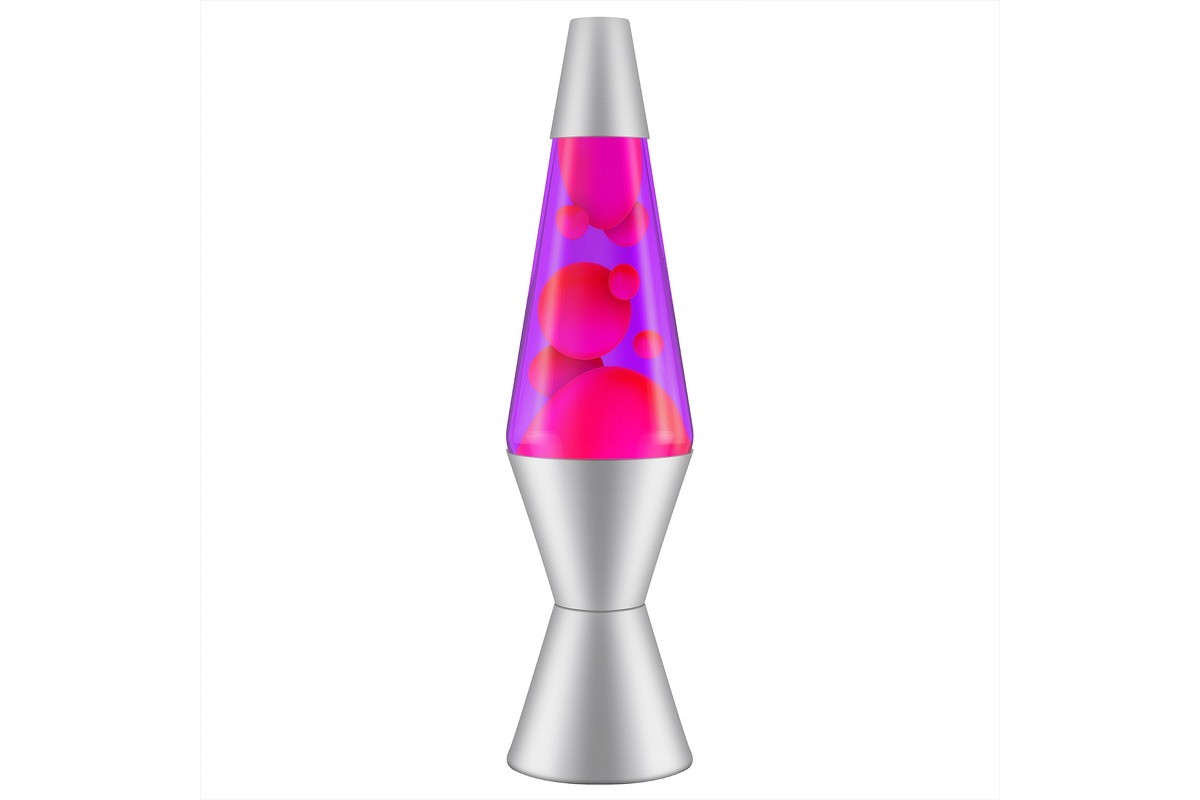
Troubleshooting Common Issues with Lava Lamps
Lava lamps are mesmerizing and captivating decorative items that add a unique ambiance to any space. However, from time to time, you may encounter some issues that prevent your lava lamp from flowing smoothly. Before you panic and think that your lava lamp is broken, there are several common problems that can be easily resolved. In this section, we’ll discuss the most common issues and provide troubleshooting tips to get your lava lamp back in action.
1. Insufficient Heat: If your lava lamp is not flowing, the first thing to check is the heat. Lava lamps require heat to melt the wax and create the flowing effect. Ensure that your lava lamp is placed in a warm environment and that the lamp’s base is generating enough heat.
2. Cold Room Temperature: Lava lamps perform best at room temperature. If the room is too cold, the wax may solidify, leading to a stagnant or sluggish flow. Consider moving the lava lamp to a warmer area of the room or turning up the heat.
3. Incorrect Bulb Wattage: Using the wrong bulb wattage can also impact the flow of your lava lamp. Make sure you are using the recommended wattage specified by the manufacturer. Using a higher wattage can cause the wax to overheat, while a lower wattage may not provide enough heat to melt the wax.
4. Cooling Wax Blob: Sometimes, the wax may form a large blob at the top or bottom of the lamp, preventing the flow. This can happen if the lamp has been exposed to cold temperatures or if it has been shaken. To resolve this, gently rotate the lamp while it is turned off. The movement will break up the wax blob and allow it to flow freely.
5. Inadequate Liquid Level: A low liquid level can affect the flow of the lava. Check the liquid level and ensure it is above the minimum mark. If the level is low, top it up with distilled water. Avoid overfilling, as it can lead to overflow or overheating.
6. Dirty or Cloudy Liquid: Over time, the liquid in your lava lamp can become cloudy or dirty, affecting the flow. To fix this, carefully empty the lamp and replace the old liquid with a fresh mixture of distilled water and the proprietary lava lamp solution provided by the manufacturer.
7. Blocked or Clogged Tube: A blockage or clog in the lava lamp’s tube can hinder the flow. Carefully remove the cap and gently clean the tube with a long, thin brush or a pipe cleaner. Ensure there are no obstructions that prevent the wax from freely circulating.
8. Uneven Base Surface: An uneven surface can cause your lava lamp to wobble or tilt, affecting the flow. Place your lava lamp on a stable and flat surface to ensure proper heat distribution and smooth flow.
9. Overheating Issues: Lava lamps should not be left on for extended periods. Overheating can cause the wax to become too thin, resulting in a fast flow or even bubbling. Follow the recommended usage guidelines and turn off the lamp when not in use.
10. Air Bubbles in the Liquid: Air bubbles can disrupt the flow of the lava. Gently tap the side of the lamp or give it a slight shake to release trapped air bubbles. Avoid excessive shaking, as it can disturb the wax formation.
11. Faulty or Old Lava Lamp: If you have tried all the troubleshooting steps and your lava lamp still fails to flow, it may be a sign of a faulty or aging lamp. Consider contacting the manufacturer for further assistance or consider replacing the lamp if necessary.
By following these troubleshooting tips, you can revive your non-flowing lava lamp and enjoy the mesmerizing motion once again. Remember, patience is key, and sometimes it may take a little time for the lava lamp to warm up and get into a flowing rhythm. Experimenting with different solutions can help you find the right method to restore your lava lamp’s captivating flow.
Insufficient Heat
One of the most common issues that can prevent your lava lamp from flowing is insufficient heat. Lava lamps rely on heat to melt the wax and create the mesmerizing flow that we all love. Without enough heat, the wax will remain solid and motionless at the bottom of the lamp.
To address this issue, the first thing you should check is the temperature of the room where your lava lamp is located. Lava lamps perform best in a warm environment, typically at room temperature. If the room is too cold, the wax may not receive enough heat to liquefy. Consider moving the lamp to a warmer area or turning up the heat in the room.
In addition to the room temperature, it’s crucial to ensure that the lamp’s base is generating enough heat. Lava lamps are equipped with a bulb at the base, which provides the necessary heat. Check the bulb wattage and make sure you are using the recommended wattage specified by the manufacturer. Using a higher wattage bulb can result in overheating, while a lower wattage may not generate enough heat to melt the wax effectively.
Another factor to consider is the distance between the bulb and the wax. The bulb should be positioned close enough to the wax without touching it. Adjust the bulb’s position if needed to ensure proper heat distribution.
If you’ve confirmed that the room temperature and bulb wattage are adequate, but your lava lamp is still not flowing, you can try using an external heat source. Placing the lamp near a gentle heat source like a radiator, heating vent, or even a warm lamp can help raise the temperature and encourage the wax to flow.
Remember to be patient when troubleshooting insufficient heat issues. Lava lamps may take some time to warm up and reach the optimum temperature for proper flow. Give it some time, and if necessary, gently rotate the lamp to distribute the heat evenly throughout the wax.
Cold Room Temperature
Another common issue that can hinder the flow of your lava lamp is a cold room temperature. Lava lamps are designed to operate optimally at room temperature, typically around 68 to 78 degrees Fahrenheit (20 to 25 degrees Celsius). If the room is too cold, it can cause the wax to solidify and impede the mesmerizing flow.
To address this issue, first, assess the temperature of the room where your lava lamp is located. If the temperature is below the recommended range, consider moving the lamp to a warmer area of the room or to a different room altogether that is warmer. Placing the lamp near a heat source, such as a radiator or a warm lamp, can also help raise the ambient temperature around the lamp.
It’s important to note that sudden temperature changes can also impact the flow of the lava lamp. Avoid placing your lava lamp near drafty areas or areas where it may be exposed to cold air, such as open windows or air conditioning vents. These sudden temperature changes can cause the wax to solidify or become inconsistent in its flow.
If you live in a particularly cold climate or during the winter months when ambient temperatures are lower, you may need to take additional measures to keep your lava lamp flowing smoothly. Consider using a heating pad or wrap to provide consistent warmth to the base of the lamp, ensuring that it stays at the optimal temperature for proper wax flow.
Additionally, if you’re using your lava lamp in a commercial or public setting, such as a store or office, take into account the room temperature settings. Ensure that the thermostat is set to a suitable temperature that promotes optimal lava lamp flow.
Remember, lava lamps are designed to create a mesmerizing and soothing visual experience. By maintaining a suitable room temperature, you can ensure that your lava lamp performs at its best, providing hours of enjoyment and relaxation.
Incorrect Bulb Wattage
Using the incorrect bulb wattage is another common issue that can affect the flow of your lava lamp. Lava lamps rely on heat to melt the wax and create the mesmerizing motion. Using the wrong bulb wattage can either cause the wax to overheat or not provide enough heat, resulting in a disrupted flow.
To ensure that your lava lamp operates properly, check the recommended bulb wattage specified by the manufacturer. Typically, lava lamps require bulbs with wattages ranging from 15 to 40 watts. Using a higher wattage bulb can cause the wax to overheat and become too thin, resulting in a faster flow or even bubbling. On the other hand, using a lower wattage bulb may not generate enough heat to properly melt the wax, leading to limited or stagnant flow.
If you are uncertain about the correct bulb wattage for your lava lamp, consult the lamp’s instruction manual or contact the manufacturer for guidance. They will be able to provide specific recommendations to ensure optimal performance.
It is worth noting that different lava lamp models may have varying wattage requirements. Therefore, it is important to use the appropriate bulb wattage specific to your lava lamp to achieve the desired flow and prevent any potential damage.
If you find that you have been using an incorrect bulb wattage in your lava lamp, it is recommended to replace it with the appropriate one as soon as possible. Using the correct bulb wattage will help maintain a steady temperature, ensuring that the wax melts evenly and flows smoothly.
Remember, using the correct bulb wattage is crucial for the proper functioning of your lava lamp. By following the manufacturer’s recommendations, you can ensure that your lava lamp provides a captivating and uninterrupted flow that enhances the overall visual appeal and ambiance of your space.
Cooling Wax Blob
Sometimes, your lava lamp may develop a blob of solid wax at the top or bottom, causing the flow to become stagnant. This can occur due to various reasons, such as exposure to cold temperatures or if the lamp has been shaken. However, there are steps you can take to address this issue and restore the smooth flow of your lava lamp.
If you notice a cooling wax blob forming in your lava lamp, the first step is to turn off the lamp and allow it to cool down completely. Once cooled, gently rotate the lamp in a circular motion. This movement helps to break up the blob and disperse the wax throughout the lamp. Avoid shaking the lamp vigorously, as this could further disrupt the flow or cause damage to the lamp.
If rotating the lamp doesn’t resolve the issue, you can try carefully tilting the lamp to encourage the wax to move away from the blob. Tilt the lamp in the opposite direction of the blob and hold it in that position for a short period. Then, return the lamp to its original position and allow the wax to settle. This method can help redistribute the wax and free up any blockages that may be obstructing the flow.
In some cases, using a hairdryer on a low heat setting can help soften the blob of wax. Hold the hairdryer a few inches away from the lamp and direct the warm air towards the blob. As the blob softens, the wax should start to flow again. However, be cautious not to overheat the lamp or expose it to excessive heat, as this can result in damage to the lamp or inconsistent flow.
Prevention is key to avoiding cooling wax blobs. To help keep your lava lamp in optimal condition, avoid exposing it to extreme temperatures. Keep it away from areas where it may be subjected to cold drafts or direct sunlight, as these can cause the wax to cool and solidify unevenly.
Remember, if your lava lamp develops a cooling wax blob, it doesn’t necessarily indicate a malfunction. With a bit of patience and gentle manipulation, you can often restore the flow and enjoy the mesmerizing motion of your lava lamp once again.
Inadequate Liquid Level
The liquid level in your lava lamp plays a crucial role in the proper functioning and flow of the wax. If the liquid level is too low, it can impede the flow and cause the wax to remain stagnant at the bottom of the lamp. Luckily, addressing this issue is relatively simple and can help restore the smooth flow of your lava lamp.
To check the liquid level, first, ensure that the lamp is turned off and has cooled down. Gently remove the cap or stopper from the top of the lamp, being cautious not to spill any liquid. The liquid level should be above the minimum fill line, which is typically marked on the side of the lamp’s glass vessel.
If the liquid level is below the minimum mark, you will need to add more liquid to the lamp. It is crucial to use distilled water or the proprietary lava lamp liquid provided by the manufacturer. Avoid using tap water, as it can contain impurities that may cloud the liquid or leave residue on the inside of the lamp.
To add more liquid, pour it slowly into the lamp’s vessel, being careful not to overfill. Add enough liquid until it reaches the recommended level. It is important not to exceed the maximum fill line, as this can lead to overflow or overheating of the lamp.
Once you have added the appropriate amount of liquid, carefully replace the cap or stopper, ensuring it is securely in place. Turn on the lamp and allow it some time to warm up. Watch as the liquid heats up and the wax begins to liquefy and flow smoothly.
Remember to regularly check the liquid level in your lava lamp. Over time, evaporation can cause the liquid level to decrease. If you notice the flow starting to slow down again, it may indicate that the liquid level is getting too low. In such cases, simply follow the steps mentioned above to add more liquid and restore the proper flow.
By maintaining an adequate liquid level, you can ensure that your lava lamp continues to provide the captivating and mesmerizing flow that it is known for. Additionally, proper liquid levels help to distribute heat evenly, allowing the wax to melt consistently and create the visual spectacle that lava lamps are renowned for.
Dirty or Cloudy Liquid
Over time, the liquid in your lava lamp can become dirty or cloudy, affecting the overall appearance and flow of the lamp. This can occur due to a buildup of impurities or residue from the wax. Fortunately, there are steps you can take to clean and restore the clarity of the liquid, resulting in a more vibrant and captivating lava lamp display.
Before cleaning the liquid, it is essential to turn off the lamp and allow it to cool completely. Once cooled, carefully remove the cap or stopper from the top of the lamp, ensuring not to spill any liquid. Take note of any specific cleaning instructions provided by the manufacturer for your specific lava lamp model.
To clean the liquid, you will need to replace it with a fresh mixture. Carefully empty the old liquid from the lamp, taking care not to spill any on the outer surface or electrical components. It is important to dispose of the old liquid properly, as it may contain contaminants or impurities.
Once the lamp is empty, prepare a fresh mixture of distilled water and the proprietary lava lamp solution specified by the manufacturer. Follow the recommended proportions and instructions provided, as they can vary depending on the brand and model of the lava lamp. The solution typically helps to maintain the proper viscosity and clarity of the liquid.
Gently pour the fresh mixture into the lamp, taking care not to overfill. Leave some space at the top to allow for the expansion of the liquid when heated. After refilling the lamp, securely replace the cap or stopper.
Turn on the lamp and let it warm up. As the liquid heats, any remaining residue or impurities should gradually dissolve and disperse, resulting in a clearer and more visually appealing appearance. It may take some time for the full effect to be visible, so be patient and allow the lamp to reach its optimal flow state.
Regular maintenance and cleaning can help prolong the life and performance of your lava lamp. It is recommended to clean the liquid every two to three months, or whenever you notice a significant buildup of dirt or cloudiness. By maintaining a clean and clear liquid, you can enjoy the full beauty and mesmerizing flow of your lava lamp.
Remember to always consult the manufacturer’s guidelines for specific cleaning instructions, as variations may exist depending on the lava lamp model. By following proper cleaning procedures, you can keep your lava lamp in excellent condition, ensuring an enchanting visual experience for years to come.
Blocked or Clogged Tube
If your lava lamp is not flowing as it should, it’s possible that the tube inside the lamp has become blocked or clogged. A blockage in the tube can impede the movement of the wax and disrupt the desired flow. Fortunately, there are steps you can take to address this issue and restore the smooth motion of your lava lamp.
To begin, ensure the lamp is turned off and has cooled down completely. Gently remove the cap or stopper from the lamp’s top, taking care not to spill any liquid. Inspect the tube and look for any visible blockages or clogs. Blockages can occur due to a variety of reasons, such as small debris, residue, or even solidified wax.
To clear the blockage, you can use a long, thin brush or a pipe cleaner. Carefully insert the brush or pipe cleaner into the tube and gently rotate it to dislodge any trapped debris or wax. Be cautious not to apply excessive force, as this can damage the tube or other components of the lamp.
If the blockage persists, you can try using warm water to flush out the tube. Fill a separate container with warm distilled water and carefully pour it into the tube. Use a small funnel if necessary to control the water flow. Allow the water to run through the tube for a few seconds, then drain it out. Repeat this process a few times to help dislodge any stubborn blockages.
Once you have cleared the blockage, replace the cap or stopper securely and turn on the lamp. Watch as the wax starts to flow smoothly through the tube, creating the mesmerizing motion characteristic of a lava lamp.
It’s important to note that preventing future blockages is key to maintaining the proper flow of your lava lamp. Avoid placing the lamp in areas where it may be exposed to dust, hair, or other debris. Keeping the lamp away from open windows or areas with high foot traffic can also help minimize the chances of blockages occurring.
Regular maintenance and cleaning of your lava lamp can help prevent blockages and ensure uninterrupted flow. Cleaning the lamp and replacing the liquid periodically can help eliminate any residue or build-up that may accumulate in the tube over time.
By addressing blockages promptly and following proper maintenance practices, you can ensure that your lava lamp continues to provide an enchanting and mesmerizing visual experience for years to come.
Uneven Base Surface
An uneven base surface can contribute to instability and hinder the proper flow of your lava lamp. When the base of the lamp is not level, it can cause wobbling or tilting, affecting the distribution of heat and the movement of the wax. Fortunately, there are steps you can take to address this issue and ensure a smooth and steady flow.
Start by carefully examining the surface on which your lava lamp is placed. Ensure that it is stable and flat. If the surface is uneven, make adjustments to level it. You can use small, adhesive felt pads or soft rubber pads to compensate for any irregularities. Place them under the base of the lamp to provide stability and level out the surface.
It’s also important to check the base of your lava lamp. Sometimes, the base itself may be uneven due to manufacturing defects. In such cases, consider placing a thin object, like a small piece of cardboard or a stack of paper, under one side of the base to level it out. Be careful not to apply too much pressure to avoid damaging the lamp or its electrical components.
When leveling the lava lamp’s base, ensure that it is securely positioned and not at risk of tipping over. An unstable lamp can not only affect the flow but also pose a safety risk. Take precautions to prevent any accidental spills or damage.
Addressing an uneven base surface promotes proper heat distribution within the lamp. This, in turn, ensures that the wax is evenly melted, allowing for a consistent and smooth flow. Without the interference of an unsteady base, your lava lamp can operate optimally and provide the mesmerizing motion it’s known for.
Regularly check the stability of your lava lamp and make any necessary adjustments to the base surface. Over time, the lamp may shift or settle, requiring re-leveling. By maintaining a stable and level base, you can enjoy the captivating flow of your lava lamp to its fullest extent.
Remember, stability is key when it comes to lava lamps. Ensuring a level base surface is a simple but crucial step that can significantly enhance the performance and visual appeal of your lava lamp.
Overheating Issues
While heat is essential for the proper flow of the wax in a lava lamp, overheating can lead to problems and disrupt the smooth motion of the lamp. Overheating can cause the wax to become overly thin, resulting in a fast and erratic flow or even bubbling. It is important to monitor the temperature of your lava lamp and take appropriate measures to prevent overheating.
One common cause of overheating is leaving the lamp on for extended periods, exceeding the recommended usage guidelines. Most lava lamps are designed to be used for a maximum of 8 to 10 hours at a time. Leaving the lamp on continuously can cause the wax to overheat, affecting its viscosity and flow. Make sure to turn off the lamp when not in use, allowing it to cool down and preventing excessive heat buildup.
Additionally, avoid exposing your lava lamp to direct sunlight or placing it near sources of excessive heat, such as heaters or fireplaces. Direct heat can lead to rapid heating, causing the wax to become too thin and disrupt the desired flow. Find a location for your lava lamp where it can be enjoyed without being exposed to excessive heat sources.
If you suspect your lava lamp is overheating, you can check the temperature of the lamp’s base. Feel the base gently with your hand. If it feels excessively hot to the touch, it may indicate overheating. In such cases, turn off the lamp immediately and allow it to cool down completely before using it again. Monitor the lamp during use to ensure a safe operating temperature.
If overheating issues persist, it is advisable to contact the manufacturer or consult a professional for further assistance. They can provide guidance on potential solutions or assess whether there may be an underlying issue affecting the lamp’s performance.
Remember, maintaining the appropriate temperature range is vital for the proper functioning and longevity of your lava lamp. By following the recommended usage guidelines and preventing overheating, you can enjoy a consistent and captivating flow while ensuring the safety and longevity of your lava lamp.
Air Bubbles in the Liquid
Air bubbles can sometimes form in the liquid of a lava lamp, disrupting the smooth flow of the wax and affecting the overall visual experience. These bubbles can be caused by a variety of factors, including temperature changes, movement, or even the initial setup of the lamp. However, there are steps you can take to minimize and remove air bubbles, ensuring a captivating and uninterrupted flow.
If you notice air bubbles in the liquid of your lava lamp, the first step is to turn off the lamp and allow it to cool down completely. Once cooled, gently tap or lightly shake the lamp to encourage the bubbles to rise to the top or dislodge from the wax. Avoid shaking the lamp too vigorously, as this can create additional bubbles or disrupt the flow of the wax.
If tapping or shaking the lamp doesn’t eliminate the air bubbles, you can try a gradual tilting technique. Carefully tilt the lamp in one direction and hold it in that position for a short period. Then, slowly bring the lamp back to its upright position, allowing the bubbles to rise to the top. Repeat this process a few times to encourage the bubbles to escape from the liquid.
In some cases, air bubbles may persist even after tapping and tilting. To further remove the bubbles, you can use a thin non-metallic object, like a toothpick or a plastic skewer, to gently poke the surface of the liquid around the bubbles. This will help release trapped air and encourage the bubbles to rise and dissipate into the atmosphere.
Preventing the formation of air bubbles in the first place is also key. Avoid sudden temperature changes by keeping your lava lamp away from drafty areas or direct sunlight. Also, ensure the lamp remains stationary once it has been set up to prevent unnecessary movement that can introduce air into the liquid.
It’s important to note that some air bubbles may be unavoidable, especially with long-term usage of the lava lamp. However, by employing these techniques to minimize and remove air bubbles, you can enhance the overall aesthetic and uninterrupted flow of your lava lamp.
Remember, patience is key when dealing with air bubbles in your lava lamp. By applying gentle tapping, tilting, and poking methods, you can achieve a clearer and more captivating display. Sit back, relax, and let the mesmerizing motion of the wax in your lava lamp take center stage.
Faulty or Old Lava Lamp
If none of the previous troubleshooting methods have addressed the issue of your non-flowing lava lamp, it may be a sign of a faulty or old lamp. Lava lamps, like any other electrical appliance, can experience wear and tear over time, leading to performance issues. In such cases, it may be necessary to consider replacing the lamp or seeking professional assistance for repair.
Age can be a significant factor in the malfunction of a lava lamp. Over time, the wax can deteriorate, losing its ability to flow properly. The heating element may also weaken, resulting in inadequate heat generation. If your lava lamp is several years old and has been consistently used, it may be reaching the end of its operational lifespan.
Additionally, manufacturing defects or damage during shipping can sometimes lead to faulty lava lamps. If your lamp is relatively new and has never worked properly, it’s worth contacting the manufacturer or vendor for support. They may be able to provide a replacement or offer guidance on resolving the issue.
If your lava lamp is still within the warranty period, it’s advisable to check the warranty terms and conditions. Depending on the specific warranty coverage, you may be eligible for a replacement or repair at no additional cost.
If you decide to replace your lava lamp, ensure that you select a high-quality model from a reputable manufacturer. Research customer reviews and ratings to ensure the lamp’s reliability and durability. Additionally, follow the manufacturer’s guidelines for proper usage and maintenance to maximize the lifespan of your new lava lamp.
If the warranty has expired or repair is not feasible, it may be time to bid farewell to your old lava lamp and consider purchasing a new one. Explore the market to find a lava lamp that suits your preferences and fits well with your decor.
Remember, while it can be disappointing to say goodbye to an old or faulty lava lamp, replacing it with a new and reliable lamp can reignite the enchanting ambiance and mesmerizing flow that lava lamps are known for.