
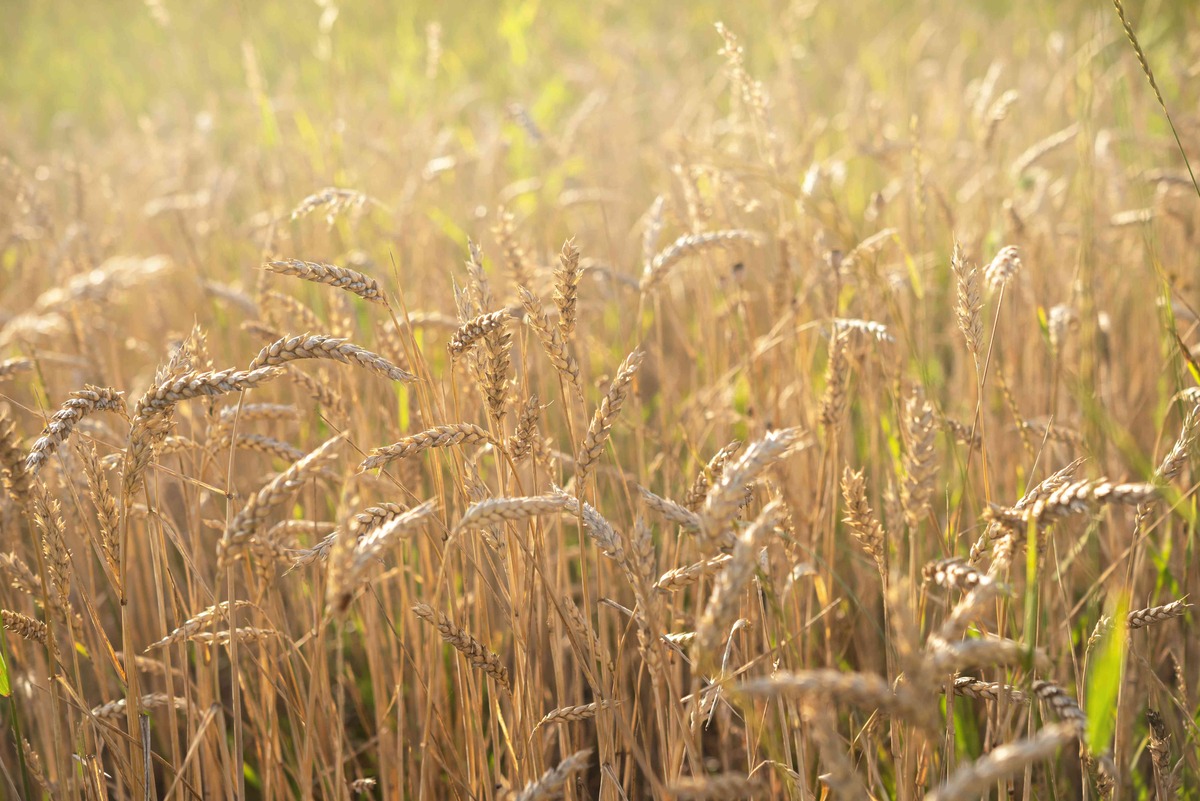
Factors to Consider Before Planting Spring Wheat
Before planting spring wheat, it is important to take several key factors into consideration. These factors can greatly impact the success and yield of your crop. By carefully evaluating the following aspects, you can make informed decisions and ensure a favorable growing environment for your spring wheat.
1. Climate and Soil Conditions: Spring wheat thrives in cooler climates with moderate temperatures. It requires well-drained soil with good moisture-holding capacity. Conduct a soil test to determine the pH and nutrient levels, as spring wheat prefers slightly acidic to neutral soils.
2. Optimal Temperature and Moisture Levels: Spring wheat has specific temperature requirements for germination and growth. The soil temperature should be around 50-60°F (10-15°C) at planting time. Adequate moisture is crucial, as dry conditions can hamper seed germination and early growth.
3. Selecting the Right Variety: Consider the specific variety of spring wheat that suits the intended use, such as baking quality or forage production. Look for varieties that are well-adapted to your region and have resistance to common pests and diseases.
4. Preparing the Soil: Proper soil preparation is essential for spring wheat planting. Remove any weeds or crop residue and loosen the soil using techniques such as plowing or tilling. This promotes better root development and nutrient uptake.
5. Seedbed Preparation: Create a well-prepared seedbed by leveling the soil surface and breaking up any clumps. This ensures good seed-to-soil contact and helps with even emergence of the plant.
6. Seedbed Depth and Seeding Rates: Plant the spring wheat seeds at the recommended depth, usually around 1-1.5 inches (2.5-3.8 cm), depending on soil type. Follow the recommended seeding rates, which vary depending on the variety and soil conditions.
7. Best Time to Plant: Consult regional guidelines to determine the optimal time for spring wheat planting in your area. Factors such as the last frost date, soil temperature, and the length of the growing season should be taken into account.
8. Pests and Diseases: Be aware of common pests and diseases that can affect spring wheat, such as aphids, wheat stem sawfly, and stripe rust. Implement integrated pest management strategies and ensure regular scouting and monitoring of your crop.
9. Crop Rotation: Implementing a crop rotation schedule can help reduce the risk of disease buildup and improve soil health. Avoid planting spring wheat in consecutive years in the same field to minimize the risk of pests and diseases.
10. Weed Control: Competing weeds can significantly reduce the yield of spring wheat. Implement effective weed control measures, such as using herbicides, practicing tillage, or employing cultural methods like narrow row spacing, to minimize weed competition.
11. Fertilizer and Nutrient Management: Conduct a soil analysis to determine the nutrient requirements of spring wheat. Provide the necessary nutrients through organic or synthetic fertilizers to ensure optimal growth and yield.
12. Monitoring and Management: Monitor the growth and development of your spring wheat regularly. Look out for signs of nutrient deficiencies, pests, or diseases, and take appropriate corrective actions to maintain a healthy crop.
13. Harvesting and Storage: Time your harvest when the moisture content of the grain reaches the appropriate level. Proper drying and storage practices are critical to prevent spoilage and maintain the quality of your harvested spring wheat.
By considering these essential factors, you can maximize the chances of a successful spring wheat crop. Remember to stay informed about the specific recommendations for your region and adapt your practices accordingly. Taking care of these aspects will contribute to a bountiful harvest and overall profitability.
Climate and Soil Conditions for Spring Wheat
Spring wheat is a versatile grain crop that requires specific climate and soil conditions to thrive. Understanding these factors is crucial for successful cultivation. Let’s explore the ideal climate and soil conditions required for spring wheat planting.
Climate: Spring wheat is well-suited to cooler climates with moderate temperatures. It grows best in regions where the average temperature ranges from 50°F (10°C) to 75°F (24°C) during the growing season. Extreme heat can negatively impact its yield and quality.
Additionally, spring wheat requires a certain number of chilling hours to break dormancy and ensure proper development. Consult local agricultural extension offices or resources to determine the chilling requirements for spring wheat in your specific region.
Soil Conditions: An important aspect of spring wheat cultivation is the soil type and its characteristics. Spring wheat prefers well-drained soils with good moisture-holding capacity, as excessive waterlogging can inhibit root growth and increase the risk of diseases.
Ideally, the soil pH for spring wheat should be slightly acidic to neutral, ranging from 6.0 to 7.5. Conduct a soil test to assess the nutrient levels and pH of your soil. Amend the soil as necessary to provide optimal growing conditions for spring wheat.
Furthermore, the soil’s organic matter content plays a significant role in the success of spring wheat. Aim for a soil organic matter level of 2% or higher to improve soil structure, water retention, and nutrient availability.
When it comes to soil texture, spring wheat grows best in loamy soils. These soils offer a balanced combination of sand, silt, and clay, providing adequate drainage without being excessively sandy or heavy clay.
Moisture Requirements: Adequate moisture is essential for spring wheat growth and development. During the germination and early growth stages, consistent soil moisture is crucial. Dry conditions can delay germination or stunt seedling growth.
However, excessive moisture or waterlogged conditions can lead to poor root development, increased disease susceptibility, and reduced yields. Thus, finding the right balance is key.
Implementing irrigation systems or utilizing natural rainfall patterns can help maintain optimal moisture levels. Monitor the soil moisture regularly and adjust irrigation or drainage practices accordingly to ensure healthy spring wheat growth.
It is worth mentioning that local climates and weather patterns may vary, so it is important to consult local agricultural experts, extension offices, or online resources to gather specific information about climate and soil conditions in your area.
By considering the proper climate and soil conditions for spring wheat, you will provide the crop with favorable growing conditions. This will enhance its ability to develop strong, healthy plants and maximize yield potential. Remember to adapt your practices according to your specific region and stay informed about any changes in weather patterns or soil conditions for optimal results.
Optimal Temperature and Moisture Levels for Spring Wheat Planting
When it comes to planting spring wheat, understanding the optimal temperature and moisture levels is vital for ensuring successful germination and growth. Both factors play a significant role in determining the overall health and productivity of the crop. Let’s delve into the specific requirements of temperature and moisture to achieve optimal spring wheat planting results.
Temperature Requirements: Spring wheat has specific temperature preferences for successful germination and growth. Soil temperature is particularly critical during planting as it directly affects seed germination. Ideally, the soil temperature should range between 50°F (10°C) and 60°F (15°C) for optimal seedling establishment.
Warmer temperatures can lead to faster germination but may also increase the risk of fungal diseases. Cooler temperatures can delay germination, slowing down the emergence of the seedlings. It is important to strike the right balance and take advantage of favorable temperature conditions to promote healthy and uniform plant establishment.
Monitoring the soil temperature is essential. You can use a soil thermometer to measure the temperature at the desired planting depth, commonly recommended at around 1-1.5 inches (2.5-3.8 cm).
Moisture Requirements: Adequate moisture is crucial for spring wheat planting. The availability of moisture affects seed germination, early growth, and overall plant vigor. However, it is important to provide just the right amount of moisture without overwatering.
At the planting stage, the seed requires sufficient moisture for germination. The soil should be adequately moist, but not waterlogged, to allow the seed to absorb water and trigger germination. Ensure that the soil is evenly moist throughout the planting depth to encourage uniform germination and emergence of seedlings.
Consistent moisture availability during the early growth stage is crucial for optimal root development and establishment. Monitor the soil moisture and adjust irrigation practices accordingly to provide adequate water without creating excessively wet conditions that could potentially lead to disease development or poor root growth.
It is important to note that moisture requirements can vary depending on local climate, soil type, and the specific stage of growth. Pay attention to weather patterns and adjust irrigation schedules accordingly to provide the necessary moisture for the spring wheat plants.
Growing spring wheat in regions with reliable rainfall patterns can be advantageous as it reduces the dependency on irrigation and helps maintain adequate moisture levels. However, in areas with limited rainfall, careful irrigation management is crucial to provide the required moisture for optimal growth.
By considering the optimal temperature and moisture levels for spring wheat planting, you can create a conducive environment for successful germination and early growth. The right balance of temperature and moisture will promote uniform seedling emergence, robust root development, and healthy plant establishment. Regular monitoring and adjustment of irrigation practices will help ensure that the crop receives the necessary moisture throughout its growth cycle.
Selecting the Right Variety of Spring Wheat
When it comes to planting spring wheat, selecting the right variety is crucial for achieving desired outcomes in terms of yield, quality, and adaptation to local growing conditions. Each variety has specific characteristics that make it suitable for different purposes or regions. By considering the following factors, you can make an informed decision and choose the most appropriate spring wheat variety for your needs.
Regional Adaptation: Different spring wheat varieties have varying degrees of adaptation to specific regions. Consider the climatic conditions, soil types, and other environmental factors in your area when selecting a variety. Local agricultural experts or extension offices can provide valuable insights into the best-adapted varieties for your region.
Purpose and End-use: Determine the purpose for which you will be using the spring wheat, as varieties can differ in quality attributes. Some varieties are specifically bred for baking quality, while others are more suitable for forage production or animal feed. Select a variety that aligns with your intended use to ensure optimal results.
Disease Resistance: It is important to consider the disease resistance profile of spring wheat varieties. Different varieties may show varying levels of resistance to common diseases such as rusts, powdery mildew, or Fusarium head blight. Choose varieties that have a good resistance to prevalent diseases in your area to minimize the risk of crop loss or yield reduction.
Growth Traits: Evaluate the growth characteristics of spring wheat varieties, such as plant height, tillering ability, and maturity dates. The ideal plant height and tillering capacity can vary depending on your specific farming practices and regional conditions. Additionally, selecting varieties with different maturity dates can allow for staggered harvesting and spread out workload.
Yield Potential: Consider the yield potential of the spring wheat varieties under consideration. Yield potential can vary significantly between different varieties, and selecting varieties with higher yield potential can contribute to increased overall productivity of your crop.
Past Performance: Research the performance history of different spring wheat varieties in your area. Look for varieties that have consistently performed well in terms of yield, quality, and disease resistance. Local agricultural trials and farmer testimonials can provide valuable insights into the performance of different varieties under real-world conditions.
Seed Availability: Ensure that the selected spring wheat variety is readily available as quality seeds. Check with local seed suppliers, agricultural cooperatives, or reputable online sellers to ensure a reliable supply of seed for your chosen variety.
Certification and Quality: Consider opting for certified seeds that meet industry quality standards. Certified seeds have undergone testing and verification to ensure purity, germination rates, and freedom from diseases or contaminants.
By considering these factors and consulting with local experts or agricultural resources, you can select the right variety of spring wheat that aligns with your specific goals and growing conditions. Careful selection of variety will contribute to better crop performance, reduced risks, and increased profitability.
Preparing the Soil for Spring Wheat Planting
Preparing the soil properly is a crucial step in ensuring successful spring wheat planting. The condition of the soil greatly affects seed germination, nutrient availability, and overall crop health. By following these guidelines, you can create an optimal environment for spring wheat growth.
1. Weed and Crop Residue Removal: Begin by removing any existing weeds and crop residues from the field. Weeds compete with spring wheat for nutrients, water, and sunlight, hampering its growth. Remove weeds manually or use herbicides to effectively control them. Additionally, removing crop residues of the previous season helps prevent disease carryover and facilitates proper soil preparation.
2. Soil Testing: Conduct a soil test to assess the nutrient levels and pH of the soil. This will provide valuable information on any nutrient deficiencies or imbalances that may need to be addressed. Adjusting the pH to the optimal range for spring wheat (slightly acidic to neutral, around 6.0-7.5) can significantly improve nutrient availability.
3. Organic Matter Addition: Increase the organic matter content of the soil by incorporating well-decomposed organic materials. This improves soil structure, enhances moisture-holding capacity, and promotes nutrient retention. Compost, manure, or cover crops can be used to add organic matter, depending on availability and local practices.
4. Tillage: Depending on the specific soil conditions and farming practices, perform tillage operations to ensure proper seedbed preparation. Tillage helps break up compacted soil, improves drainage, and alleviates soil compaction. However, excessive or unnecessary tillage can cause soil erosion and degradation, so strike a balance based on your soil type and requirements.
5. Soil Fertility: Based on the soil test results, apply recommended fertilizers to address any nutrient deficiencies. Nitrogen, phosphorus, and potassium are essential for spring wheat growth and should be provided in appropriate amounts. Consult with local agricultural experts or extension offices to determine the appropriate fertilizer type and application rates for your specific soil and nutrient requirements.
6. Soil Moisture: Prior to planting, ensure that the soil is at the appropriate moisture level. It should be moist enough to facilitate seed germination but not excessively wet that it leads to waterlogging. Insufficient moisture can delay germination, while excess moisture can hinder root development and increase disease susceptibility.
7. Seedbed Preparation: Create a well-prepared seedbed by leveling the soil surface and breaking up clumps. This allows for good seed-to-soil contact and helps promote even emergence of the spring wheat seedlings. Use appropriate equipment such as harrows, cultivators, or rollers to achieve a fine and firm seedbed.
8. Soil Compaction Management: Take measures to minimize soil compaction, as compacted soil can impede root growth and restrict water and nutrient uptake. Avoid working the soil when it is too wet, as this can lead to compaction. Utilize controlled traffic or implement no-till or reduced-till practices to minimize soil disturbance and preserve soil structure.
By following these steps and paying attention to soil preparation, you can create an optimal environment for spring wheat planting. Good soil health provides a solid foundation for the crop’s growth and development, optimizing its yield potential and ensuring a successful harvest.
Seedbed Preparation for Spring Wheat
Proper seedbed preparation is crucial for ensuring the successful establishment and growth of spring wheat. Creating an optimal seedbed provides the ideal conditions for seed germination, seedling emergence, and root development. Let’s explore the key steps involved in seedbed preparation for spring wheat.
1. Weed and Debris Removal: Begin by removing any weeds, crop residues, or other debris from the field. Weeds can compete with spring wheat for resources and hinder its growth. Removing them before planting reduces competition and provides a clean growing environment for the seedlings.
2. Soil Moisture Assessment: Evaluate the soil moisture content before seedbed preparation. The soil should be adequately moist, but not overly saturated or too dry. Proper soil moisture ensures that the seeds have enough moisture to germinate and support early growth. Use a soil moisture meter or visually assess the soil to determine its moisture level.
3. Creating a Smooth and Firm Seedbed: Use appropriate equipment such as disk harrows, field cultivators, or heavy rollers to create a smooth and firm seedbed. This helps ensure good seed-to-soil contact, promotes uniform seedling emergence, and reduces the chances of soil crusting. A firm seedbed facilitates proper root development and provides stability for the emerging seedlings.
4. Seedbed Leveling: Level the seedbed surface to ensure uniform moisture distribution and even planting depth. This can be done using equipment such as land levelers or floatation tires to eliminate high and low spots in the field. A level seedbed helps prevent uneven emergence and facilitates the efficient use of irrigation water.
5. Seedbed Density and Clod/Boulder Removal: Remove any large clods or boulders from the seedbed to prevent interference with seed placement and seedling emergence. It is essential to achieve an even seedbed density to promote uniform plant spacing and ensure consistent growth and yield across the field.
6. Fertility Management: Apply fertilizers or soil amendments based on soil test results and regional recommendations. Ensure that the necessary nutrients are available to support spring wheat growth during its early stages. Incorporate the fertilizers into the seedbed as necessary, following local guidelines and regulations to prevent fertilizer runoff and environmental damage.
7. Irrigation Preparation: Assess the irrigation needs of your spring wheat crop and consider pre-irrigation, especially if the soil moisture levels are low. Adequate soil moisture at planting helps initiate seed germination and promotes uniform emergence. Proper irrigation management throughout the growth cycle ensures consistent moisture supply for optimal plant development.
8. Conservation Measures: Implement conservation practices like contour plowing, terracing, or cover cropping to minimize soil erosion and preserve soil health. These measures help maintain soil structure, organic matter content, and overall soil fertility, contributing to long-term sustainable crop production.
9. Timing: Time your seedbed preparation to align with the optimal planting window for spring wheat in your region. Factors such as soil temperature, weather conditions, and crop rotation schedules need to be considered to ensure the best chances of success.
By following these steps, you can create a well-prepared seedbed for spring wheat that optimizes seed germination, seedling emergence, and early growth. A carefully prepared seedbed sets the stage for a healthy and productive crop, contributing to higher yields and overall profitability.
Understanding Seedbed Depth and Seeding Rates for Spring Wheat
When it comes to planting spring wheat, understanding the optimal seedbed depth and seeding rates is essential to promote the healthy establishment and growth of the crop. These factors directly impact seed placement, seedling emergence, plant spacing, and overall yield potential. Let’s delve into the importance of seedbed depth and seeding rates for spring wheat.
Seedbed Depth:
The seedbed depth refers to the depth at which the spring wheat seeds are planted in the soil. The ideal seedbed depth depends on factors such as soil type, moisture availability, and local environmental conditions. Spring wheat seeds are typically planted at a depth of 1 to 1.5 inches (2.5 to 3.8 cm) in loam or clay-loam soils.
Planting seeds at the proper depth ensures that they have access to moisture for germination while still being able to push through the soil surface. Planting too shallow can expose the seeds to dry conditions and hinder germination, while planting too deep may delay emergence and weaken seedlings.
It is important to consider soil moisture conditions at the time of planting. If soil moisture is limited, planting the seeds slightly deeper can help access moisture at a slightly lower level. However, be cautious not to plant too deep in dry conditions, as it can delay emergence.
Seeding Rates:
Seeding rate refers to the number of seeds planted per unit area. The optimal seeding rate for spring wheat depends on various factors, including variety, soil fertility, expected yield potential, and planting conditions. Seeding rates are typically expressed as pounds or kilograms of seed per acre or the number of seeds per square foot.
Higher seeding rates can help maximize yield potential by increasing plant density and competition with weeds. However, excessive seeding rates can lead to overcrowding and limited access to resources, resulting in reduced yields and increased risk of disease development.
Conversely, lower seeding rates may result in fewer plants per unit area, which can lead to higher individual plant yield potential but increased weed competition and decreased overall crop performance.
The recommended seeding rates for spring wheat can vary depending on the region, variety, and local growing conditions. Consult regional guidelines or local experts to determine the appropriate seeding rates for your specific situation. Factors such as soil fertility, expected weed pressure, and the desired plant stand density play a role in determining the ideal seeding rate.
It is important to calibrate seeding equipment accurately to ensure consistent seed placement and achieve the desired seeding rate. Regularly monitor seed depth and spacing during planting to ensure uniform emergence and establish a uniform plant stand.
By understanding the optimal seedbed depth and appropriate seeding rates for spring wheat, you can enhance the chances of a successful crop. Proper seed placement and plant density promote uniform emergence, minimize competition with weeds, and optimize yield potential, ultimately contributing to a productive and profitable harvest.
Best Time to Plant Spring Wheat According to Regional Guidelines
The best time to plant spring wheat varies based on regional guidelines and specific environmental conditions. Planting spring wheat at the right time is crucial for optimal germination, growth, and yield potential. Local agricultural experts, extension offices, and historical weather data can provide valuable guidance on the ideal planting window for your region. Let’s explore the factors to consider when determining the best time to plant spring wheat.
Last Frost Date: The last frost date in your region is an important consideration when deciding on the planting time. Spring wheat is sensitive to frost, so planting too early can expose the emerging seedlings to the risk of frost damage. Consult local weather records or use online resources to determine the average date of the last frost in your area.
Soil Temperature: Soil temperature is a critical factor for spring wheat germination. It is recommended to plant spring wheat when the soil temperature at the desired planting depth reaches around 50°F to 60°F (10°C to 15°C). Cooler soil temperatures can delay germination and emergence, while warmer temperatures can increase the risk of disease development.
Growing Degree Days: Growing degree days (GDD) is a measure of heat accumulation over time. Monitoring GDD can help determine the optimal planting time for spring wheat. Regional guidelines often provide information on the minimum accumulative GDD needed for spring wheat planting. Keep track of the GDD in your area to identify when the threshold is reached.
Weather and Climate Patterns: Consider the local weather patterns, rainfall distribution, and overall climate conditions in your region. Planting too early or too late can result in suboptimal conditions for spring wheat growth. Wet or waterlogged soil can lead to poor germination and root development, while prolonged dry spells can hinder seedling emergence.
Length of Growing Season: The length of the growing season, from planting to harvest, is an important factor in determining the best time for spring wheat planting. Ensure that your chosen varieties have sufficient time to mature and reach their yield potential before the arrival of adverse conditions such as extreme heat or early frost.
Crop Rotation: Consider the crop rotation schedule on your farm. Avoid planting spring wheat in the same field consecutively to reduce disease pressure and pest infestations. A proper crop rotation plan minimizes the risk of soil-borne diseases and enhances overall soil health.
Regional Recommendations: Consult regional agricultural guidelines provided by local authorities, universities, or agricultural extension services. These guidelines take into account local climate conditions, disease and pest pressures, and historical data to provide specific recommendations on the best time to plant spring wheat in your area.
By taking these factors into consideration and following regional guidelines, you can determine the best time to plant spring wheat in your specific region. Planting at the optimal time sets the stage for successful germination, vigorous growth, and ultimately, a productive harvest.
Common Pests and Diseases to Watch Out for when Planting Spring Wheat
When planting spring wheat, it is essential to be aware of common pests and diseases that can impact the health and yield of the crop. Early detection and proper management of these pests and diseases are crucial to ensure a successful harvest. Let’s explore some of the key pests and diseases to watch out for when planting spring wheat.
1. Aphids: Aphids are tiny insects that feed on the sap of spring wheat plants, causing stunted growth and decreased yield. Look out for curled leaves, distorted plant growth, and the presence of sticky excretion known as honeydew. Early detection and timely application of insecticides can help control aphid populations.
2. Wheat Stem Sawfly: Wheat stem sawflies are major pests of spring wheat, particularly in certain regions. The adult insects lay eggs inside the stem, and the larvae feed on the plant, causing lodging and reduced grain quality. Scout fields for signs of sawfly larvae in the stem and consider using resistant varieties along with cultural practices like timely harvesting to manage this pest.
3. Stripe Rust: Stripe rust, caused by the fungus Puccinia striiformis, can severely impact spring wheat yield and quality. Monitor spring wheat fields for yellowish-orange pustules on leaves, which eventually turn into stripes. Fungicides and resistant varieties are effective management strategies to control stripe rust and prevent its spread.
4. Fusarium Head Blight: Fusarium head blight, also known as scab, is a fungal disease that affects the head or spikes of spring wheat. Symptoms include bleached spikelets, shriveled grains, and pinkish fungal growth. Planting resistant varieties, appropriate crop rotation, and timely fungicide applications are key management practices for minimizing the impact of Fusarium head blight.
5. Hessian Fly: The Hessian fly is a major pest that can cause significant damage to spring wheat. The larvae of this fly feed on the plant stem, leading to reduced plant vigor, stunting, and lodging. Crop rotation, planting resistant varieties, and implementing cultural practices like delayed planting can help manage Hessian fly infestations.
6. Powdery Mildew: Powdery mildew is a fungal disease that appears as a powdery white or grayish coating on the leaves and stems of spring wheat. It can hinder photosynthesis and reduce yield potential. Regular field scouting, maintaining proper plant spacing, providing adequate ventilation, and using fungicides if necessary are effective strategies for managing powdery mildew.
7. Root Rots: Root rots, caused by various fungi, can affect the root system of spring wheat plants, leading to poor nutrient uptake and stunted growth. Symptoms include discolored roots, root decay, and wilting. Proper field drainage, disease-free seed, crop rotation, and avoiding waterlogged conditions can help reduce the incidence of root rots.
It is essential to regularly monitor spring wheat fields for signs of pests and diseases. Early detection allows for prompt action and minimizes the impact on crop growth and yield. Integrated Pest Management (IPM) techniques, including cultural practices, resistant varieties, biological control agents, and judicious pesticide use, can help manage and prevent pest and disease outbreaks in the most sustainable manner.
Consult with local agricultural experts, extension offices, or resources for accurate identification of pests and diseases and to develop appropriate management strategies tailored to your specific region and cropping system.
Implementing Crop Rotation Practices with Spring Wheat
Crop rotation is an essential practice in sustainable agriculture, and incorporating spring wheat into a well-planned rotation can offer numerous benefits. Crop rotation not only helps break disease cycles and manage pests but also improves soil health, enhances nutrient availability, and increases overall crop productivity. Let’s explore the importance of implementing crop rotation practices with spring wheat.
Disease Management: One of the primary benefits of crop rotation is reducing the buildup of diseases and pests in the soil. By rotating spring wheat with other crops, you break the disease cycle and disrupt the reproduction and survival of pathogens specific to spring wheat. This helps mitigate diseases such as Fusarium head blight, powdery mildew, and soil-borne pathogens, reducing the reliance on chemical controls.
Improved Soil Health: Crop rotation enhances soil health and fertility. Different crops have varying root structures, nutrient requirements, and interactions with soil microorganisms. When spring wheat is rotated with other crops, it helps improve soil structure, organic matter content, and nutrient cycling. Deep-rooted crops, for example, can break up compacted soil layers, improve water infiltration, and enhance nutrient availability for subsequent crops.
Weed Control: Crop rotation can play a significant role in weed management. By rotating spring wheat with crops like legumes or root crops, you can introduce different management practices. Legumes, for example, can fix nitrogen and reduce the need for synthetic fertilizers while suppressing weed growth. Additionally, alternating crops with different growth habits can disrupt weed life cycles and reduce weed populations.
Nutrient Management: Crop rotation helps optimize nutrient availability and reduces the risk of nutrient imbalances. Different crops have varying nutrient requirements, and rotating spring wheat with crops that differ in nutrient uptake helps prevent nutrient depletion. For instance, leguminous crops fix atmospheric nitrogen, enriching the soil with this essential nutrient for subsequent crops like spring wheat.
Pest Management: Crop rotation can effectively manage pests that are specific to spring wheat. By rotating with non-host crops, you disrupt the life cycles of pests and reduce infestations. Pests that rely on spring wheat for survival may not find suitable habitat or food sources when other crops are present, leading to population reductions.
Increasing Crop Productivity: Crop rotation leads to improved overall crop productivity. By reducing disease pressures, improving soil health, managing weeds, and optimizing nutrient availability, spring wheat and subsequent crops can achieve better yields. Rotation also helps minimize yield losses associated with continuous spring wheat production, as the diversity in the rotation provides a more balanced use of available resources.
When implementing crop rotation practices with spring wheat, it is crucial to plan a diverse sequence of crops that consider local conditions, market demands, and the specific needs of the rotation crops. Sustainable rotations typically include a combination of cereals, legumes, oilseeds, and other cash crops.
Monitor the rotation for potential challenges and make adjustments as needed. Evaluate the performance of different crops in the rotation and take note of pest or disease issues that may arise. Regular soil testing can also guide nutrient management decisions based on the nutrient requirements of the rotation crops.
By implementing crop rotation practices with spring wheat, you can enhance soil health, manage pests and diseases, improve weed control, optimize nutrient availability, and increase overall crop productivity. A well-designed crop rotation system is a valuable tool for sustainable and successful spring wheat production.
Importance of Weed Control in Spring Wheat Planting
Weed control plays a crucial role in the success of spring wheat planting. Weeds compete with spring wheat for resources such as sunlight, water, and nutrients, hampering its growth and reducing crop yield. Implementing effective weed control measures is essential to ensure optimal spring wheat growth and maximize productivity. Let’s explore the importance of weed control in spring wheat planting.
1. Resource Competition: Weeds compete with spring wheat for essential resources, including water, nutrients, and light. The presence of weeds can significantly reduce the availability of these resources for the spring wheat crop, leading to stunted growth, decreased photosynthesis, and lower yields. Effective weed control minimizes resource competition, allowing spring wheat to access the necessary resources for its growth and development.
2. Reduced Crop Yield: Uncontrolled weed growth can result in substantial yield losses for spring wheat. Weeds can reduce crop yield by competing for resources, shading the crop, and releasing allelopathic chemicals that inhibit crop growth. Research has shown that competitive weed pressure can significantly decrease spring wheat yield potential. Timely and effective weed control practices help mitigate these challenges, allowing spring wheat to reach its maximum yield potential.
3. Prevention of Disease and Pest Infestations: Weeds can serve as hosts for pests and diseases that can affect spring wheat. Certain weeds can harbor pests or disease-causing pathogens, acting as a reservoir for their reproduction and survival. By controlling weeds, you reduce the risk of introducing pests and diseases to the spring wheat crop. Additionally, removing weed hosts can disrupt the life cycles of pests, reducing infestations and disease pressure.
4. Enhanced Crop Growth and Development: Spring wheat that has minimal weed competition can allocate its resources more efficiently for growth and development. With reduced competition, the crop can produce more tillers, develop a stronger root system, and exhibit better overall vigor. This leads to thicker stands, increased leaf area, improved photosynthesis, and ultimately, better grain fill and higher yield potential.
5. Weed Seed Bank Management: Managing weeds in spring wheat fields helps prevent weed seed production and reduces the weed seed bank in the soil. Weeds produce an abundance of seeds that can remain viable in the soil for many years, causing persistent weed problems. By implementing effective weed control strategies, you can minimize the introduction of new weed seeds to the soil and reduce the abundance of weed seeds for future crops.
6. Ease of Harvest: Proper weed control promotes an even crop stand and reduces the presence of unwanted plant matter during harvest. This facilitates a smoother and more efficient harvest process. Without the interference of tall, tangled weeds, harvesting equipment can operate more effectively, reducing crop damage and improving overall harvest quality.
Implementing a combination of cultural, mechanical, and chemical weed control practices is essential for effective weed management in spring wheat planting. These practices may include timely cultivation, crop rotation, use of herbicides, cover cropping, and mulching, among others. It is important to select weed control methods that are appropriate for your specific farming practices and prioritize sustainable weed management strategies.
By prioritizing weed control in spring wheat planting, you can minimize resource competition, reduce yield losses, prevent pest and disease infestations, promote healthy crop growth, manage the weed seed bank, and facilitate a successful harvest. Implementing proactive weed control measures contributes to optimal spring wheat production and maximizes the economic potential of your crop.
Fertilizer and Nutrient Management for Spring Wheat Growth and Yield
Proper fertilizer and nutrient management are essential for achieving optimal growth, development, and yield in spring wheat. Spring wheat has specific nutrient requirements that must be met at different growth stages to ensure its nutritional needs are adequately fulfilled. Effective fertilizer and nutrient management practices contribute to healthier plants, improved productivity, and overall crop success. Let’s explore the importance of fertilizer and nutrient management in spring wheat.
Soil Fertility Assessment: Conduct a soil analysis to assess the nutrient status and pH level of the soil before planting spring wheat. Soil testing provides valuable insights into nutrient deficiencies or imbalances, allowing for targeted fertilizer applications. Understanding the nutrient needs of your soil helps optimize fertilizer choices and application rates.
Nutrient Requirements: Spring wheat requires adequate amounts of essential nutrients, including nitrogen (N), phosphorus (P), potassium (K), and other micronutrients such as sulfur (S) and zinc (Zn). These nutrients play key roles in supporting plant growth, photosynthesis, protein synthesis, and grain development. Applying the right amount of nutrients at the right time ensures that spring wheat plants have access to the nutrients necessary for their physiological processes.
Phosphorus and Potassium: Phosphorus and potassium are especially critical during early growth stages and for promoting root development, flowering, and grain filling in spring wheat. Adequate availability of these nutrients supports robust plant growth, enhances resistance to stress, and contributes to overall crop yield. Incorporate phosphorus and potassium fertilizers into the soil before or at planting, based on soil test recommendations.
Nitrogen Management: Nitrogen is a primary nutrient that greatly influences spring wheat productivity. Nitrogen promotes vegetative growth, protein synthesis, and grain development. Splitting nitrogen applications during the growing season helps match plant requirements at different growth stages. Apply a portion of the nitrogen at planting, and the remaining amount during stem elongation and jointing stages. Proper nitrogen management ensures efficient utilization of fertilizer and reduces the risk of nutrient losses through leaching or volatilization.
Micronutrients: While spring wheat requires macronutrients in larger quantities, micronutrients are equally important for its growth and development. Deficiencies in micronutrients such as sulfur, zinc, iron, or manganese can negatively impact yield and quality. Consider foliar applications or incorporate micronutrients into the fertilizer program when deficiencies are detected through soil or tissue testing. However, ensure that micronutrient applications are based on demonstrated deficiencies, as excessive amounts can be detrimental.
Environmental Considerations: Account for environmental factors such as rainfall patterns, irrigation practices, soil texture, and organic matter content when designing fertilizer and nutrient management plans. These factors influence nutrient availability, nutrient losses, and the efficacy of fertilizers. Adjust nutrient applications accordingly to optimize nutrient uptake by spring wheat while minimizing potential negative impacts on the environment.
Monitoring and Adaptation: Regularly monitor spring wheat plants for nutrient deficiency or toxicity symptoms, including chlorosis, stunted growth, or leaf discoloration. Adjust fertilizer applications based on crop response and ongoing soil testing. Maintaining accurate records of fertilizer applications, visual observations, and yield data allows for continuous improvement and informed nutrient management decisions in subsequent growing seasons.
Implementing proper fertilizer and nutrient management practices in spring wheat production is essential for achieving optimal growth, development, and yield. By providing the necessary nutrients in the right amounts and at the appropriate growth stages, you can support healthy plant growth, improve plant resilience, and increase overall crop productivity.
Monitoring and Managing Spring Wheat Throughout its Growth Cycle
Monitoring and managing spring wheat throughout its growth cycle is crucial to maximize crop yield, quality, and overall success. By closely observing the crop and implementing timely management practices, potential issues can be identified and addressed, leading to healthier plants and optimized productivity. Let’s explore the importance of monitoring and managing spring wheat throughout its growth cycle.
Early Growth Stage: During the early growth stage, monitoring soil moisture levels is crucial for successful seed germination and establishment. Adequate soil moisture promotes uniform emergence and root development. Assessing the need for irrigation or supplemental watering ensures optimal conditions for seedling growth and helps prevent moisture stress.
Vegetative Growth Stage: Regular monitoring of spring wheat during the vegetative growth stage is essential for detecting nutrient deficiencies, weed emergence, or disease and pest infestations. Visual observations should encompass aspects such as plant height, leaf color, tiller development, and overall plant vigor. Prompt action can be taken to address nutrient imbalances, weed competition, or disease and pest pressures.
Reproductive Growth Stage: Pay close attention to the reproductive growth stage, as this is when grain fill, flowering, and pollination occur. Monitor for signs of stress such as drought or heat stress, which can negatively impact yield potential. Weather conditions during this stage can also affect diseases such as Fusarium head blight or lodging risks. Adjust irrigation and implement disease management strategies to prevent yield losses.
Nutrient Management: Regular soil testing and tissue analysis can guide nutrient management decisions throughout the growth cycle. Monitor nutrient levels in the soil, ensuring adequate nutrient availability for spring wheat. Adjust fertilizer applications based on soil test results, plant tissue analysis, and visual observations. Monitoring plant nutrient status helps optimizenutrient uptake, reduce nutrient deficiencies, and prevent excessive nutrient application, minimizing potential environmental impacts.
Weed and Pest Control: Continuously monitor for weed growth and pest infestations throughout the growth cycle. Timely identification and appropriate management practices such as herbicide applications, cultural practices, or biological control methods can help suppress weed competition and mitigate pest damage. Regular scouting allows for early detection to implement precise management strategies.
Water Management: Efficient water management is critical for spring wheat. Monitor soil moisture levels and adjust irrigation practices to ensure adequate moisture during critical growth stages. Over- or under-irrigation can lead to water stress or excessive moisture, adversely affecting spring wheat growth and yield. Monitor weather forecasts to make informed irrigation decisions and reduce the risk of water waste or crop damage.
Disease and Disease Prevention: Regular monitoring for disease symptoms, such as powdery mildew or stripe rust, is crucial for timely disease management. Scouting allows for early detection and implementation of appropriate disease control measures. Fungicide applications, cultivar selection, and crop rotation are effective strategies to mitigate disease risks and preserve crop health.
Harvest Readiness: Monitor spring wheat plants towards the end of their growth cycle to assess harvest readiness. Observe the crop’s physiological maturity, which is indicated by hard kernels and moisture content within the desired range for storage. Monitoring ensures harvesting at the optimal time, preventing harvest losses due to shattering, field losses, or compromised grain quality.
Monitoring and managing spring wheat throughout its growth cycle enables proactive decision-making and allows for timely interventions to address potential issues. By closely observing the crop and implementing proper management practices, you can optimize growth, maximize yield potential, and ultimately ensure a successful harvest.
Harvesting and Storing Spring Wheat
The process of harvesting and storing spring wheat is a critical stage in ensuring the preservation of grain quality and maximizing the yield potential of the crop. Proper harvesting methods, timely grain moisture management, and appropriate storage conditions are essential to maintain the integrity of the harvested spring wheat. Let’s explore key considerations for harvesting and storing spring wheat.
Harvest Timing: Harvesting spring wheat at the optimal time is crucial for achieving maximum yield and grain quality. Spring wheat is considered ready for harvest when it reaches physiological maturity, indicated by hard kernels and moisture content within the desired range for storage. Monitoring the crop and consulting local resources or agricultural experts ensure timely harvest decisions.
Harvesting Equipment and Techniques: Select appropriate harvesting equipment and techniques to minimize grain loss and maintain the quality of the harvested crop. Combines equipped with proper headers and settings help efficiently thresh and separate the grain from the straw. Adjust combine settings to optimize grain separation and minimize kernel damage.
Grain Moisture Management: Monitor the moisture content of the harvested spring wheat to ensure safe storage and prevent grain spoilage. Aim for a moisture content of around 12-14% for safe storage, as higher moisture levels can lead to mold growth or heat build-up. Utilize moisture meters or handheld testers to monitor grain moisture during and after harvest.
Drying Grain: If the harvested spring wheat exceeds the desired moisture level, take necessary steps to dry the grain to a suitable moisture content for storage. Grain dryers or aeration systems can be used to reduce moisture levels, ensuring safe storage conditions. Proper airflow and temperature control are crucial to prevent over-drying or moisture migration within the stored grain.
Grain Cleaning and Handling: Thoroughly clean the harvested spring wheat to remove impurities, chaff, and foreign materials that may affect grain quality. Utilize grain cleaners to separate and remove any damaged or shriveled kernels. Handle the grain gently to minimize kernel damage and prevent the introduction of contaminants during handling and transportation.
Storage Conditions: Store spring wheat in appropriate conditions to maintain its quality and prevent the development of pests or mold. Choose storage facilities that provide adequate ventilation and control temperature and humidity levels. Regularly monitor stored grain for signs of pest infestation, mold growth, or moisture condensation. Implement pest management strategies and appropriate fumigation methods if necessary.
Quality Control: Regularly monitor the quality of stored grain by inspecting samples for signs of mold, pests, or moisture. Check stored grain for changes in temperature or moisture content that may indicate spoilage. Properly record and manage inventory to ensure traceability and prevent losses due to spoilage or deterioration.
Grain Marketing: Determine the appropriate time to market and sell the spring wheat crop based on local market conditions, demands, and pricing trends. Stay informed about market conditions and consult with grain buyers or marketing advisors to make informed decisions to maximize profitability.
By following proper harvesting and storing practices, you can ensure the preservation of grain quality, minimize losses, and maximize the value of your spring wheat crop. Proper harvest timing, equipment selection, moisture management, storage conditions, and quality control measures all contribute to the successful post-harvest management of spring wheat.