
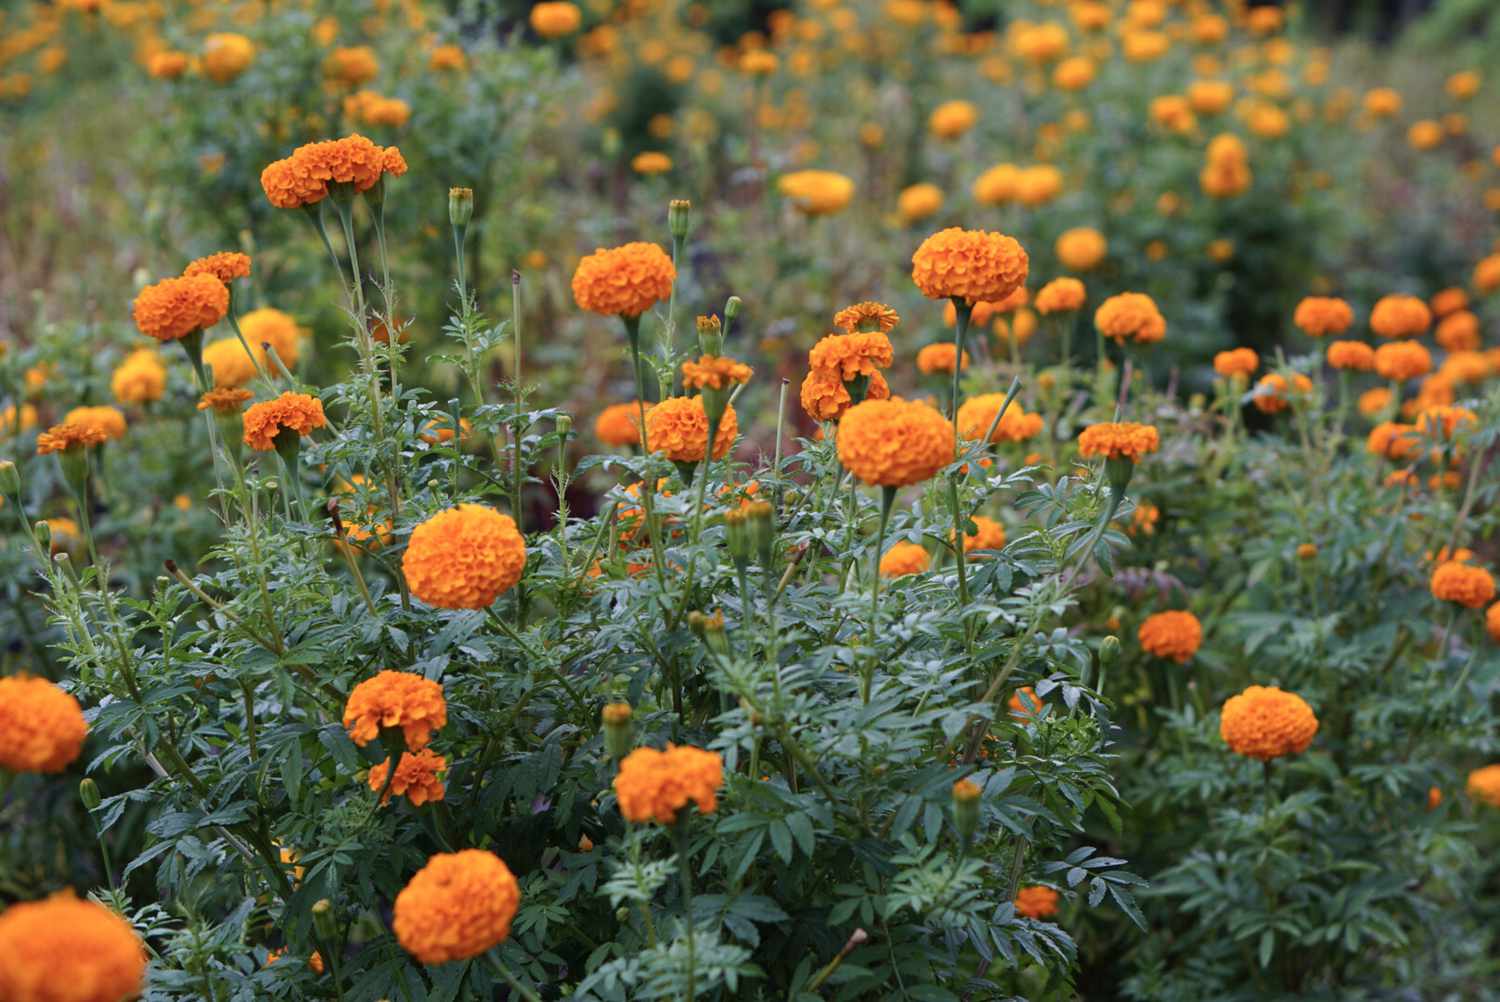
The Best Time to Plant Marigold Seeds
Marigolds are vibrant and cheerful flowers that can brighten up any garden. If you’re looking to grow marigolds from seeds, it’s essential to plant them at the right time. The timing will depend on various factors, including your climate and the specific marigold variety you’re growing.
Typically, marigold seeds are best planted in the spring, after the last frost has passed. This ensures that the seeds have optimal conditions for germination and growth. In many regions, this means planting marigold seeds in late April or early May.
However, if you live in a region with a mild climate or a longer growing season, you may be able to plant marigold seeds earlier in the year. In these areas, you can start planting marigold seeds as early as late February or early March.
On the other hand, if you live in a region with a shorter growing season or colder temperatures, it’s best to wait until the soil has warmed up and the frost danger has passed. This is usually in late spring or early summer, around late May or early June.
It’s important to note that marigolds thrive in warm weather, so it’s crucial to avoid planting the seeds too early in the season when the soil is still cold. Planting marigold seeds in cold soil can result in poor germination and stunted growth.
Another factor to consider when determining the best time to plant marigold seeds is the specific marigold variety. Some varieties, like French marigolds (Tagetes patula), are more cold-sensitive and prefer warmer temperatures. Others, like African marigolds (Tagetes erecta), are more tolerant of cooler conditions.
Ultimately, the best time to plant marigold seeds is when the soil is warm and the risk of frost has passed. This ensures that the seeds have optimal conditions for germination and that the young plants can thrive without being damaged by cold temperatures. By planting marigolds at the right time, you’ll give them the best chance to grow healthy and vibrant, providing you with a stunning display of colorful flowers all season long.
Factors to Consider Before Planting Marigold Seeds
Before you start planting marigold seeds, there are a few key factors to consider to ensure successful growth and vibrant blooms. Taking these factors into account will help you create the optimal conditions for your marigold plants:
1. Sunlight: Marigolds are sun-loving plants and require at least 6-8 hours of direct sunlight per day. Make sure to choose a location in your garden that receives ample sunlight to promote healthy growth and abundant blooms.
2. Space Availability: Consider the available space in your garden before planting marigold seeds. Marigolds require adequate spacing to allow proper air circulation and prevent overcrowding. Depending on the variety, plan for a spacing of around 8-12 inches between plants.
3. Soil Quality: Marigolds thrive in well-drained soil that is rich in organic matter. Before planting, prepare the soil by removing weeds, loosening it with a garden fork, and incorporating compost or well-rotted manure to improve fertility and drainage.
4. pH Level: Marigolds prefer slightly acidic to neutral soil with a pH range of 6.0-7.0. Test your soil’s pH and make necessary adjustments by adding lime to raise the pH or sulfur to lower it, ensuring a favorable soil environment for marigold growth.
5. Watering Requirements: Marigolds have moderate water needs and prefer consistently moist soil. Avoid overwatering, as this can lead to root rot, and instead water deeply when the top inch of soil feels dry. Mulching around the plants can help retain moisture and suppress weed growth.
6. Pest and Disease Control: Consider potential pests and diseases that may affect your marigold plants. While marigolds are generally resistant to many pests, keep a lookout for aphids, spider mites, and slugs. Use organic pest control methods or consider companion planting with herbs or other beneficial flowers to deter pests.
7. Companion Planting: Marigolds have natural insect-repellent properties, making them excellent companions for other plants. Consider interplanting marigolds with vegetables like tomatoes or cabbage to deter pests and attract beneficial insects for pollination and pest control.
8. Frost Protection: While marigolds are generally frost-tolerant, young seedlings can be susceptible to cold temperatures. If you live in a region with late frosts, consider protecting your young marigold plants with a frost cloth or transplant them outdoors after the last frost date.
By considering these factors before planting marigold seeds, you’ll set the stage for healthy growth and successful blooms. Taking the time to prepare the soil, provide adequate sunlight, and address potential pests or diseases will help ensure that your marigold garden thrives throughout the growing season.
Climate Requirements for Marigold Seeds
Marigolds are versatile flowers that can adapt to a wide range of climates. However, understanding the specific climate requirements for marigold seeds will help you provide the optimal growing conditions. Here are the key climate factors to consider when planting marigold seeds:
1. Temperature: Marigold seeds thrive in warm temperatures. They prefer daytime temperatures between 70-85°F (21-29°C) and nighttime temperatures above 60°F (15°C). If you live in a region with cooler temperatures, consider starting the seeds indoors or waiting until the weather warms up in the spring.
2. Frost Tolerance: While marigolds are relatively frost-tolerant, they are still susceptible to frost damage, especially young seedlings. It’s best to wait until the risk of frost has passed before planting marigold seeds outdoors. In areas with long winters, starting the seeds indoors can help give them a head start.
3. Humidity: Marigolds prefer moderately dry conditions with good air circulation. High humidity can promote disease development, particularly powdery mildew. If you live in a humid climate, ensure proper spacing between plants and consider providing adequate airflow to minimize humidity-related issues.
4. Rainfall: Marigolds prefer well-drained soil and are moderately drought-tolerant. While they can handle periods of dryness, consistent watering is still necessary, especially during dry spells or extended periods without rainfall. Water deeply rather than frequent shallow waterings to encourage deep root growth.
5. Wind: Marigolds can withstand moderate wind exposure. However, strong winds can damage tall varieties or cause the plants to bend or break. If you live in an area prone to strong winds, consider providing some protection, such as planting marigolds near a fence or using stakes for support.
6. Day Length: Marigolds are considered day-neutral plants, meaning they are not significantly influenced by day length. However, shorter days in the fall can trigger the formation of flowers, which makes them an ideal choice for late-season color in gardens where summers are longer and warmer.
Understanding the climate requirements for marigold seeds allows you to tailor your gardening practices to provide the best possible conditions. By considering factors such as temperature, frost tolerance, humidity, rainfall, wind exposure, and day length, you can create an environment that promotes healthy growth and abundant blooms for your marigold plants.
Soil Conditions for Planting Marigold Seeds
The success of growing marigold seeds heavily depends on the soil conditions in which they are planted. Creating the right soil environment will provide the necessary nutrients, drainage, and structure for healthy growth and vibrant blooms. Here are the key soil conditions to consider when planting marigold seeds:
1. Soil Type: Marigolds prefer well-drained soil that is rich in organic matter. Sandy loam or loamy soil is ideal for marigolds, as it provides good drainage while retaining enough moisture for the plants. Avoid heavy clay soils that tend to become compacted and retain excess water.
2. pH Level: Marigolds thrive in slightly acidic to neutral soil with a pH range of 6.0-7.0. Test your soil’s pH using a home testing kit or by sending a sample to a local cooperative extension. Adjust the pH if necessary by adding lime to raise the pH or sulfur to lower it, ensuring an optimal pH level for marigold growth.
3. Organic Matter: Incorporating organic matter into the soil improves its fertility and structure. Before planting marigold seeds, amend the soil with well-rotted compost, aged manure, or other organic materials. This enriches the soil, improves moisture retention, and promotes beneficial microbial activity.
4. Drainage: Adequate drainage is essential for marigold plants. Poorly drained soil can lead to root rot and other moisture-related issues. If you have heavy clay soil, consider amending it with coarse sand, perlite, or vermiculite to improve drainage. Raised beds can also help provide better drainage for marigold seedlings.
5. Soil Moisture: While marigolds prefer well-drained soil, they still require consistent moisture. Keep the soil evenly moist, being careful not to overwater. Overwatering can lead to root rot and other waterlogged-related problems. Mulching around the plants can help retain soil moisture and regulate temperature.
6. Nutrients: Marigolds are moderate feeders and benefit from a balanced fertilizer application. Before planting marigold seeds, incorporate a slow-release fertilizer into the soil according to the package instructions. This provides a steady supply of nutrients throughout the growing season, promoting healthy plant growth and vibrant flowers.
7. Weed Control: Maintaining weed-free soil is important when planting marigold seeds. Weeds compete with marigold plants for nutrients, water, and sunlight. Regularly remove weeds by hand or use organic mulch to suppress weed growth and keep the soil around marigold plants clean.
By ensuring the right soil conditions for planting marigold seeds, you provide an optimal growing environment for your plants. The combination of well-drained soil, proper pH, organic matter, good drainage, adequate soil moisture, balanced nutrients, and weed control sets the foundation for strong and healthy marigold growth.
Steps to Prepare the Marigold Seeds for Planting
Properly preparing marigold seeds before planting sets the stage for successful germination and healthy seedlings. Taking these steps will increase the likelihood of achieving optimal growth and vibrant blooms. Here are the essential steps to prepare marigold seeds for planting:
1. Seed Selection: Start by selecting high-quality marigold seeds from reputable suppliers or saved from previous healthy plants. Look for seeds that are plump, firm, and free from damage or discoloration.
2. Seed Stratification (Optional): Some marigold varieties benefit from a process called stratification, which involves exposing the seeds to cold temperatures to simulate natural winter conditions. Stratification can help improve germination rates for certain marigold species, but it is not necessary for all types.
3. Seed Cleaning: Thoroughly clean the marigold seeds to remove any debris, chaff, or damaged seeds. You can do this by placing the seeds in a fine-mesh sieve or strainer and gently rinsing them under running water. Allow the seeds to dry completely before proceeding.
4. Seed Scarification (Optional): Some marigold seeds have hard coats that may inhibit germination. If you have seeds with tough outer shells, consider scarifying them by gently rubbing them with sandpaper or nicking them with a small file. This process helps water penetrate the seed coat, promoting faster and more uniform germination.
5. Pre-Soaking (Optional): Pre-soaking marigold seeds can help jumpstart germination. Place the cleaned and scarified seeds in a container with warm water and let them soak for 12-24 hours. After soaking, drain the water and transfer the seeds to a damp paper towel to continue germination.
6. Seed Storage: If you’re not planting the marigold seeds immediately, store them in a cool, dry place in airtight containers or sealed plastic bags. Label the containers with the seed variety and date of collection or purchase to keep track of their freshness.
7. Germ Testing (Optional): If you’re unsure about the viability of older seeds, you can perform a germination test before planting. Place a few seeds between damp paper towels or in a seed-starting tray and keep them in a warm location. Check daily for germination and discard any seeds that show no signs of sprouting.
By following these steps to prepare marigold seeds for planting, you increase the chances of successful germination and healthy seedlings. Taking the time to select quality seeds, clean and scarify them if necessary, and provide proper storage conditions will contribute to a thriving marigold garden.
Direct Sowing vs Starting Indoors: Pros and Cons
When it comes to planting marigold seeds, you have two primary options: direct sowing them outdoors or starting the seeds indoors. Each method has its own set of pros and cons that you should consider before deciding which approach is best for your gardening needs. Here are the advantages and disadvantages of direct sowing and starting marigold seeds indoors:
Direct Sowing:
- Pros:
- Easy and straightforward: Direct sowing involves planting marigold seeds directly into the ground, eliminating the need for transplanting.
- Less labor-intensive: There is no need to spend time and effort on starting seeds indoors and caring for seedlings.
- Natural adaptation: Directly sowing marigold seeds allows them to naturally adapt to outdoor conditions from the beginning.
- Cost-effective: Direct sowing is usually more affordable since it doesn’t require additional equipment or supplies.
- Cons:
- Longer germination period: It may take longer for seeds to germinate outdoors due to varying weather conditions.
- Unpredictable results: Factors like soil temperature, moisture, and pests can affect germination and success rates when sowing directly outdoors.
- Greater vulnerability: Young seedlings may be more susceptible to damage from pests, extreme weather, or accidental trampling.
Starting Indoors:
- Pros:
- Controlled environment: Starting marigold seeds indoors allows you to control the temperature, humidity, and light conditions for optimal germination.
- Earlier starts: Starting seeds indoors gives you a head start on the growing season and can extend the flowering period.
- Higher success rate: By starting seeds indoors, you can ensure more consistent germination and healthier seedlings.
- Protection from pests and weather: Indoor seedlings are less vulnerable to pests, frost, or other adverse weather conditions.
- Cons:
- Requires additional time and effort: Starting seeds indoors involves setting up a suitable environment, providing care, and transplanting seedlings later.
- Potential for transplant shock: Transplanting marigold seedlings outdoors can lead to transplant shock if not done properly.
- Increased costs: You may need to invest in grow lights, seed-starting trays, potting soil, and other supplies for indoor seed starting.
- Space constraints: Indoor seed starting requires adequate space for trays or pots, which may be a limitation for some gardeners.
Considering the advantages and disadvantages of direct sowing and starting marigold seeds indoors allows you to make an informed decision based on your gardening preferences, available resources, and local climate conditions. Both methods can be successful, so choose the one that suits your needs and circumstances to enjoy a vibrant and flourishing marigold garden.
How to Plant Marigold Seeds Outdoors
Planting marigold seeds outdoors is a straightforward process that, when done correctly, will help ensure successful germination and healthy growth. To plant marigold seeds outdoors, follow these steps:
1. Choose the Right Location: Select a sunny location in your garden, as marigolds thrive in full sun. Ensure the area has well-drained soil and enough space to accommodate the growth of the marigold plants.
2. Prepare the Soil: Clear the planting area of any weeds or debris. Loosen the soil with a garden fork or tiller and incorporate organic matter, such as compost or well-rotted manure, to improve soil fertility and drainage.
3. Determine the Planting Time: Plant marigold seeds outdoors after the last frost date in your area. Check your local frost dates and aim to plant the seeds when the soil temperature reaches around 60°F (15°C).
4. Sow the Seeds: Create small planting holes with your finger or a dibber. The holes should be about 1/4 inch deep. Space the holes according to the recommended spacing for the particular marigold variety you’re growing. Drop one or two seeds into each hole.
5. Cover and Water: Gently cover the marigold seeds with soil and lightly firm the surface. Water the soil gently to ensure proper moisture. Avoid overwatering, as excessive moisture can lead to poor germination and root rot.
6. Maintain Moisture: Keep the soil consistently moist until the seedlings emerge. Water the newly planted seeds regularly, taking care not to let the soil dry out completely. Consider using a gentle misting spray or a watering can with a fine spout to avoid disturbing the seeds.
7. Thin Seedlings (Optional): If multiple seeds germinate in the same hole, thin the seedlings once they have developed their first true leaves. Snip off the weaker seedlings, leaving only one strong seedling per planting hole. Thinning promotes better airflow and prevents overcrowding.
8. Provide Care: As the marigold seedlings grow, continue to provide regular waterings to keep the soil evenly moist. Mulching around the plants can help conserve moisture and suppress weeds. Monitor for pests or diseases and take appropriate action if necessary.
9. Transplant if Necessary: If the marigold seedlings become overcrowded or you need to adjust their positioning, consider transplanting them to a new location with adequate spacing. Transplant carefully, ensuring that the roots are not disturbed or damaged in the process.
By following these steps, you can successfully plant marigold seeds outdoors and enjoy the beautiful blooms of these vibrant and cheerful flowers in your garden.
How to Start Marigold Seeds Indoors
If you want to get a head start on the growing season and ensure a higher success rate for your marigold plants, starting marigold seeds indoors is a great option. Here’s a step-by-step guide on how to start marigold seeds indoors:
1. Gather Supplies: Collect all the necessary supplies, including seed-starting trays or pots, seed-starting mix, seeds, a spray bottle or watering can, and grow lights (optional).
2. Choose the Right Time: Start marigold seeds indoors 6-8 weeks before the last expected frost date in your area. Check your local frost dates to determine the optimal time to begin indoor seed starting.
3. Fill Containers: Fill seed-starting trays or small pots with a high-quality seed-starting mix. Moisten the mix before adding it to the containers.
4. Sow the Seeds: Plant two to three marigold seeds in each container, inserting them into the soil to a depth of about ¼ inch. Space the seeds evenly in the containers.
5. Provide Adequate Moisture: Water the containers gently using a spray bottle or watering can with a fine spout. Ensure that the soil is evenly moist, but avoid overwatering, as it can lead to damping-off disease.
6. Create a Suitable Environment: Place the containers in a warm location where the temperature remains around 70-75°F (21-24°C). If needed, use a seedling heat mat to maintain consistent soil temperature.
7. Consider Grow Lights: If you don’t have access to sufficient natural light, consider using fluorescent or LED grow lights to provide adequate light for the seedlings. Position the lights a few inches above the seedlings and keep them on for 14-16 hours per day.
8. Thin and Transplant: Once the seedlings develop their first true leaves, thin them by removing the weaker seedlings, leaving the strongest ones in each container. This ensures that the remaining seedlings have enough space and nutrients to grow properly.
9. Harden Off: Approximately one to two weeks before the last frost date, gradually expose the seedlings to outdoor conditions. Start by placing them in a sheltered area for a few hours each day, gradually increasing the time and exposure to sunlight and wind.
10. Transplant Outdoors: After the last frost has passed and the seedlings are sufficiently hardened off, transplant them into the garden or desired containers. Choose a sunny location with well-drained soil and space the plants according to the specific marigold variety’s recommended spacing.
By following these steps, you can successfully start marigold seeds indoors and ensure healthy seedlings ready for transplanting outdoors, giving you a head start on a beautiful and vibrant marigold garden.
Optimal Spacing and Depth for Planting Marigold Seeds
Proper spacing and planting depth are crucial factors when planting marigold seeds. Providing adequate space and ensuring the correct planting depth allows the plants to grow and develop without competition and promotes healthy root establishment. Here are the optimal spacing and depths for planting marigold seeds:
Spacing:
- In the Garden: Marigold plants require sufficient space to allow for proper airflow, prevent overcrowding, and promote optimal growth. Depending on the variety, space marigold plants approximately 8 to 12 inches apart. This spacing ensures that the plants have enough room to grow and prevents the spread of diseases.
- In Containers: When planting marigolds in containers, the spacing may vary based on the container size and the specific variety of marigold. As a general guideline, leave about 1 to 2 inches between each marigold plant in the container to allow for their growth and ensure they aren’t crowded.
Planting Depth:
- In the Garden: When planting marigold seeds in the garden, the general rule of thumb is to sow them at a depth of about ¼ inch. Make a small indentation or hole in the soil using your finger or a dibber and drop the seeds into the hole. Gently cover the seeds with soil and lightly firm the surface to ensure good seed-to-soil contact.
- In Containers: For container planting, follow the same guideline of planting marigold seeds at a depth of about ¼ inch. Fill the container with a well-draining potting mix, make small holes with your finger or dibber, place the seeds in the holes, cover lightly with soil, and gently pat down the surface.
By spacing marigold plants appropriately and planting the seeds at the right depth, you allow the plants to establish healthy root systems and prevent competition for nutrients and resources. Proper spacing also ensures adequate air circulation, reducing the risk of disease development. When planting marigold seeds, be mindful of the specific variety’s recommended spacing and planting depth, as they can slightly vary.
Watering and Care Tips for Marigold Seeds
Proper watering and care are essential for the successful growth of marigold seeds. By following these tips, you can ensure that your marigold plants receive adequate moisture and care, resulting in healthy, vibrant blooms:
1. Watering:
- Consistent Moisture: Marigold seeds require consistent moisture for germination and early growth. Water the soil gently, ensuring that it stays evenly moist. Avoid overwatering, as it can lead to root rot, damping-off, or other fungal diseases.
- Deep Watering: Water deeply, allowing the water to reach the root zone. This promotes root development and helps the plants withstand dry periods.
- Monitor the Soil: Regularly check the soil moisture level by inserting your finger into the soil up to the second knuckle. If it feels dry, it’s time to water. If it feels moist, wait before watering again.
- Morning Watering: Water marigold plants in the morning to allow foliage and soil to dry during the day. Watering in the evening can lead to prolonged moisture on the leaves, increasing the risk of fungal diseases.
- Avoid Overhead Watering: When possible, water at the base of the plants rather than overhead to minimize the risk of wetting the leaves, which can invite fungal diseases.
2. Fertilizing:
- Pre-Planting Fertilizer: Incorporate compost or well-rotted manure into the soil before planting marigold seeds to provide a nutrient-rich foundation for growth.
- Slow-release Fertilizer: Apply a balanced slow-release fertilizer once the seedlings have established their first true leaves. Follow the package instructions for application rates.
- Avoid Excessive Fertilizer: Avoid over-fertilizing marigold plants, as it can lead to leggy growth and fewer blooms. Follow the recommended dosage for the specific fertilizer you are using.
3. Thin Seedlings if Necessary:
- Thinning: If multiple marigold seedlings emerge from the same planting hole, thin the seedlings to one per hole. Snip off the weaker seedlings at ground level, allowing the strongest seedling to grow without competition.
- Optimal Spacing: Proper spacing between marigold plants allows for good air circulation, preventing the spread of diseases and ensuring adequate sunlight and nutrient availability.
4. Weeding:
- Weed Control: Regularly remove weeds from the vicinity of marigold plants. Weeds compete with marigolds for nutrients, water, and sunlight.
- Mulching: Apply a layer of organic mulch around marigold plants to suppress weed growth, conserve soil moisture, and regulate soil temperature.
By following these watering and care tips for marigold seeds, you can ensure the health and vitality of your marigold plants. Consistent and appropriate watering, proper fertilization, thinning seedlings, and weed control will promote optimum growth, vibrant blooms, and a beautiful marigold garden.
Common Problems and Troubleshooting for Marigold Seed Plantings
While marigolds are generally easy to grow from seeds, they may encounter some common problems during the planting and growing process. Understanding these issues and their potential solutions will help you troubleshoot problems and ensure the successful growth of your marigold seed plantings:
1. Poor Germination:
- Seed Quality: Use fresh, high-quality seeds from reliable sources to maximize germination rates.
- Soil Temperature: Ensure that the soil temperature is warm enough for proper germination, typically around 70-85°F (21-29°C).
- Seed Quality: Avoid planting old or improperly stored seeds, as their viability and germination rates may be compromised.
2. Damping-off:
- Overwatering: Avoid overwatering, as excessive moisture can increase the risk of damping-off disease. Maintain proper soil drainage and allow the soil to dry slightly between waterings.
- Fungicide Treatment: Use a fungicide specifically labeled for damping-off disease to treat affected seedlings. Follow the instructions carefully.
- Start with Sterilized Soil: Use pasteurized or sterilized seed-starting mix to prevent the introduction of pathogens that can cause damping-off.
3. Pest Issues:
- Aphids and Spider Mites: Control these common pests by regularly inspecting your plants and using insecticidal soaps or organic pest control methods.
- Slugs and Snails: Protect seedlings from slugs and snails by using physical barriers such as copper tape or organic slug control methods.
- Caterpillars: Handpick caterpillars or use natural predators like birds or beneficial insects to control their population.
4. Nutrient Deficiencies:
- Yellowing Leaves: Yellowing leaves may indicate a nitrogen deficiency. Apply a balanced fertilizer to provide sufficient nutrients for healthy growth.
- Pale Leaves: Pale or yellowish leaves may signal an iron deficiency. Incorporate iron-rich fertilizers or apply an iron supplement to the soil.
5. Leggy Seedlings:
- Inadequate Light: Insufficient light can cause seedlings to become elongated and leggy. Provide adequate light using grow lights positioned a few inches above the seedlings.
- Proper Spacing: Crowding seedlings can also contribute to leggy growth. Thin crowded seedlings to provide adequate space for each plant.
6. Environmental Stress:
- Extreme Temperatures: Protect seedlings from extreme temperatures, such as frost or heatwaves, by providing appropriate shelter or shade.
- Transplant Shock: If transplanting seedlings, minimize transplant shock by carefully handling the roots and providing appropriate environmental conditions.
By being aware of these common problems and troubleshooting tips for marigold seed plantings, you can address issues promptly and ensure the successful growth and development of your marigold plants. Providing optimal conditions, proper care, and timely interventions will help you overcome challenges and enjoy the beauty of healthy and vibrant marigold flowers.
When to Expect Marigolds to Bloom
Waiting for the vibrant blooms of marigolds is an exciting part of gardening. The time it takes for marigolds to bloom can vary based on several factors, including the marigold variety, growing conditions, and planting method. Here’s a general timeline to give you an idea of when to expect marigolds to bloom:
Direct-Sown Marigolds:
- Germination: Marigold seeds typically germinate within 5 to 14 days, depending on the specific variety and growing conditions.
- Seedling Growth: After germination, marigold seedlings will continue to grow and develop leaves, stems, and root systems over the course of a few weeks.
- Bud Formation: Around 6 to 8 weeks after sowing the seeds, the marigold plants will start forming flower buds, preparing for blooming.
- Blooming: Depending on the variety, marigolds will usually start to produce flowers about 8 to 10 weeks after sowing the seeds. Once they start blooming, they will continue to produce flowers throughout the growing season.
Indoor-Started Marigolds:
- Germination: When started indoors, marigold seeds generally germinate within 5 to 10 days since the controlled environment provides optimal conditions for germination.
- Seedling Growth: Indoor-started marigold seedlings will grow and develop faster than direct-sown seedlings due to the controlled conditions and optimal care.
- Bud Formation: Similar to direct-sown marigolds, indoor-started seedlings will begin forming flower buds around 6 to 8 weeks after sowing the seeds.
- Blooming: Expect indoor-started marigolds to bloom approximately 8 to 10 weeks after sowing the seeds, similar to direct-sown marigolds. However, they may have a slight head start due to the indoor growing conditions.
It’s important to note that these timelines are general guidelines, and the actual blooming time can vary based on factors such as weather conditions, temperature, and care practices. Additionally, different marigold varieties have varying growth rates and bloom times. Some early-blooming varieties may start blooming even sooner, while others may take a bit longer.
By providing the appropriate growing conditions, including ample sunlight, proper watering, and regular fertilization, you can help accelerate the blooming process and enjoy the beautiful and colorful blooms of marigolds throughout the growing season.
Harvesting Marigold Seeds
Harvesting marigold seeds allows you to save and propagate your favorite marigold varieties for future plantings. It’s a rewarding process that can help you maintain a self-sustaining garden. Here’s a step-by-step guide on how to harvest marigold seeds:
1. Selecting Seedheads:
- Maturity: Wait until the marigold flower heads have completely dried on the plant. The petals will have fallen off, and the seed pods will appear dry and brown.
- Coloration: Look for the characteristic elongated seed pods or “beaky heads” that develop after the petals drop. These hold the seeds and should be fully brown and dry.
2. Harvesting the Seeds:
- Timing: Choose a dry and sunny day to harvest the marigold seeds. Early morning is often the best time, as any morning dew will have dried but the day’s heat hasn’t fully set in.
- Container: Hold a container or a paper bag below the seedhead to catch the seeds as they fall. This will prevent the seeds from getting lost or scattering on the ground.
- Seed Removal: Gently rub or squeeze the dried seed pods between your fingers to release the small, dark marigold seeds. Alternatively, you can use scissors or pruners to cut the entire seedhead off, placing it directly into a paper bag to prevent any seed loss.
3. Cleaning the Seeds:
- Debris Removal: Transfer the collected marigold seeds to a clean, dry bowl or tray. Remove any seed casings, chaff, or remaining plant debris by gently blowing on the seeds or using a fine sieve or strainer to separate the seeds from the unwanted material.
- Drying: Allow the seeds to air dry further in a well-ventilated area for about a week. Make sure the seeds are completely dry before storing them.
4. Storing the Seeds:
- Container: Store the dried marigold seeds in airtight glass jars, envelopes, or seed storage containers. Label the containers with the name of the marigold variety and the date of harvesting.
- Storage Conditions: Store the seed containers in a cool, dry place away from direct sunlight. This will help maintain the viability of the seeds for the following planting season.
Harvesting marigold seeds allows you to continue growing these beautiful flowers year after year. By following these steps to select, harvest, clean, and store the marigold seeds properly, you can ensure a bountiful supply of seeds for future plantings and share them with fellow gardeners as well.