
Why Plant Calendula Seeds?
If you’re looking to add a splash of vibrant color to your garden and enjoy a multitude of health benefits, then planting calendula seeds is a fantastic choice. Calendula, also known as pot marigold, is a beautiful flowering plant that belongs to the daisy family. Not only does it brighten up any landscape, but it also has medicinal properties that make it a popular herb in natural healing and skincare remedies.
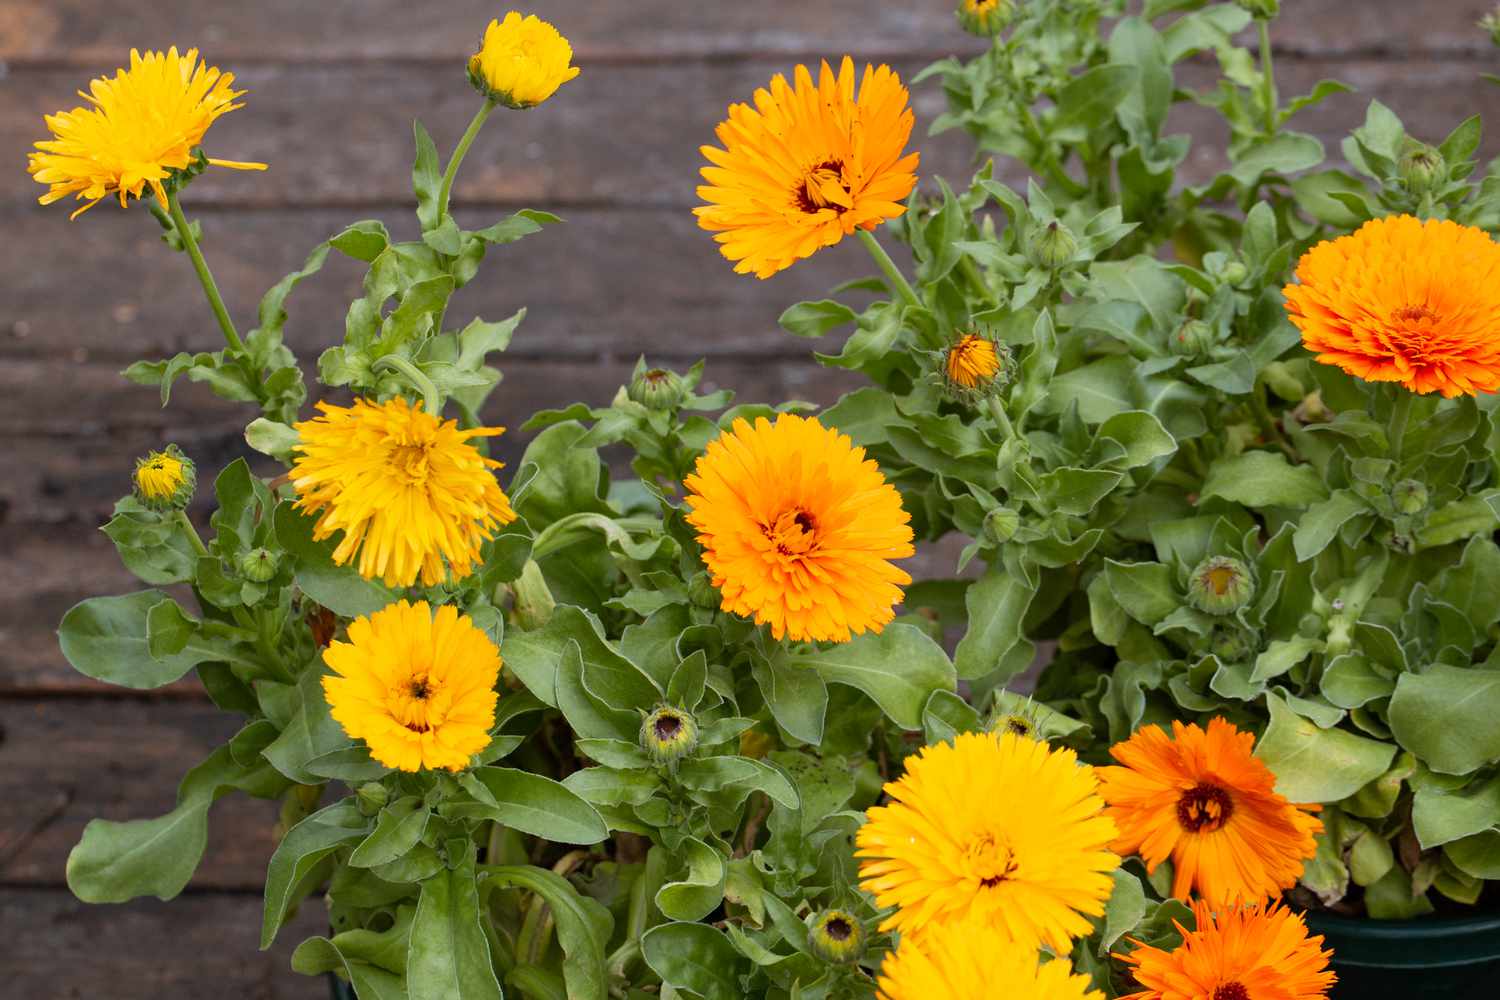
One of the main reasons to plant calendula seeds is for their stunning flowers. Their sunny, yellow or orange blooms add a cheerful touch to any garden bed, container, or flower arrangement. The petals are delicately crinkled, creating a visually pleasing texture. Calendula flowers are not only aesthetically pleasing but also attract beneficial pollinators like bees and butterflies, helping to support the overall health of your garden ecosystem.
In addition to their aesthetic appeal, calendula flowers offer various health benefits. They are known for their anti-inflammatory, antifungal, and antibacterial properties, making them a valuable addition to natural remedies and skincare products. Calendula oil is commonly used topically to soothe dry or irritated skin, alleviate sunburns, and promote wound healing. The flowers can also be used to prepare herbal teas or infusions that may help with digestive issues and boost the immune system.
Furthermore, growing calendula from seeds is relatively easy and accessible to both experienced gardeners and beginners. Calendula seeds are widely available and affordable, making it a cost-effective way to adorn your garden with vibrant blooms. Whether you have a large backyard or a small balcony, calendula can be cultivated in containers, raised beds, or traditional garden plots, allowing you to enjoy its beauty and benefits regardless of your space limitations.
Lastly, calendula is a resilient plant that can withstand a variety of weather conditions and soil types. It is known for its ability to tolerate both cool and warm climates, making it suitable for planting in different regions. This adaptability, combined with its low maintenance requirements, makes calendula an excellent choice for busy gardeners or those who are new to gardening.
Understanding Calendula Seeds
Before diving into the process of planting calendula seeds, it’s important to have a clear understanding of what they are. Calendula seeds are small, oval-shaped structures that serve as the starting point for growing calendula plants. They contain all the genetic information needed to develop into vibrant and blooming flowers.
Calendula seeds come in various sizes and colors, depending on the specific variety. While most are light brown or tan, there are also some dark brown or black cultivars available. The seeds have a slightly curved shape and may have a rough or smooth texture, depending on the variety.
When it comes to purchasing calendula seeds, you have two options: buying them from a reliable garden center or saving seeds from existing plants. If you choose to buy them, look for reputable seed suppliers that offer organic, non-GMO, and heirloom varieties. This ensures the quality and authenticity of the seeds you’re getting.
When saving your own calendula seeds, select the healthiest flowers from your existing plants. Allow the flowers to fully mature and dry on the stem before collecting the seeds. Once dried, gently rub the flowers to release the seeds. It’s important to note that hybrid varieties may not produce true-to-type seeds, so it’s best to save seeds from open-pollinated or heirloom varieties.
Calendula seeds have a moderate germination rate and can take anywhere from 5 to 14 days to sprout, depending on the environmental conditions. They require warmth, moisture, and proper soil contact to successfully germinate. Understanding the germination process is crucial for successful seedling establishment.
The viability of calendula seeds can vary depending on their age and storage conditions. It’s advisable to use fresh seeds within a year of purchase or harvest for better germination rates. If you need to store seeds, keep them in a cool, dry place in a sealed container to maintain their integrity.
Now that you have a better understanding of calendula seeds, including their appearance, sources, and germination characteristics, you’re ready to move on to the next steps of planting and growing these delightful flowers.
Choosing the Right Time for Planting
When it comes to planting calendula seeds, timing is everything. The success of your plants will greatly depend on choosing the right time to sow the seeds. Calendula is a cool-season annual, meaning it thrives in mild temperatures. Understanding the optimal planting time will ensure healthy growth and abundant blooms.
The ideal time to plant calendula seeds is in the early spring or fall, depending on your climate. If you live in a region with mild winters, you can start planting in early spring, once the soil has thawed and the threat of frost has passed. Calendula seeds germinate best at temperatures between 65°F and 75°F (18°C and 24°C), so wait until the soil is consistently warm enough for successful germination.
In cooler climates, where winters are more severe, it’s best to plant calendula seeds in the fall. This allows the seeds to germinate and establish a strong root system before winter’s cold sets in. The plants will then bloom early the following spring, giving you an extended period of beautiful flowers.
It’s important to note that calendula plants can tolerate light frost, but prolonged exposure to freezing temperatures can damage or even kill them. If you’re planting in the fall, make sure to leave enough time for the plants to establish themselves before the first frost arrives.
If you’re unsure about the specific timing in your area, consult your local agricultural extension office or a knowledgeable gardening expert. They can provide region-specific information and help you determine the best time to plant calendula seeds for optimal growth and blooms.
Keep in mind that calendula plants are relatively fast-growing, taking about 50 to 60 days from planting to the first blooms. This quick growth allows you to enjoy their vibrant colors and medicinal benefits in a relatively short period. By selecting the right time to sow the seeds, you’ll ensure that your calendula plants thrive and reward you with a spectacular display of color and beauty.
Weather Considerations
When planting calendula seeds, it’s essential to consider the weather conditions in your area. Calendula is known for its ability to tolerate a wide range of temperatures, but certain weather factors can impact the growth and health of your plants.
Temperature plays a crucial role in the success of calendula growth. As a cool-season annual, calendula prefers temperatures between 55°F and 75°F (13°C and 24°C). These moderate temperatures promote healthy growth and vibrant blooms. If the temperature becomes too hot, above 75°F (24°C), the plants may become stressed, leading to reduced flower production and increased susceptibility to diseases.
On the other hand, exposing calendula plants to frost or freezing temperatures can be detrimental. While they can tolerate light frost, prolonged exposure to freezing temperatures can damage or kill the plants. If you anticipate a frost or freeze, consider covering the plants with a frost cloth or bringing them indoors temporarily to protect them from the extreme cold.
In addition to temperature, consider the amount of sunlight your calendula plants will receive. They prefer full sun to partial shade, with at least 6 hours of direct sunlight per day. Adequate sunlight is essential for robust growth, productive flowering, and vibrant blooms. Ensure that you select a location that receives sufficient sunlight throughout the day.
Another weather consideration is rainfall. Calendula plants appreciate regular watering, but they also need well-draining soil to prevent root rot. If your area experiences heavy rainfall, you may need to take precautions to ensure proper drainage and prevent waterlogged soil. Amending the soil with organic matter or planting in raised beds can enhance drainage and prevent water accumulation.
Lastly, wind can be a factor to consider, especially in areas with strong gusts or constant wind. Calendula plants have shallow root systems, which make them susceptible to being uprooted or damaged by strong winds. Planting them in a sheltered location or using windbreaks can provide some protection against strong winds and help prevent damage to the plants.
By taking these weather considerations into account, you can create optimal growing conditions for your calendula plants. Providing the right temperature, sunlight, and moisture levels will support their growth, promote abundant blooms, and ensure a successful gardening experience.
Soil Preparation for Calendula Seeds
Preparing the soil before planting calendula seeds is essential for providing a nutrient-rich and well-draining environment that promotes healthy growth. Calendula plants prefer fertile, loamy soil with good drainage to prevent waterlogged conditions that can cause root rot. Here are some steps to prepare the soil for successful calendula seed planting:
1. Clear the area: Start by removing any weeds, rocks, or debris from the planting site. This ensures that the seeds have ample space to grow and reduces competition for nutrients and water.
2. Loosen the soil: Calendula seeds thrive in loose soil that allows for proper root development. Use a garden fork or a tiller to loosen the soil to a depth of about 6 to 8 inches (15 to 20 cm). Breaking up compacted soil improves drainage and prevents water from pooling around the roots.
3. Amend the soil: Calendula plants benefit from soil that is rich in organic matter. Incorporate well-rotted compost, aged manure, or organic fertilizer into the soil, working it in thoroughly. This helps improve the soil’s fertility, water retention, and drainage ability, providing an ideal growing environment for the seeds.
4. Adjust pH level: Calendula prefers a slightly acidic to neutral soil pH range of 6.0 to 7.0. Use a pH testing kit to check the soil’s pH level. If the pH is outside the desired range, you can adjust it by adding soil amendments. For acidic soil, apply lime to raise the pH, and for alkaline soil, apply sulfur or peat moss to lower the pH.
5. Level the soil: After amending the soil, level the surface using a rake. This ensures even moisture distribution and prevents water from pooling in lower areas.
6. Water the soil: Before planting calendula seeds, thoroughly water the soil. This helps settle the soil and ensures good seed-to-soil contact, which is crucial for germination. Avoid over-watering, as this can lead to waterlogged conditions.
By following these soil preparation steps, you’ll create a favorable environment for calendula seeds to germinate and establish healthy plants. Proper soil preparation sets the foundation for successful growth and ensures that your calendula plants have the necessary nutrients and drainage for optimal development.
Sowing Calendula Seeds
Once you have prepared the soil, it’s time to sow your calendula seeds. Sowing seeds properly is crucial for successful germination and healthy plant growth. Here are the steps to sow calendula seeds:
1. Select the planting location: Choose a location that receives ample sunlight and has well-draining soil. Calendula plants thrive in full sun to partial shade, so ensure the area meets their light requirements.
2. Determine the spacing: Calendula plants require space for proper air circulation and to avoid overcrowding. Space the seeds or seedlings about 6 to 12 inches (15 to 30 cm) apart, depending on the variety’s mature size.
3. Plant the seeds: Gently press the calendula seeds into the soil, about ¼ inch (6 mm) deep. Cover them loosely with soil or use a light layer of vermiculite or peat moss to help retain moisture while allowing the seeds to breathe.
4. Water the seeds: After sowing, water the area gently to provide moisture for germination. Ensure that the soil remains consistently moist during the germination period, which can take 5 to 14 days.
5. Thin the seedlings: Once the seedlings emerge and develop their first true leaves, thin them out if they are too close to each other. This will create ample space for the remaining plants to spread out and receive adequate airflow and light.
6. Mulch the soil: Adding a 1-2 inch (2.5-5 cm) layer of organic mulch, such as straw or wood chips, around the seedlings can help retain moisture, suppress weeds, and moderate soil temperature. Be careful not to mulch too close to the stems to prevent rot.
7. Provide proper care: Water the seedlings regularly, keeping the soil moist but not waterlogged. As they grow, monitor the soil moisture levels to ensure they receive adequate hydration. Water deeply during dry periods and reduce watering during rainy periods.
By following these steps, you can sow calendula seeds with confidence and ensure a successful start to your plants. With proper care, you’ll soon enjoy the vibrant colors and delightful blooms of your calendula plants.
Proper Watering Techniques
Watering is a critical aspect of caring for your calendula plants. Proper hydration ensures their growth, development, and overall health. However, it’s important to water them correctly to avoid overwatering or underwatering. Here are some essential watering techniques for your calendula plants:
1. Watering frequency: Calendula plants prefer moderately moist soil, so water them when the top inch (2.5 cm) of soil feels dry to the touch. Avoid watering too frequently, as this can lead to waterlogged conditions and root rot. Aim for a consistent watering schedule, allowing the soil to dry slightly between watering sessions.
2. Deep watering: When you water your calendula plants, ensure that the water reaches the root zone. Instead of lightly sprinkling the surface, water deeply to encourage deep root growth. This helps the plants access water and nutrients from lower soil levels, making them more resilient and better able to withstand dry periods.
3. Irrigate at the base: To prevent foliage diseases and minimize water evaporation, water the plants at the base rather than overhead. Directing the water towards the soil near the base of the plants allows it to reach the root system efficiently.
4. Avoid overwatering: Overwatering can lead to root rot and other fungal diseases. It’s crucial to strike a balance between providing enough moisture and avoiding excessive watering. Check the soil’s moisture level before watering and adjust the frequency accordingly. Factors such as weather conditions, soil type, and container size may influence the watering needs of your calendula plants.
5. Mulch for moisture retention: Adding a layer of organic mulch, such as straw or wood chips, around the base of the plants can help retain soil moisture. Mulch acts as a barrier, reducing evaporation of water from the soil and keeping the root zone cool. This can help maintain a consistent moisture level and reduce the frequency of watering.
6. Watering during dry periods: During hot and dry periods, increase the frequency and amount of water given to your calendula plants. Pay attention to signs of wilting or drooping leaves, as they may indicate that your plants need more water. Be cautious not to let the soil dry out completely, as this can stress the plants and impact their overall health.
Remember that each garden and climate is unique, so it’s important to observe and adjust your watering practices accordingly. By providing just the right amount of water at the right time, your calendula plants will flourish, producing abundant blooms and bringing beauty to your garden.
Fertilizing Calendula Plants
Fertilizing your calendula plants can provide them with the necessary nutrients for robust growth, vibrant blooms, and overall health. While calendula is generally considered a low-maintenance plant, providing some fertilizer can help maximize their potential. Here are some important tips for effectively fertilizing your calendula plants:
1. Choose the right fertilizer: Calendula plants benefit from a balanced, all-purpose fertilizer that contains equal amounts of nitrogen (N), phosphorus (P), and potassium (K). Look for a fertilizer with an N-P-K ratio of around 10-10-10 or 14-14-14. This will provide a good balance of nutrients for overall plant health and bloom production.
2. Timing of fertilization: Start fertilizing your calendula plants about a month after they have been transplanted or when they have developed their first set of true leaves. For direct-seeded calendula, wait until the seedlings have established and are growing well. Fertilize them every 4-6 weeks throughout the growing season.
3. Follow the label instructions: Always follow the instructions provided on the fertilizer package for the correct dosage and application method. The recommended amount may vary depending on the brand and the size of your planting area. Avoid overfertilizing, as this can lead to excessive vegetative growth and fewer blooms.
4. Apply the fertilizer evenly: Sprinkle the fertilizer evenly around the base of the plants, avoiding direct contact with the leaves or stems. Lightly scratch the fertilizer into the soil surface and water thoroughly to aid in nutrient absorption by the roots.
5. Supplement with organic matter: Calendula plants respond well to organic fertilizers such as well-rotted compost or aged manure. These natural fertilizers provide a slow release of nutrients and improve soil structure over time. Mix them into the soil before planting or apply them as a side dressing around the plants.
6. Observe and adjust: Regularly monitor the growth and overall health of your plants. If you notice signs of nutrient deficiency, such as pale leaves or stunted growth, consider adjusting your fertilization regimen. Supplemental feedings may be necessary, especially if your soil is nutrient-poor or if the plants show signs of stress.
7. Water after fertilizing: After applying the fertilizer, water your calendula plants thoroughly to ensure the nutrients are absorbed into the soil. This will also help prevent the fertilizer from burning the plants’ roots.
Remember, while fertilizing is beneficial for calendula plants, it’s important to strike a balance. Avoid excessive fertilization, as this can lead to overgrowth or nutrient imbalances. With proper fertilization, you can encourage healthy, prolific blooms and enjoy the full potential of your calendula plants.
Protecting Calendula Seeds from Pests
Like any other plants, calendula seeds can be vulnerable to various pests that can hinder their growth and development. Protecting your calendula seeds from pests is crucial to ensure successful germination and the establishment of healthy plants. Here are some effective methods to safeguard your calendula seeds from common pests:
1. Use physical barriers: One of the simplest and most effective ways to protect your calendula seeds from pests is by using physical barriers. Covering the planting area with a fine mesh or row covers can prevent pest insects, birds, and animals from accessing the seeds. Ensure the barriers are secure and provide enough space for the plants to grow.
2. Proper garden hygiene: Maintaining good garden hygiene can help prevent pest infestations. Remove fallen debris, dead leaves, and decaying plant matter that may harbor pests or provide them with a breeding ground. Keeping the garden clean and well-maintained reduces the chances of pest insects finding suitable habitats near your calendula plants.
3. Companion planting: Incorporating companion plants with natural pest-repellent properties can help deter pests from your calendula seeds. For example, planting marigolds, nasturtiums, or herbs like basil or mint nearby can repel insects that may harm the calendula plants. Additionally, some companion plants may attract beneficial insects that prey on common pests.
4. Organic pest control: If you notice pest infestations on your calendula plants, consider using organic pest control methods. This can include spraying natural insecticidal soaps or neem oil on affected plants to deter or eliminate pests. Avoid using chemical pesticides, as they can harm beneficial insects and pollinators and may be detrimental to human health.
5. Handpicking: If you spot pests directly on your calendula plants, consider handpicking or manually removing them. This method is best for larger pests like caterpillars or snails. Check your plants regularly and remove any pests you find to prevent them from causing significant damage.
6. Encourage natural predators: Create a garden environment that attracts beneficial insects and predators that feed on common pests. Planting nectar-rich flowers like lavender or dill can attract ladybugs, lacewings, and hoverflies that help control pest populations. Providing a diverse and balanced ecosystem can help naturally maintain pest populations at manageable levels.
7. Crop rotation: If you have had pest issues in a previous growing season, practice crop rotation. Avoid growing calendula or other related plants in the same location for consecutive years, as this can attract pests specific to those plants. Rotating crops can disrupt pest life cycles and reduce the likelihood of reinfestation.
By implementing these pest prevention methods, you can protect your calendula seeds and promote successful germination. Creating a pest-resistant environment allows the seeds to develop into healthy plants, ensuring the beauty and benefits of calendula in your garden.
When and How to Transplant Calendula Seedlings
Transplanting calendula seedlings is an important step in their growth journey. This process allows the seedlings to establish stronger roots and continue their development in a more permanent location. Here are some guidelines on when and how to transplant your calendula seedlings:
1. Timing: Wait until the calendula seedlings have developed a strong root system and have grown to a height of around 3 to 4 inches (7.5 to 10 cm) before transplanting. Typically, this occurs around 4 to 6 weeks after germination when the seedlings have at least two sets of true leaves. Choose a calm, overcast day or transplant in the early evening to minimize stress on the seedlings.
2. Selecting a location: Choose a well-draining area that receives full sun to partial shade. Calendula plants thrive in full sun, but they can tolerate some shade, especially in hotter climates. Ensure the soil in the new planting location is adequately prepared and enriched with organic matter.
3. Preparing the soil: Prior to transplanting, prepare the planting hole by digging a small hole slightly larger than the size of the seedling’s root ball. Loosen the soil around the hole and incorporate organic matter, such as compost, to promote better drainage and provide nutrients for the growing plant.
4. Transplanting process: Gently remove the calendula seedlings from their current container, taking care not to damage the delicate root system. If the seedlings are in a peat pot or biodegradable container, you can transplant them directly into the prepared hole. Otherwise, loosen the root ball gently and place the seedling into the hole, making sure the top of the root ball is level with the soil surface. Fill in the hole with soil, gently firming it around the base of the plant to eliminate any air pockets.
5. Watering after transplanting: After transplanting, water the seedlings thoroughly to help settle the soil and ensure good root-to-soil contact. This will also provide the plants with the initial hydration they need to recover from the transplanting process. Monitor the soil moisture closely in the following days to ensure the seedlings don’t dry out.
6. Care after transplanting: Protect the transplanted seedlings from extreme weather conditions, such as strong winds or intense heat, until they become established. Mulching around the base of the plants can help retain moisture and regulate soil temperature. Regularly water the seedlings, keeping the soil evenly moist but not waterlogged, until they show signs of new growth.
By following these transplanting guidelines, you can help your calendula seedlings thrive in their new location. With proper care and attention, the seedlings will adapt to their new surroundings, continue to grow, and reward you with beautiful blooms to enjoy.
Supplementary Care for Calendula Plants
While calendula plants are generally low-maintenance, providing some supplementary care can help ensure their optimal growth, health, and blooming. Consider the following tips to keep your calendula plants happy and thriving:
1. Regular pruning: Calendula plants benefit from regular pruning to encourage bushier growth and continuous blooming. Pinch or snip off spent flowers to promote new bud formation. You can also trim back leggy stems to maintain a compact and tidy plant appearance. Regular pruning stimulates fresh growth and prolongs the blooming period of your calendula plants.
2. Deadheading: Removing faded or wilted flowers, a practice known as deadheading, helps redirect the plant’s energy towards producing new blooms. Calendula plants produce abundant flowers, and regular deadheading prevents them from going to seed prematurely. The removal of spent flowers also enhances the overall aesthetic of the plants and keeps the garden looking neat and tidy.
3. Watch for pests and diseases: Monitor your calendula plants regularly for signs of pests or diseases. Common pests that may affect calendula include aphids, slugs, and snails. Inspect the plants for visual symptoms such as yellowing leaves, wilting, or spots, which could indicate the presence of diseases like fungal infections. Promptly address any pest or disease issues through organic pest control methods or appropriate treatments to prevent further damage.
4. Mulching: Applying a layer of organic mulch, such as straw or wood chips, around the base of your calendula plants can help conserve moisture, suppress weeds, and regulate soil temperature. Mulching also helps prevent soil erosion and reduces evaporation, which is particularly beneficial during hotter months or in drier climates.
5. Provide support if needed: Depending on the variety and growth habit of your calendula plants, providing support may be necessary. Calendula plants can sometimes become top-heavy or prone to flopping over, especially when in full bloom. Consider using small stakes or individual plant supports to keep the stems upright and prevent them from bending or breaking.
6. Regular watering: Calendula plants prefer moderate and consistent moisture. Water them regularly to keep the soil evenly moist, but avoid overwatering as it can lead to root rot. During hot and dry periods, pay extra attention to watering to prevent drought stress. Use a watering can or a soaker hose to deliver water directly to the base of the plants, ensuring the foliage remains dry to prevent disease development.
7. Harvesting flowers: Regularly harvest the calendula flowers as they reach their peak bloom. This not only allows you to enjoy their beauty but also encourages the plants to produce more flowers. Calendula flowers can be harvested by snipping the stems just above a leaf node or by gently plucking the petals. Use the harvested flowers in culinary preparations, teas, or for making homemade skincare remedies.
By providing supplementary care and attention to your calendula plants, you can enhance their overall health, appearance, and blooming potential. With proper pruning, deadheading, pest monitoring, adequate watering, and other care practices, your calendula plants will thrive and bring beauty to your garden.
Harvesting Calendula Flowers
Harvesting calendula flowers is a rewarding and enjoyable process. Calendula blooms not only add vibrant colors to your garden but also offer numerous benefits when used in culinary, medicinal, and skincare applications. Here are some guidelines on how to harvest calendula flowers:
1. Timing: Calendula flowers should be harvested when they are fully open and at their peak freshness. Choose a time when the morning dew has dried, as this helps maintain the flowers’ integrity and reduces the risk of mold or fungal growth.
2. Selecting flowers: Look for flowers that have fully opened and have vibrant colors. Calendula blooms are typically bright yellow or orange, with delicate petals that are slightly crinkled in appearance. Avoid harvesting flowers that show signs of wilting, discoloration, or damage.
3. Harvesting technique: To harvest calendula flowers, hold the stem near the base, just above a leaf node or branching point. Use a pair of clean, sharp garden scissors or pruning shears to make a clean snip. Aim to cut the stem about 1 inch (2.5 cm) below the flower head to ensure you have enough stem to work with for processing or displaying the flowers.
4. Harvesting throughout the season: Calendula plants produce a continuous supply of flowers throughout the growing season. To encourage prolonged blooming, harvest the flowers regularly, as soon as they reach their prime. This practice not only allows you to enjoy fresh blooms but also stimulates the plant to produce more flowers.
5. Drying flowers: If you plan to use the calendula flowers for dried arrangements, herbal teas, or skincare preparations, proper drying is essential. Bundle the harvested flowers in small bunches and hang them upside down in a well-ventilated, dark, and dry space. This allows the flowers to air dry naturally and preserve their colors, shapes, and compounds. Once completely dry, store the flowers in an airtight container away from direct sunlight.
6. Using fresh flowers: If you prefer to use fresh calendula flowers immediately, gently remove any insects or debris before incorporating them into your preparations. Rinse the flowers lightly under running water, being careful not to damage the delicate petals. Pat them dry with a paper towel or let them air dry before adding them to salads, soups, desserts, or as a garnish for various dishes.
7. Enjoying the flowers: Whether using fresh or dried calendula flowers, there are numerous ways to enjoy them. Add fresh petals to salads, smoothies, or herbal infusions for a pop of color and subtle flavor. Infuse dried calendula flowers in oil to create homemade skincare products or incorporate them into herbal remedies for their soothing and healing properties.
By following these guidelines, you can harvest calendula flowers at their peak freshness and utilize them in a variety of ways. Whether for culinary, medicinal, or decorative purposes, harvesting calendula flowers allows you to appreciate their beauty and benefit from their versatile properties.
Storing Calendula Seeds
Properly storing calendula seeds ensures their longevity and viability for future planting seasons. Whether you have harvested seeds from your own plants or purchased them, following these guidelines will help maintain their quality until you are ready to sow them again:
1. Dry thoroughly: Before storing calendula seeds, make sure they are completely dry. Harvested seeds should be allowed to air dry for several weeks until they are fully dry and brittle. This helps prevent mold or rot during storage. Spread the seeds out in a single layer on a clean, dry surface and ensure good airflow around them.
2. Clean and separate: After drying, remove any plant debris or chaff from the seeds. Gently rub the seeds between your hands or use a fine sieve or mesh screen to separate them from unwanted materials. Discard any seeds that appear damaged, discolored, or shriveled as they may not be viable.
3. Storage containers: Choose appropriate containers for storing the calendula seeds. Opt for small envelopes, glass jars, or airtight containers that are specifically designed for seed storage. Make sure the containers are clean, dry, and sealable to prevent moisture or pests from entering.
4. Labeling and documentation: Label the storage containers with the date and variety of the seeds. This helps you keep track of the age and specific cultivars. Additionally, consider keeping a seed journal or spreadsheet to record important information like harvest dates, seed sources, and any specific characteristics or observations.
5. Cool and dark location: Store the sealed containers of calendula seeds in a cool, dark, and dry location. Ideal storage temperatures range from 32°F to 41°F (0°C to 5°C), such as in a refrigerator or a cool basement. Avoid exposing the seeds to fluctuating temperatures or direct sunlight, as these conditions can reduce seed viability.
6. Test germination rates: Over time, the germination rates of stored calendula seeds may decline. To ensure planting success, periodically conduct germination tests by planting a small sample of seeds in a separate container. This will help you assess their viability before sowing the entire batch.
7. Rotating seeds: Calendula seeds are typically viable for 2 to 3 years when stored properly. To maintain the highest germination rates, it’s advisable to rotate your seed stock by planting the oldest seeds first and continuously replenishing your supply with fresh seeds. This ensures a constant supply of healthy and viable seeds.
By following these guidelines, you can effectively store calendula seeds and maintain their quality for future planting seasons. Storing seeds properly ensures their longevity, allowing you to propagate beautiful calendula plants year after year.
Final Thoughts
Cultivating calendula plants from seed can be a rewarding and fulfilling experience. These vibrant and versatile flowers not only add beauty to your garden but also offer numerous health benefits and culinary uses. By following the proper techniques for planting, caring for, and harvesting calendula, you can enjoy a successful and thriving garden. Remember these key points:
Understanding calendula seeds is essential to ensure proper germination and growth. Select high-quality seeds, know when to plant them, and provide them with the right conditions.
Soil preparation is vital for creating an optimal growing environment. Loosen the soil, amend with compost, and ensure good drainage to support healthy root development.
Proper watering techniques help maintain the moisture levels your calendula plants need without overwatering or underwatering. Water deeply, but let the soil dry out slightly between waterings.
Fertilizing calendula plants with a balanced, all-purpose fertilizer can provide them with essential nutrients for healthy growth and abundant blooms.
Protecting calendula seeds from pests and diseases through physical barriers, natural predators, and organic pest control methods ensures their successful development.
Understanding when and how to transplant calendula seedlings promotes stronger root establishment and continued growth. Choose the right timing and prepare the soil adequately for successful transplantation.
Supplementary care, including pruning, deadheading, monitoring for pests and diseases, mulching, and providing support if needed, enhances the overall health and appearance of calendula plants.
Harvesting calendula flowers at the right time and using appropriate techniques allows you to enjoy their beauty and utilize them in various culinary, medicinal, and skincare applications.
Storing calendula seeds properly ensures their viability for future planting seasons. Dry thoroughly, clean and separate the seeds, store in a cool and dark location, and periodically test their germination rates.
With these insights and techniques, you can cultivate calendula plants successfully, from seed to harvest. Enjoy the vibrant colors, delightful blooms, and the many benefits that calendula offers in your garden and beyond.